
Snowflake and Azure are incredibly capable of storing data securely. You can see all reports available to customers through their pages of security and compliance reports for both Azure and Snowflake. This is fantastic for data stored in the platform, though we must still consider how that data is transferred into the platform from other systems outside Snowflake’s network.
For example, consider the simple situation of trying to upload a file with the PUT command in SnowSQL. This command takes files from your local machine and uploads them to Snowflake. This is the standard mechanism for uploading files to an internal stage in Snowflake, but the same discussion applies to other mechanisms such as the PUT command in Snowpark for Python. By default, this process will send the file over the standard public internet. That’s not to say it isn’t secure of course and Snowflake will ensure that all data is encrypted throughout the transfer, but this journey to Snowflake has still travelled over the public internet. As I’ve said before, it would take somebody far more knowledgeable in networking and systems than myself to explain exactly how somebody could intercept this traffic. If I did know then, I still wouldn’t think it was a good idea to share that here. Suffice it to say, somebody out there may be able to intercept this traffic and do something malicious with it.
So, how do we prevent this issue? How do we ensure our access to Snowflake remains secure when strict restrictions are in place, complying to frameworks such as HITRUST, PCI-DSS and ISO/IEC 27001? The answer is private connectivity, establishing a direct route between your virtual network and the underlying storage account that Snowflake uses for internal stages. In this article, I will explain how to configure this for a Snowflake account that is hosted in an Azure region.
I would recommend reading through my previous article first: “Configure Azure Private Link Connectivity with Snowflake.” This discusses how to configure private connectivity when accessing Snowflake in general and is strongly recommended. Once you have set this up, you can pursue this article’s objective of configuring private endpoints for internal stages in a way that can be easily tested, as you can authenticate SnowSQL to your Snowflake account with private connectivity and thus ensure the entire journey is securely set up.
This article discusses how to configure private endpoints for internal stages in an Azure-hosted Snowflake account. If you wish to view the AWS equivalent, please see my colleague Roger Garcia’s article: “Configure AWS PrivateLink to Securely Connect to Snowflake Internal Stages.”
Architecture
Before discussing how to implement the solution, we first discuss the architecture.
Simple Architecture Diagram
This diagram shows a simple representation of how traffic from other resources inside a virtual network can interact with Snowflake’s internal stages using private connectivity.
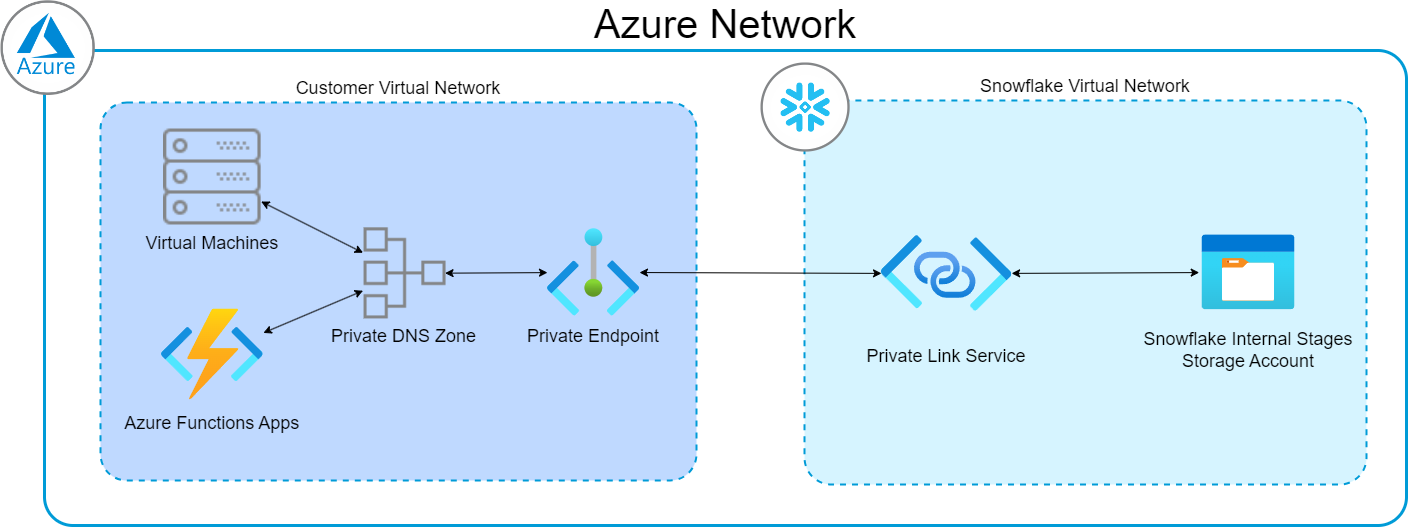
Naturally, you can also enjoy more complex models by peering other virtual networks and performing other networking feats, but they are outside the scope of this article.
Note that all internal stages in a Snowflake account are actually containers inside the same Azure storage account. Therefore, this process authorises private connectivity for the entire set of internal stages in your Snowflake account. You cannot configure this functionality for a subset of internal stages. This does NOT prevent you from uploading files to internal stages without private connectivity, but we will discuss how to block public access if desired further down in the article.
Architecture Components
From the diagrams above, we can see the following key components are required:
- A Snowflake account deployed in Azure
- All Snowflake accounts will already sit inside a relevant virtual network and have a private link service ready and waiting, so do not worry about this.
- A virtual network in Azure to contain the private endpoint
- A private DNS zone in Azure that can route traffic inside the network to the private endpoint
- Configuration of any other resources inside Azure is not covered in this article, but this article does cover DNS routing for those resources using a private DNS zone.
Requirements
To configure the architecture above, the following is required:
- Snowflake Business Critical Edition (or higher) deployed in Azure
- ACCOUNTADMIN access in your Snowflake account
- A resource group in Azure to work with
- The ability to create/modify the following objects inside the Azure resource group:
- Virtual Network
- Private Endpoint
- Private DNS Zone
Step 1: Enable Internal Stages Private Link and Retrieve Details from Snowflake
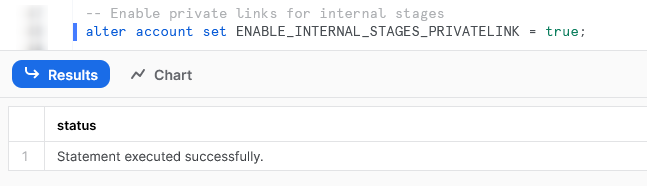
The first step is simple. First, log in to your Snowflake account and execute the following command using the ACCOUNTADMIN role:
alter account set ENABLE_INTERNAL_STAGES_PRIVATELINK = true;
This will enable the private connectivity functionality for internal stages in your Snowflake account.
Now execute the following command, still using the ACCOUNTADMIN role:
select SYSTEM$GET_PRIVATELINK_CONFIG();
This will return a dictionary object with all the relevant details for configuring your private connectivity:
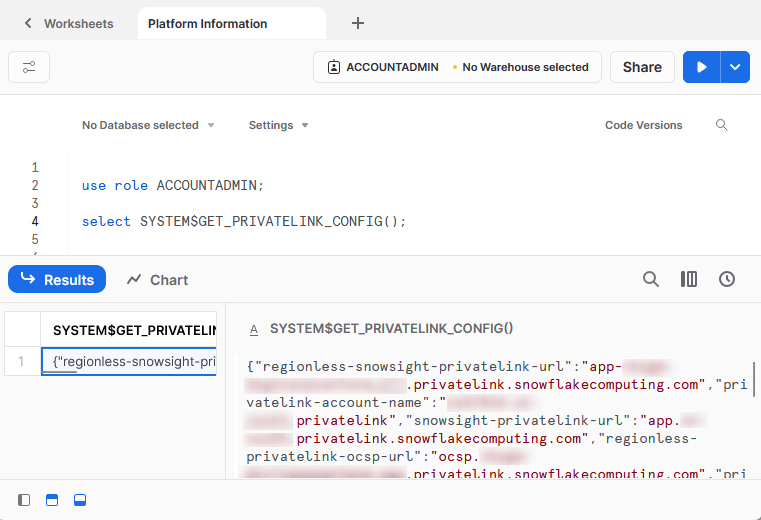
This will take the following format, where I have masked any relevant information:
{
  "privatelink-pls-id": "sf-pvlinksvc-azazureregion.a1b2cd34-ef5a-6b78-9c12-d3e4567890f0.azureregion.azure.privatelinkservice",
  "privatelink-account-name": "accountid.azure-region.privatelink",
  "privatelink-internal-stage": "/subscriptions/a1b2cd34-ef5a-6b78-9c12-d3e4567890f0/resourceGroups/sfc-prod-storage/providers/Microsoft.Storage/storageAccounts/a1bc234d57ef89",
  "regionless-snowsight-privatelink-url": "app-org-my_account.privatelink.snowflakecomputing.com",
  "snowsight-privatelink-url": "app.azure-region.privatelink.snowflakecomputing.com",
  "regionless-privatelink-ocsp-url": "ocsp.org-my_account.privatelink.snowflakecomputing.com",
  "privatelink-account-url": "accountid.azure-region.privatelink.snowflakecomputing.com",
  "regionless-privatelink-account-url": "org-my_account.privatelink.snowflakecomputing.com",
  "privatelink_ocsp-url": "ocsp.accountid.azure-region.privatelink.snowflakecomputing.com",
  "privatelink-connection-ocsp-urls": "[]",
  "privatelink-connection-urls": "[]"
}
Of this output, our only interest for this use case is the “privatelink-internal-stage” value. This is the resource id for the Azure storage account in Snowflake’s network that hosts any internal stages for the Snowflake account. So for our example, we receive the following value:
/subscriptions/a1b2cd34-ef5a-6b78-9c12-d3e4567890f0/resourceGroups/sfc-prod-storage/providers/Microsoft.Storage/storageAccounts/a1bc234d57ef89
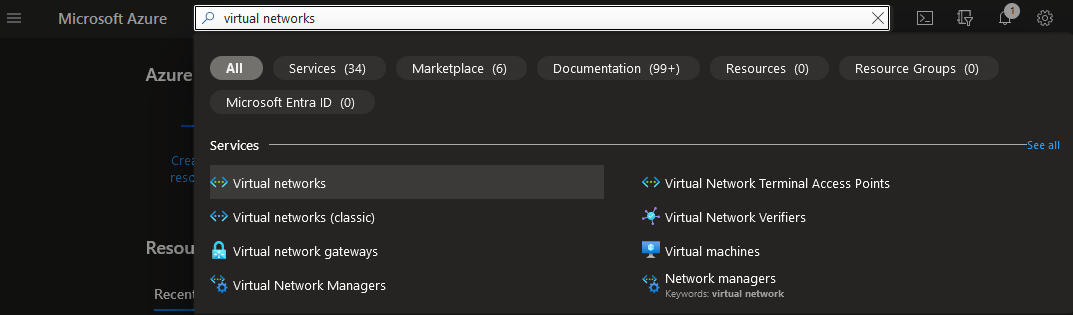
Step 2: Create a Virtual Network in Azure
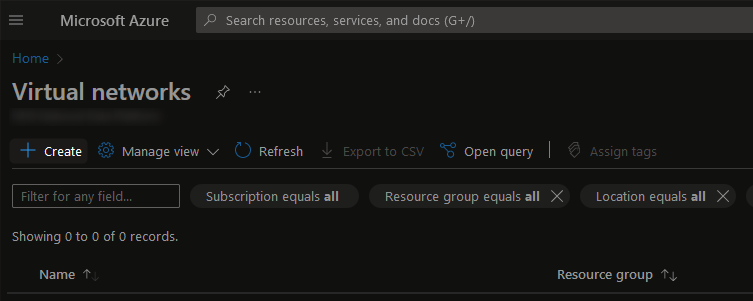
This next step is to create a virtual network in Azure. You can do this directly within the Azure Portal by searching for the “Virtual networks” service then selecting “Create:”
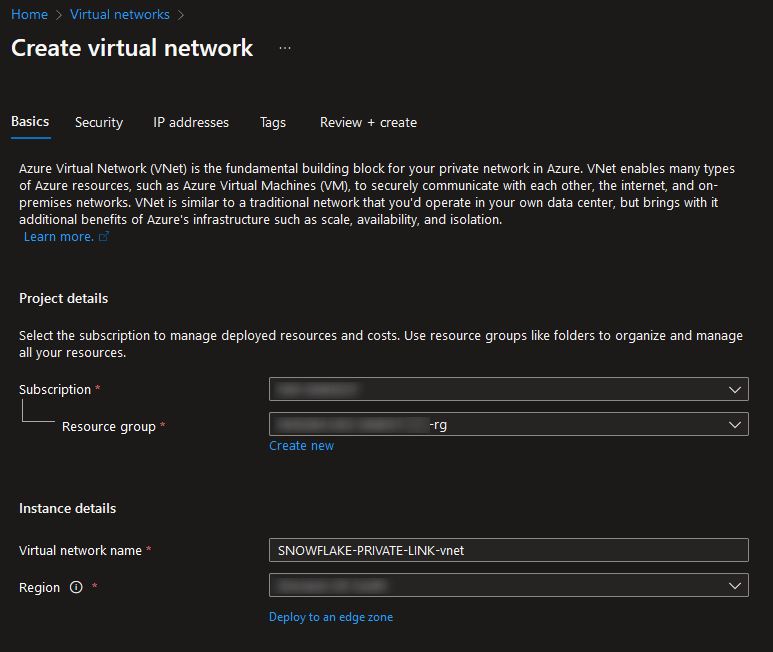
On the “Basics” tab, decide which subscription, resource group and region you wish to deploy the virtual network into and give it an appropriate name. For our demonstration, the private endpoint is called SNOWFLAKE-PRIVATE-LINK-vnet, where the vnet suffix is our internal naming convention for denoting virtual networks:
You may wish to configure additional settings on the “Security” tab, or you can leave this as default.
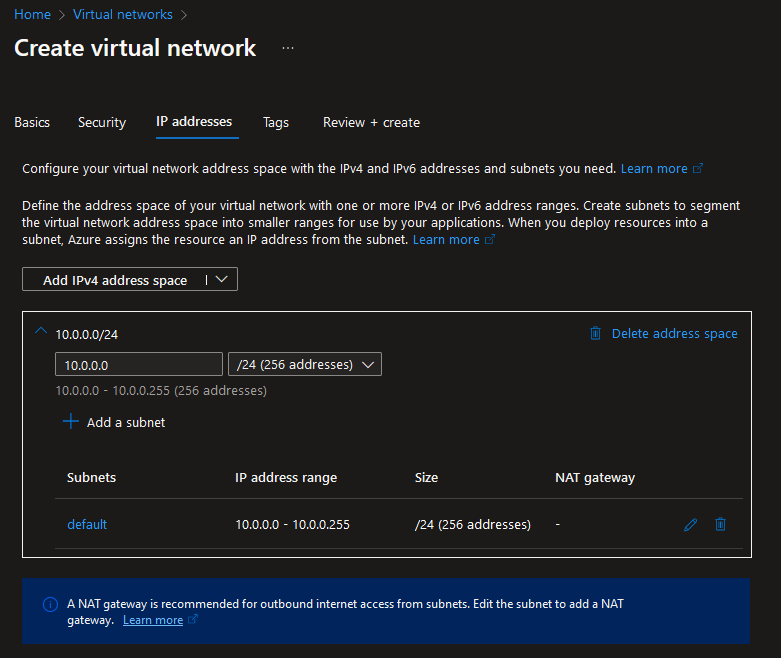
On the “IP addresses” tab, you can determine a range of IP addresses that are allocated for your virtual network. To keep things simple, we can leave this as default for this article. Naturally, it is advised to agree a suitable range of IP addresses ahead of time that will fit with your wider Azure architecture.
You may wish to create an additional subnet specifically for private endpoints if you intend to apply additional security methods, but this is not covered in this article:
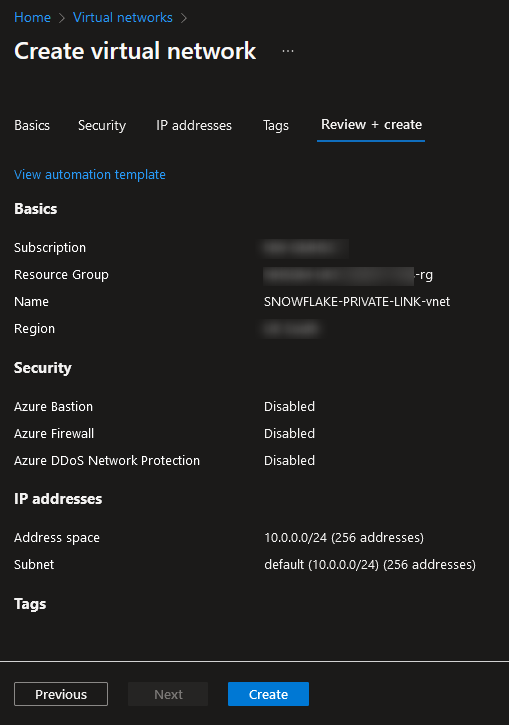
Feel free to add any tags as relevant for your organisation’s methodology. Finally, review and create the virtual network:
Step 3: Create a Private Endpoint in Azure
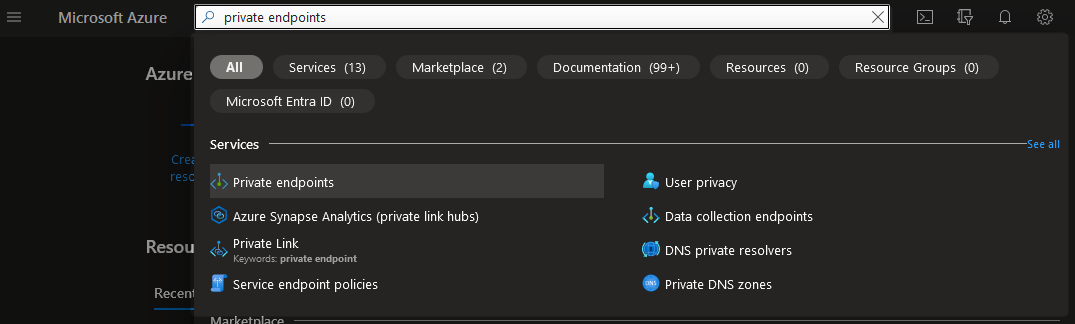
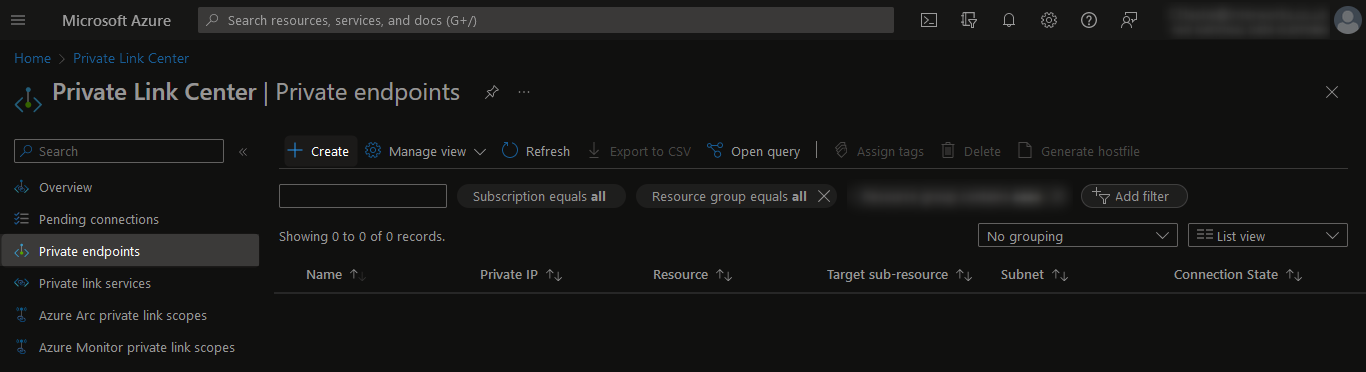
Now that we have the details from the Snowflake account and a virtual network in Azure, we can begin creating the private endpoint in Azure. You can do this directly within the Azure Portal by searching for the “Private endpoints” service then selecting “Create:”
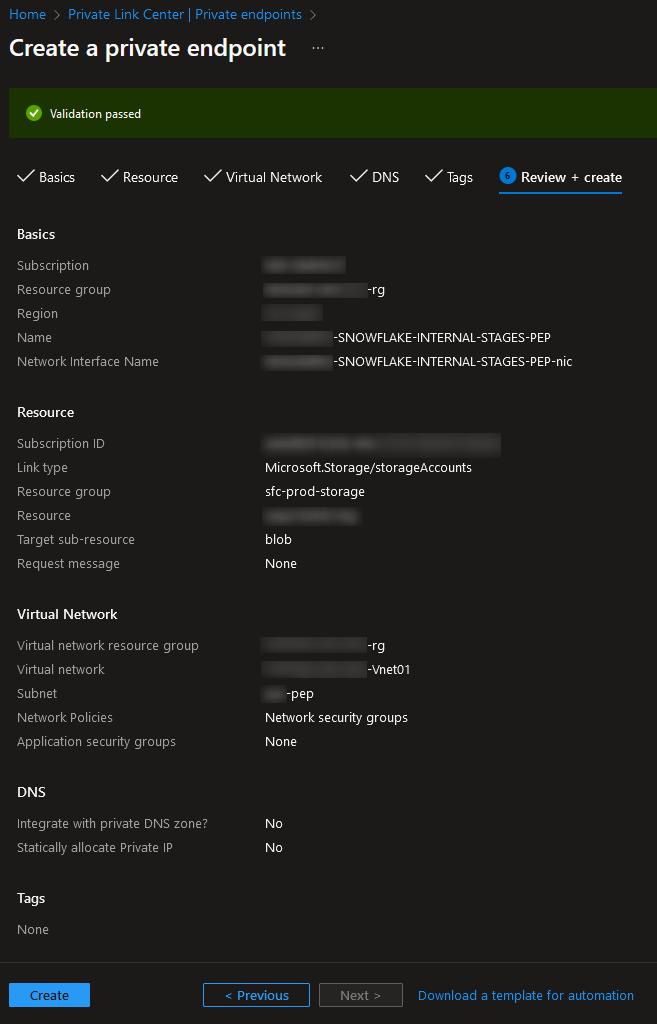
On the “Basics” tab, decide which subscription, resource group and region you wish to deploy the private endpoint into and give it an appropriate name. For our demonstration, the private endpoint is called SNOWFLAKE-INTERNAL-STAGES-PEP, where the PEP suffix is our internal naming convention for denoting private endpoints:

On the “Resource” tab, select “Connect to an Azure resource by resource ID or alias” and paste the “privatelink-internal-stage” value that you received from Snowflake. For our example, that value is as follows:
/subscriptions/a1b2cd34-ef5a-6b78-9c12-d3e4567890f0/resourceGroups/sfc-prod-storage/providers/Microsoft.Storage/storageAccounts/a1bc234d57ef89
When the “Target sub-resource” box appears, enter “blob:”

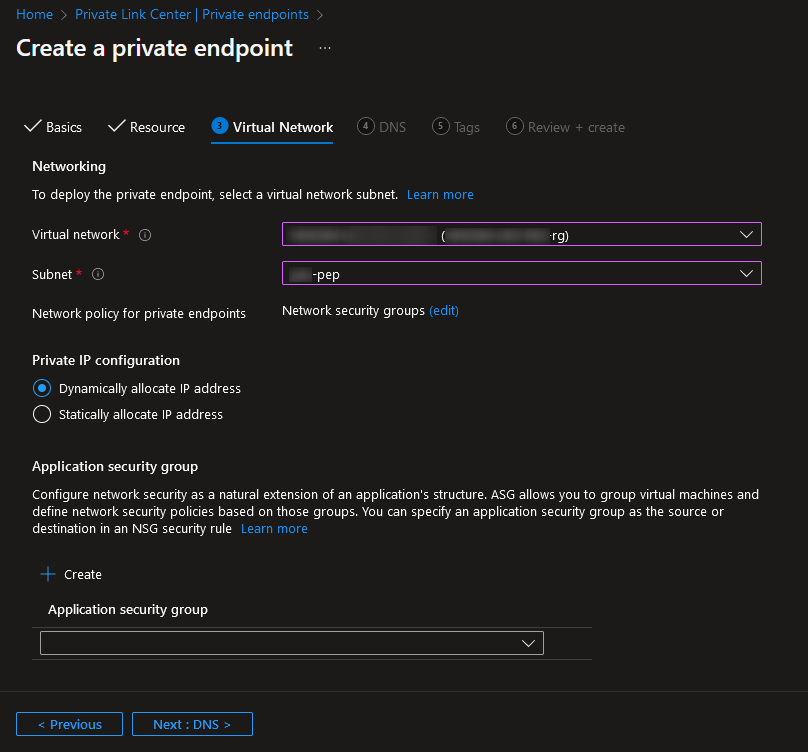
On the “Virtual Network” tab, select your virtual network and subnet from the list. You may wish to change other settings or configure an application security group, depending on your preference and requirements:
You cannot configure DNS specifically for this type of resource so you can ignore the next tab. Feel free to add any tags as relevant for your organisation’s methodology. Finally, review and create the private endpoint:
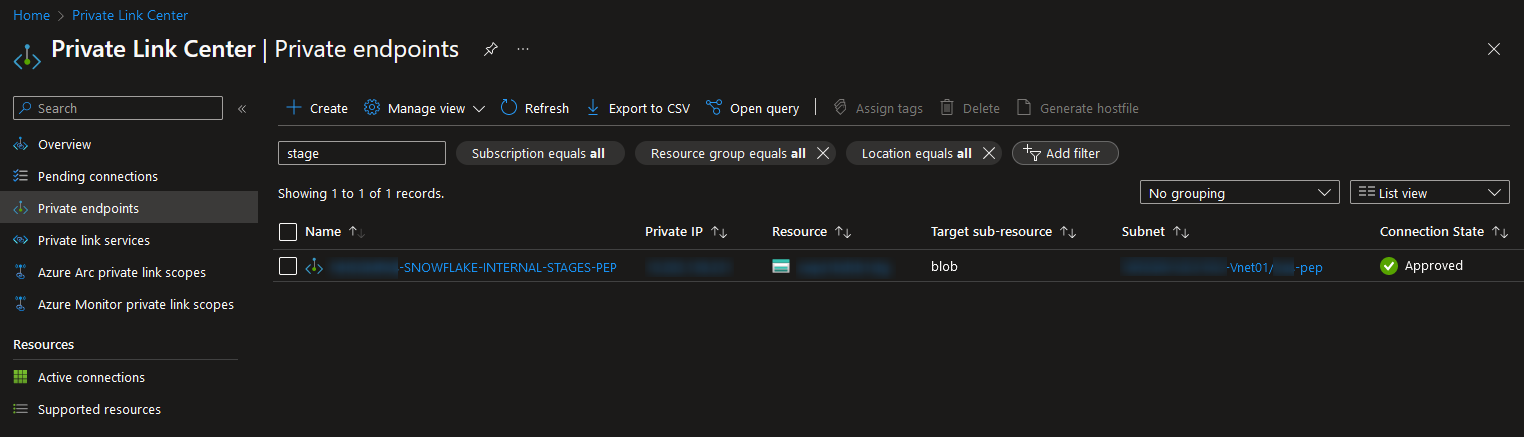
Once the private endpoint has deployed, it can be found in the list of private endpoints in Azure. Notably, the connection state will be set to “Pending” until the endpoint is authorised in Snowflake:

Step 4: Authorise the Private Link in Snowflake
Now that the private endpoint exists, we can authorise it in Snowflake. To achieve this, we must first retrieve the resource id for the private endpoint and generate a temporary access token that Snowflake can leverage. This will require the Azure CLI as this step cannot be achieved in the Azure Portal.
Step 4a: Retrieve the Resource ID of the Private Endpoint
In Azure Portal, the resource ID for the private endpoint can be retrieved from its “Properties” pane:
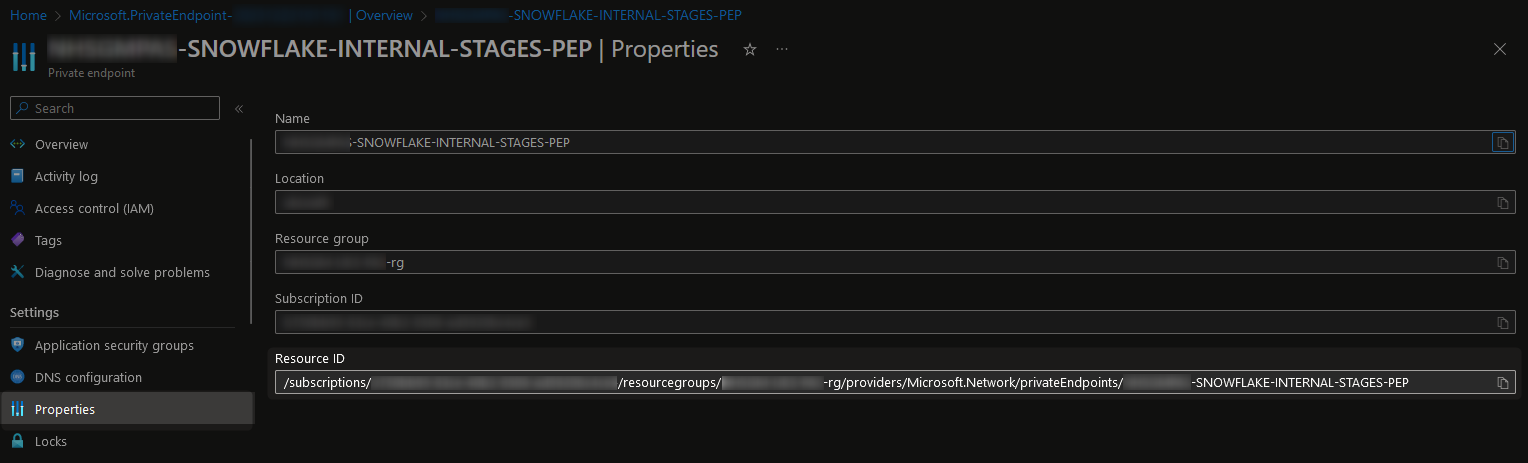
This will take the following example format:
/subscriptions/a123bc45-67de-89f1-2345-ab6789cd1ef2/resourcegroups/my-resource-group-rg/providers/microsoft.network/privateendpoints/SNOWFLAKE-INTERNAL-STAGES-PEP
Step 4b: Authorising the Private Link in Snowflake
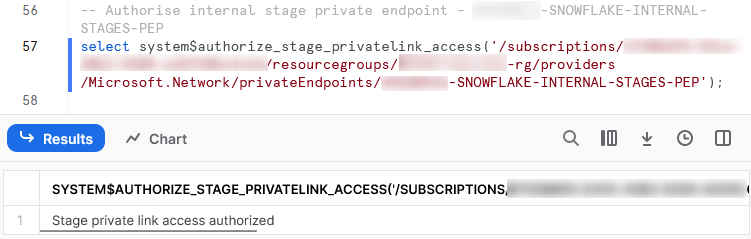
The above value can now be submitted to Snowflake’s SYSTEM$AUTHORISE_STAGE_PRIVATELINK_ACCESS() function as follows:
select SYSTEM$AUTHORIZE_STAGE_PRIVATELINK_ACCESS( '/subscriptions/a123bc45-67de-89f1-2345-ab6789cd1ef2/resourcegroups/my-resource-group-rg/providers/microsoft.network/privateendpoints/SNOWFLAKE-INTERNAL-STAGES-PEP' ) ;
Entering this into Snowflake will inform us that the private link has been authorised:
Once this step is complete, the “Connection State” of the private endpoint in Azure will change to “Approved:”
Now all we need to do is sort out the DNS routing for our traffic and we’re good to go!
Step 5: DNS Routing
At this point, we have almost finished our journey. Traffic is now authorised to travel between our Azure virtual network and Snowflake’s, via our designated private endpoint. However, we cannot visit the private endpoint’s IP address directly Snowflake is expecting traffic to match a given format to meet the requirements of the SSL certificate. In short, we must ensure that we still attempt to access Snowflake using an appropriate URL.
Step 5a: Which URLs Need to Be Routed?
Recall that back in step 1, we retrieved the following “privatelink-internal-stage” value using Snowflake’s SYSTEM$GET_PRIVATELINK_CONFIG() function:
/subscriptions/a1b2cd34-ef5a-6b78-9c12-d3e4567890f0/resourceGroups/sfc-prod-storage/providers/Microsoft.Storage/storageAccounts/a1bc234d57ef89
The very last section of this value is a storage account name. For our example, the value is a1bc234d57ef89.
To determine the URLs to route, we must leverage this storage account name as part of a full storage account URL, by prepending it to “.blob.core.windows.net” and “.privatelink.blob.core.windows.net”.
This yields the following URLs:
a1bc234d57ef89.blob.core.windows.net a1bc234d57ef89.privatelink.blob.core.windows.net
Step 5b: Where Should Traffic Be Routed to?
This part is easy. In the Azure Portal, head back to your private endpoint and look at the “DNS configuration” tab. There, you will see an IP address listed for your private endpoint:
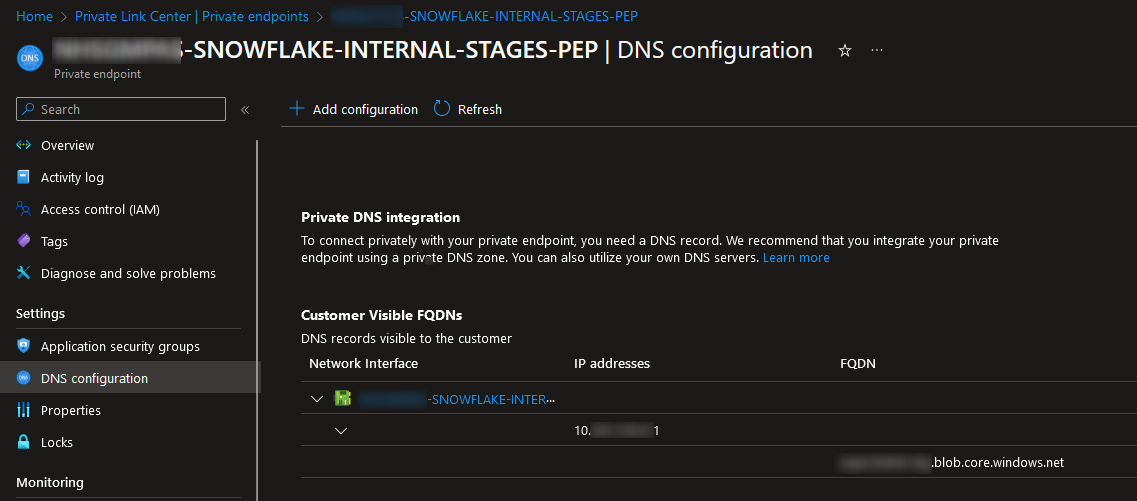
For demonstration purposes going forwards, lets assume our private endpoint as the IP address 10.0.0.11.
Step 5c: Route Traffic from Other Resources Inside the Virtual Network
This step discusses how to route traffic from other resources inside your virtual network, such as virtual machines or functions apps that you are hosting in Azure. A common example of this is having a virtual machine within your network that users connect to when working, which they can then use to connect to Snowflake and upload files if needed. The configuration of any such resource is not covered by this article; however, this article will now cover the DNS routing for those resources using a private DNS zone.
Step 5c1: Create the Private DNS Zone for privatelink.blob.core.windows.net
The first step is to create a private DNS zone for “privatelink.blob.core.windows.net” within your desired resource group. Skip this step is you have already created such a DNS zone earlier; for example, if you have already created a private DNS zone when accessing private endpoints for other storage accounts in your network.
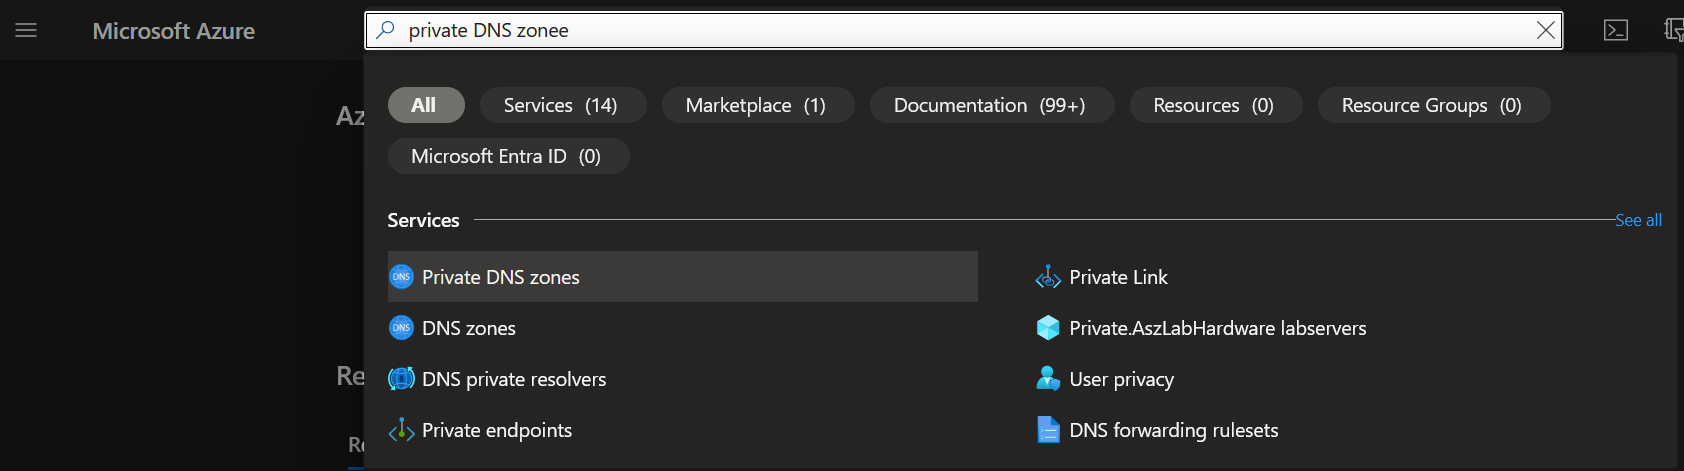
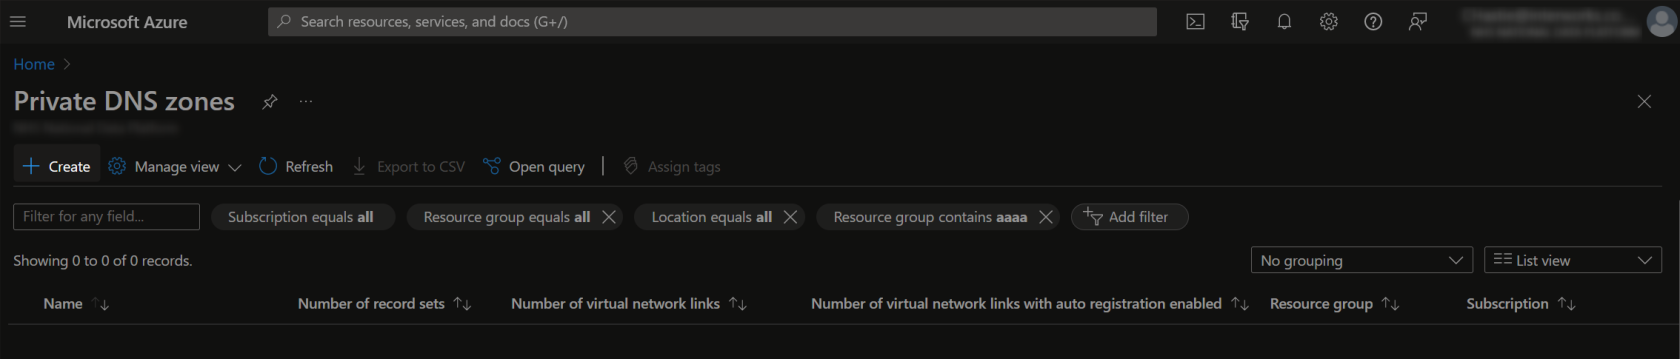
To begin setting this up within the Azure Portal, search for the “Private DNS zones” service then selecting “Create:”
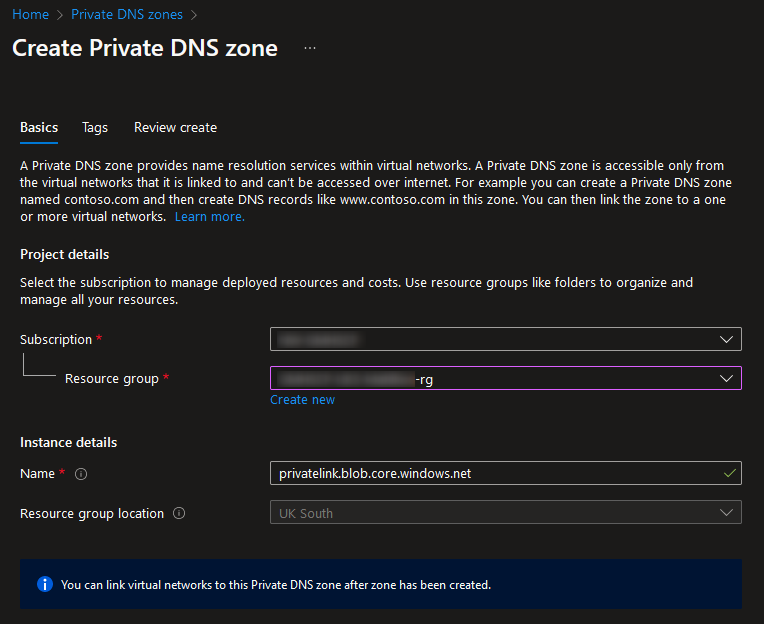
On the “Basics” tab, decide which subscription and resource group you wish to deploy the private DNS zone into. The name must match the URL domain that will be routed, so enter the following value:
privatelink.blob.core.windows.net
It is important to note that only one private DNS zone can exist for each domain per resource group. So, if you have multiple Snowflake accounts and deliberately want to keep the private DNS zone separate, these will need to sit in different resource groups and ideally not be exposed to the same resources/users.
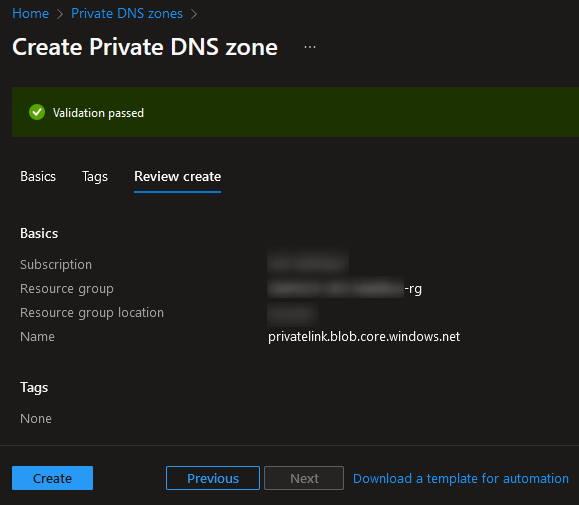
Feel free to add any tags as relevant for your organisation’s methodology. Finally, review and create the private DNS zone:
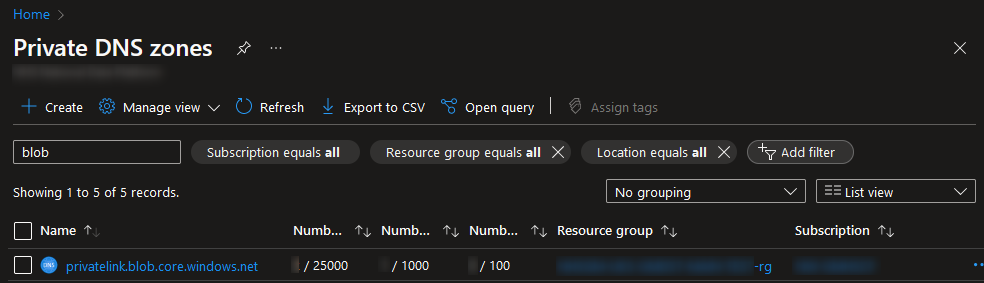
The private DNS zone should now be visible in your list of private DNS zones:
Select the private DNS zone to view the list of record sets that are routed. At first, this will be empty:

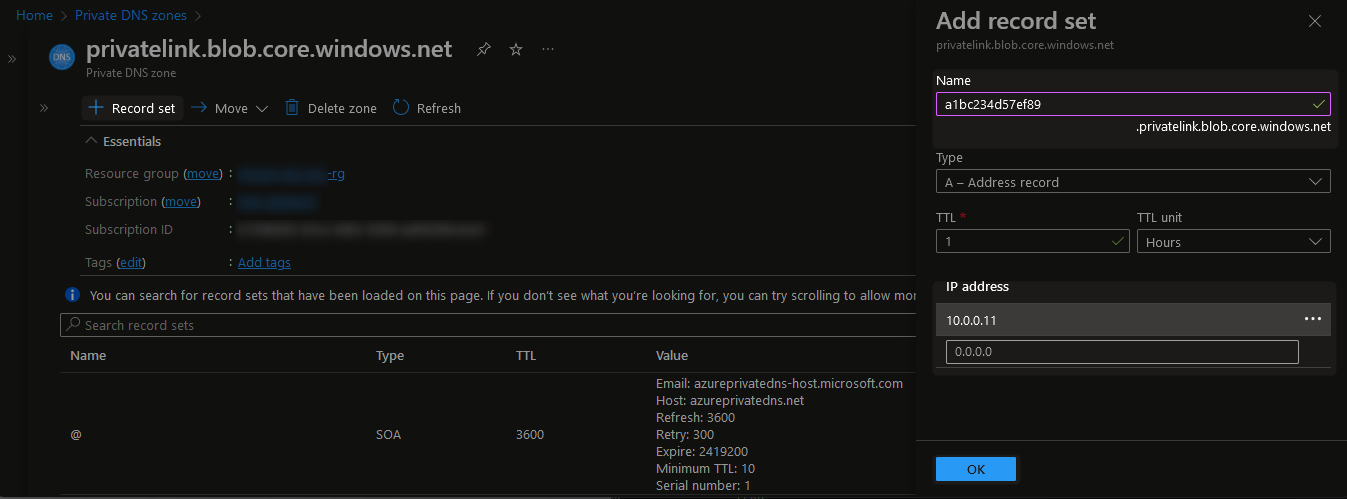
Select “+ Record set” to add records for each of the URLs that we wish to route, acquired in step 5a. The “name” should be everything in the URL that takes place before the “.privatelink.blob.core.windows.net,” so the “privatelink-internal-stage” value received from step 1 and the IP address will be that of the private endpoint that you received in step 5b:
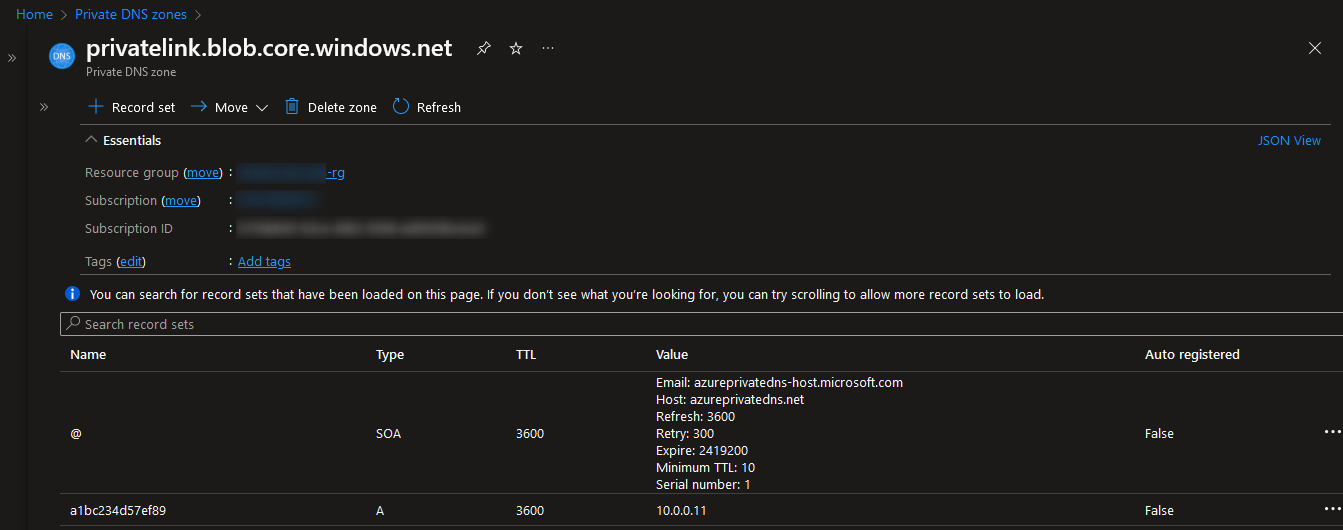
When you are finished, you will see something similar to this example:
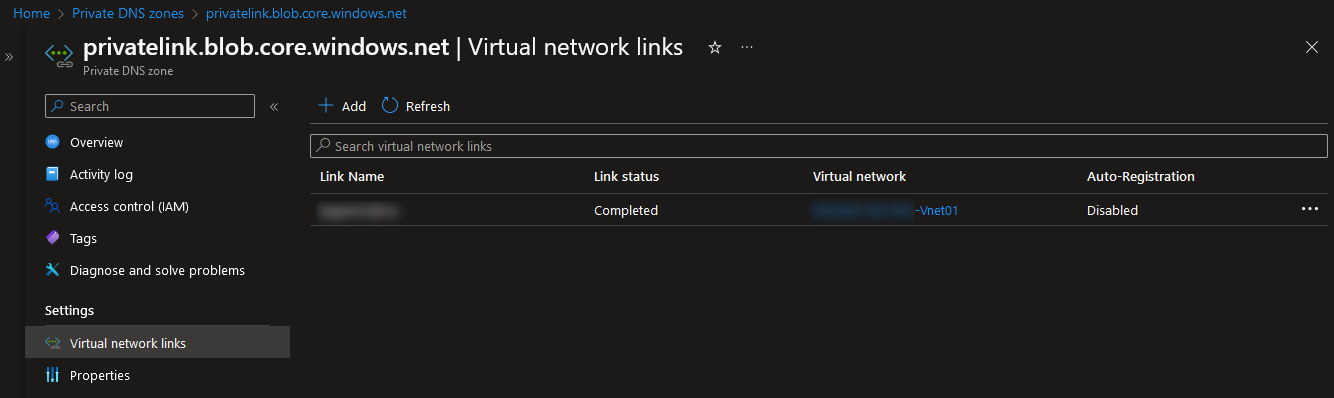
Step 5c2: Link the Private DNS Zone to Your Virtual Network(s)
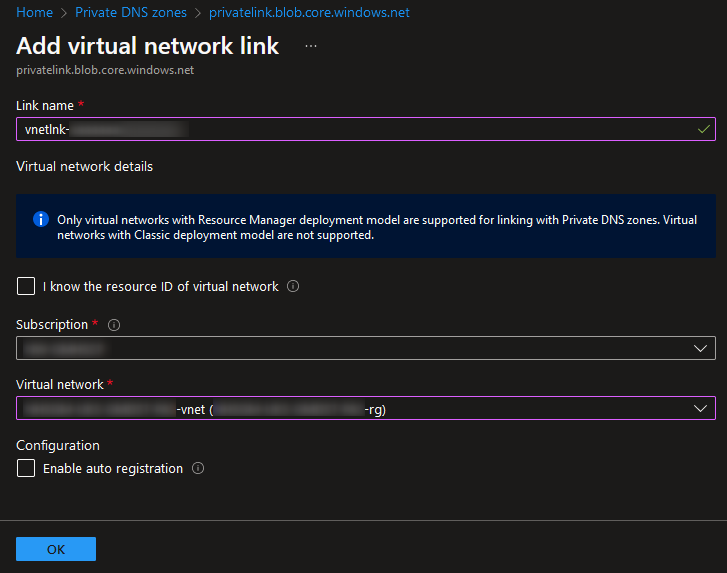
Now all that remains is to connect your private DNS zone to any virtual network(s) that will be leveraging the private endpoint to connect to Snowflake. This is configured using the “Virtual network links” pane within the private DNS zone. New links are created by select “Add:”
Step 5c3: Configure DNS Configuration for the Private Endpoint Itself
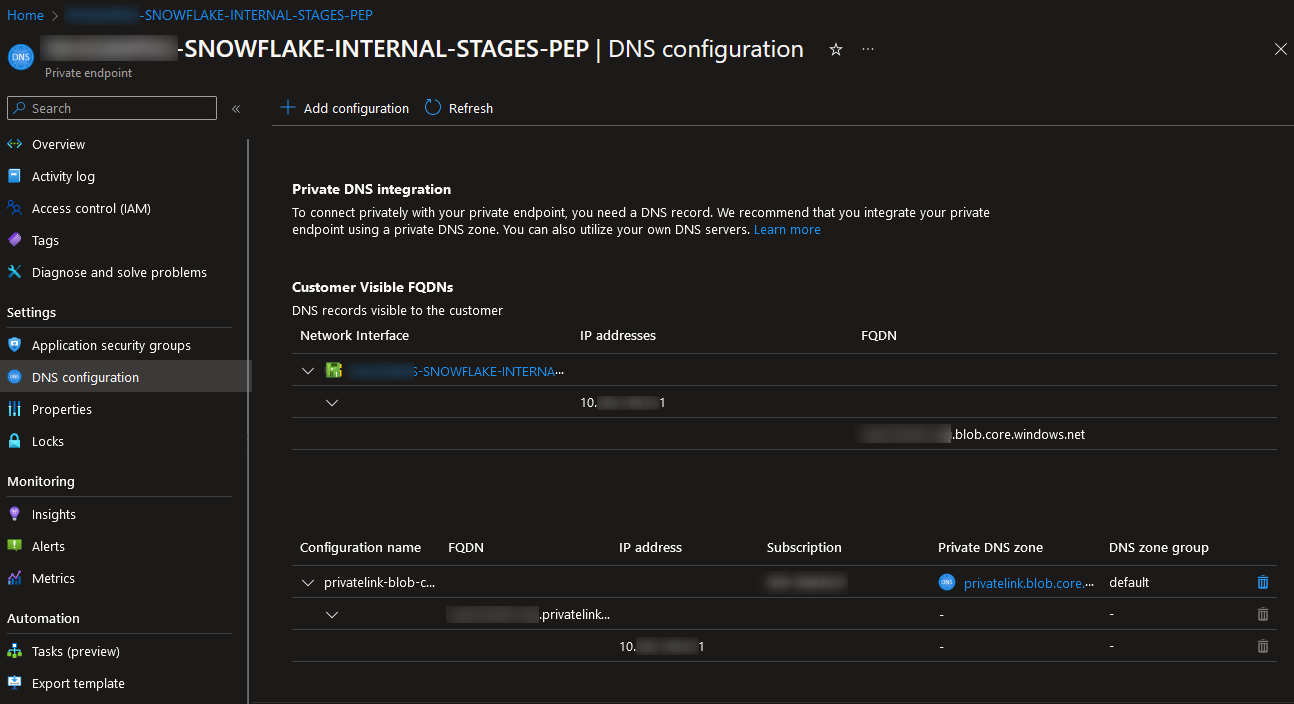
This step is optional, though some like to complete it anyway to tie everything together. If you navigate back to your private endpoint in Azure and look at the “DNS configuration” pane, you should now see a “Custom DNS records” value performing the DNS mapping that you applied earlier in this step:

If you wish, you may want to replace this with a full configuration between the endpoint and the private DNS zone. You can do so by selecting “Add configuration” and selecting your new private DNS zone from the dropdown list:

This will now display your configuration slightly differently, referring to the private DNS zone instead of a custom DNS mapping:
And there we have it. Any resource within your selected virtual networks will now be able to direct any traffic to your “privatelink.blob.core.windows.net” URL through to your private endpoint. You won’t see anything on the surface, but underneath you will find that Azure is routing that traffic away from the original URL and to your private endpoint instead, securely connecting you to Snowflake.
Step 6: Testing the Connectivity
The easiest way to test this process is to use a Virtual Machine within your network that can already connect security to Snowflake using private connectivity, as discussed in the previous article: “Configure Azure Private Link Connectivity with Snowflake.”
There are two main things to consider when testing the connectivity:
- Is the DNS routing correctly?
- Can files be uploaded?
We will tackle each of these in turn.
Step 6a: Is the DNS Routing Correctly?
This is easy to test in a terminal with either the dig command in linux/macOS or the Resolve-DnsName command in Windows PowerShell. For this example, we use the following Resolve-DnsName command:
Resolve-DnsName a1bc234d57ef89.blob.core.windows.net
Note that this test does not use the privatelink version of the URL as an input, as we wish to ensure the traffic routes to the privatelink automatically.
If this is successful, you should see a similar result to the following:
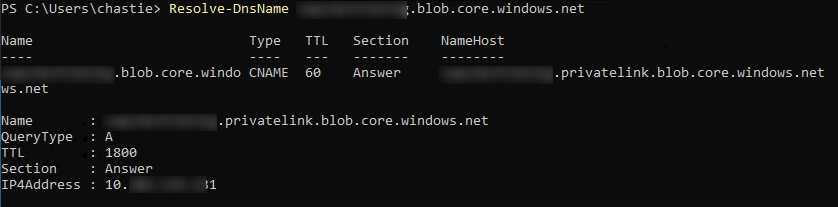
The notable parts of this test are that the name successfully resolves to the privatelink equivalent, and we can then see the IP address for the private endpoint under “IP4Address”.
Step 6b: Can Files Be Uploaded?
The easiest way to test this process is to set up SnowSQL and leverage the PUT command. Once you have authenticated using SnowSQL, you can leverage a PUT command similar to the following example:
PUT 'file://path/to/my/file.extension' '@"MY_DATABASE"."MY_SCHEMA"."MY_STAGE"/destination/path';
If your file uploads correctly, you will see a simple summary detailing that the ingestion has been successful:

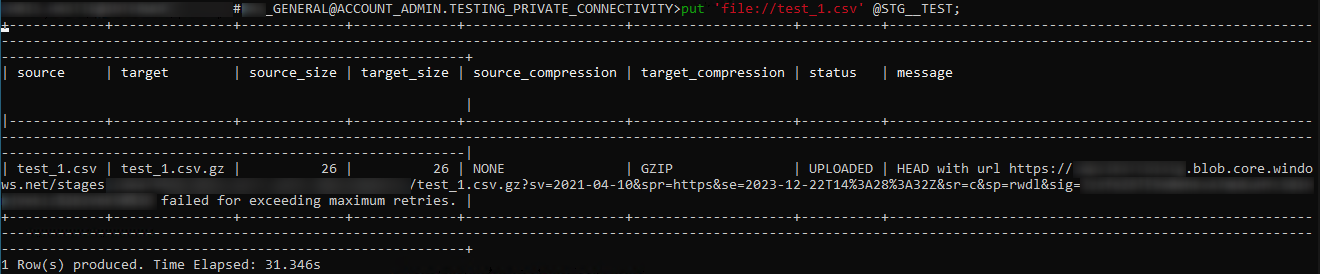
If your DNS routing is not configured correctly, you may see an error output similar to the below. This error shows that the command did not use the privatelink version of the URL and then could not find a destination:
Step 7: Blocking Public Access to Internal Stages
Once you are confident that the files are uploading correctly in your tests, you may wish to disable public access to internal stages entirely.
Do not take this step to block public access until you are sure that all of your production pipelines are either safely paused or already migrated to leveraging the private endpoints
This process is simple and can be achieved with a single command:
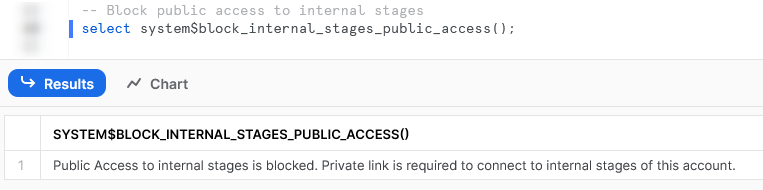
select system$block_internal_stages_public_access();
Executing this command will return a simple result stating that public access to internal stages has been blocked:
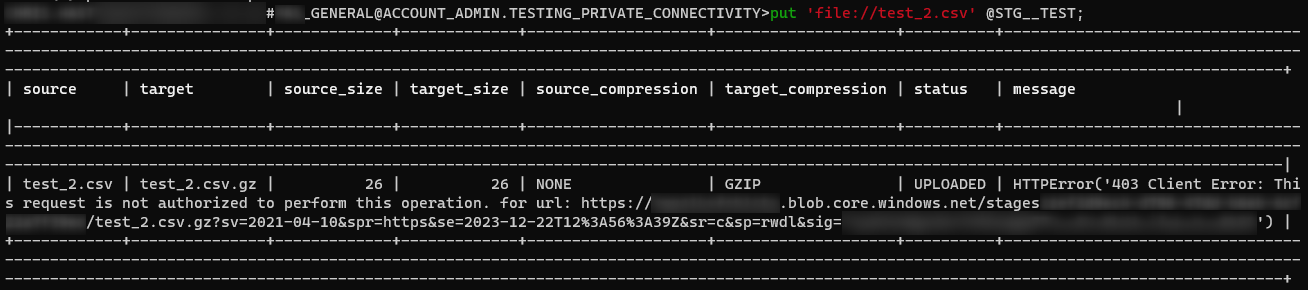
Once this step is complete, any attempts to upload data without a private endpoint will be rejected, demonstrated in the following screenshot:
This brings us to the end of the article. I hope you found it useful. The above steps should enable you leverage private endpoints to upload data directly to any internal stage in your network, through SnowSQL’s PUT command or any similar mechanism, from any internal resources on your network. As mentioned before, you won’t see anything on the surface, but underneath you will find that Azure is routing that traffic away from the original URL and to your private endpoint instead, securely connecting you to Snowflake.