
Snowflake is a powerful software that can store data points that are important for auditing the ETL process. This is done by creating a control table, which tracks ETL jobs that have been run and their statuses. There are a variety of methods for populating a control table and in this post, I will review how to do so with an HTTP Triggered Azure Function. Azure Functions are a serverless solution that require less code and maintenance while providing savings on cost. They can easily be written and deployed by logging into your Azure account via VS Code.
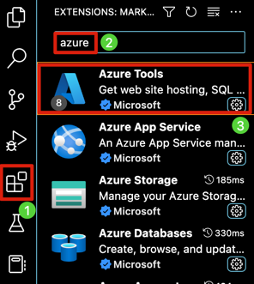
To log into your Azure account via VS Code, launch the application and install the Azure Tools extension.
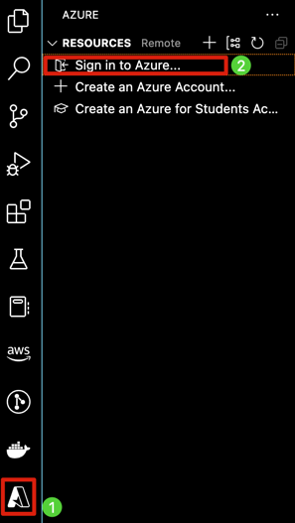
Once Azure tools is installed on your machine select the Azure extension in the left side pane, click Sign into Azure, and enter your credentials. Once the login process is complete, you will see the screen on the right and be able to begin the development process in VS Code.
 |
 |
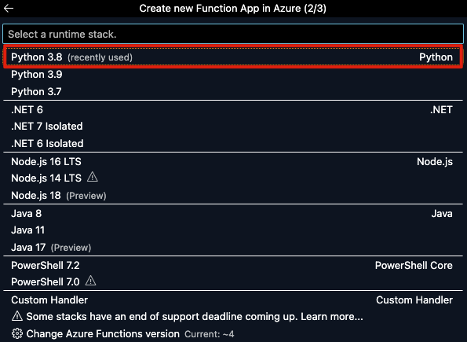
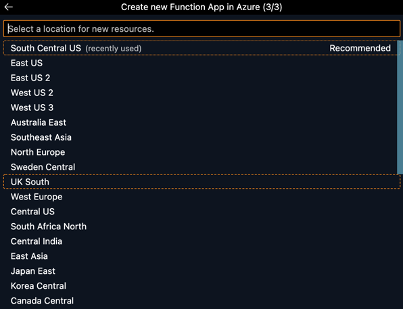
With VS Code connected to your Azure account you can now create a Function App that will eventually host your Azure Function. To do so show the command palette (Shift+Cmd+P on Mac, Shift+Ctrl+P on Windows), and type in Azure Functions: Create Function App in Azure. Once you select this option, you will be prompted to input a unique name for the function app, select the runtime stack for your function (this example will be in Python 3.8 as it is the most recent version of Python supported by Snowpark as of publishing), and select the region to host new resources.

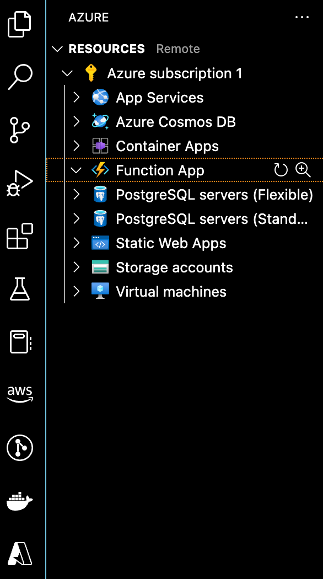
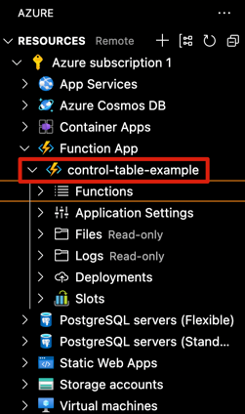
It will take a few minutes for Azure to provision the resources for your function app. Once that process is complete, you will be able to see your new function app in the left side pane under the dropdown menu for Function App.
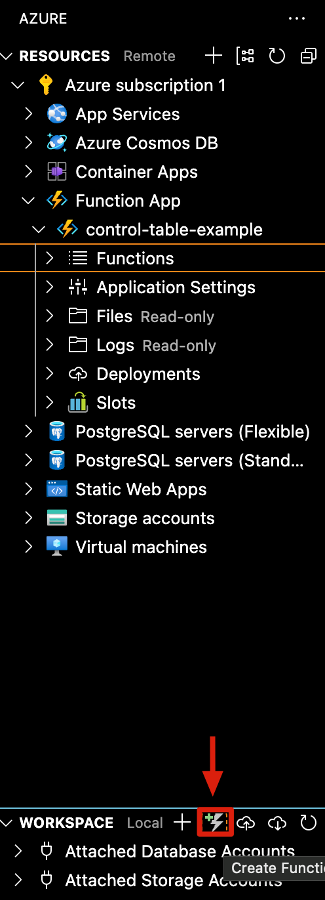
From here, it is time to create your function. You will direct your attention to the bottom half of the left-side pane and click on the button Create Function.
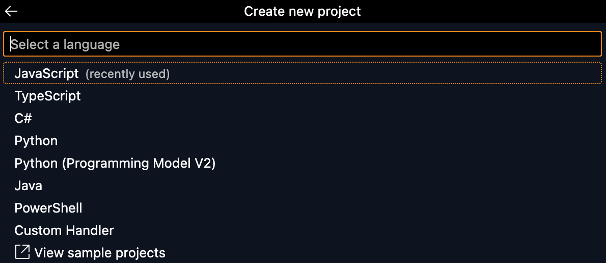
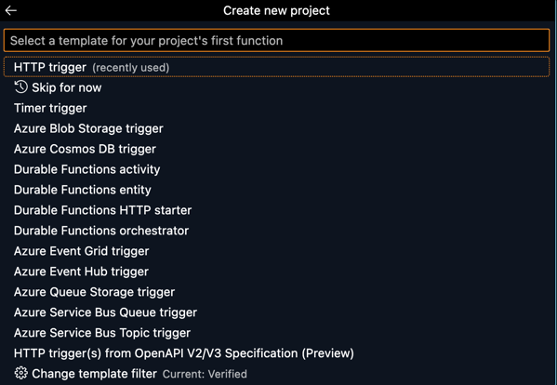
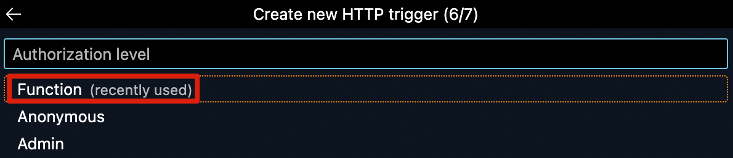
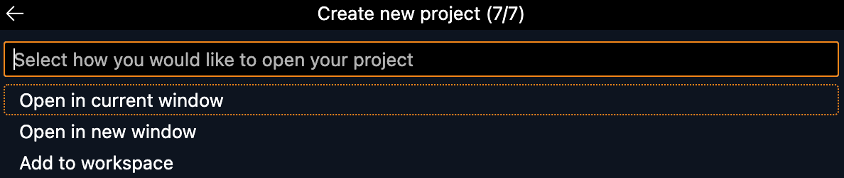
You will be prompted to select a folder to host your new project. I recommend creating a new folder that is dedicated to the project you are working on. After you will be asked to select the runtime stack for the function you will be writing. I selected Python 3.8 as my interpreter since it is supported by Snowpark. With your interpreter selected you must select a template for your project. In this example I will be selecting HTTP trigger. From here, follow the steps to name your new project, select Function as your authorization level, and then select Open in current window.

NOTE: If you are prompted with a window asking, “Do you trust the authors of the files in this folder,” then select, “Yes, I trust the authors.”
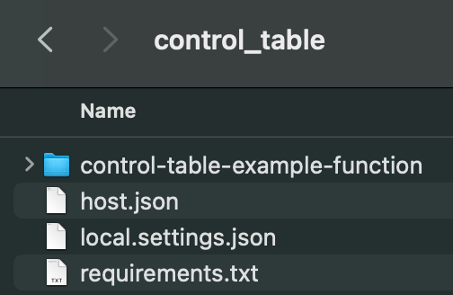
Now that we have the function set up, double check your folder to make sure you have the files and folder listed in the photo below.
Once you’ve confirmed that the file and folder are there, it’s time to setup a development environment for Snowpark Python. This will help to seamlessly deploy your function to Azure along with Snowpark Python, a core dependency for connecting your function to Snowflake. To accomplish this piece, we will start a new terminal in VS Code and type in the following code to change your directory.
cd ~/Documents/<your-path-here>/
A successful run of this code will show that you are now working in your project folder. My example is shown below:

Now that we are in the proper directory it is time to begin the installation process. To install Snowpark Python into your project folder copy and paste the code below into your terminal:
pip install snowflake-snowpark-python -t .
NOTE: If you are receiving an error message, then double check your version of pip is for Python 3.8.
This will take a few moments and once the install is complete you will have additional folders in your project folder. Now it is time to start developing your function.
For this example, I am going to populate the control table with a GET link that will be used to pull data from an API. First, we will use the sample script below to test our Snowflake connection. Be sure to input your own credentials in lines 11 – 13.
# Import the necessary libraries for the function.
from snowflake.snowpark import Session
import azure.functions as func
import logging

# Create the function.
def main(req: func.HttpRequest) -> func.HttpResponse:
    logging.info('HTTP trigger received a new request.')
    # Store connection parameters in a dictionary for creating a new session.
    connection_parameters = {
        "account": "<your-account>",
        "user": "<your-username>",
        "password": "your-password"
    }
    try:
        # Create a new session.
        new_session = Session.builder.configs(connection_parameters).create()
        # Select the current version of Snowflake being used.
        new_session.sql("SELECT CURRENT_VERSION()").collect()
        # Close the Snowflake Snowpark Session.
        new_session.close()
        return func.HttpResponse(f"Complete")
    except Exception as e:
        logging.info(f"Manual log - Error encountered")
        logging.info(e)
        return func.HttpResponse(f"Error encountered")
main(0)
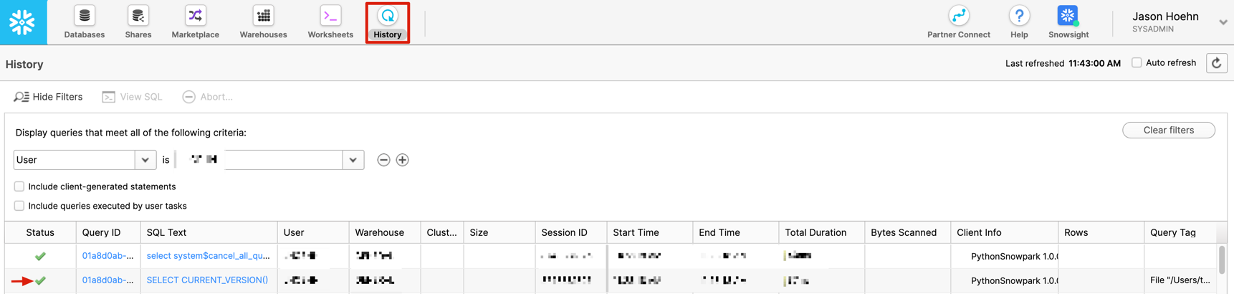
Execute the function and check the history tab in your Snowflake instance to see if SELECT CURRENT_VERSION() was executed successfully. You should see a green check mark under Status if the statement executed successfully. You should also notice that the Client Info column shows that the statement was executed using Python Snowpark.
Now that we’ve confirmed that our function is connected to Snowflake, it’s time to create and start populating our control table with dummy data. The script below will walk through this process and provide comments on specific components.
# Import the necessary libraries for the function.
from snowflake.snowpark import Session
import azure.functions as func
from datetime import datetime
import logging

# Create the function.
def main(req: func.HttpRequest) -> func.HttpResponse:
    logging.info('HTTP trigger received a new request.')
    # Store connection parameters in a dictionary for creating a new session.
    connection_parameters = {
        "account": "<your-account>",
        "user": "<your-username>",
        "password": "your-password"
    }
    url = 'https://nhl.com/'
    date = datetime.now()
    try:
        # Create a new session.
        new_session = Session.builder.configs(connection_parameters).create()
        # Create the necessary warehouse and database if it does not exist.
        new_session.sql("CREATE WAREHOUSE IF NOT EXISTS <your-warehouse>").collect()
        new_session.sql("CREATE DATABASE IF NOT EXISTS <your-database>").collect()
        # Use the proper warehouse and database for our schema / table.
        new_session.sql("USE WAREHOUSE <your-warehouse>").collect()
        new_session.sql("USE DATABASE <your-database>").collect()
        # Create & use the schema for our table.
        new_session.sql("CREATE SCHEMA IF NOT EXISTS <your-schema>").collect()
        new_session.sql("USE SCHEMA <your-schema>").collect()
        # Create the table and insert some dummy data.
        new_session.sql(
            "CREATE TABLE IF NOT EXISTS "
            "<your-table>(url VARCHAR, "
            "is_ingested BOOLEAN, "
            "message_received TIMESTAMP_NTZ, "
            "ingestion_attempted_at TIMESTAMP_NTZ DEFAULT NULL, "
            "number_of_attempts INT, "
            "time_synced TIMESTAMP_NTZ DEFAULT NULL"
        ).collect()
        new_session.sql(
            "INSERT INTO <your-table>(url, is_ingested, message_received, number_of_attempts) "
            f"VALUES('{url}', 'FALSE', '{date}', 0)"
        ).collect()
        # Close the Snowflake Snowpark Session.
        new_session.close()
        return func.HttpResponse(f"Complete")
    except Exception as e:
        logging.info(f"Manual log - Error encountered")
        logging.info(e)
        return func.HttpResponse(f"Error encountered")
main(0)
Execute the function and then navigate to your Snowflake instance to see if the table you created is populated with the proper data.

Now that we’ve confirmed that, we can populate our Snowflake table with static data it’s time to make this function dynamic and test its functionality. The below script will pull the url from the body of a POST request.
# Import the necessary libraries for the function.
from snowflake.snowpark import Session
import azure.functions as func
from datetime import datetime
import logging

# Create the function.
def main(req: func.HttpRequest) -> func.HttpResponse:
    logging.info('HTTP trigger received a new request.')
    # Store connection parameters in a dictionary for creating a new session.
    connection_parameters = {
        "account": "<your-account>",
        "user": "<your-username>",
        "password": "your-password"
    }
    url = req.get_json()['url']
    date = datetime.now()
    try:
        # Create a new session.
        new_session = Session.builder.configs(connection_parameters).create()
        # Create the necessary warehouse and database if it does not exist.
        new_session.sql("CREATE WAREHOUSE IF NOT EXISTS <your-warehouse>").collect()
        new_session.sql("CREATE DATABASE IF NOT EXISTS <your-database>").collect()
        # Use the proper warehouse and database for our schema / table.
        new_session.sql("USE WAREHOUSE <your-warehouse>").collect()
        new_session.sql("USE DATABASE <your-database>").collect()
        # Create & use the schema for our table.
        new_session.sql("CREATE SCHEMA IF NOT EXISTS <your-schema>").collect()
        new_session.sql("USE SCHEMA <your-schema>").collect()
        # Create the table and insert some dummy data.
        new_session.sql(
            "CREATE TABLE IF NOT EXISTS "
            "<your-table>(url VARCHAR, "
            "is_ingested BOOLEAN, "
            "message_received TIMESTAMP_NTZ, "
            "ingestion_attempted_at TIMESTAMP_NTZ DEFAULT NULL, "
            "number_of_attempts INT, "
            "time_synced TIMESTAMP_NTZ DEFAULT NULL"
        ).collect()
        new_session.sql(
            "INSERT INTO <your-table>(url, is_ingested, message_received, number_of_attempts) "
            f"VALUES('{url}', 'FALSE', '{date}', 0)"
        ).collect()
        # Close the Snowflake Snowpark Session.
        new_session.close()
        return func.HttpResponse(f"Complete")
    except Exception as e:
        logging.info(f"Manual log - Error encountered")
        logging.info(e)
        return func.HttpResponse(f"Error encountered")
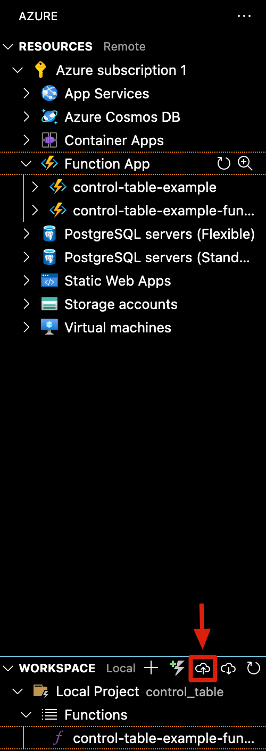
With the function updated to pull URL’s dynamically, it is time to deploy the function to Azure. In the left side panel of VS Code select Deploy. You will be prompted to select the Function App to deploy your Azure Function to. Select the Function App that you created earlier. When prompted select Deploy. The function will take a few minutes to deploy to Azure.

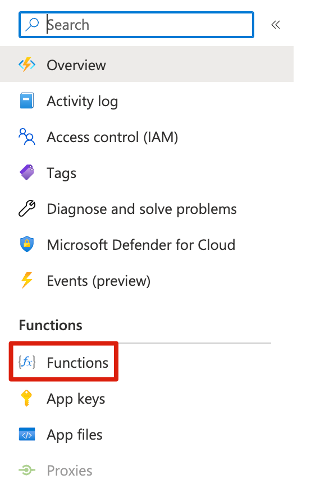
With the function fully deployed it’s time to test that it is working properly. Login to your Azure instance and navigate to your function. The path is as follows Function App -> Functions -> <your-function-name> -> Get Function URL and copy the function URL.


Take your freshly copied URL and transition over to Postman. Create a new POST request, input your link in the proper field and enter the below JSON object into the body in raw format.
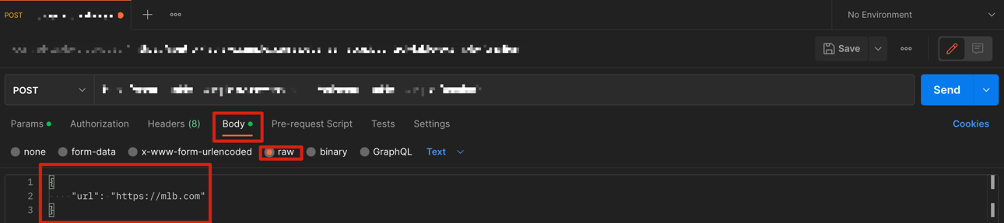
Click Send and then navigate to your Snowflake instance. You should now see two rows in your control table.

With that, you now have a fully functional Azure Function that populates a control table with a POST request. This can be utilized to receive a GET link from a third-party for ingestion and is completely customizable (I’ll have more on that in a later blog post). Thank you for reading and as always feel free to reach out to us at InterWorks here.
If you are interested in learning more about Snowflake with Python, be sure to check out the rest of our Snowflake with Python series! You can also find great code snippets in our public GitHub repository, including a custom library to simplify creating Snowflake Snowpark Session objects in Python.