
This is the second part of the three-part series on SSO and user provisioning. This one is a follow up on my previous post, which went over the core concepts of how SSO (and SCIM) work. Now we are going to delve deeper into actually setting SCIM user provisioning between Azure AD and Snowflake.
Links to related posts:
- Overview of SSO and SCIM
- SCIM and User Management for Snowflake with Azure AD (you are here)
- Snowflake SSO with Azure AD: coming soon
If you haven’t read the overview session and feel you’re comfortable with the subject itself, or just want to try your hand implementing it, then you’re in good hands. Otherwise, I suggest you go check out my earlier post and join us once you’re all caught up. Also don’t forget to smash that like and subsc- oops, wrong platform.
Foreword
We are going to hop between Snowflake and Azure Portal for the duration of this post, so it’s probably worth having them two open side-by-side if you’re following us at home. Also, we’d need to submit a few SQL statements, and for that we’re going to use Snowflake’s worksheets / SQL editor screen (both classic and new UI are fine).
SCIM Before SAML?
Order of operations is debatable. It made sense to me to start off with creating users, roles and assignments before moving on and allowing them access to the platform via SAML SSO, but you do you.
Also this topic has been covered, probably a few hundred times at this point, here’s one from one of the horses mouth. If you prefer an “official step by step guide,” I won’t be (much) offended.
Below is the blow-by-blow setup guide with notes, clarifications and my commentary.
Step 1: Snowflake – Create Provisioner Role
Head over to Snowflake UI (dBeaver or whatever other method you use to run statements on Snowflake). We would need to create a role (as opposed to a user / service account) within our Snowflake account that would be used to provision new users on behalf of Azure AD.
use role accountadmin;
create role if not exists aad_provisioner;
grant create user,create role on account to role aad_provisioner;
grant role aad_privisioner to role accountadmin;
In the step above, we use accountadmin role to create a role priviosioner as well as grant that role ability to create both, users and roles on account. Finally we add newly created role to accountadmin hierarchy (such that accountadmin has full control over it as well as inherit all of its privileges).
Step 2: Snowflake – Create Security Integration
Next bit we need to do is to create security integration. Security integration is a Snowflake object that allows for external services to interact with Snowflake. In our case, it would allow Azure AD to create roles and users (as per grant statements above).
SCIM uses standardised REST API calls (to snowflake provided endpoints); so not only do we need to create pathway for external service to interact with Snowflake (security integration), we also need to be able to authenticate against Snowflake (some form of pre-shared key / token). This token:
- Expires every six months, so would need periodic regeneration – length of this is something you cannot change
- Will be shown only once after execution of a system function below – you cannot “get it back” unless you save the output of the command
create or replace security integration aad_provisioning
    type = scim
    scim_client = 'azure'
    run_as_role = 'AAD_PROVISIONER';

select system$generate_scim_access_token('AAD_PROVISIONING');
Tokens are valid for six months as mentioned above, and running a function system$generate_scim_access_token() again would produce different token each time. Running the function second time does not invalidate previously issued token. You would need to drop the security integration itself and recreate it to invalidate the token. See here for more details on the function.
Take note of the output from the function. It should be a long string, starting with something like ver:1-hint: followed by a long string of numbers, letters, dashes, etc.
From perspective of Snowflake, we are ready and standing by. As soon as there’s a call to SCIM REST API, Snowflake will validate the token and use the information we’d given to the integration (aad_proviosioner role for example) to create users and roles.
Step 3: Azure – Adding SCIM to Azure Active Directory
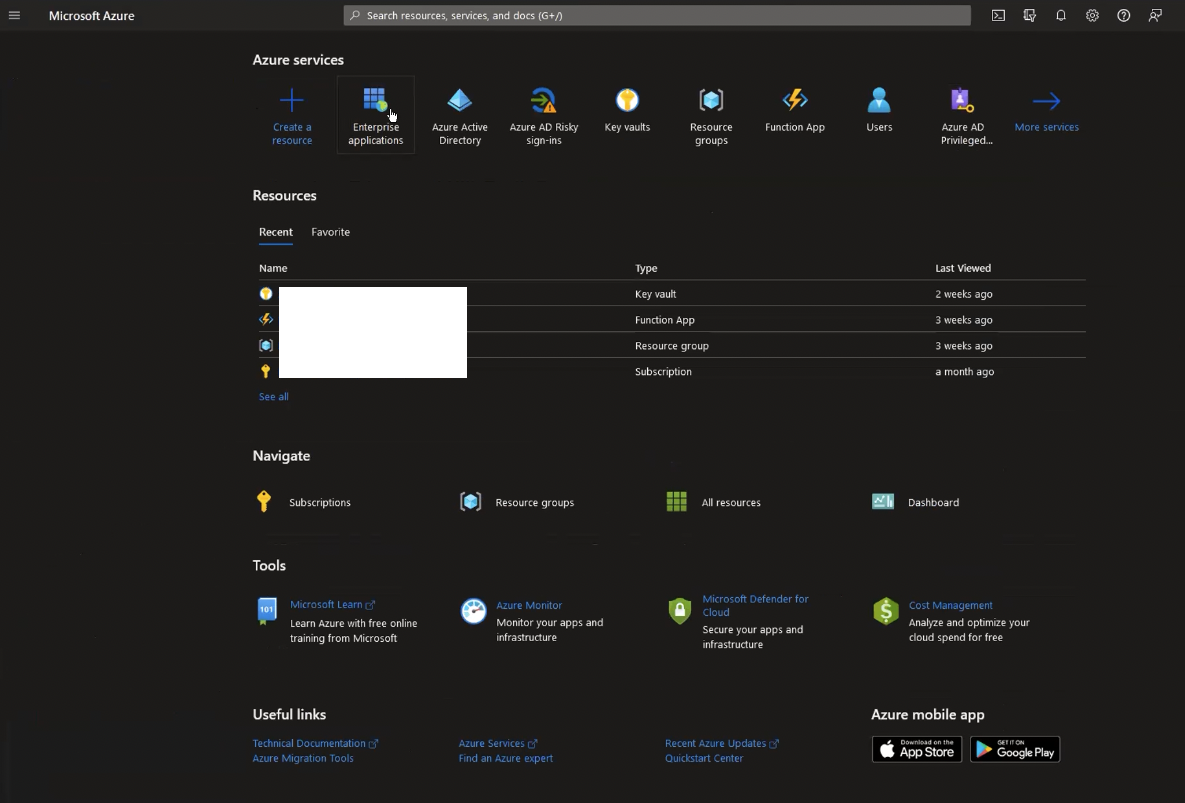
Head over to Azure Portal. Once you’re logged on (and have admin privileges that allow you to add new applications to the subscription), click on (or search for) Enterprise applications:
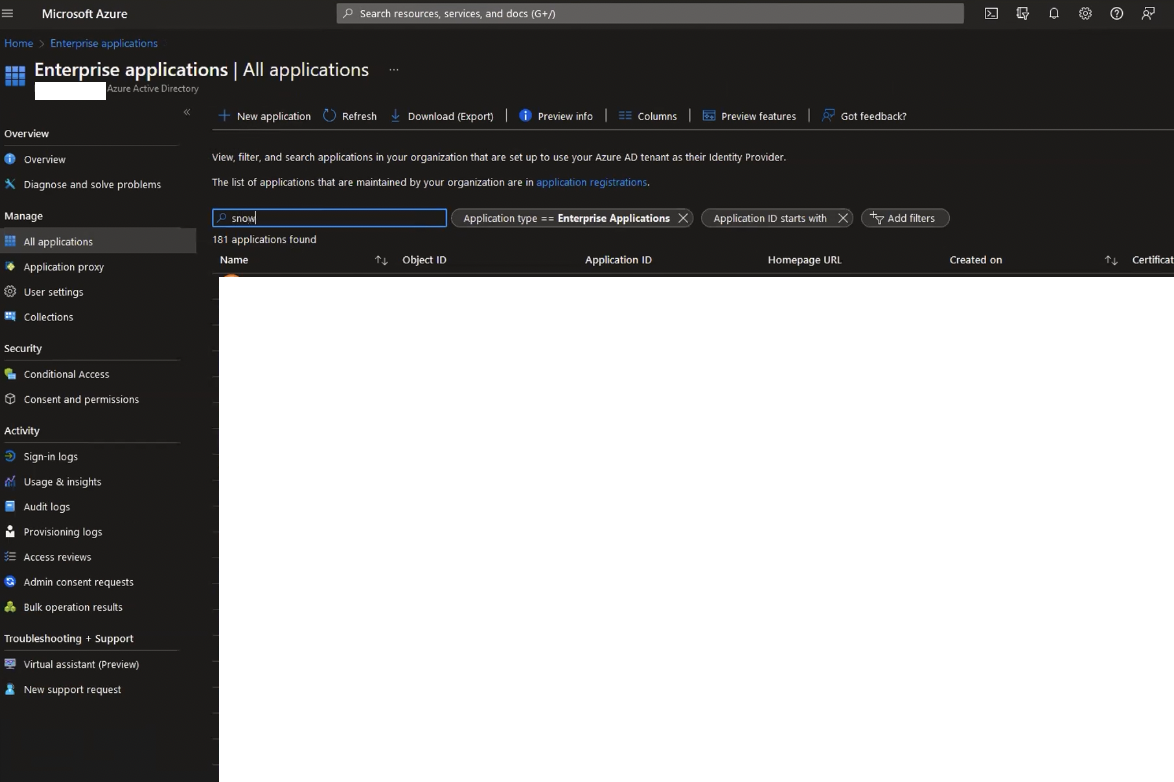
Once inside the enterprise application service, search for Snowflake. If you have followed us out of step, and setup SSO first, you’ll probably see an application on the filtered list. You can reuse the same application. In fact, it’s probably best you do. If you cannot see an app on the filtered list already, then click on New application instead:
You’ll be greeted with Browse AD Gallery, which is where you can search for Snowflake again:
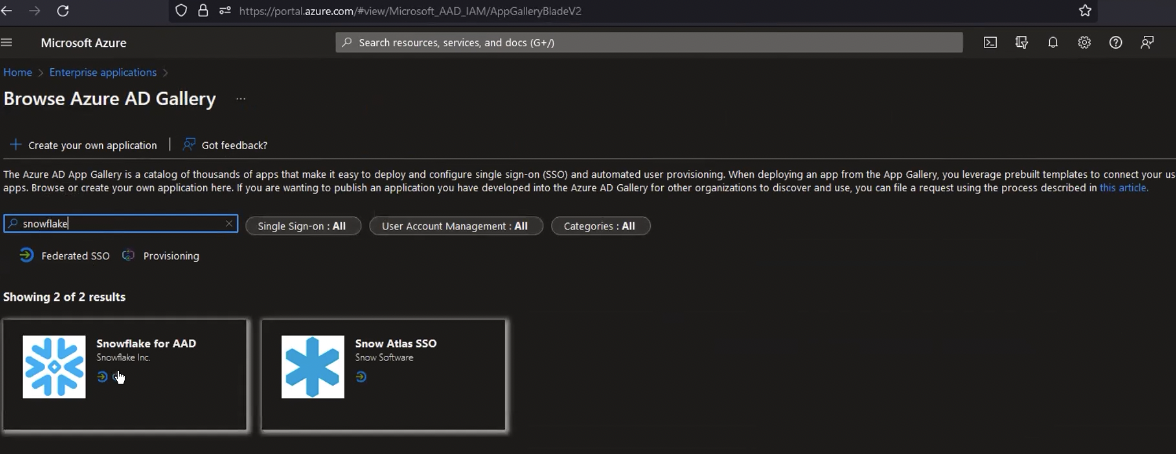
Gallery applications would have a bunch of stuff pre-configured for Snowflake, so that will be the easiest way to setup SCIM with Snowflake. There are other ways, like rolling your own app if you’d wish to go that way, but that’s outside of the scope of this article.
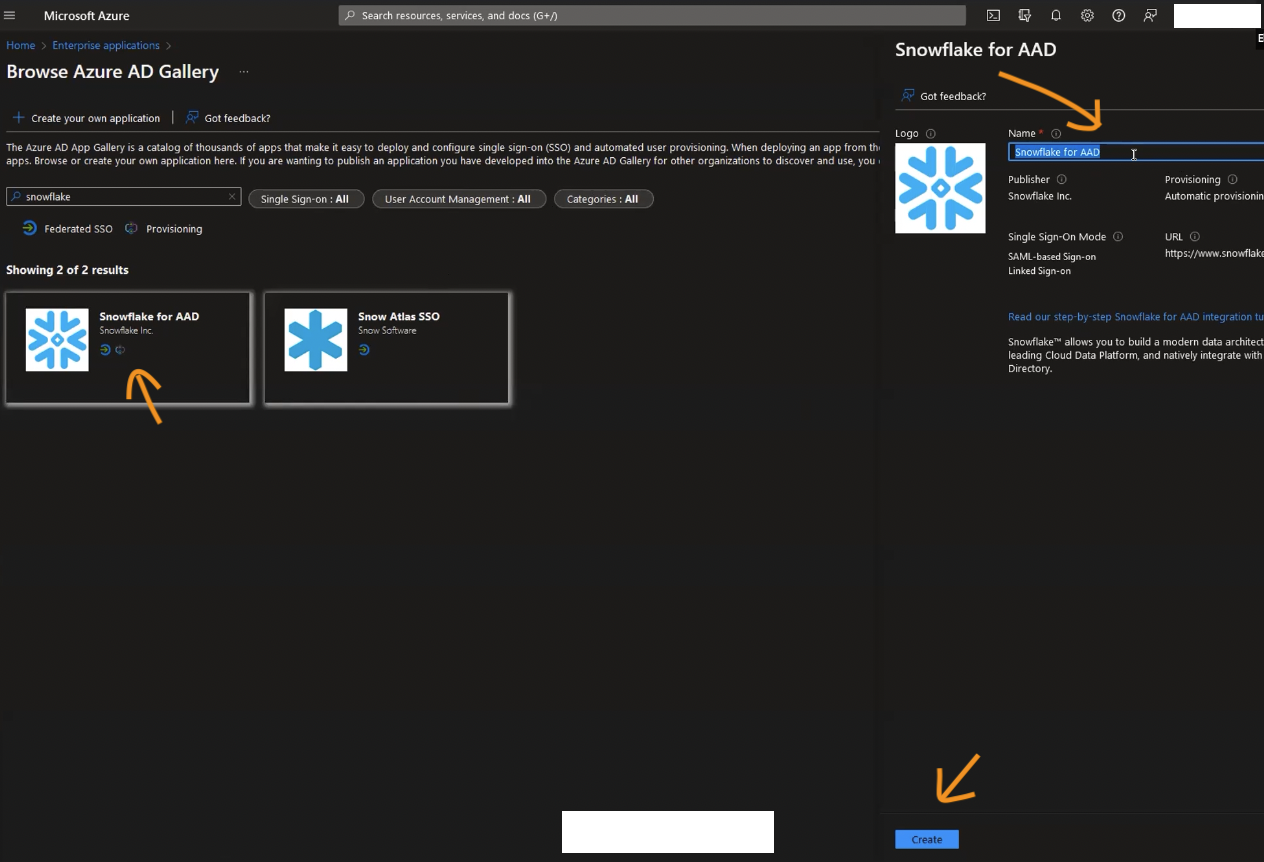
Click on Snowflake for AAD application, this will bring up dialogue where you can define a name for your application (defaults to Snowflake to AAD). You can click Create in the bottom right-hand side to proceed:
Once the application gets created, you’ll be dropped into its configuration screen:
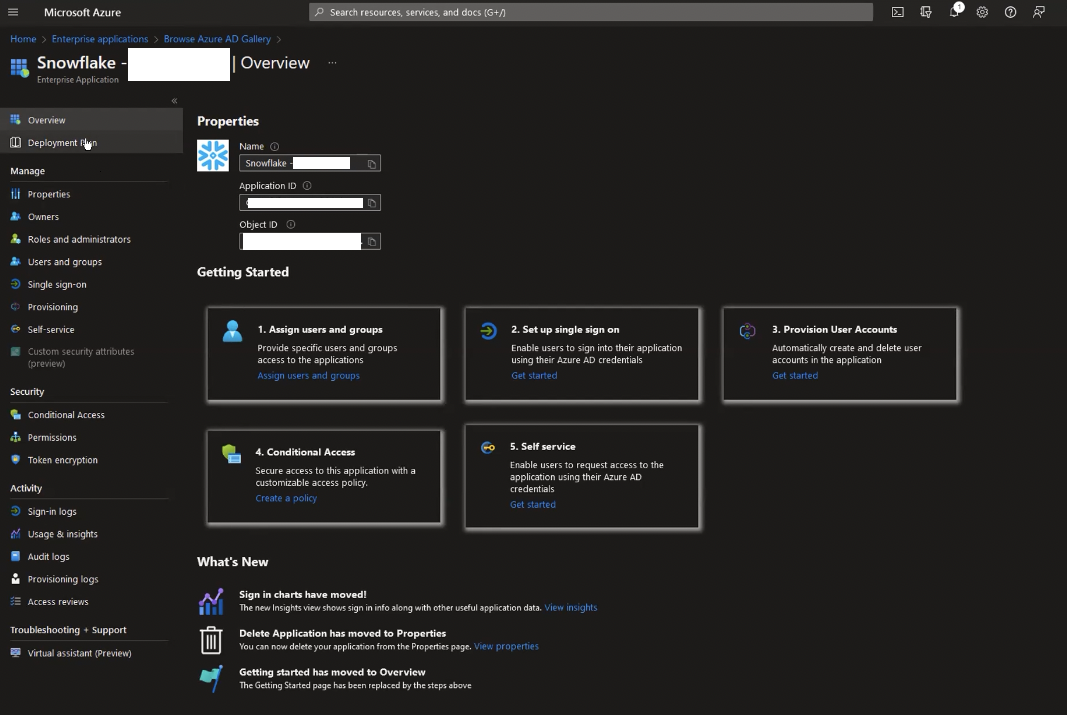
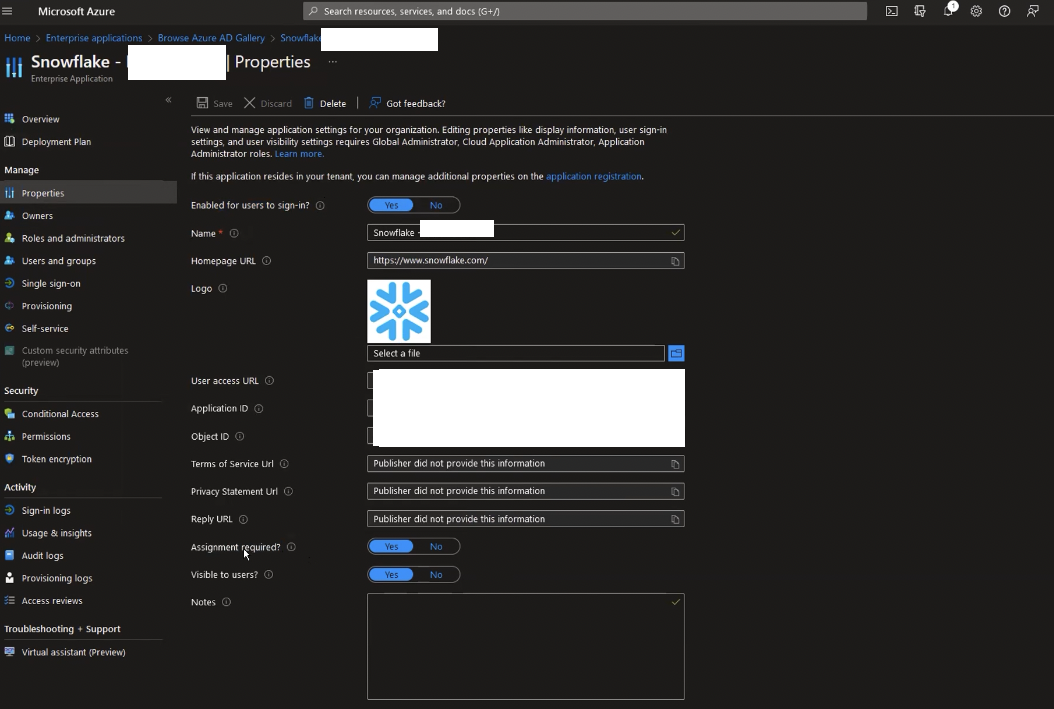
If you head over to properties, you can check out some of the pre-populated parameters for this application. Take note of the Assignment required toggle. If the toggle is switched to No, then any user would be able to sign in to the application as soon as they are added to Azure, guests and all, which is probably not what you want. If This is set to Yes, then each user would have to be manually “assigned” to be able to use this application.
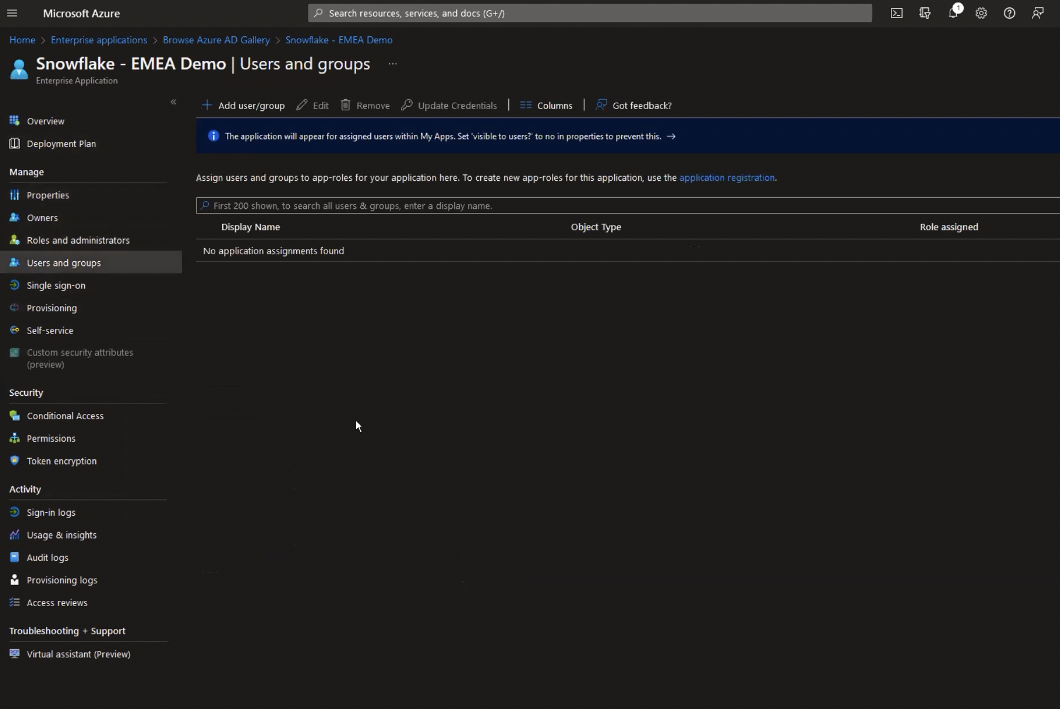
If you left it at Yes, then click on Users and Groups and Add users/groups. You’ll be presented with add assignment dialogue:
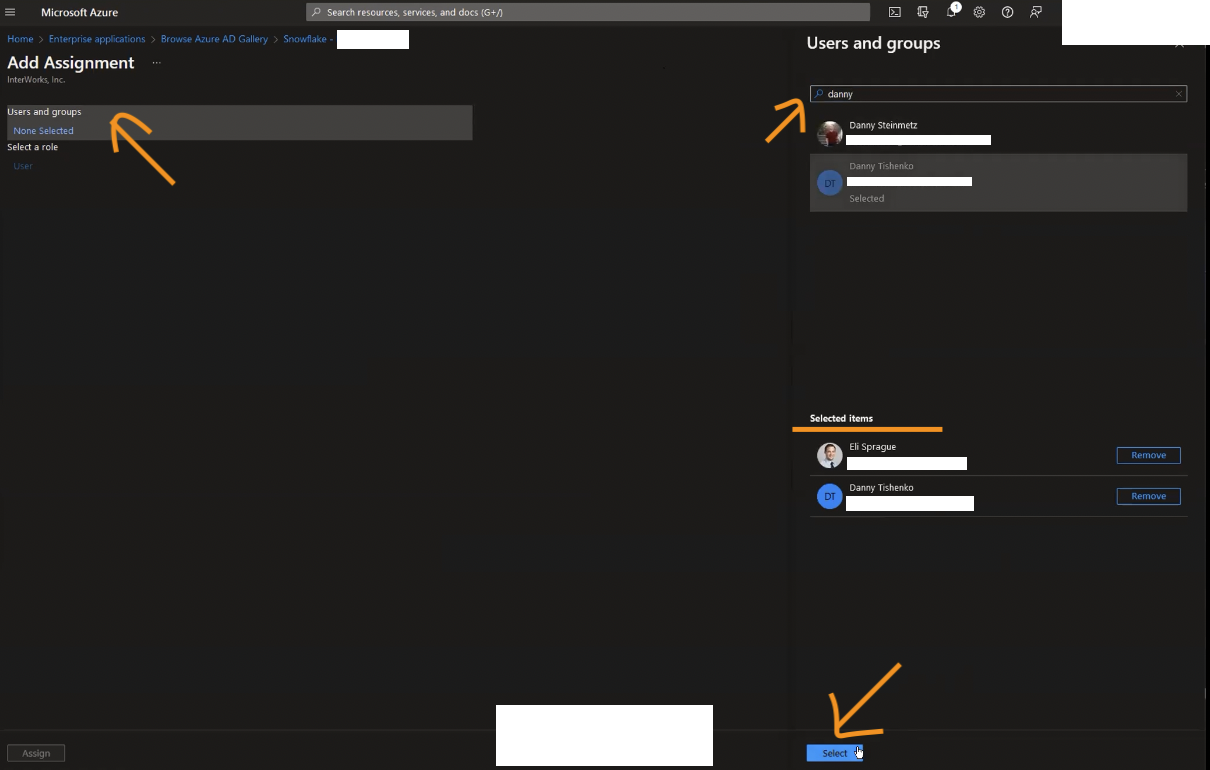
Now’s the time to search and add the users you want to have access to Snowflake through SCIM. Once you’re done, click Assign which should return you to the Users and Groups section with the users you’ve added just now on the list. Conversely, you can also add AD groups and not just users, in which case a role with the same name would be created in Snowflake, as would the users.
At this point, if you want someone else to manage this application, you could add them in the Owners section, but that’s not necessary right now. Useful though, if you want multiple people within organisation to have control over the application properties.
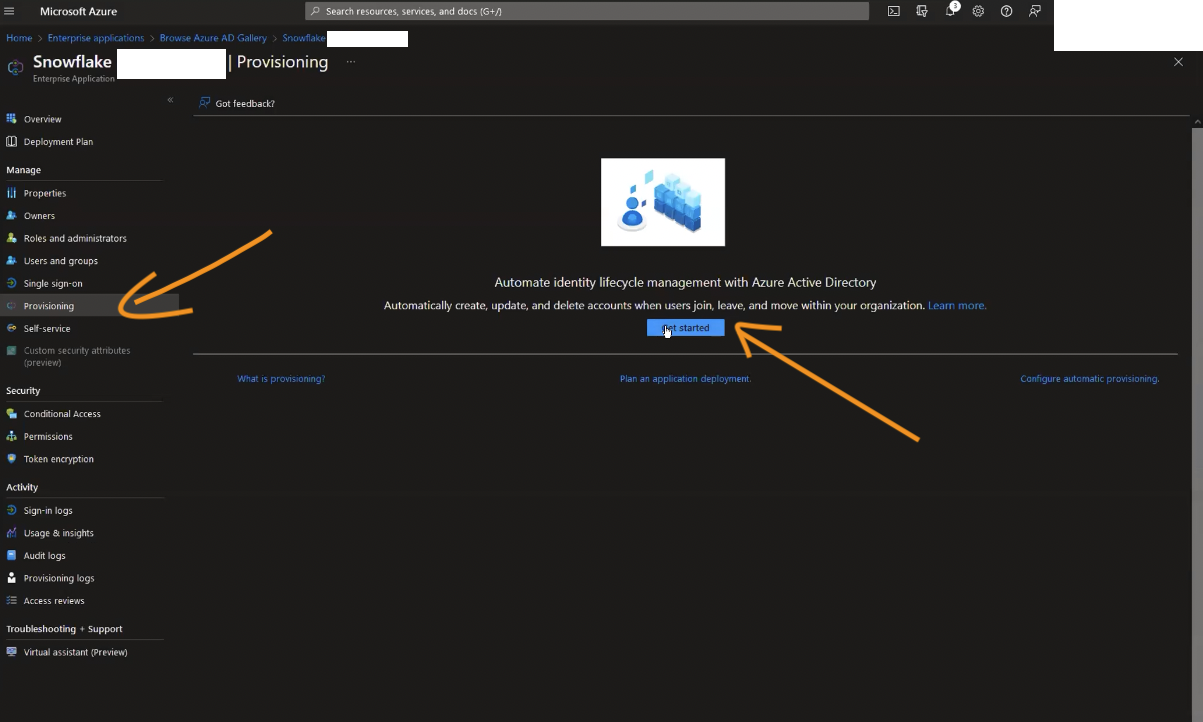
Step 4: Azure – Automatic Provisioning of Users and Roles
Head over to the Provisioning section of the application configuration page and click Get started (if shown).
In the Provisioning Mode drop-down, select Manual. You’ll be asked to fill in Tenant URL as well as secret token.
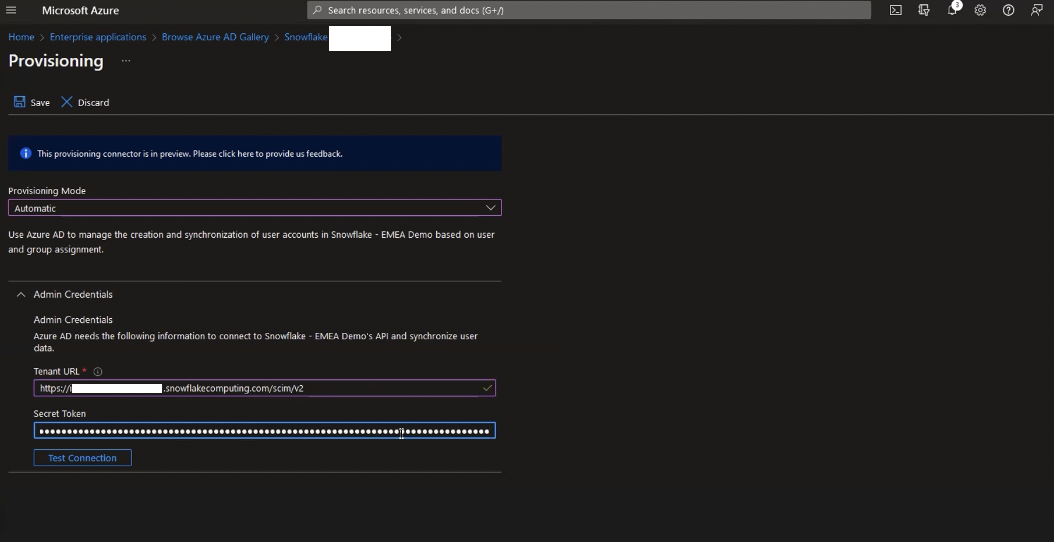
Something that isn’t super clear in the documentation (there’s already an open issue on this) is what Tenant URL actually refers to. What Azure is actually asking for here is for the base endpoint that it should send REST requests to when trying to provision users. The URL will depend on your Snowflake’s account URL. All you need to do is add /scim/v2 at the end of the string.
For example, if your Snowflake account URL is https://my-company.snowflakecomputing.com, then the Tenant URL will be https://my-company.snowflakecomputing.com/scim/v2.
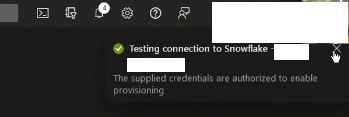
Secret token is the token we’ve generated and took note of earlier in Snowflake UI. Once you’re happy, click on Test Connection and notification in the top-right corner should show successful connection to Snowflake:
Click Save. You can take a quick look at the mapping section once expanded. This effectively maps objects as they appear in AD (users, groups) to how they are expected in Snowflake (users, roles respectively). Within each section for users and groups, there will be a mapping of object properties from Azure to Snowflake:
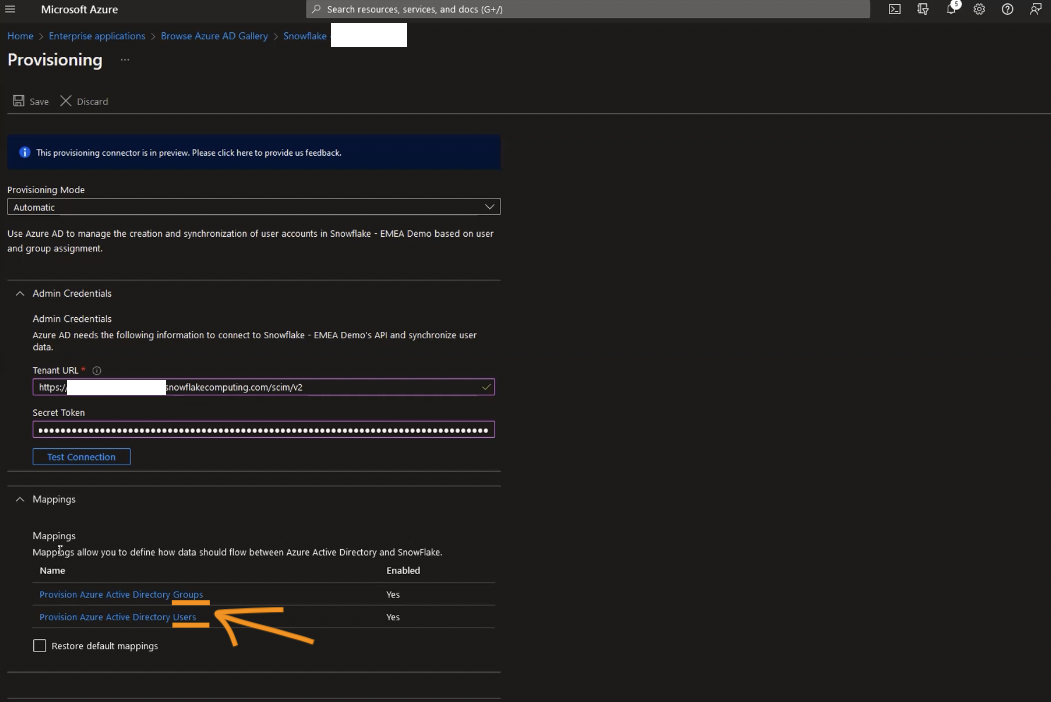
For example if you click on Provision Azure Active Directory Groups, you’ll be taken to attribute mapping for groups (=roles in Snowflake parlance).
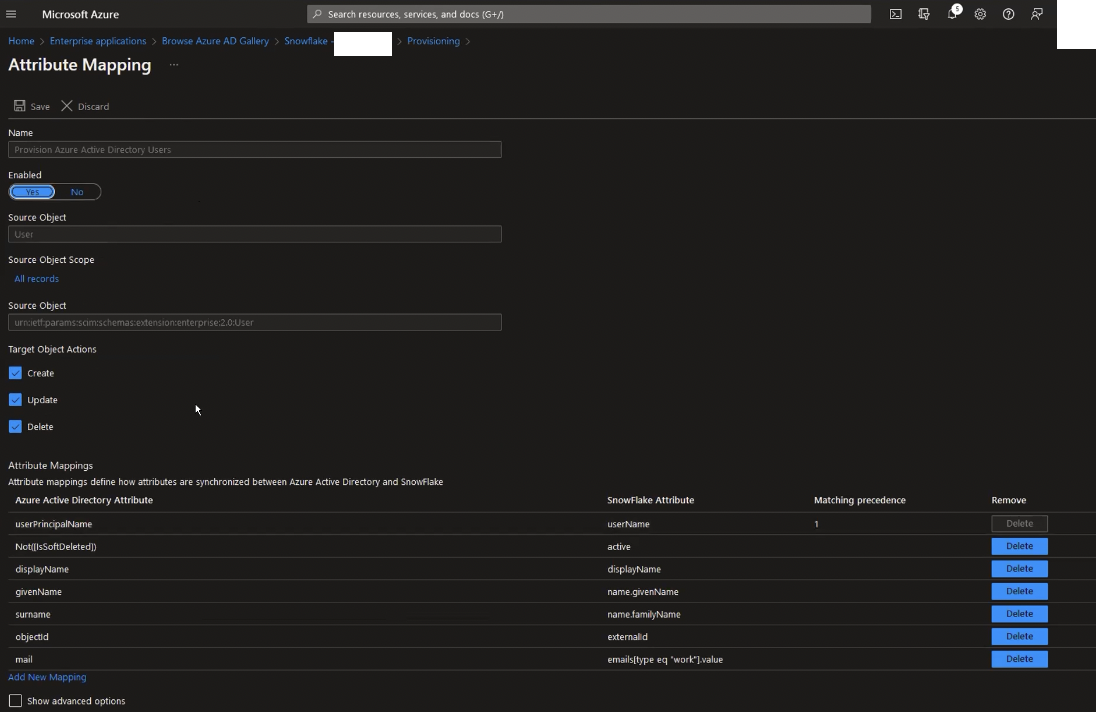
In the attribute mapping grid, you’ll see that AAD attribute surname is mapped to SCIM expected attribute for user name.family.Name. This is surname, as well as other attributes on the list, that you will see on Snowflake if you run desc user <username>.
From this screen, you can also control what actions that are happening on the Azure AD side are replicated to Snowflake – if the user is created, updated, or deleted, should any of those be replicated on Snowflake.
For the most part, if at all, you don’t need to change things here (or the user mappings section for that matter). The only thing I can think of is, if you would like to setup defaults for Snowflake users from within AD; for example, default warehouse to user, or role, etc. There’s an excellent article written on the subject here.
Finally, if you expand the Settings section, you’ll see that the scope for which users will be processed by this application is set to those that we’ve assigned to the application earlier (as opposed to everyone). You can toggle that if you wish, but for now we’re going with Sync only assigned users and groups:
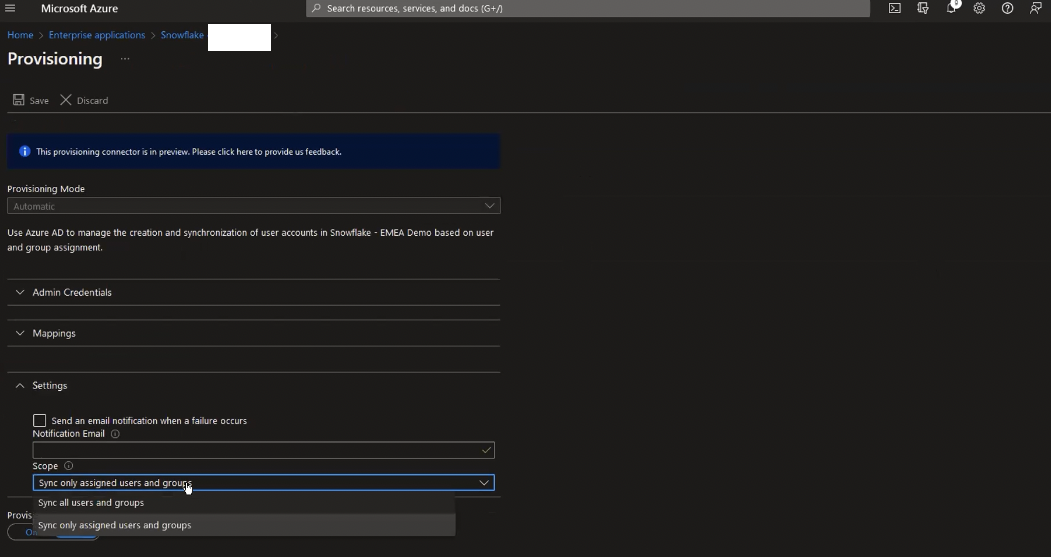
You can add additional filters for users in scope in the Attribute Mapping > Source object scope, but the selection and attribute syntax is beyond the scope (ha!) of this article. Last thing left to do is set provisioning status to On.
This will queue provisioning to be run against Snowflake. Once that happens, you’ll be able to have a look at the status dashboard, as well as any logs from the provisioning activity:
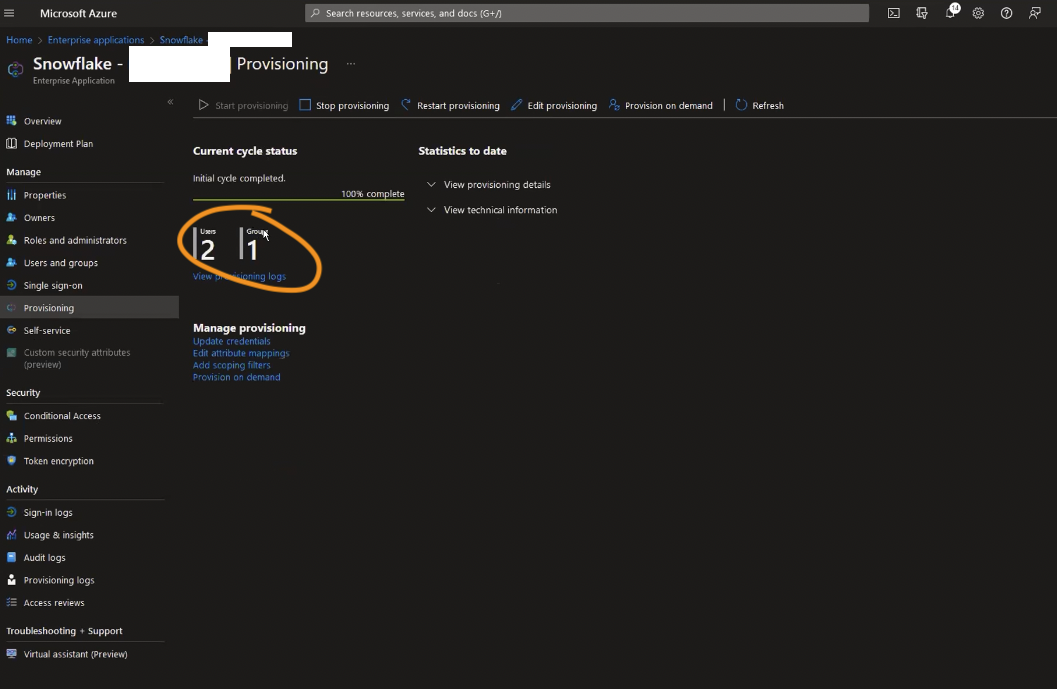
Step Last: Snowflake – Validate Provisioning
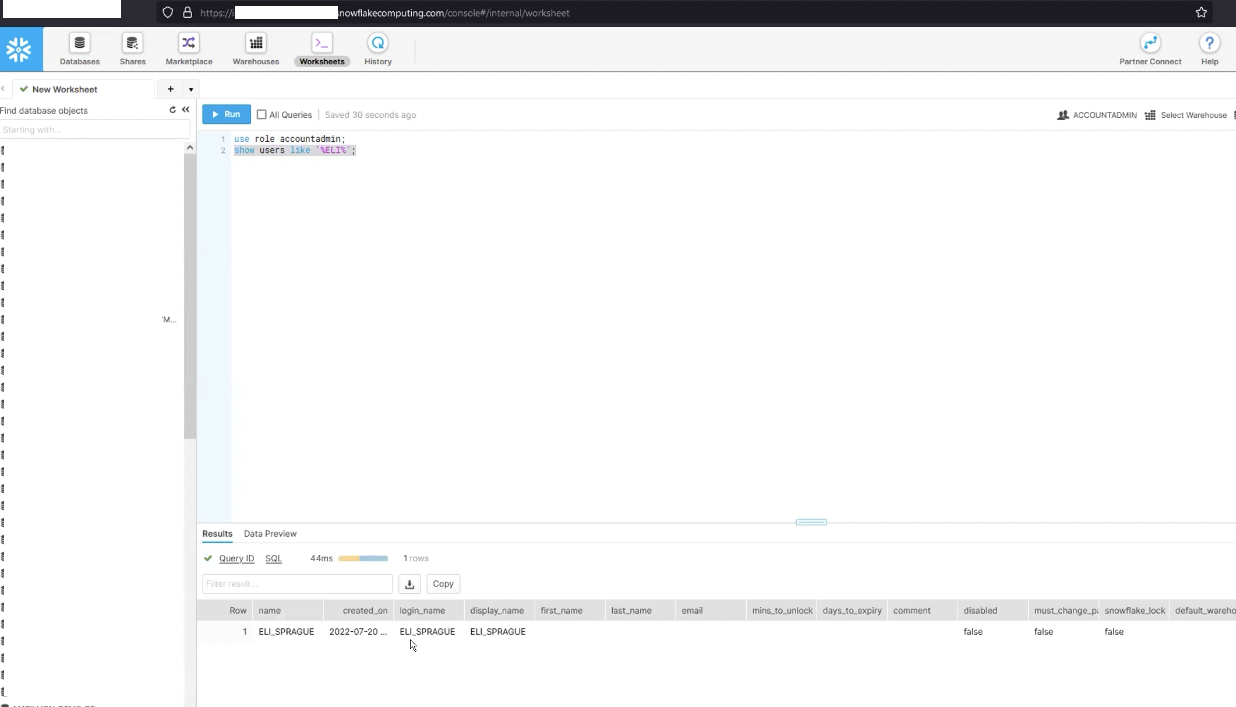
Once the process is completed successfully on the Azure side, you can head back to Snowflake and check that the users you’ve added to the application have indeed been added, and their attributes have been mapped correctly.
So, at this point, we have users and groups (roles) provisioned from Azure AD into Snowflake. Yay. You’re probably wondering if this is it, however.
Well, yeah kind of. The rest of the setup would depend on your organisation’s needs, and only you would know what that should look like, unfortunately. But, as an example, here’s what you could do with your setup.
Example User and Group Setup
Create several groups in AD that map to your organisation’s teams or functional units. For example, you could try creating following groups:
- SNOWFLAKE_DATA_ENGINEER
- SNOWFLAKE_DATA_ARCHITECT
- SNOWFLAKE_DATA_ANALYST
Then, within Azure AD allocate users to those groups. Those groups have to be flat (not nested / hierarchical) as AD does not guarantee that those nested groups would be processed.
Then be sure to go back and add the groups you’ve just created to Snowflake Enterprise Application configuration screens in Azure, in the Assignment section. Once ready, (re)start provisioning users and groups, and you’ll find that both users and groups are replicated to Snowflake, and that each of the users you’ve added to the groups have had that role assigned to them on Snowflake, too.
You can then go an grant specific permissions to each of the roles on Snowflake side, like ability to create databases to data architect, create tables and views to data engineer, or read from select tables to data analyst. You could also create a hierarchy of roles, such that data engineer “inherits” all permissions granted to data analyst (in addition to having their own).
-- permissions are remit of securityadmin role
use role securityadmin;

-- specific grants to each role
grant create database,create schema on account to role data_engineer;
grant create table,create view in schema database.schema to role data_engineer;
grant select on tables in schema database.schema to role data_analyst;
grant select on views in schema database.schema to role data_analyst;

-- hierarchy
grant role data_analyst to role data_engineer;
grant role data_engineer to role data_architect;
I’d venture a guess that there’s a way to get Azure AD to create those hierarchies (through custom attribute mappings, perhaps). Same goes for grants to each of those roles (groups). For my current setup, I’m using Terraform Snowflake provider to manage role relationships and permissions. This works really well, so never really had to explore this side of integration.
Next Up
So, now that we’ve users and roles in Snowflake, one last bit we need is to setup single sign on for them, which is going to be topic for the next time.