This series takes you from zero to hero with the latest and greatest cloud data warehousing platform, Snowflake.
Note: This blog was updated in October 2023 with minor updates.
Our previous post in this series explained how to import data via the Snowflake user interface. You can also stage your data and load it into tables with code via SnowSQL, which is what this blog post will demonstrate.
Setting the Stage for SnowSQL
There are many ways to import data into Snowflake, and utilising code allows users to automate the process. To import data into a Snowflake stage using SnowSQL, the following requirements must be met:
- SnowSQL must be installed on the user’s machine
- The data must be in a suitable file format
- A warehouse in Snowflake must exist to perform the import
- A destination database must exist in Snowflake
- A destination stage must exist within the Snowflake database
To load data from a Snowflake stage into a table, the following additional requirements must be met:
- A destination table must exist within the Snowflake database
- A suitable file format must exist within the Snowflake database
We will achieve all of the above within this article.
Installing SnowSQL
SnowSQL is the command line interface tool which allows users to execute Snowflake commands from within a standard terminal. This means users do not need to be within the Snowflake UI to prepare and execute queries. It is also noteworthy that certain commands cannot be executed from within the Snowflake Worksheets environment but can be executed via SnowSQL, with the most noteworthy being the command to import data into a Snowflake stage.
Before we can start using SnowSQL, we must install it. You can do so by navigating to the SnowSQL Download page. Once the installer downloads, execute it and run through the installer to install SnowSQL. You may need to enter admin credentials to install the software.
Verifying the Installation of SnowSQL
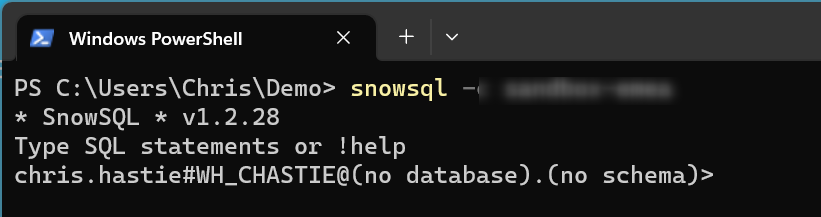
Once SnowSql is installed, it can be called from within any standard terminal. For this example we will be using Windows Powershell however we could equivalently use any other terminal depending on the operating system.
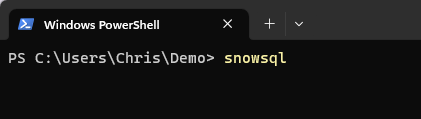
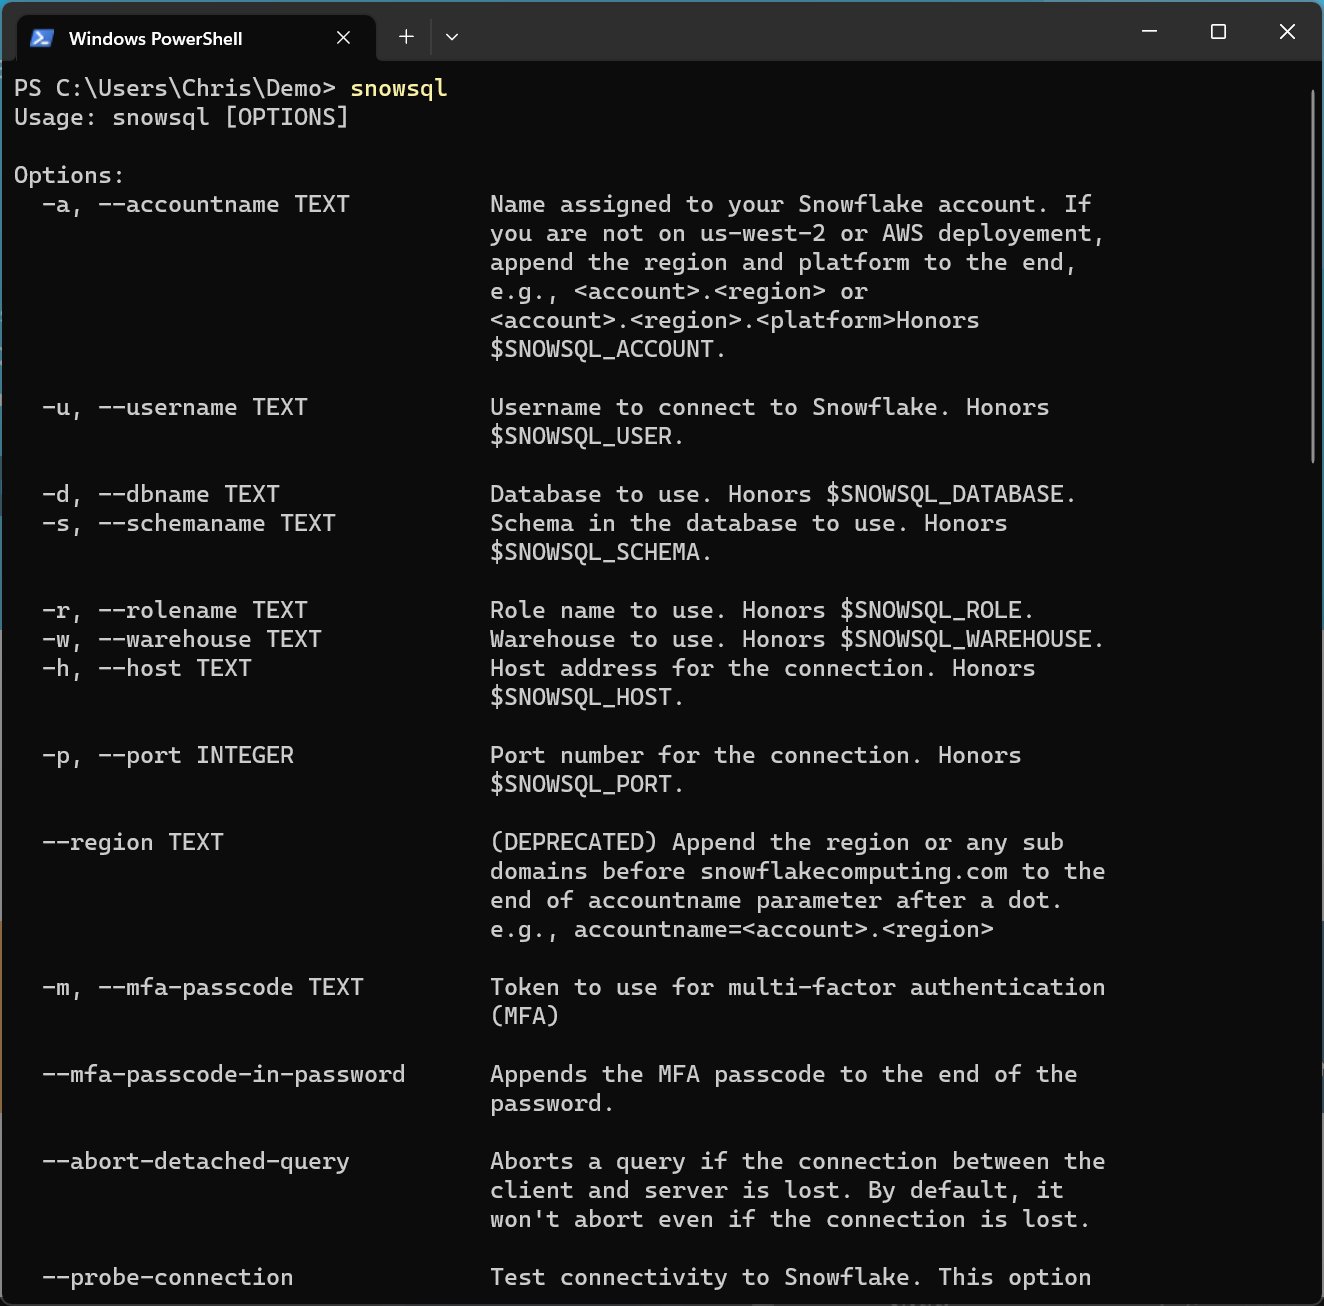
Begin by executing the command snowsql to verify the installation. This will list the various options which can be used within SnowSQL.
Preparing Data for Import
Before we can import any data into Snowflake, it must first be stored in a supported format. At time of writing, the full list of supported is contained in the table below. An up to date list of supported file formats can be found in Snowflake’s documentation.
| Structured/Semi-Structured | Type | Notes |
| Structured | Delimited (CSV, TSV, etc.) | Any valid single-byte delimiter is supported; default is comma (i.e. CSV). |
| Semi-Structured | JSON | |
| Avro | Includes automatic detection and processing of Snappy-compressed Avro files. | |
| ORC | Includes automatic detection and processing of Snappy or zlib-compressed ORC files. | |
| Parquet | Includes automatic detection and processing of Snappy-compressed Parquet files. | |
| XML | Supported as a preview feature. |
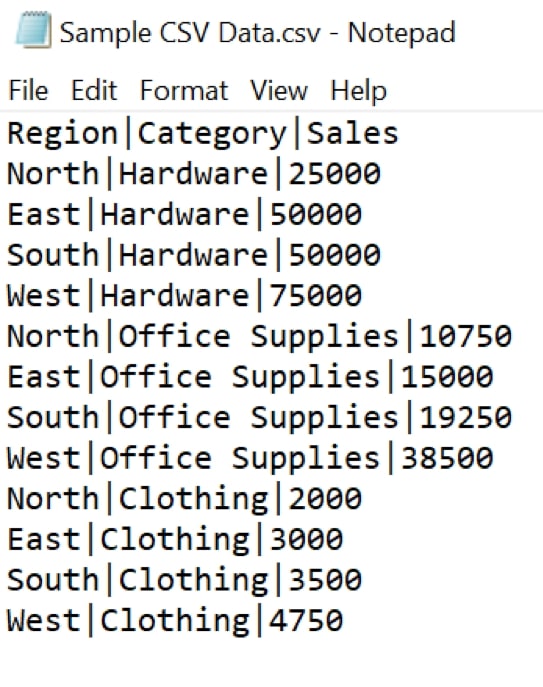
For this example, we will load the following structured data which is delimited with vertical bars.
Region|Category|Sales
North|Hardware|25000
East|Hardware|50000
South|Hardware|50000
West|Hardware|75000
North|Office Supplies|10750
East|Office Supplies|15000
South|Office Supplies|19250
West|Office Supplies|38500
North|Clothing|2000
East|Clothing|3000
South|Clothing|3500
West|Clothing|4750
We store this inside a file called “Sample CSV Data.csv”:
Using SnowSQL to Execute Commands
The first step towards utilising SnowSQL is to establish a connection with your Snowflake environment. Three pieces of information are required to establish a connection:
- The Snowflake account to connect to, including the region
- An existing user within that account
- The corresponding password for that user
As Snowflake is a cloud service, each account is accessed via a URL. This URL is usually of the following format:
https://<Organisation>-<Account-Name>.snowflakecomputing.com
For example:
https://myorganisation-my-account.snowflakecomputing.com
Legacy Snowflake accounts can also be accessed by referencing the account and location directly:
https://<Account>.<Account_Region>.snowflakecomputing.com
For example:
https://my-account.uk-south.azure.snowflakecomputing.com
If you already have a Snowflake account, you should see one of the above forms matches the URL that you use to access the Snowflake UI.
The URL above is actually a wrapper around the Snowflake account identifier. Everything between https:// and .snowflakecomputing.com is the account identifier, as in the following examples:
<Organisation>-<Account-Name>
myorganisation-my-account

<Account>.<Account_Region>
my-account.uk-south.azure
We can leverage this account identifier to authenticate SnowSQL into Snowflake. Note that we are still using Windows PowerShell however this can be achieved in any equivalent terminal. We enter account using the --accountname option in SnowSQL, along with my user chris.hastie with the --username option.
snowsql --accountname myorganisation-my-account --username my_user

We can also use the shorter names for these options, respectively -a and -u
snowsql -a myorganisation-my-account -u my_user

In both situations, a password prompt will appear. Enter the password for the desired user. Do not be alarmed if your terminal does not display the password, it will still be reading the input.
With the connection established, SnowSQL will output the current user along with the current warehouse, database and schema. We have not yet selected any, which is why they are all left as none selected.
Preparing a Warehouse
We encourage Snowflake users to test their data loads with various warehouse sizes to find their optimum balance between credit cost to performance. As we are loading a very small file in a bespoke instance, we will use an extra small warehouse called “LOAD_WH”.
If the warehouse does not exist, it can be created with the CREATE WAREHOUSE command. Note that we have determined the size as extra small to keep this as low-cost as possible. We could also configure other options such as the AUTO_SUSPEND if desired.
create warehouse WH_LOAD warehouse_size = 'X-SMALL';
Upon successful execution, SnowSQL will output that the warehouse has been created.

Often, Snowflake will automatically switch the environment to leverage the new warehouse. If it does not, or if you already have a warehouse that you wish to use without creating it again first, leverage the USE WAREHOUSE command.
use warehouse WH_LOAD;
We can now see our current warehouse in our connection string, directly after the user name.

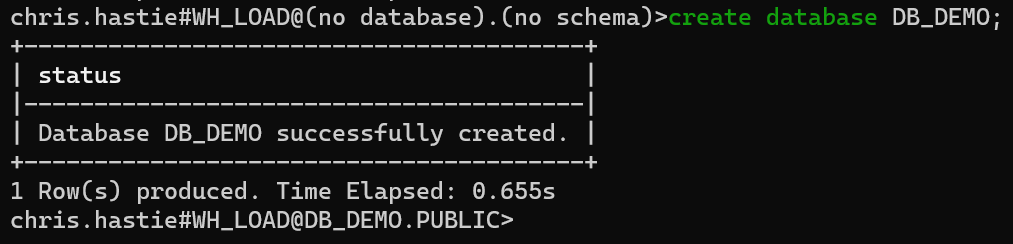
Preparing a Database
In a similar fashion to warehouses, users can create databases via the CREATE DATABASE command. For this example, we will create a databased called DB_DEMO.
create database DB_DEMO;
With this database created, our connection will automatically update to use this database. DB_DEMO is now provided in the connection string, along with the default PUBLIC schema.
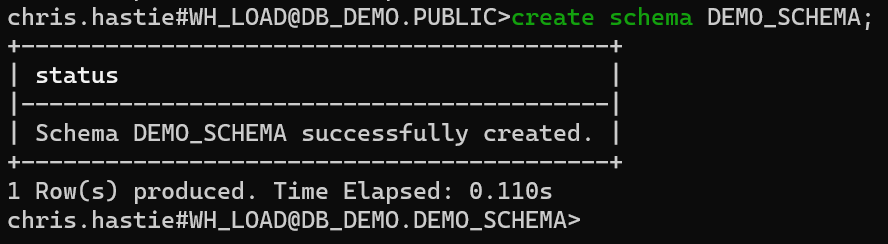
For the sake of uniformity, we will also use the CREATE SCHEMA command to create a new schema called DEMO_SCHEMA.
create schema DEMO_SCHEMA;
Our connection string has now updated to display that we are connected to the DEMO_SCHEMA schema within our DB_DEMO database.
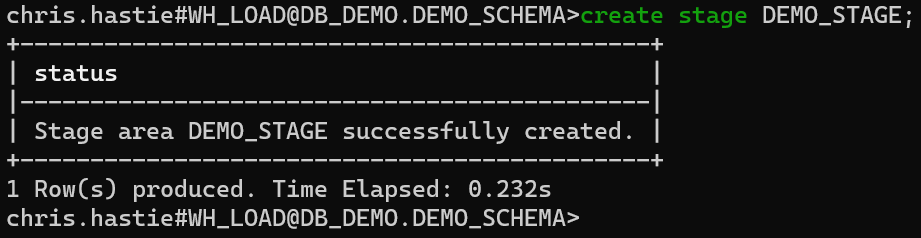
Preparing a Stage
Stages are Snowflake’s version of storage buckets. Each stage is a container for storing files, and can be either an internal stage within Snowflake or an external stage within Amazon S3 or Azure Blob storage.
For this example, we will create a simple internal stage within Snowflake using the CREATE STAGE command. Our stage will be called DEMO_STAGE.
create stage DEMO_STAGE;
If our data was stored in cloud storage, such as Amazon S3 or Azure Storage, we would require authentication credentials to the storage location along with the URL. For fast results, these can be entered as part of the CREATE STAGE command, as in the following example.
create stage DEMO_S3_STAGE
  URL='s3://bucket/path/to/files/'
  CREDENTIALS=(AWS_KEY_ID='1a2b3c' AWS_SECRET_KEY='4x5y6z')
;

create stage DEMO_AZURE_STAGE
  URL='azure://account.blob.core.windows.net/container/path/to/files/'
  CREDENTIALS=(AZURE_SAS_TOKEN='my-sas-token')
;
In general when interacting with cloud storage, InterWorks would recommend leveraging storage integrations instead of storing credentials inside the stage. This is covered in the following two articles:
- Configuring Storage Integrations Between Snowflake and AWS S3
- Configuring Storage Integrations Between Snowflake and Azure Storage
Finally we can import our data into our stage using the PUT command. More information for this command and other SnowSQL commands can be found in Snowflake’s documentation. A key piece of information is that the PUT command can only be executed from outside the main Snowflake interface, which is why we are using SnowSQL instead.
In general, the PUT command takes the following structure:
put 'FILE://path/to/file' '@STAGE_NAME/path/to/stage subdirectory/';
There are additional options that you can leverage if desired, such as OVERWRITE = TRUE to overwrite any existing file(s) of the same name.
It is important to get the file location string correct as this may vary depending on the terminal you are using. Note that the stage is determined using an @ sign and we wrap both the file path and the destination reference inside pair of single quotation marks ' ' as this allows us to include spaces if desired.
For our example, we simply wish to upload our “Sample CSV Data.csv” file into the root of our stage:
put 'FILE://Sample CSV Data.csv' '@DEMO_STAGE';
After performing the import, SnowSQL will output some key information. This includes the name of the file, its size and the status of the import.

At this point in our journey, our file has now been successfully imported into a secure and encrypted stage in Snowflake.
Preparing the Destination Table
Now that our data is secure in a Snowflake stage, we can think about how we want to view it. In order to load data from a stage into a table, we first must create the table and a file format to match our data.
The following steps could still be performed from within the SnowSQL command line interface, however we will instead perform the remaining steps in Snowflake itself via the Worksheets functionality. We can do this the remaining commands that we wish to execute can all be performed from within Snowflake, in contrast to the previous PUT command which could not.
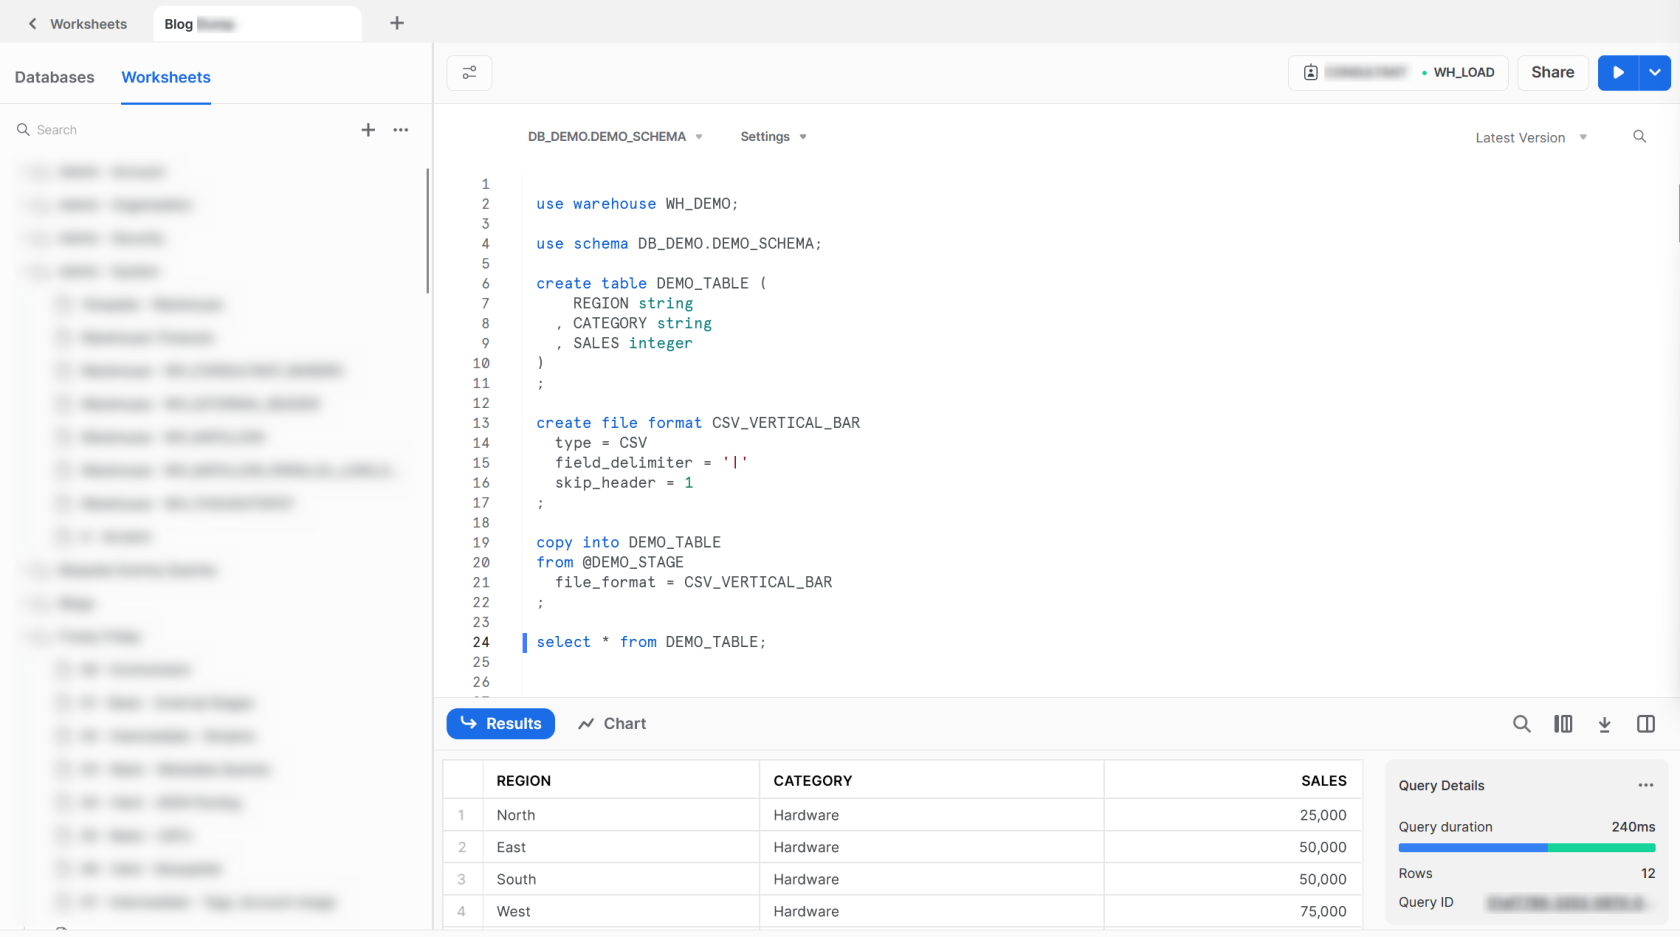
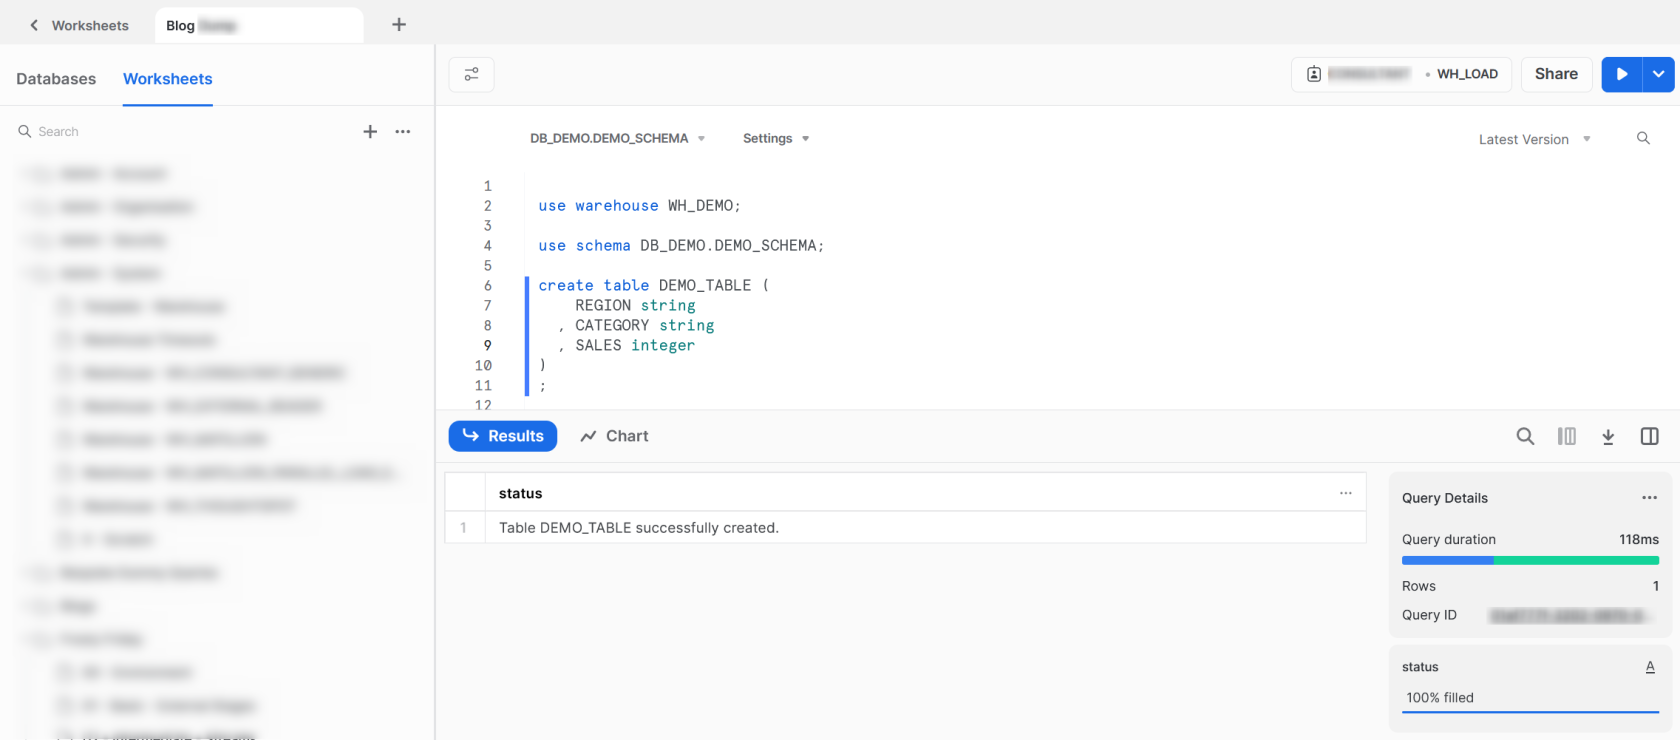
To create our table, we first ensure that we are using the correct warehouse, database and schema. We can then use the CREATE TABLE command to create our table as we would in any SQL-compliant data warehouse.
use warehouse WH_DEMO;

use schema DB_DEMO.DEMO_SCHEMA;

create table DEMO_TABLE (
    REGION string
  , CATEGORY string
  , SALES integer
)
;
Preparing the File Format
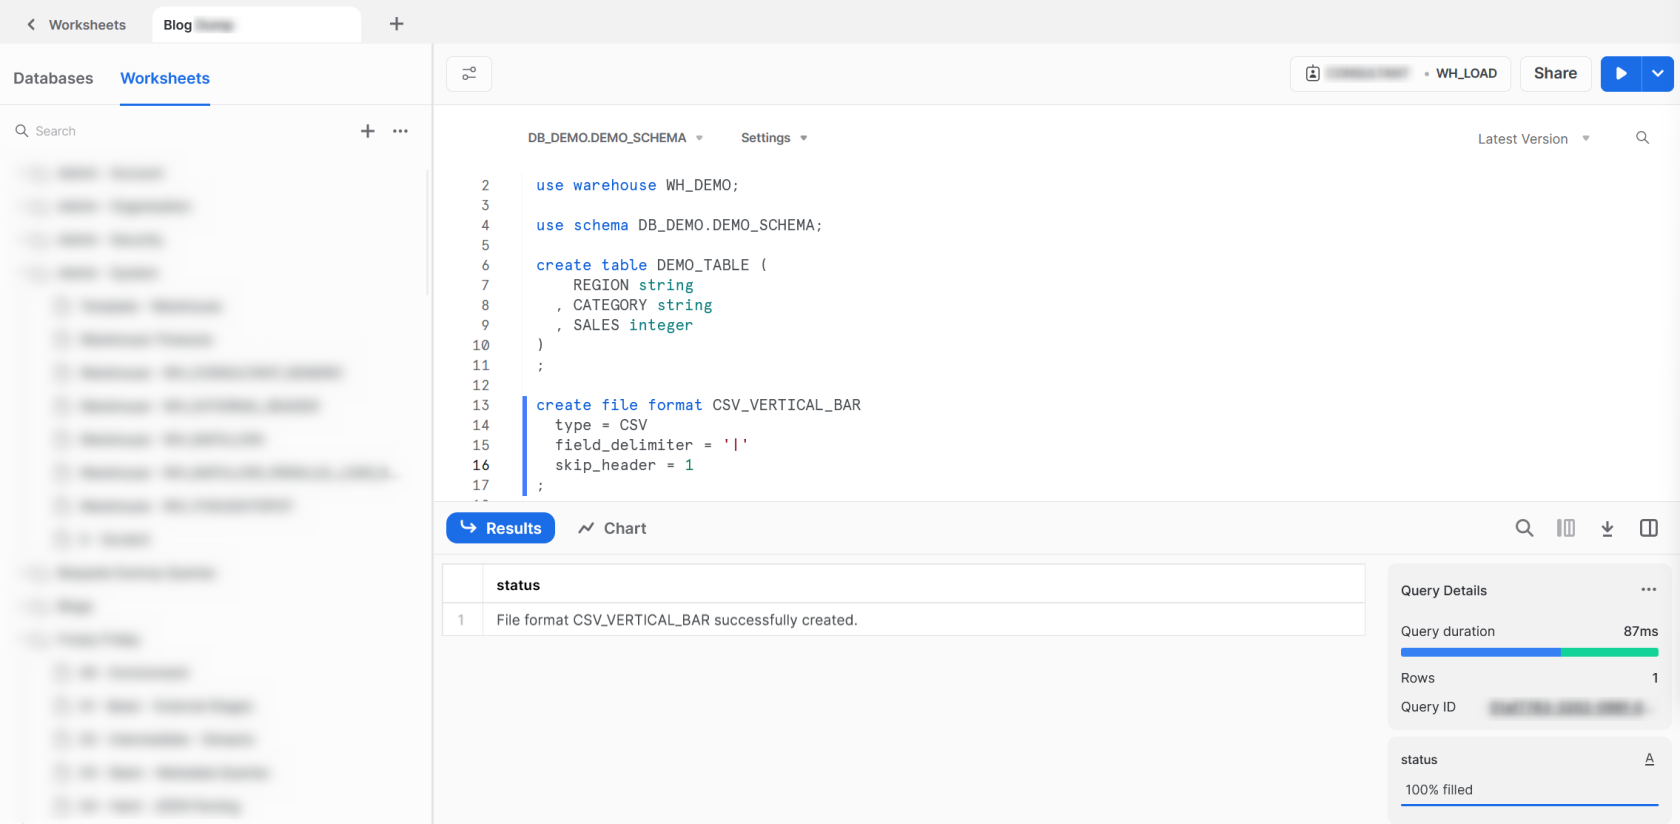
With our destination table created, the final piece of the puzzle before we load our data is to create a file format. As mentioned earlier, our data is stored as a vertical bar delimited CSV file.

Using the CREATE FILE FORMAT command we can create a file format called CSV_VERTICAL_BAR. We determine that the file type is CSV which instructs Snowflake to look for a structured text file with delimited fields. Our field delimiter is a vertical bar and skip the first row of data. We do this as the first line of data in our file contains the column names, which we do not want to import into our table in Snowflake.
create file format CSV_VERTICAL_BAR
  type = CSV
  field_delimiter = '|'
  skip_header = 1
;
Loading the Data from the Stage into the Table
Now that we have all of our pieces lined up, we can use the COPY INTO command to load our data from the stage into the destination table. As with all commands, full information can be found within Snowflake’s documentation.
copy into DEMO_TABLE
from @DEMO_STAGE
  file_format = CSV_VERTICAL_BAR
;
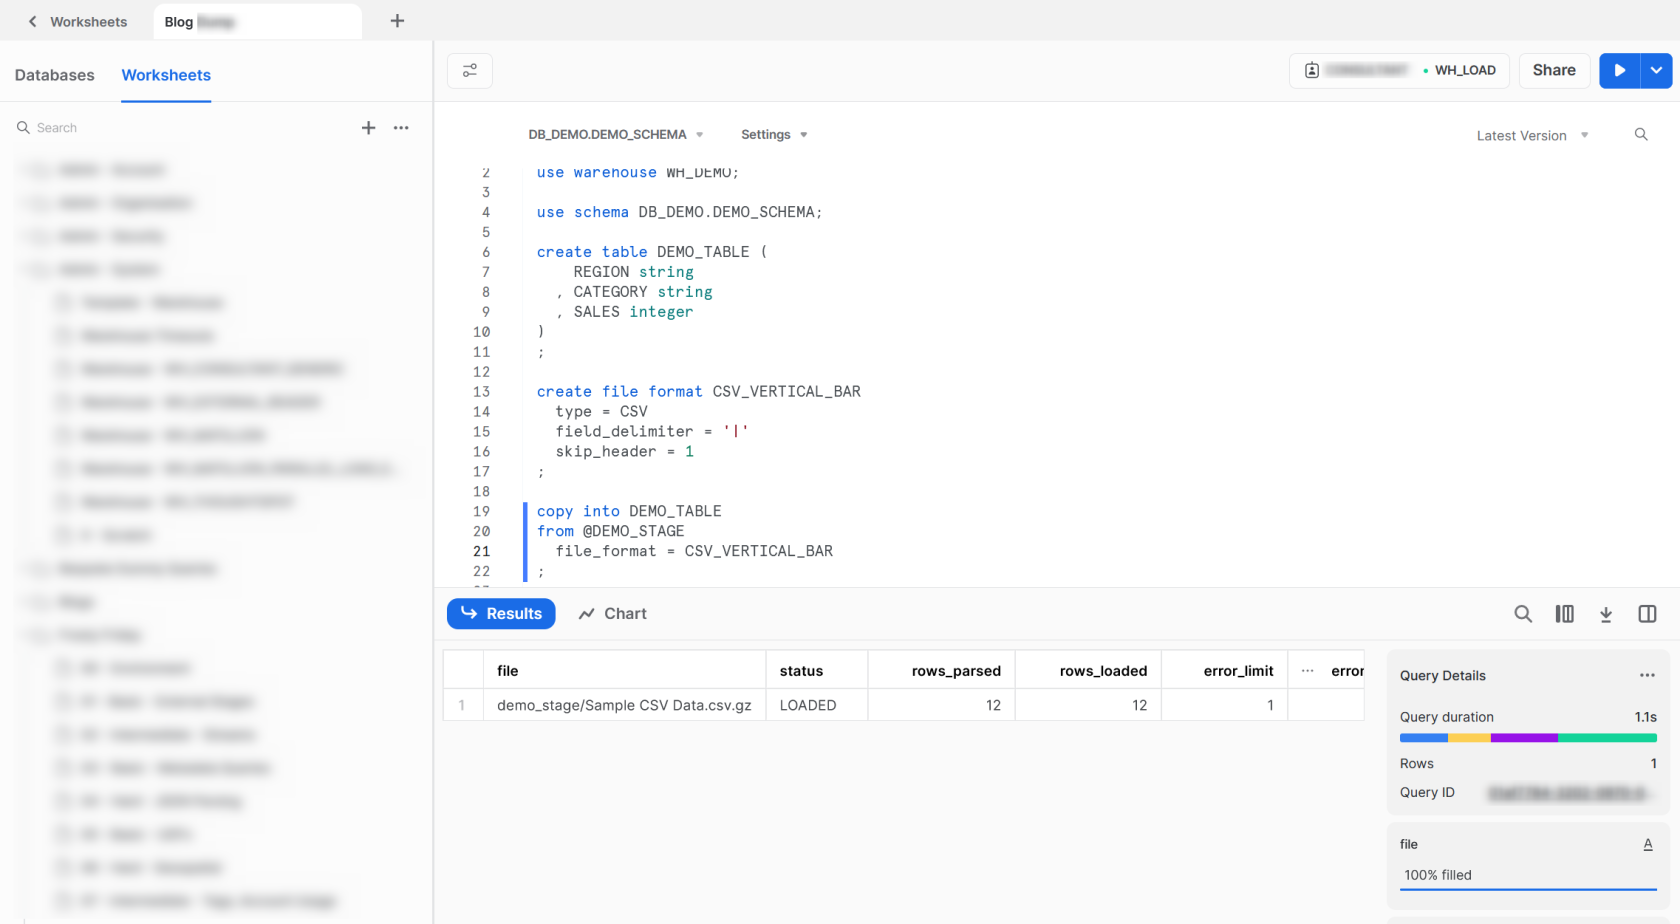
The output informs us that the file loaded successfully, parsing and loading all 12 rows. We can verify this with a standard SELECT command from our table.
select * from DEMO_TABLE;