
This series takes you from zero to hero with the latest and greatest cloud data warehousing platform, Snowflake.
You’ve probably heard about Snowflake by now, but if you haven’t, it needs to be a part of your analytics practice. This series will lay out all the essentials for getting started with this cloud-based data warehouse.
Snowflake is built differently from other data warehouses. Its columnar architecture and vectorized execution make it capable of handling massive analytic workloads. Adaptive optimization keeps things running fast. Because Snowflake separates compute from storage, you can scale it up or down depending on your needs. It is a data warehouse originally built in the cloud for the cloud. It didn’t start as an on-premise solution that then got migrated into a web-based server. That brings the advantage of a completely new paradigm on how data warehouses are used.
Let’s say that you have a Snowflake account and have toured the interface. A key question at this stage is how to create a database and get some data loaded onto the system. We will begin with creating a database.
Creating Databases via the User Interface
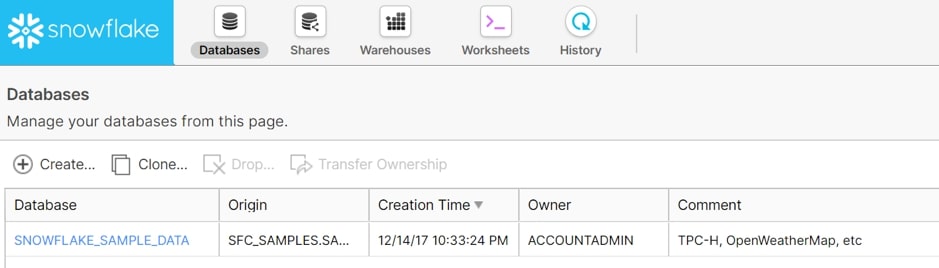
To start, we log into our Snowflake environment and select the Databases option in the main navigation bar at the top of the screen. This area lists all databases in your environment. If none have been set up yet, your list will look similar to the image below. Note that Snowflake provides its own sample data for you to play with, too:
To create a new database, select the Create button. This will open up a new window where you can name your database and enter descriptive comments if desired. For our example, I have called my database Demo_DB and given it the comment A database used for demonstration:
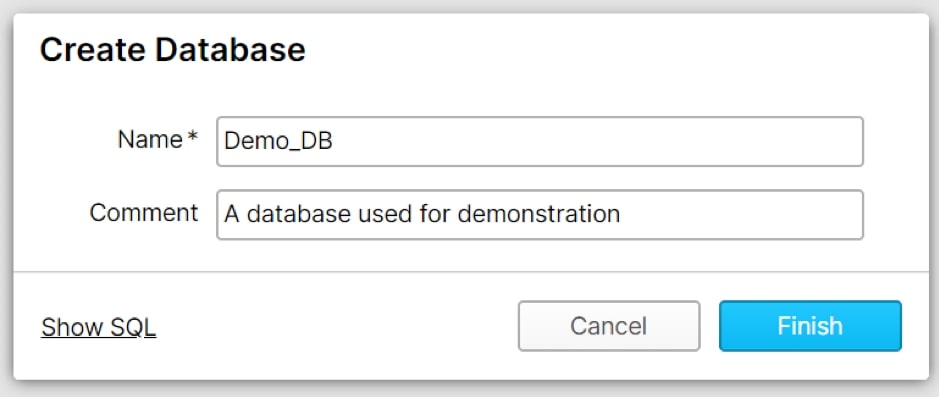
When naming the database, keep in mind that there are certain restrictions. The most common restrictions are that you cannot use spaces and cannot start the name with a number. You can read the full set of restrictions in Snowflake’s documentation.
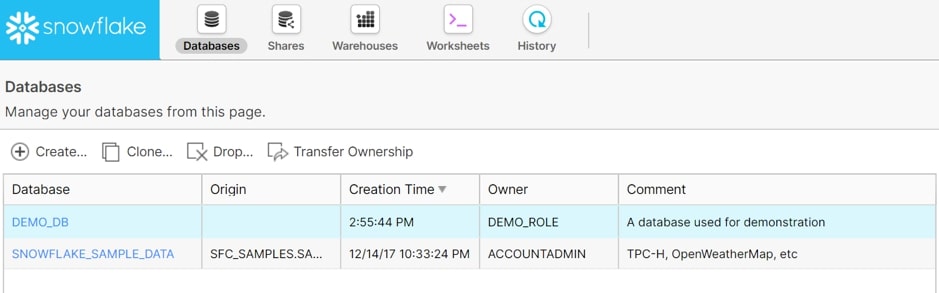
Selecting Finish will create the database. When we return to our database list, we can see our new database. Notice that Snowflake automatically formats the name in uppercase to abide by the restrictions in the above documentation:
By selecting the name of our database, we can see more information. This includes any tables, views or schemas that exist in the database. As the database has just been created, none of these objects exists yet and each list is blank:

Creating Schemas via the User Interface
A basic way of describing schemas in a database is as a logical grouping for other objects, including tables and views. Each schema in a database can have its own security configuration just like a database and acts as a container of the objects inside.
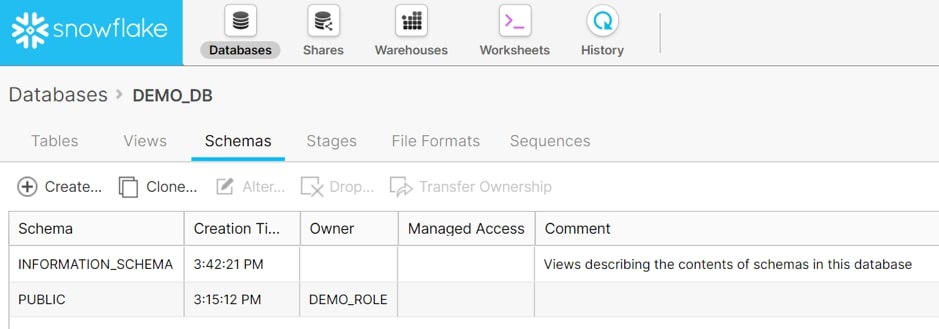
From inside our database, select Schemas from the navigation menu. This area lists all existing schemas in the database. By default, Snowflake will create a public schema and the information schema. The PUBLIC schema is the default schema and can be used to create any other objects, whilst the INFORMATION_SCHEMA is a special schema for the system that contains all metadata for the database:
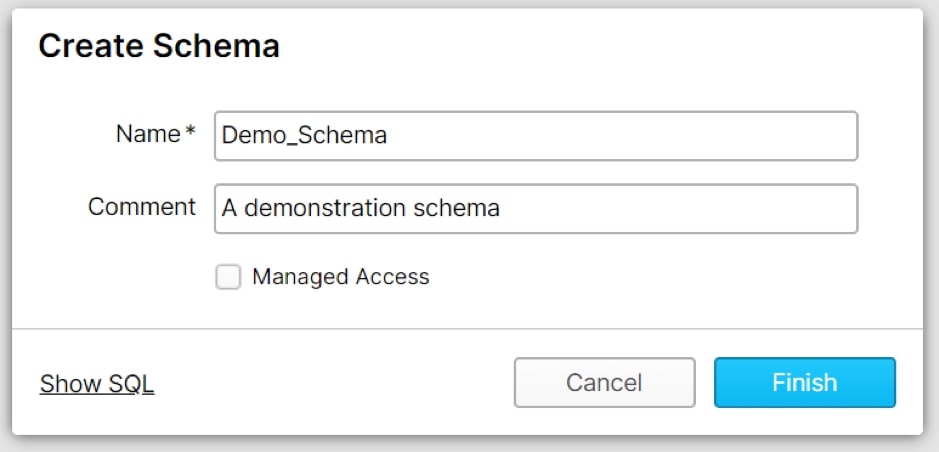
To create a schema, select Create. As with a database, we are asked to provide a name and a comment. The same name restrictions apply. In addition, we have the Managed Access option, which determines whether the security of objects within the schema is managed by the schema owner or the owner of the individual object:
Creating Databases with Code
A great feature of Snowflake is that each action taken in the user interface can also be performed using SQL code, and Snowflake tells you exactly what this code is. By selecting Show SQL in the Create Database window, I can see the SQL code to create my database:

This means we can create databases directly in the user interface on a case-by-case basis, or we can simplify the process using a single line of code. This can be very helpful for creating databases on the fly or for automating processes.
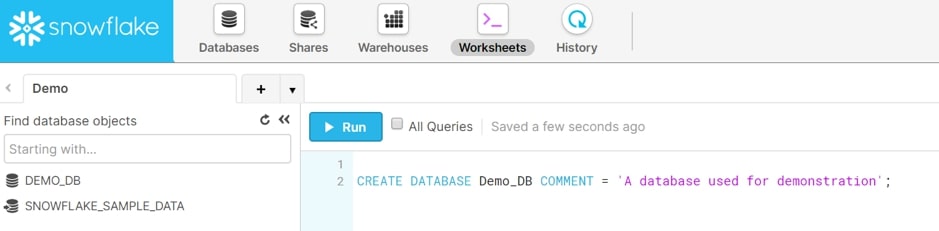
To execute any SQL code in Snowflake, begin by selecting Worksheets from the main navigation bar at the top of the screen. This area lists all databases on the left side for reference and provides a canvas for you to enter your code. On the right, we can see our current role, database, warehouse and schema. We will get to each of these during this blog series:

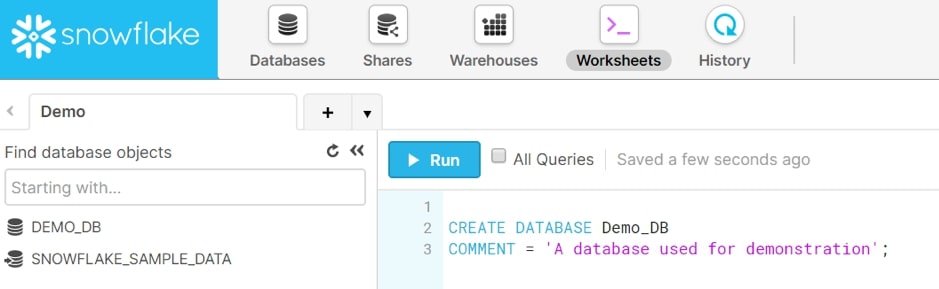
To create a database, we simply enter our code on the canvas. Note that I have ended my statement with a semicolon; this is used to distinguish between statements and should be placed at the end of each complete SQL statement.
Remember that when naming the database, there are certain restrictions. The most common restrictions are that you cannot use spaces and cannot start the name with a number. You can read the full set of restrictions in Snowflake’s documentation:
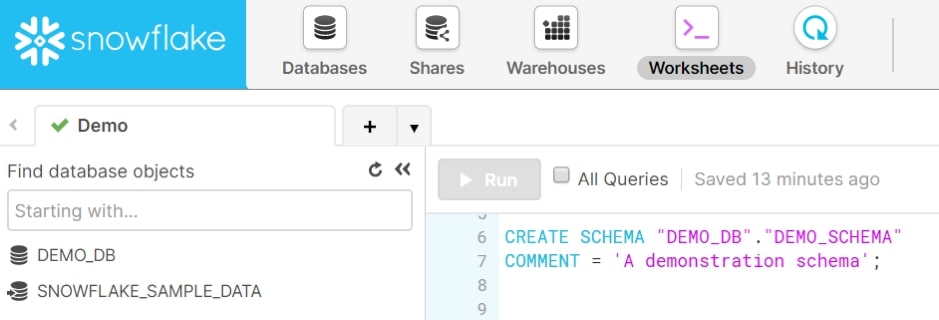
For the sake of simplicity, we can also break this into multiple lines as our statement doesn’t end until the semicolon:
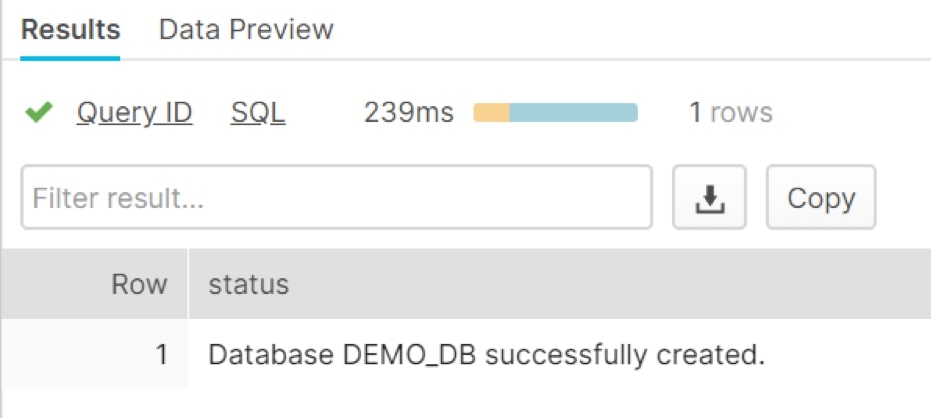
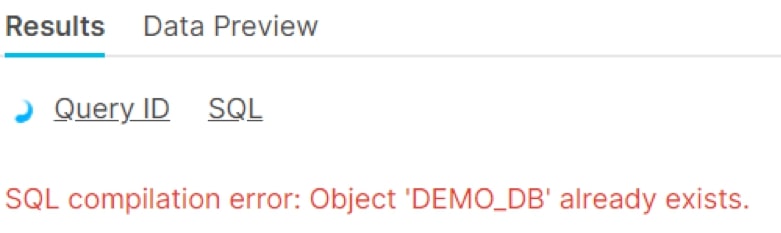
To execute the script, select Run just above the canvas. Provided that the database does not already exist and our command did not trigger any other errors, we will see the following confirmation from Snowflake in the Results pane:
If the user does not have permission to create tables, the table existed already or another error occurs, an error will be provided instead:
Creating Schemas with Code
Similarly to databases (indeed, for all objects and user-interface commands in Snowflake), we can create schemas using SQL code:
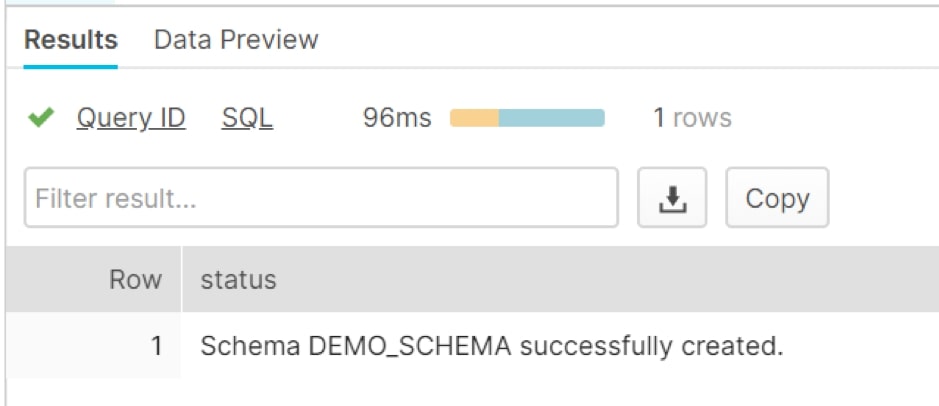
As before, provided that the schema does not exist already and our command did not trigger any other errors, we will see the following confirmation from Snowflake in the Results pane:
Staging Data
Once we have a database and a schema, we can begin staging data that we can then load into our database. Check back in shortly for the next post in this blog series!