Portals for Tableau 101 shares the basics of interacting with InterWorks' embedded analytics solution, Portals for Tableau.
Please note that Portals for Tableau are now officially known as Curator by InterWorks. You can learn more at the official Curator website.
How to Create Public Pages
The most commonly used feature of our portal is one that is easily overlooked: it is the ability to protect content behind a login. However, sometimes you have content that should be public. Maybe you’ve got a “Contact Us” page, information on how to get access to the portal, or your signature vegan, kosher and smoked pork ribs recipe that you wish to share with the world. These pages should be excluded from any authentication for obvious reasons.
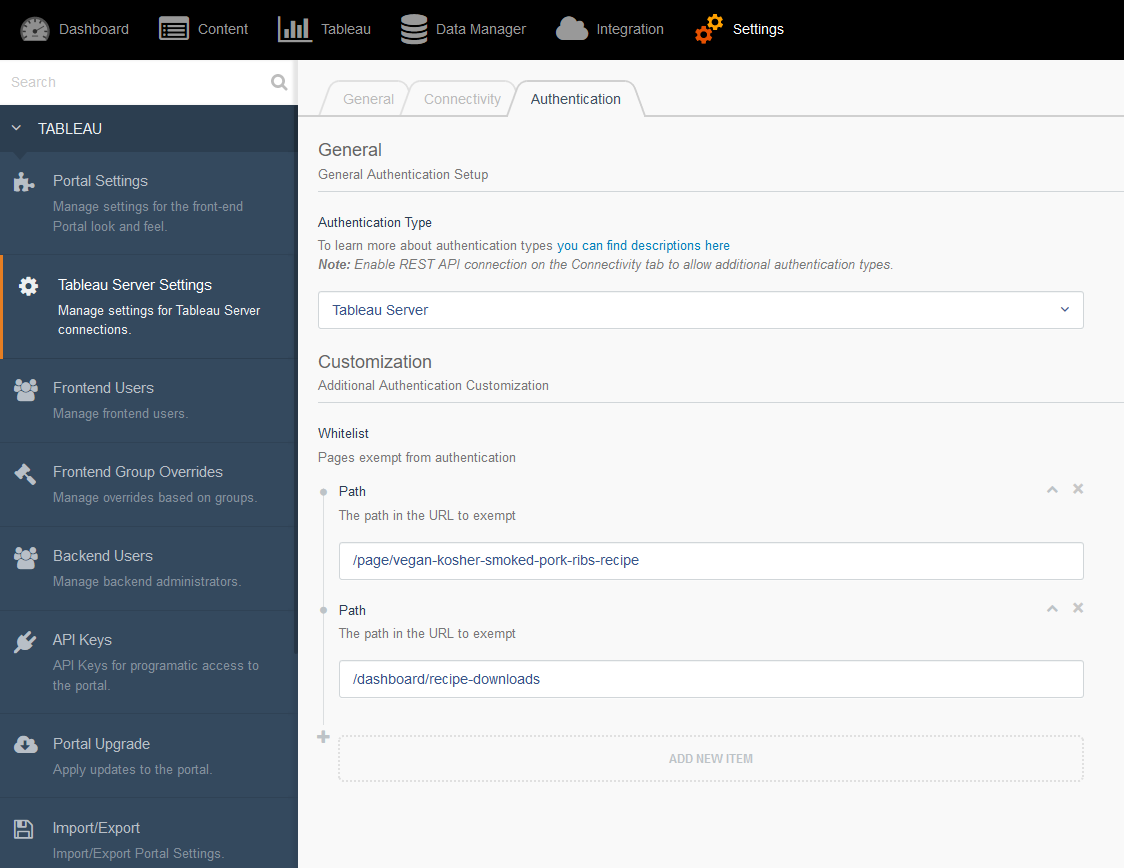
To bypass authentication for a link in the portal, navigate to Backend > Settings > Tableau Server Settings > Authentication tab. You should see a Whitelist field where you can add paths that need to be public. Click the Add New Item button to add a path. The path you’ll enter is everything after your portal’s domain name, so for a link like https://www.yourportal.com/page/vegan-kosher-smoked-pork-ribs-recipe, you would enter “/page/vegan-kosher-smoked-pork-ribs-recipe” into the field. Once you save, the path(s) you entered will no longer require the user to be logged in to the portal to view.
How to Create Public Dashboards
If you need to make a dashboard public, you can do so by going through the same process. However, the dashboard must also be public on its Tableau Server. This could mean that it is hosted in Tableau Public, or it could mean that you have guest access enabled for it on your Tableau Server.


