Portals for Tableau 101 shares the basics of interacting with InterWorks' embedded analytics solution, Portals for Tableau.
Please note that Portals for Tableau are now officially known as Curator by InterWorks. You can learn more at the official Curator website.
Are you interested in embedded analytics but worried about where to start? Do you love the look of our Portals for Tableau but have little to no experience in programming? Welcome to “Portals for Tableau 101” where I will help guide you through Portals for Tableau with some introductory lessons. Today let’s start at the beginning and get your Tableau Server connected to the portal.
Accessing the Portal Backend
First, we need to log in to the backend of the portal. This backend login account is separate from your Tableau Server account and will be provided when you get a portal. To get to the backend landing page, type in the site’s backend URL, e.g. https://[site-url]/backend.

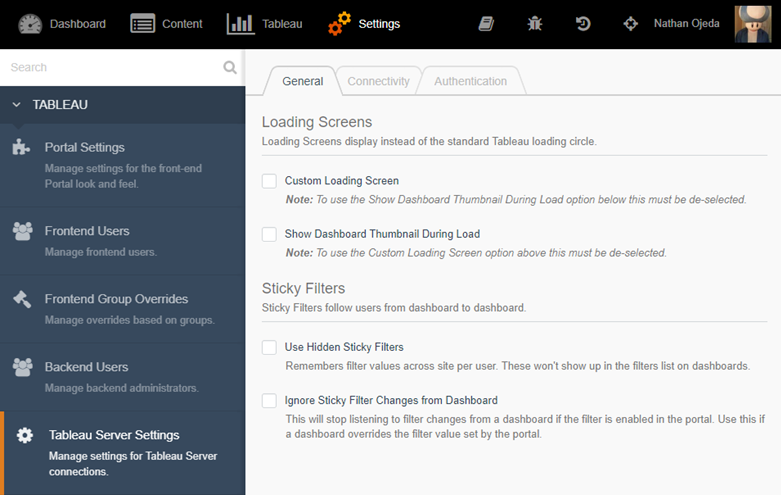
From here we click on the Settings button in the top navigation. Once you’re on the Settings page, click on the Tableau Server Settings menu link in the left-hand navigation:

Connecting to Your Tableau Server
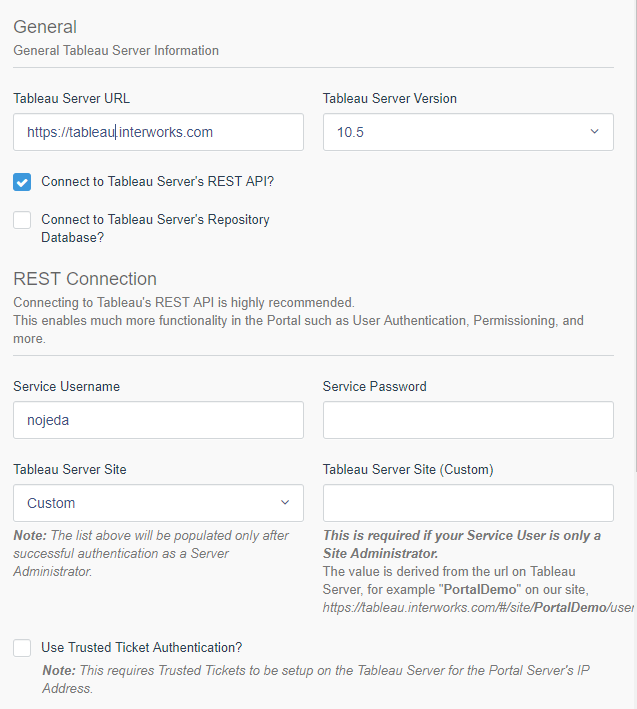
When you see the landing page for Tableau Server Settings click on the Connectivity tab. On the Connectivity tab, you will need to enter the Tableau Server URL you want to which you want to connect. You’ll also need to select the Server Version:

We always suggest you connect to the Tableau Server REST API to use the full functionality of the portal. To do this, you will need a Tableau Server Admin or Site Admin account. The reason we need these higher-permission accounts is that the backend systems needs permission to request the information from the Tableau Server. What a frontend user will see is based on their Tableau Server account and not the backend Service Account.
Specify Site and Authenticate
The Tableau Server Site drop-down will display a list of Tableau sites you can select to authenticate against. The drop-down will only display a list if your Service Account is a Tableau Server Admin and the settings have been saved.
Tableau Server Site (Custom) is used when you are not using a Tableau Server Admin account. If you are using a Tableau Site Admin account, then you must specify what site that admin belongs to. The value is derived from the URL on Tableau Server, e.g. PortalDemo on our site.
Trusted Ticket Authentication can be enabled as well. To do this, check the box and follow the instructions that display in the new popup. This should be some useful information you will need to send to the admin of your Tableau Server. If you have problems with trusted tickets, try our debugging steps.
That’s all you need to know to have your Tableau portal talk to your Tableau Server. We do have more advanced options for unique setups, but we will cover those at another time. For now, you can go out there and start adding dashboards to your new portal!

