This series takes you from zero to hero with the latest and greatest cloud data warehousing platform, Snowflake.
A critical part of any Snowflake database is the storage of the data. Snowflake is capable of both storing data within the environment and accessing data that is stored in other cloud storage environments. Regardless of whether the data is stored internally or externally, the location the data is stored in is known as a stage. In turn, the process of uploading files into one of these stages is known as staging.
Types of Snowflake Stages
Snowflake allows for several types of stage:
- External stages are storage locations outside the Snowflake environment in another cloud storage location. This could be either Amazon S3 storage or Microsoft Azure storage, allowing for greater flexibility for potential web hosting and ELT solutions prior to accessing the data in Snowflake. The drawback with these stages is that the storage location may be in a different region from your Snowflake environment, which may impact data loading speeds.
- User stages are personal storage locations for each user. These stages are unique to the user, meaning no other user can access the stage. Each user has a user stage allocated by default, and these cannot be altered or dropped.
- Table stages are storage locations held within a table object. This is helpful when files only need to be loaded into that specific table, and these stages will achieve that result fastest. However, they are limited to that one table, and the files cannot be accessed by other tables.
- Internal named stages are storage location objects within a Snowflake database/schema. Because they are database objects, the same security permissions apply as with any other database objects. These stages are not created automatically, unlike user and table stages. However, they do provide greater flexibility for loading files into multiple tables and/or allowing multiple users to access the same stage.
Notice that it is only possible to create external stages and internal named stages, as the other two types of stage are automatically created and managed by Snowflake itself.
Creating a Stage via the User Interface
We are going to create a stage within our Demo_DB database. To begin, we open this database in Snowflake and select Stages from the navigation menu. This page lists all stages existing within the database. As we have not created any yet, this list is blank:

Select Create… to begin creating a stage. The first choice is whether the stage should be an internal named stage (managed by Snowflake) or external stage (existing in Amazon S3 or Microsoft Azure storage):
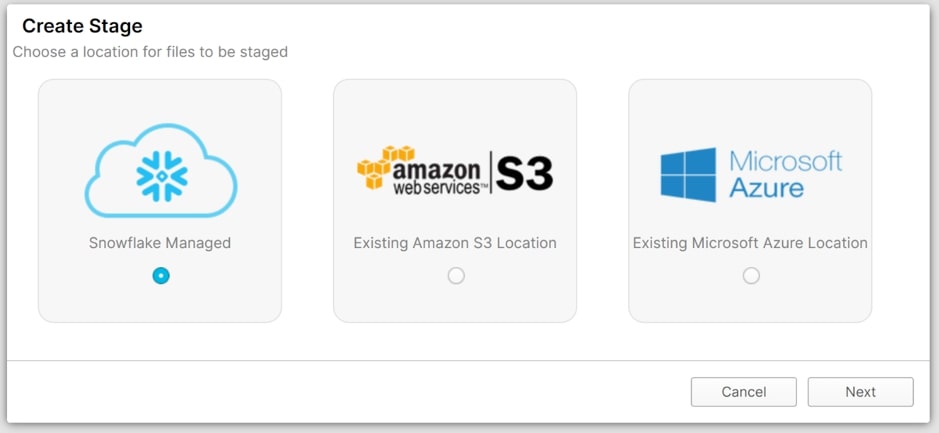
The simplest of these options is the internal named stage managed by Snowflake. If this option is selected, the only requirements are a name for the stage, the schema it will belong to and any comments. Remember that all object names must adhere to Snowflake’s object naming syntax:

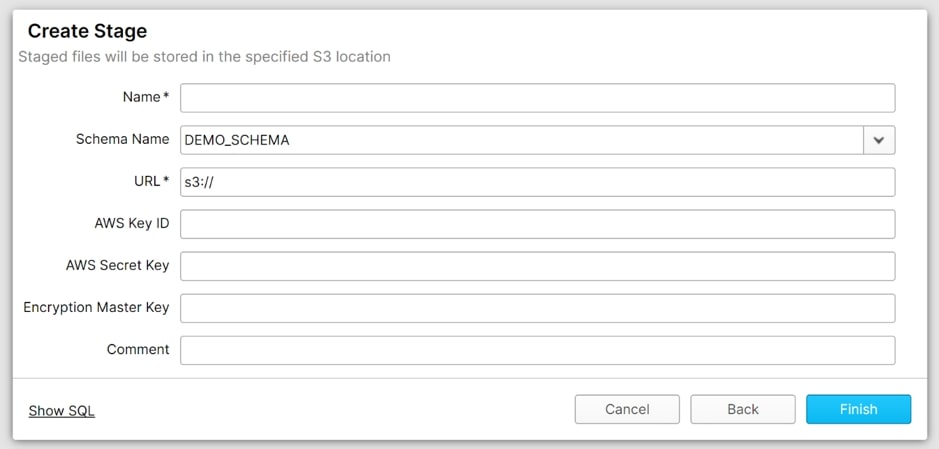
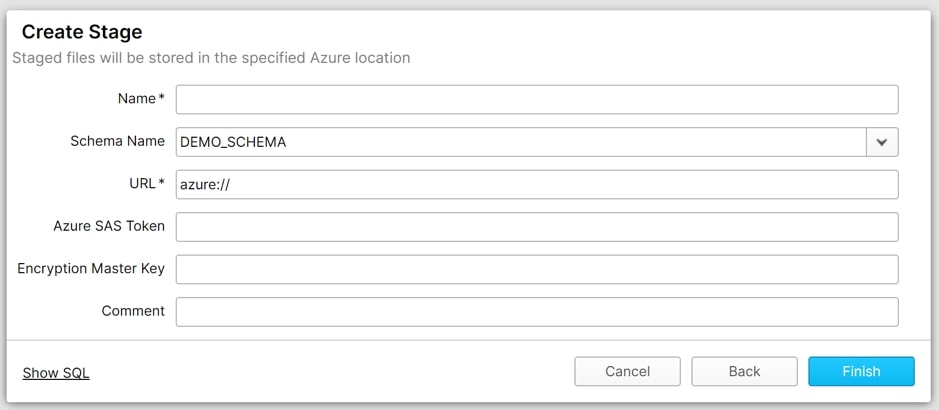
External stages require more information as a connection is being established to another storage environment. In addition to a name, schema and comment, you will need to provide the location of the stage along with any authentication credentials.
For Amazon S3:
For Microsoft Azure:
Creating a Stage with Code
Similar to databases, schemas and indeed all objects and user interface commands in Snowflake, we can create stages using SQL code. It is worth remembering that a great feature of Snowflake is that each action taken in the user interface can also be performed using SQL code, and Snowflake tells you exactly what this code is when you select the Show SQL option.
To create an internal named stage called Demo_Stage, we execute following code:
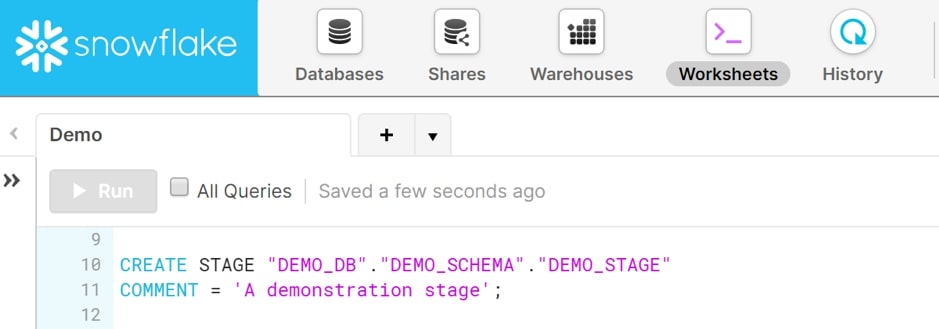
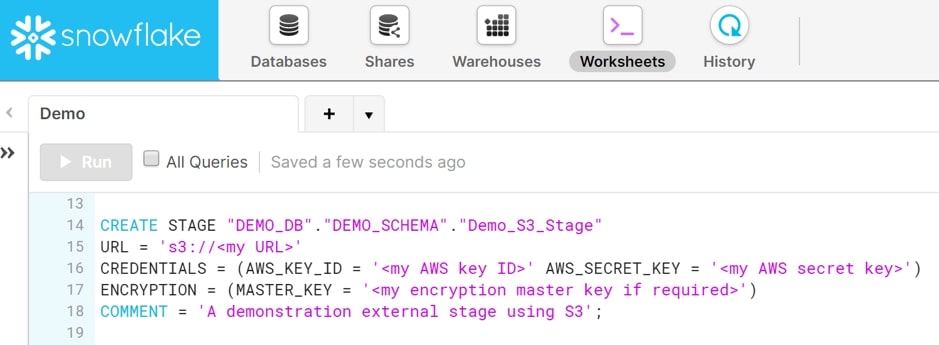
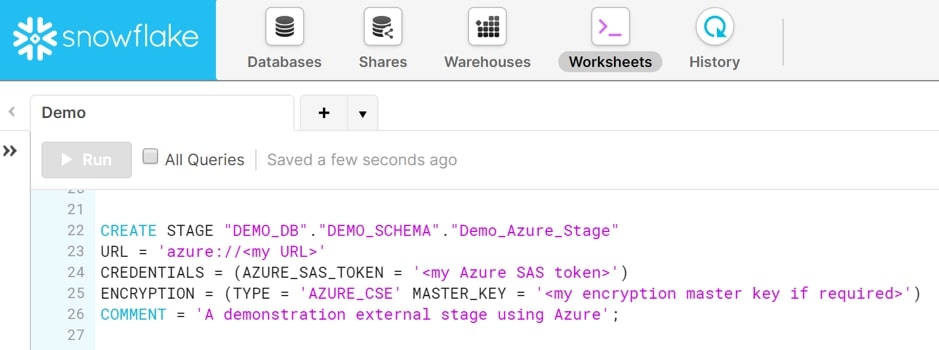
Similarly, we can create external stages to Amazon S3 and Microsoft Azure storage.
For Amazon S3:
For Microsoft Azure:
Learn more about stages in Snowflake’s documentation.
Loading Data
Once we have a database, schema and stage, we can begin staging data and loading it into tables in our database. Depending on your preference, you can do this either via the user interface or using code via SnowSQL, both options we cover in this series. Find the right resource for you!

