
This series takes you from zero to hero with the latest and greatest cloud data warehousing platform, Snowflake.
As a Snowflake user and a Python enthusiast, I was very happy to learn that Snowflake has created its own Python package to connect to Snowflake and execute commands. As these commands are executed locally and transmitted to Snowflake, the full SnowSQL functionality is available for use.
Prerequisites
Before you can install the Python connector for Snowflake, you must first ensure that a supported version of Python is installed. At time of writing, the connector requires either Python 2.7.9 or Python 3.5.0 at a minimum; more recent versions are also supported.
To confirm the version of Python which is installed on a machine, open a terminal and execute the following line:
Python --version
If you do not have Python installed, you can get started by visiting the website for the Python Software Foundation and downloading the relevant packages for your operating system.
If your version of Python is out of date, open a terminal and execute the following line:
Python -m pip install --upgrade pip
Installing the Python Connector for Snowflake
As the Python connector for Snowflake is part of the Python Package Index (PyPI), installing it is a simple case of opening a terminal and executing the following line:
pip install snowflake-connector-Python
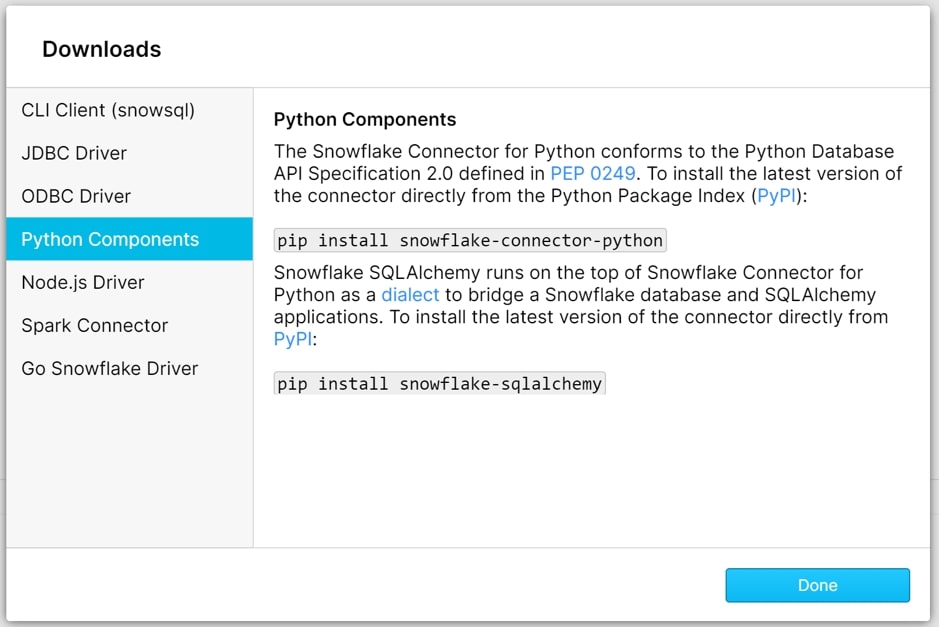
It is also advised to install snowflake-alchemy, a package that will enable the creation and execution of SQL code for Snowflake:
pip install snowflake-sqlalchemy
These steps are also advised by Snowflake via the Downloads area of the user interface:
Connecting to Snowflake via Python
Now that the connector is installed, we can connect to Snowflake in a Python IDE. It does not matter which IDE we use. To begin, open your desired IDE to a new Python script and import the Snowflake package:
import snowflake.connector as sf
Three pieces of information are required to establish a connection to Snowflake:
- The Snowflake account to connect to, including the region
- An existing user within that account
- The corresponding password for that user
As Snowflake is a cloud service, each account is accessed via a URL. For example, InterWorks’ account in the EU is accessed via https://myAccount.my-region.snowflakecomputing.com.
This URL is formed by https://<Account>.<Account_Region>.snowflakecomputing.com.
Therefore, we can see that our account is myAccount.my-region, and I will be connecting with the user my_user. To simplify matters, we can create these as variables in Python:
sfAccount = 'myAccount.my-region'
sfUser = 'my_user'
We also take this opportunity to enter in our password. As it is not best practice to hard-code passwords, I will instead make use of the getpass package to enter my password:
sfPswd = ''

# Request user password if not provided already
if sfPswd == '' :
  import getpass
  sfPswd = getpass.getpass('Password:')
We now have all we need to establish the connection to Snowflake. The following code will attempt to establish the connection. If the connection is established, the Snowflake version number is returned. Otherwise, a message is printed expressing that the connection failed:
# Test the connection to Snowflake by retrieving the version number
try:
    sfConnection = sf.connect(
        user=sfUser,
        password=sfPswd,
        account=sfAccount
    )
    sfq = sfConnection.cursor()
    sfq.execute("SELECT current_version()")
    sfResults = sfq.fetchall()
    print('Snowflake Version: ' + sfResults[0][0])
    sfq.close()
    sfConnection.close()
except:
    print('Connection failed. Check credentials')
With our engine tested and working, we can leverage it to establish a connection with Snowflake and begin executing SQL commands:
# Open connection to Snowflake
sfConnection = sf.connect(
    user=sfUser,
    password=sfPswd,
    account=sfAccount
)
sfq = sfConnection.cursor()
Our variable sfq is used for executing Snowflake queries. Any SQL command string we pass through sfq.execute() will be executed in our Snowflake environment. What follows are some examples in which we execute basic commands to create a database, a schema and an internal named stage:
sfq.execute('CREATE DATABASE DEMO_DB')
sfq.execute('USE DATABASE DEMO_DB')
sfq.execute('CREATE SCHEMA DEMO_SCHEMA')
sfq.execute('USE DEMO_DB.DEMO_SCHEMA')
sfq.execute('CREATE STAGE DEMO_STAGE')
As you may have noticed, each time we are simply passing a string to our sfq.execute() function. This opens up the potential to replace repeated pieces with variables and create a more automatic script:
sfDatabase = 'DEMO_DB'
sfSchema = 'DEMO_SCHEMA'
sfStage = 'DEMO_STAGE'

sfq.execute('CREATE DATABASE {0}'.format(sfDdatabase))
sfq.execute('USE DATABASE {0}'.format(sfDatabase))
sfq.execute('CREATE SCHEMA {0}'.format(sfSchema))
sfq.execute('USE {0}.{1}'.format(sfDatabase, sfSchema))
sfq.execute('CREATE STAGE {0}'.format(sfStage))
Taking this one step further, we can simplify our process whilst turning it into a function. This function can then be called to automatically create a database and a schema. Below is a complete function to create a new database and schema:
def CreateSnowflakeDBandSchema (
    sfPswd = '',
    sfAccount = 'myAccount.my-region',
    sfUser = 'my_user',
    sfDatabase = 'DEMO_DB',
    sfSchema = 'DEMO_SCHEMA'
):
    import snowflake.connector as sf

    # Request user password if not provided already
    if sfPswd == '' :
      import getpass
      sfPswd = getpass.getpass('Password:')

    # Test the connection to Snowflake
    try:
      sfConnection = sf.connect(
          user=sfUser,
          password=sfPswd,
          account=sfAccount
      )
      sfq = sfConnection.cursor()
      # sfq.execute("SELECT current_version()")
      # sfResults = sfq.fetchall()
      # print('Snowflake Version: ' + sfResults[0][0])
      sfq.close()
      sfConnection.close()
    except:
      print('Connection failed. Check credentials')

    # Open connection to Snowflake
    sfConnection = sf.connect(
      user=sfUser,
      password=sfPswd,
      account=sfAccount
    )

    sfq = sfConnection.cursor()

    sfq.execute('CREATE DATABASE IF NOT EXISTS {0}'.format(sfDatabase))
    sfq.execute('CREATE SCHEMA IF NOT EXISTS {0}.{1}'.format(sfDatabase, sfSchema))

    print('Steps complete')
With this function created, we can call it and pass in new values for the variables. This allows us to automate the process. You could go further by passing in your password and looping through a series of desired new databases and/or schemas:
CreateSnowflakeDBandSchema (
    sfAccount = 'myAccount.my-region',
    sfUser = 'my_user',
    sfDatabase = 'ANOTHER_DEMO_DB',
    sfSchema = 'ANOTHER_DEMO_SCHEMA'
)
We now have all the tools required to leverage Python to automate Snowflake commands. If you fancy a challenge, try building a Python function to automate a set of tasks you regularly execute in Snowflake.
Unlocking New Snowflake Potential with Python
My first challenge was to build a function that automatically reads the metadata from a local CSV file and creates a matching table in Snowflake, proceeding to then upload the file to a new internal named stage and load the data into the table. This only scratches the surface of what you can do with Python and Snowflake, and yet it has saved me a lot of time over the last few months when handling bespoke problems that require data uploads. Another challenge is to read in a list of new users and create each of them with the correct security permissions in Snowflake.
Let me know if you come up with any other inventive ways to leverage Python with Snowflake!