
Snowflake have developed a simple command line tool that can be used to investigate snowflake connectivity issues. This tool’s full name is the Snowflake Connectivity Diagnostic Tool, however it is more commonly referred to as SnowCD.
If you are seeing connection issues with Snowflake, I would recommend using SnowCD as your first investigative action to determine where these issues may be occurring. Using SnowCD, it is easy to ensure that all required Snowflake endpoints are available and accessible to your machine. If you use SnowCD from a machine that sits within a virtual network, as most corporate machines and/or servers do. Then, SnowCD allows you to easily verify that Snowflake is accessible for all machines that sit within that virtual network.
It is important to note that this is worth running through whenever you are connecting to Snowflake from a new machine/location as connectivity issues may not always be clear. For example, some users are still able to receive data from Snowflake, but not as quickly as they would like, and mistakenly identify a network connectivity issue as a performance issue. SnowCD allows you to rule out network connectivity issues quickly and easily.
Retrieving the List of Specific Endpoints Required for Your Snowflake Account
Before we can use SnowCD to investigate connectivity issues, we first must retrieve the list of endpoints that your network must be able to access to use your specific Snowflake account.
We can retrieve this information by executing the following query from within Snowflake. This query can be executed by any role in the Snowflake account, so anybody can execute it.
SELECT SYSTEM$WHITELIST();
As you can see from my screenshot, this returns an interesting looking string.
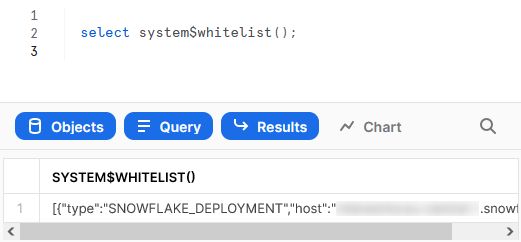
This string is actually a JSON object, and you can download the full file to see contents similar to the following. This is just an example, and you will see a different result depending on your Snowflake account, organisation, region and cloud provider.
[
  {
    "type": "SNOWFLAKE_DEPLOYMENT",
    "host": "<account>.<region>.snowflakecomputing.com",
    "port": 443
  }
  {
    "type": "OCSP_CACHE",
    "host": "ocsp.snowflakecomputing.com",
    "port": 80
  },
  {
    "type": "DUO_SECURITY",
    "host": "<duo-identifier>.duosecurity.com",
    "port": 443
  },
  ...
]
It is important to note that SYSTEM$WHITELIST() does not provide the required information if your Snowflake account leverages private connectivity. If this is the case, use SYSTEM$WHITELIST_PRIVATELINK() instead. All other steps in this blog post are the same.
I would recommend saving this as a file on your local machine. For this demonstration, we will call the file my_whitelist_file.json.
Ensuring Connectivity for Your Snowflake Account
At this stage, we don’t strictly need to use SnowCD and verify the connection. I would absolutely still recommend it, but the main action I would recommend if SnowCD flags errors is an action that I would recommend at this stage anyway. I would strongly recommend sending this JSON list of Snowflake endpoints to your IT department, or whomever would be administrating the firewall for your virtual network. The objective is for them to whitelist all of the endpoints on this list for your network, which should ensure the required connectivity.
Using SnowCD to Test Connectivity to Your Snowflake Account
Before we can use SnowCD, we must first install it.
Installing SnowCD
The files to install SnowCD are all found here. There are files for each operating system, and they can be installed similarly to any other program for the corresponding operating system. You can find detailed instructions here if required. As I am using Windows, my installation process was to simply download the latest file and execute it.
Adding SnowCD to Your PATH
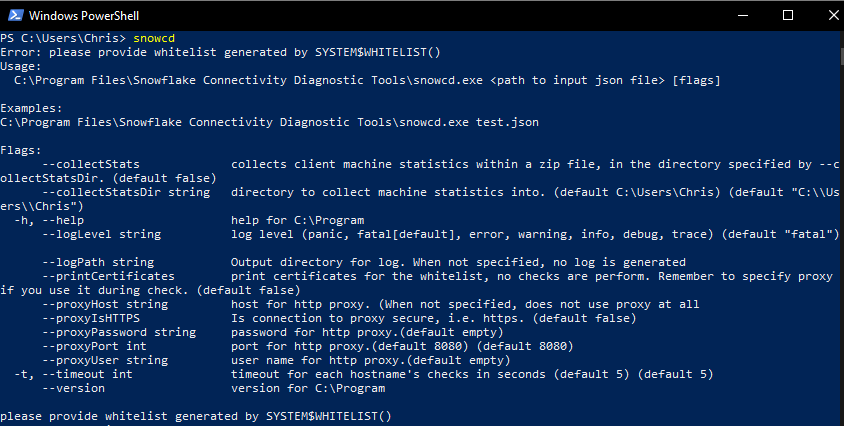
SnowCD is executed via the command line and must be present in your PATH environment variable if you wish to leverage the simple snowcd command. Depending on your operating system, the command may have already been added to your PATH by the installer. You can check this by opening a PowerShell window or similar terminal and executing the command snowcd.
As you can see here, if I execute snowcd, then I receive a long message regarding a missing whitelist input followed by example connectivity. If snowcd is not detected as a command, you will instead receive an error stating that snowcd is not recognised.
If snowcd has indeed not been recognised, then it can be added to your path by following the relevant steps for your operating system.
Windows
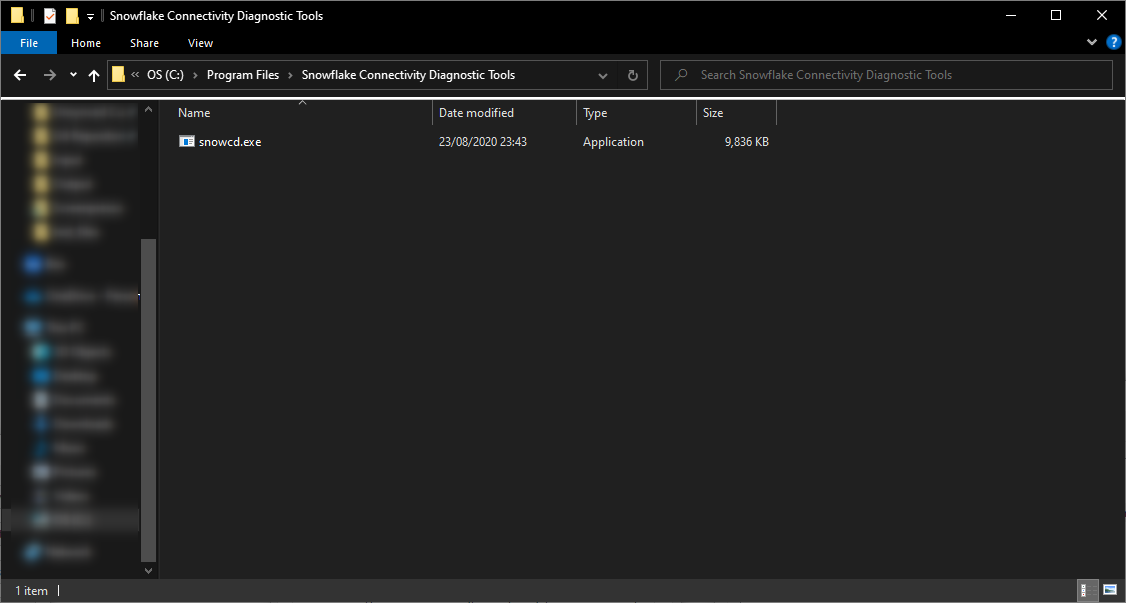
First we must find your SnowCD directory. This should have been selected during the installation process and will default to C:\Program Files\Snowflake Connectivity Diagnostic Tools. The only contents will be the snowcd.exe file.
Once we have this directory, we can edit our PATH system variable by following these steps:
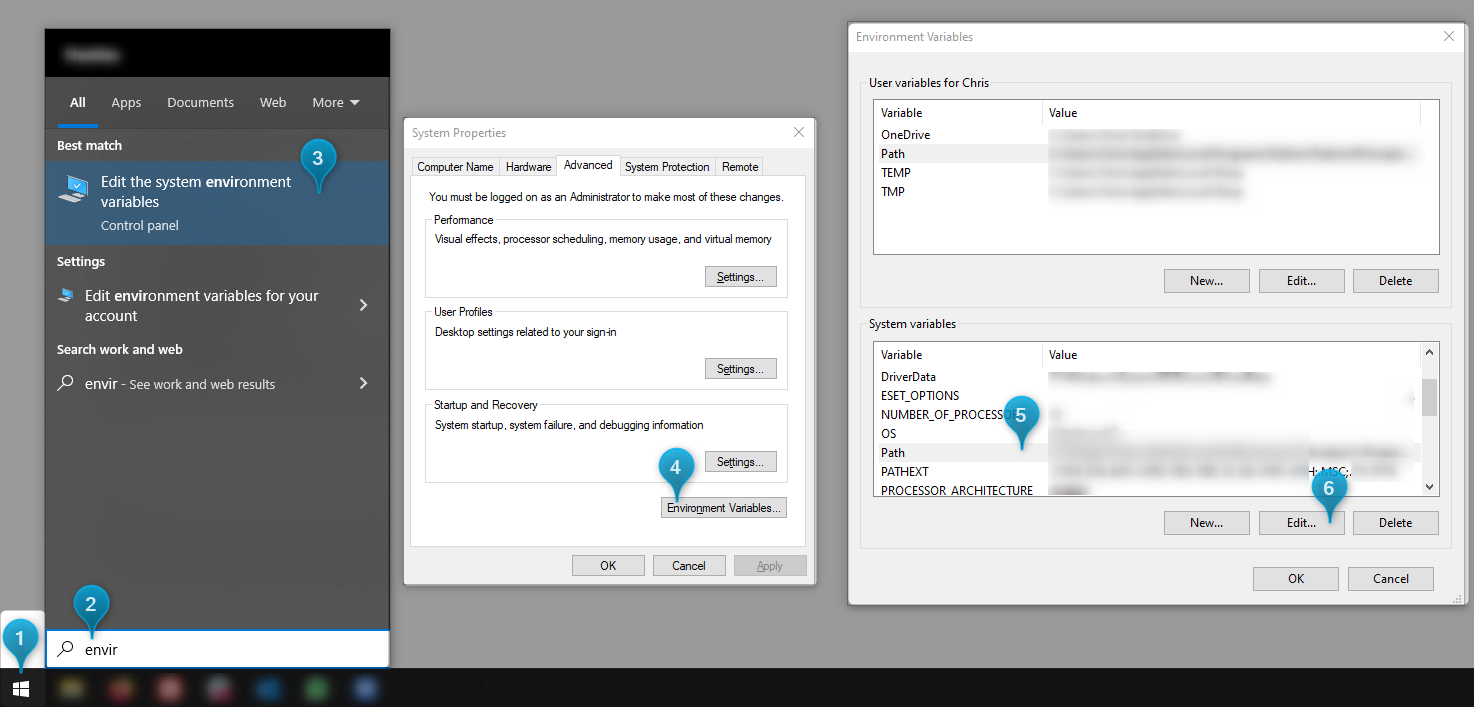
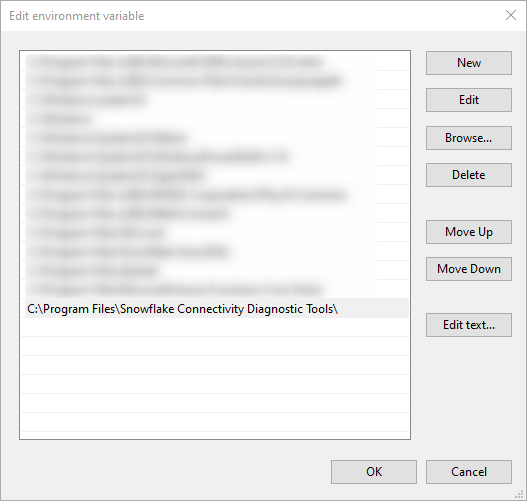
This will add the command to your PATH. You may need to log out and back in to your machine for these changes to be reflected in new terminal windows.
MacOS and Linux
It is my understanding that both of these operating systems install SnowCD into the following directory: /opt/snowflake/snowcd
This directory can be added to your PATH by opening a terminal and executing the command sudo nano /etc/paths and manually entering the directory to the bottom of the file.
In truth, I am not a MacOS or Linux user, so you may need to search for further guidance on adding a directory to a PATH variable if this does not work for your version of MacOS or Linux.
Using SnowCD
Actually using SnowCD is very simple, so we have basically finished our journey at this stage. All that remains is to open a terminal window, for example PowerShell if using Windows, and enter the following command:
snowcd "path/to/whitelist/file.json"
For our specific example, our file is called my_whitelist_file.json and is stored in my Downloads directory, so I can execute the following command:
snowcd "C:\Users\Chris\Downloads\my_whitelist_file.json"
As we can see, SnowCD executed correctly and all checks were passed, which means I am able to connect to Snowflake fully as desired.

If you see any other message than this, it is likely to be an error message that states the specific endpoint that cannot be reached. If this is the case, I would recommend reaching out to your IT department, or whomever would be administrating the firewall for your virtual network, and letting them know that you are still seeing connectivity issues with the endpoint. The simplest solution here would be to send them the entire JSON file again so that they can ensure all endpoints are accessible.
I would also recommend paying specific attention to the wording of the error that is output as it may include instructions on how to resolve it.
Closing
And so concludes this post about leveraging SnowCD to investigate connectivity issues with your Snowflake account. I hope you find it useful. This post has only tackled the standard scenario and has not covered situations such as HTTP proxies. There are some nuances here regarding SSL-terminating proxy servers so to avoid giving outdated information, I will instead provide this link to Snowflake’s own documentation on the topic.
Thanks for reading!