
In my last blog, I showed you how to iterate through a variable to bring multiple tables into the raw layer of your data warehouse. Today, I’m going to build on that concept by creating a DIM table and performing an UPSERT. Now, to start, I won’t go over the process of building the DIM table today, as that will be in my next blog, so stay tuned. Today, I will simply concentrate on the process of doing an upsert because it’s simple, but vital.
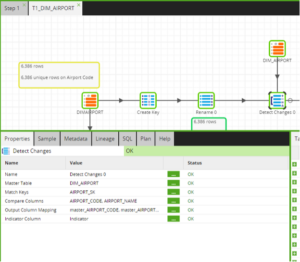
The first step in doing an upsert is to read in the table you’re updating and connect your new data and existing data via the Detect Changes tool (pictured below). Set your existing table as the Master Table and your SK column (or whatever your Primary Key is) as the Match Key. The next step in setting up the Detect Changes tool is to bring in all columns that are not in the key field into the Compare Columns section.
A side note on the SK column: I will teach you how to create that in next week’s blog.
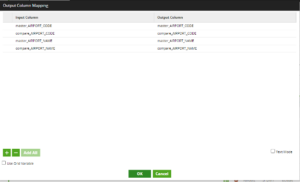
Finally, I simply need to include the master and compare columns in Output Columns Mapping section of the Detect Changes tool:
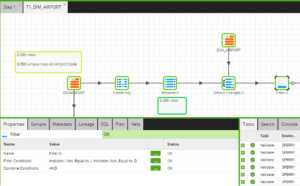
The next tool we need is the Filter tool. We need to filter for only our new data and changes by filtering on the Indicator column created in the previous step for any value not equal to D or I:
Now, I will bring in the Table Update tool, but don’t worry, I will break this down step-by-step:
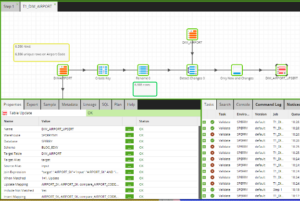
As you can see above, I need to select my Warehouse, Database and Schema, then name my table. For the Target Alias and Source Alias sections, just leave the defaults. Now, I just need to create my join expression. Make sure not to forget that we only want to join on the C or Compare indicator:
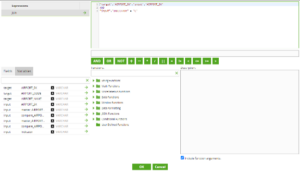
Next, I will use the SK field and the compare columns to map to the appropriate columns in the Update Mapping section of the Update Table tool.

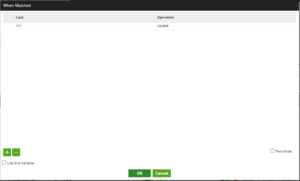
In the When Matched section of the tool, I will need the formula below. The Case column reads 1=1 and the Operation column reads Update. This tells Matillion to update each column when the keys are matched:
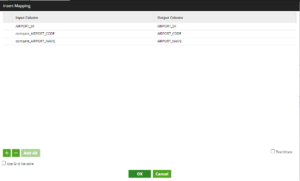
The final step is to do the Insert Mapping. This is basically a repeat of the Update Mapping:
That’s all there is to it! Stay tuned next week when we discuss creating keys in your tables, and I’ll throw in a few shortcut hints as well.