Our Certified Tableau Trainers are asked a myriad of questions each day. In this series, they share some answers.
Sometimes Tableau puts mark labels exactly where we want ‘em… But sometimes the default positioning of mark labels leaves class participants asking:
“Can I pick where my mark labels go?”
The answer is yes! You have two options for adjusting positioning for your mark labels:
- Adjust the alignment using the Label button
- Click directly on the mark and set it free to be wherever you choose
- Not really adjusting mark labels at all … but adding annotation as a label instead (that’s why I said there are only two options).
However, as with many decisions in life, these two options have different long-term effects as well as different effects depending on which chart type you’re using.
Option 1: Label Button Alignment
In the below example, a bar chart is labeled at the rightmost edge of each bar. Navigating to the Label button reveals that Tableau has defaulted the alignment to automatic. However, by clicking the drop-down menu, we have the option to choose our mark alignment.
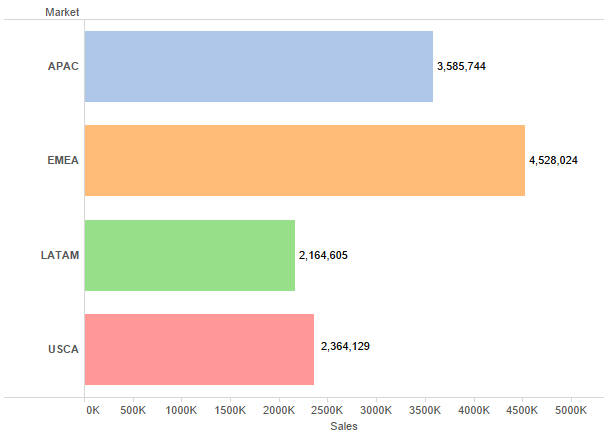
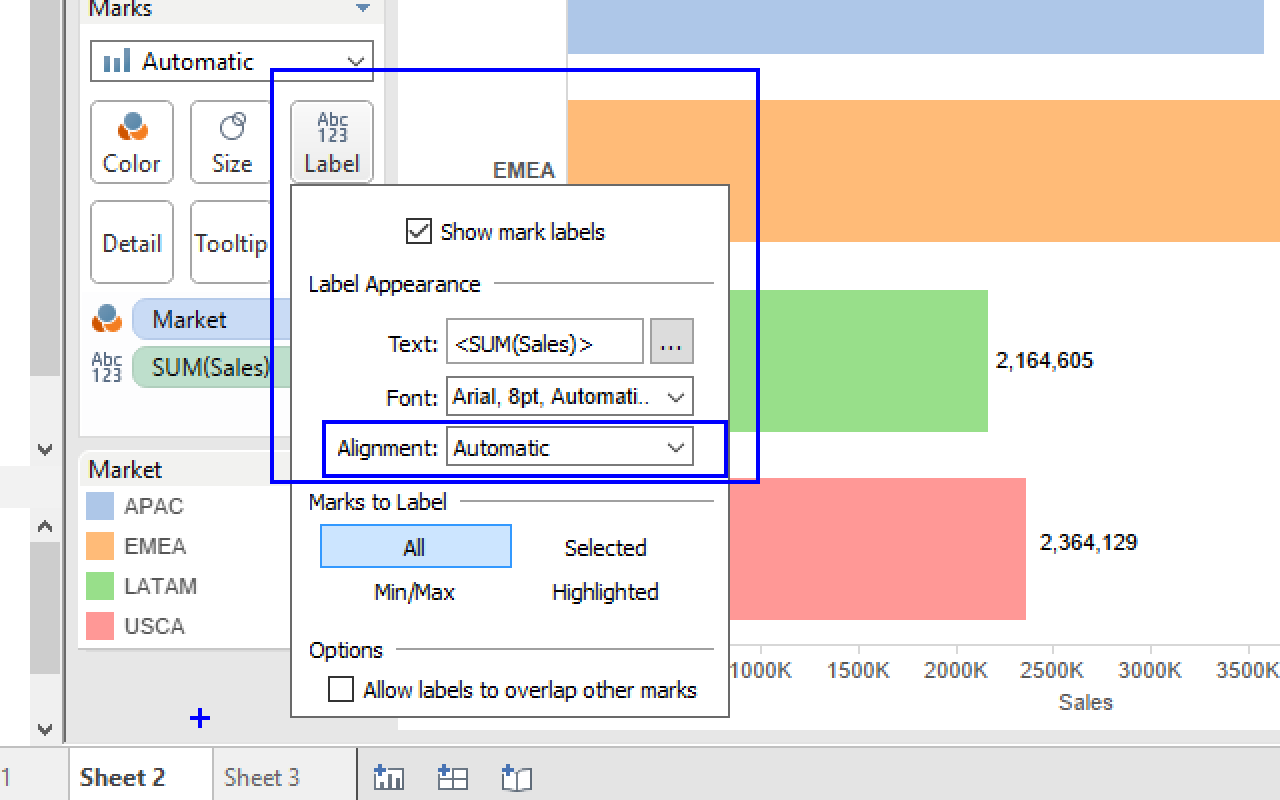
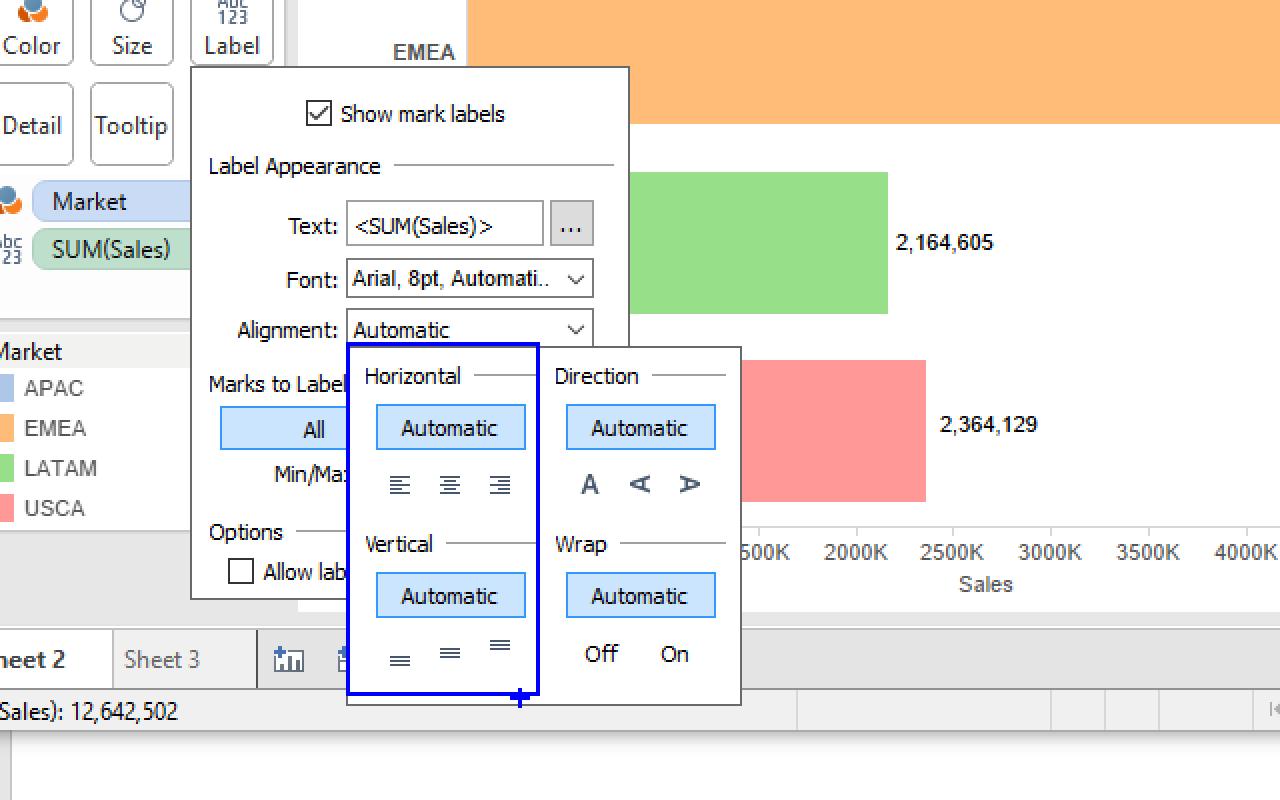
We have both horizontal and vertical mark label alignment options.
See if you can guess which options produce this result …
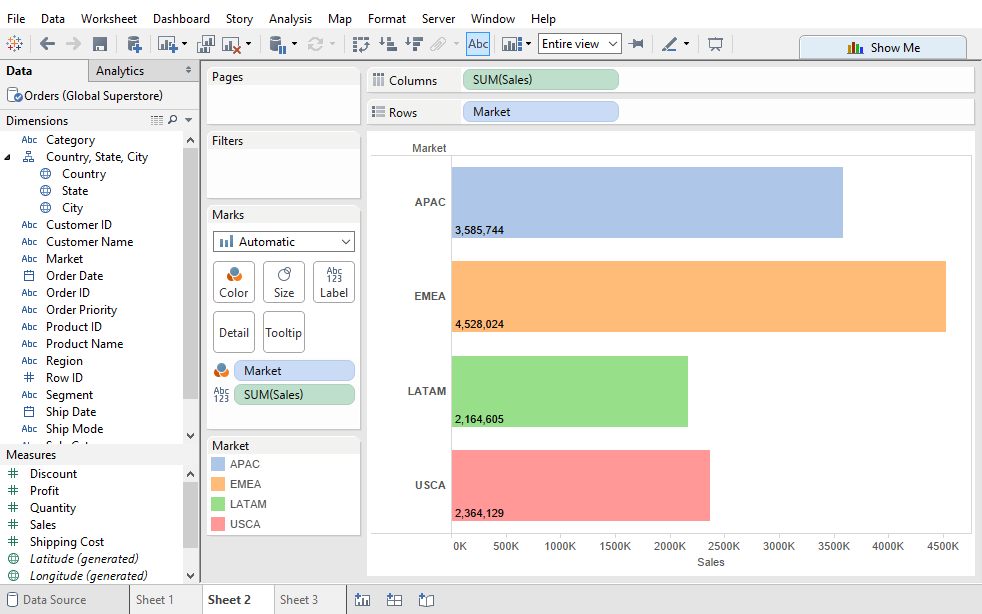
If you said left horizontal alignment and bottom vertical alignment, you’d be right.
I created a line graph to show sales across months, and after dragging the Sales pill to Measures (or choosing Show Mark Labels in the Labels button), we have the same options for our line graph:
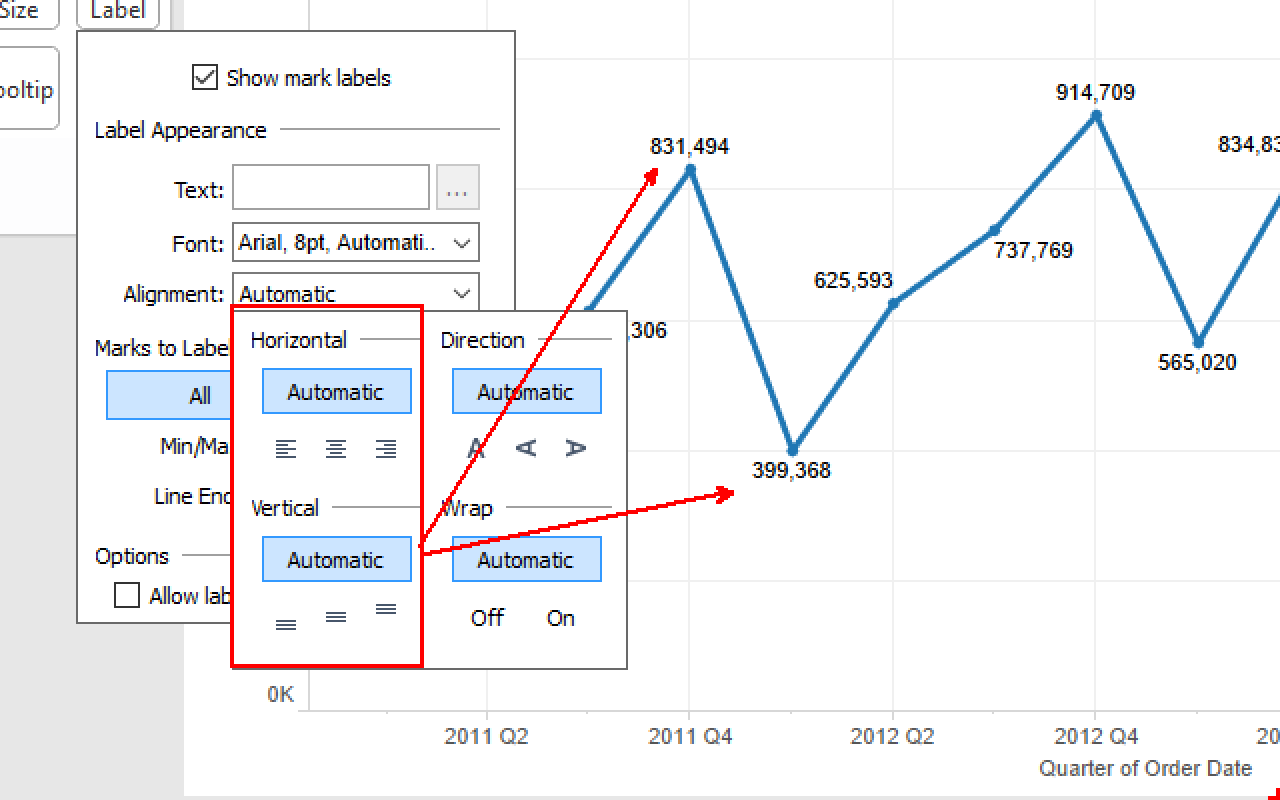
This time, changing the alignment in the same way produces the following:
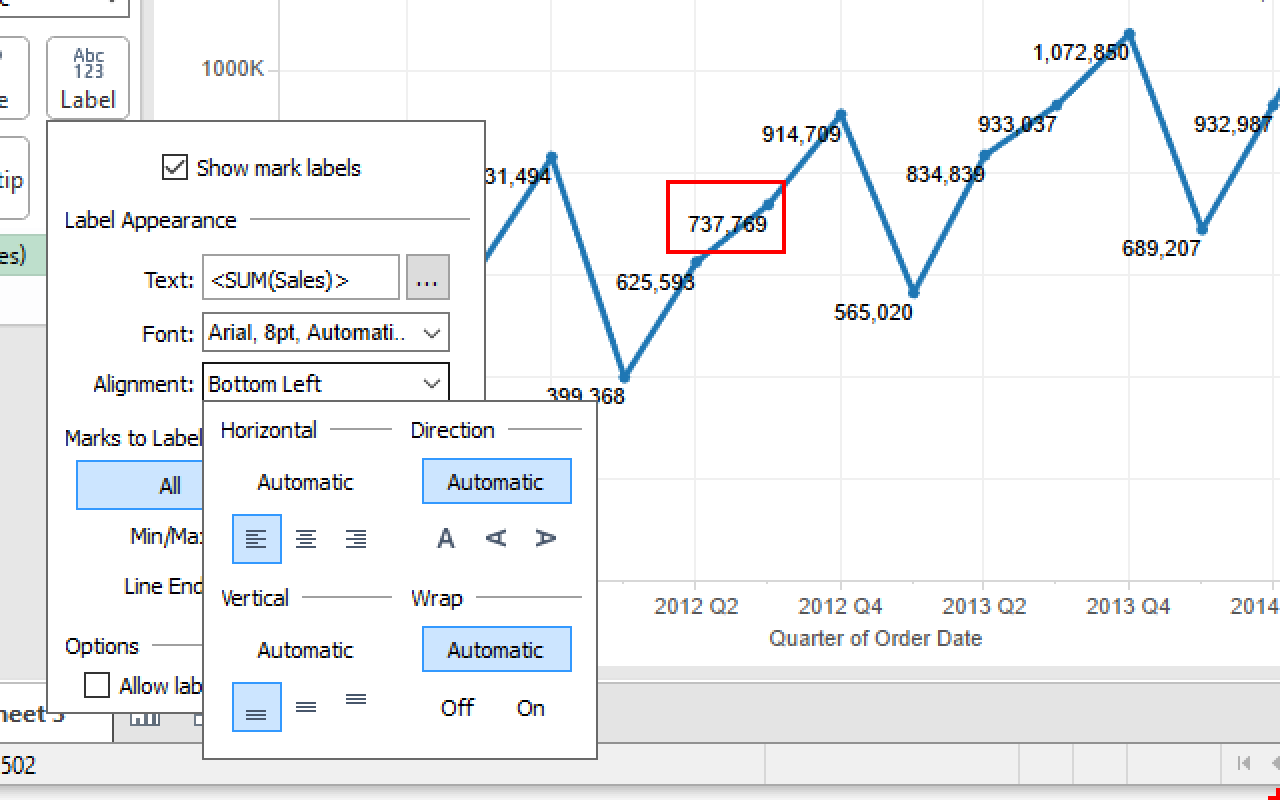
Now, Tableau has moved every label to the bottom left of each point on the line chart. This option has overridden the default, therefore mark labels can overlap our line (as seen above). I’ll leave it to you to explore the best option for your scenario.
Finally, we have the pie chart: one in which labels are often used!
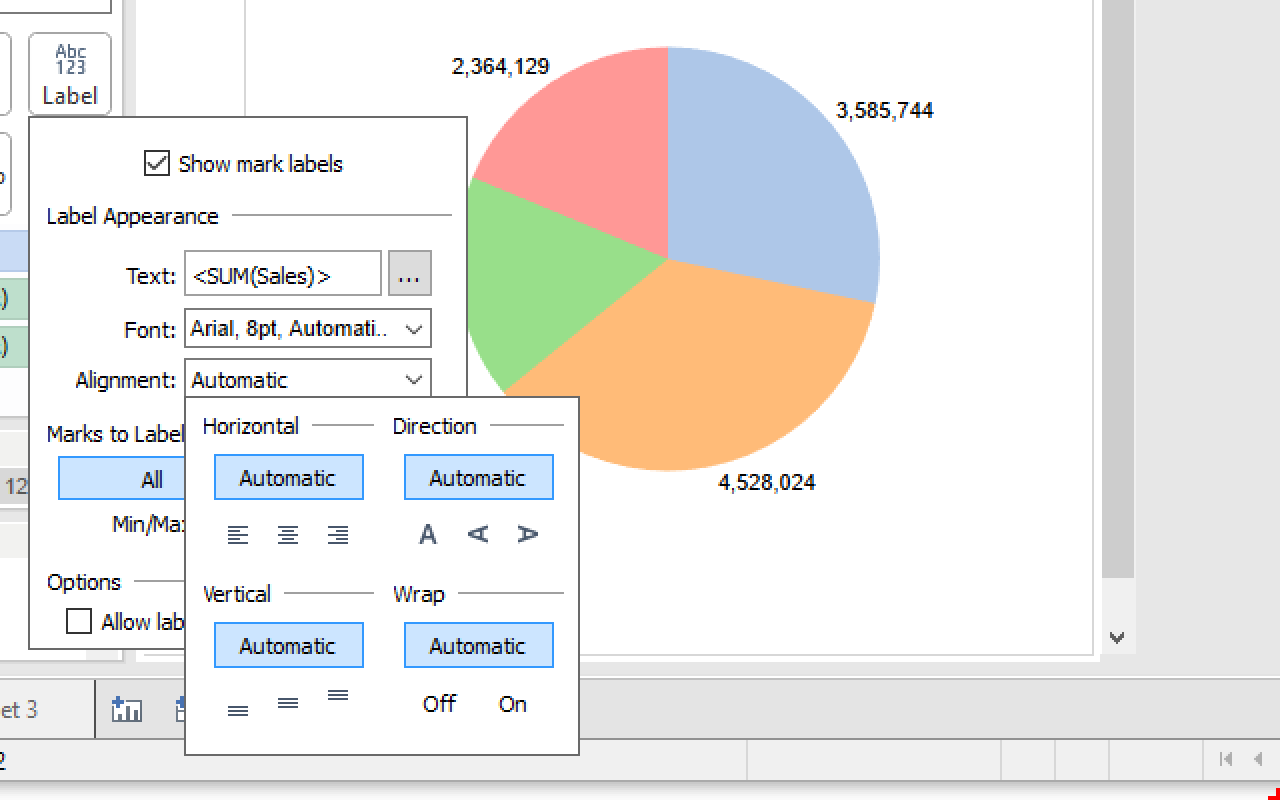
You can try the above methods all you want, but those labels aren’t going to budge a bit. Apparently, when faced with a pie, Tableau knows no direction (which is sometimes how I feel when faced with pie … but I digress). And herein lies the rub: How do we get those mark labels inside the pie? Or anywhere else for that matter?
Option 2: Set the Mark Free
This brings us to label-positioning tactic #2 (from above):
“Click directly on the mark and set it free to be wherever you choose.”
This method is as simple as clicking on the label you want to reposition — wait until you get the following cross quadruple arrow cursor (at least that’s what I call it):

Then, drag the label wherever you want. As you can see, in the below screen shot, I’m bringing it inside the pie:
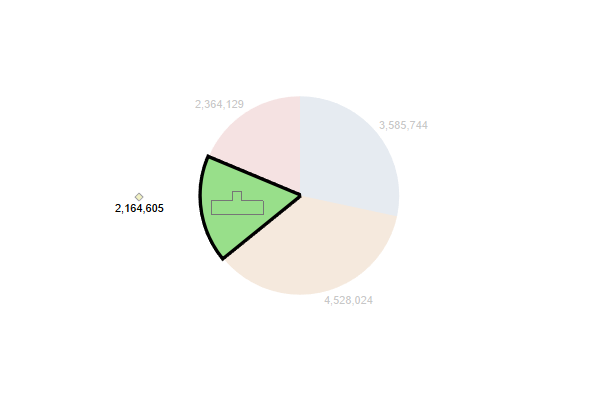
Lather, rinse, repeat and we’ve got a nicely labeled pie chart:
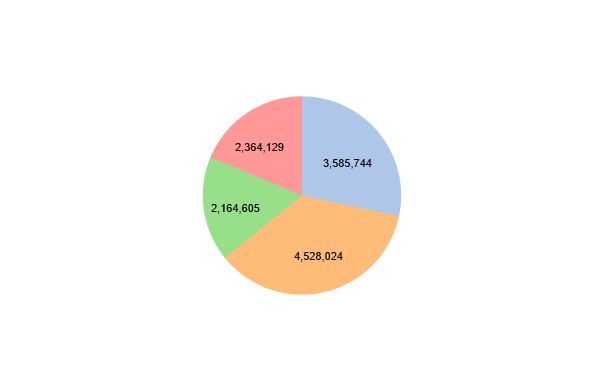
There’s only one issue.
Now that you’ve freed those marks to float around wherever you put them, they are free to float into places you don’t want them (e.g. if the chart changes). See what happens when I exclude EMEA (the orange slice):
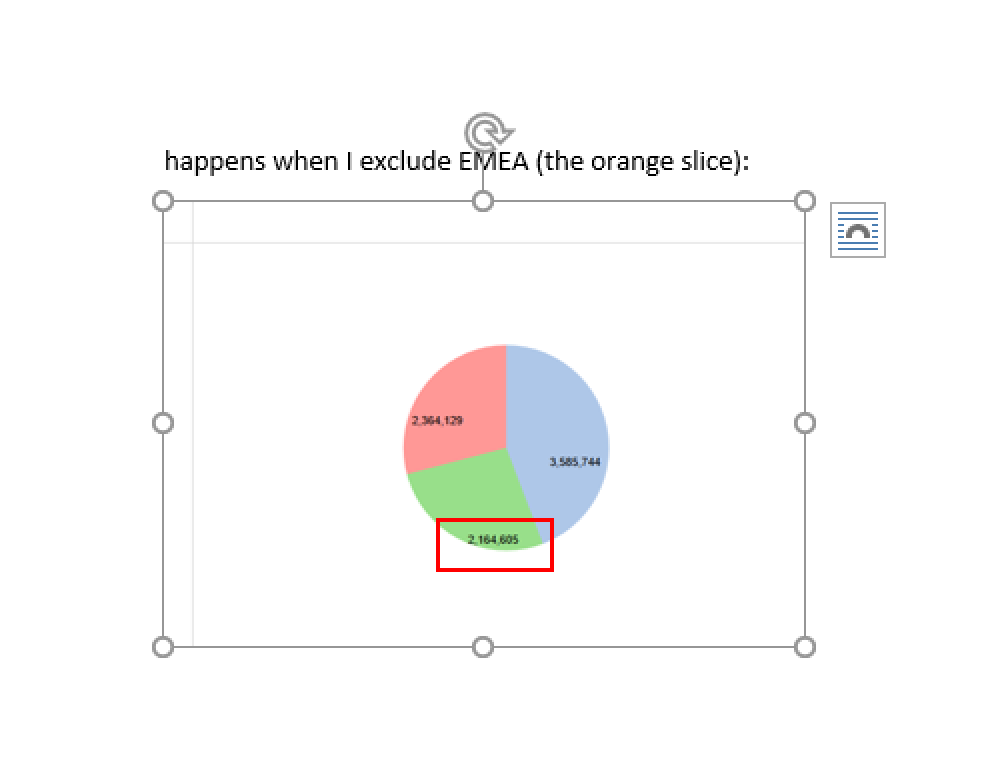
Our green mark label has floated right to the bottom of the green pie slice. Similarly, when I resize my pie, those marks get so jumbled we can’t even tell which piece of pie they reference:
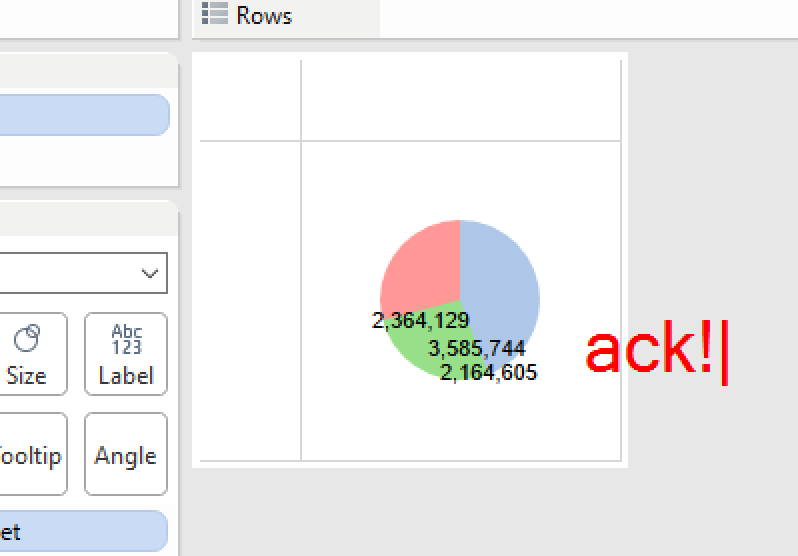
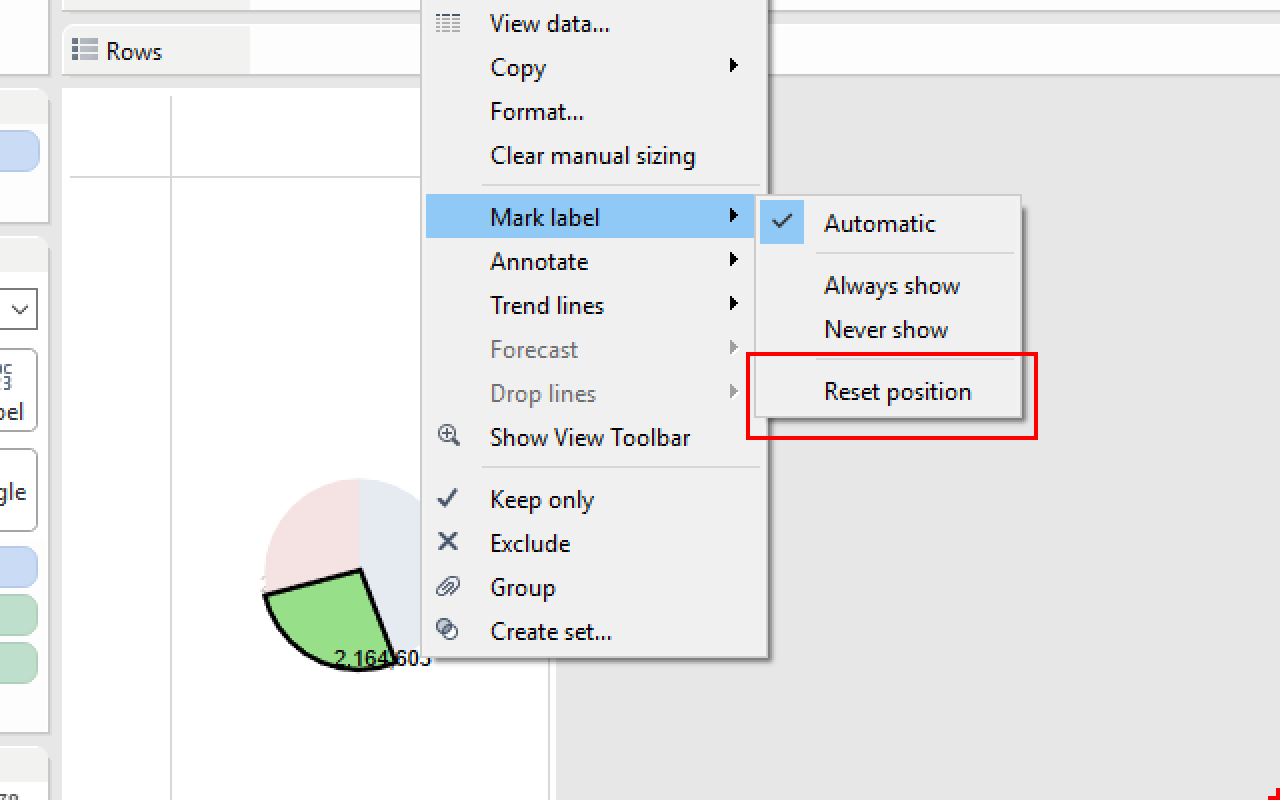
This is a risk you take any time you override Tableau’s default label positioning and free your labels by manually positioning them. So, if you’re now reconsidering this whole pie chart labelling ordeal, you’re probably wondering how to get the labels back to where they started. Right-clicking on the mark brings up the below menu, and under Mark Label we have the option to reset the position. This will get you back to automatically positioned labels.
The above manual method will work on any chart type — it is just most often requested on the pie chart. So, the moral of the story is: You can reposition your labels, but beware of resizing or changing your chart with floating labels, as they become unpredictable!
Don’t Forget Option 3: Annotations
Lastly, we have the non-label way to get labels wherever you want. Don’t use labels! Use annotations instead, which you’ll have to come back to the blog to learn about!
And now that you’ve got your marks right where you want ‘em, find out how to format them in this blog post!

