
In an insightful blog series, my colleague Danny dived into setting up SCIM and SSO with Azure Active Directory (AAD) – a must-read for organizations using AAD for managing Snowflake users and roles. AAD’s popularity is clear, but it’s not without workflow challenges, especially since high-level Azure roles such as Group Administrator and User Administrator are like gold dust and tightly held within IT departments.
As data architectures evolve, including the dynamic changes in roles, Snowflake Account admins often encounter bottlenecks when delegating tasks to IT due to the high-level Azure roles. This is where Okta comes into play as a compelling alternative. With its secure, user-friendly, and flexible design, Okta provides a solution that not only adapts to these evolving needs but also facilitates smooth project flow. If you’re aiming for secure autonomy from IT, Okta could be your new best friend!
In this article we won’t repeat the details of how SSO and SCIM operate – our earlier post has covered that. Instead, we’re kicking off a fresh, super practical two-part blog series on setting up SCIM and SSO with Okta for Snowflake. Stay tuned and let’s get techy!
Setup Guide
Step 1: Creating a Provisioner Role in Snowflake
Begin by creating a role in Snowflake that will have the necessary privileges to create users and roles via Okta, as shown in the following code snippet:
USE ROLE SECURITYADMIN;
CREATE ROLE IF NOT EXISTS OKTA_PROVISIONER;
GRANT CREATE USER ON ACCOUNT TO ROLE OKTA_PROVISIONER;
GRANT CREATE ROLE ON ACCOUNT TO ROLE OKTA_PROVISIONER;
GRANT ROLE OKTA_PROVISIONER TO ROLE SECURITYADMIN;
It’s important to follow best practices for role management in Snowflake by assigned the newly created role to an existing higher-level role (SECURITYADMIN) to maintain the hierarchical structure of roles in Snowflake.
Now, a SECURITYADMIN user could change settings for a user that might not match up with Okta. To prevent this, you can instead grant the role OKTA_PROVISIONER to the ACCOUNTADMIN role.
Step 2: Creating a Security Integration and Generating an Authentication Token
Security Integrations enable external services like Okta to communicate with Snowflake. They are essential for tasks such as creating users and roles, as well as granting these roles to users in Snowflake.
The following is a code snippet to create a SCIM Security Integration, that interacts with Okta:
USE ROLE ACCOUNTADMIN;

CREATE OR REPLACE SECURITY INTEGRATION OKTA_PROVISIONING
  TYPE = SCIM
  SCIM_CLIENT = 'OKTA'
  RUN_AS_ROLE = 'OKTA_PROVISIONER';
The security Integration needs to authenticate each time with Snowflake, which is done with an authentication Token. The token can be generated using the following command:
SELECT SYSTEM$GENERATE_SCIM_ACCESS_TOKEN('OKTA_PROVISIONING');
It’s crucial to copy the entire token. You can use the copy button for that:
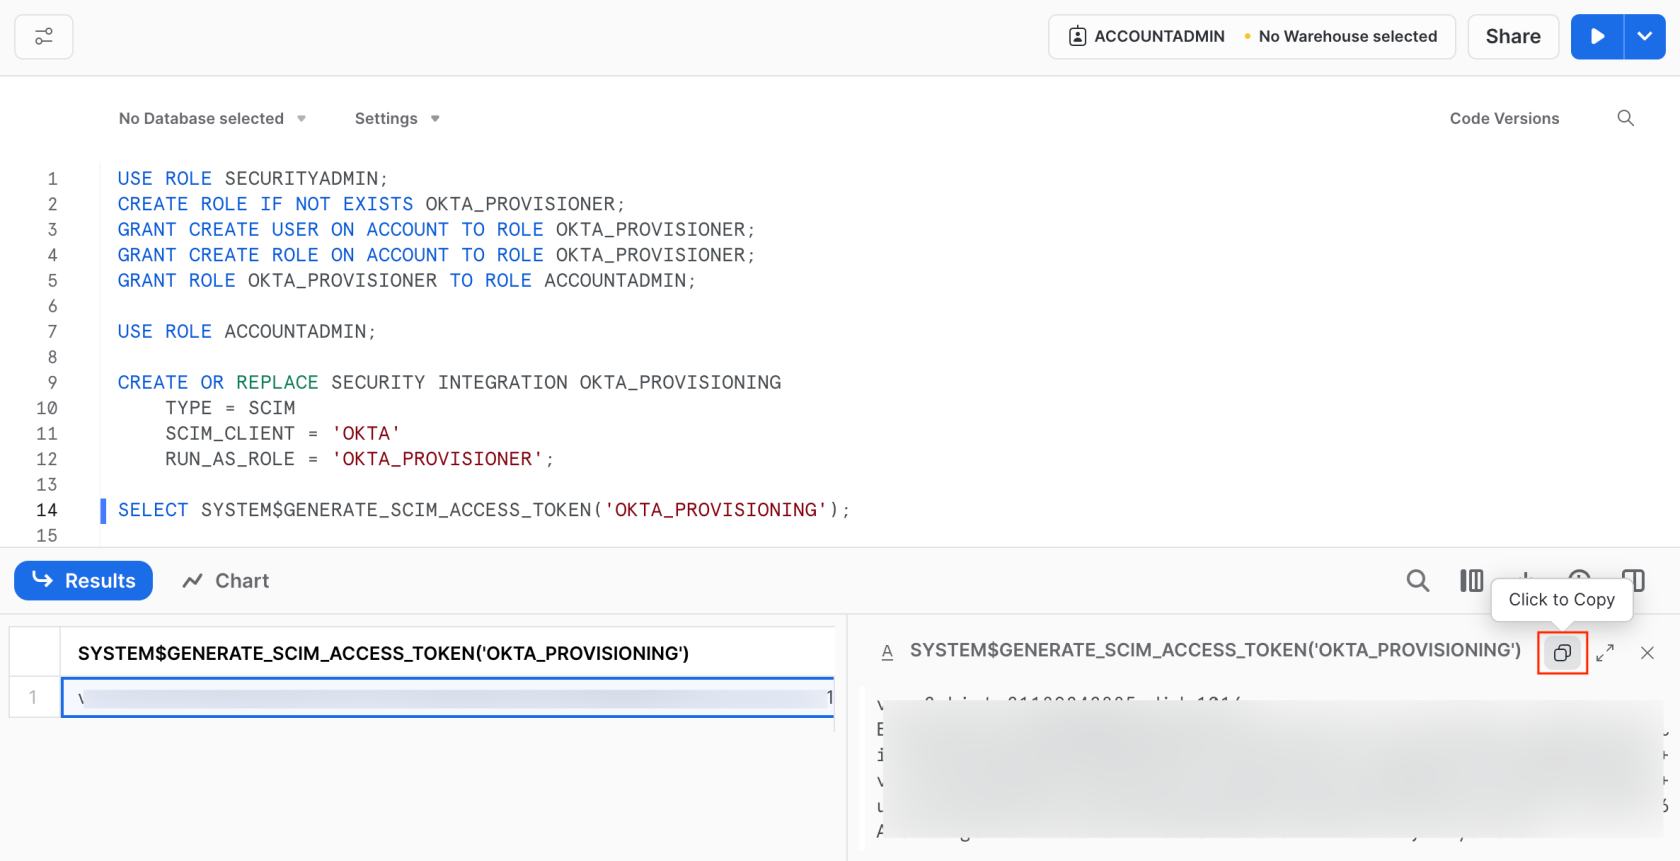
The token is displayed once and comes with a fixed six-month expiration period and needs to be regenerated periodically. Running the SYSTEM$GENERATE_SCIM_ACCESS_TOKEN() function again will create a new token each time, but it won’t invalidate the previous one. To invalidate a token, you’d need to drop the security integration.
With these configurations in place, Snowflake is now ready to handle SCIM REST API calls, using the generated token to validate requests and manage the creation of users and roles.
Step 3: Configuring the Provisioning Integration in Okta
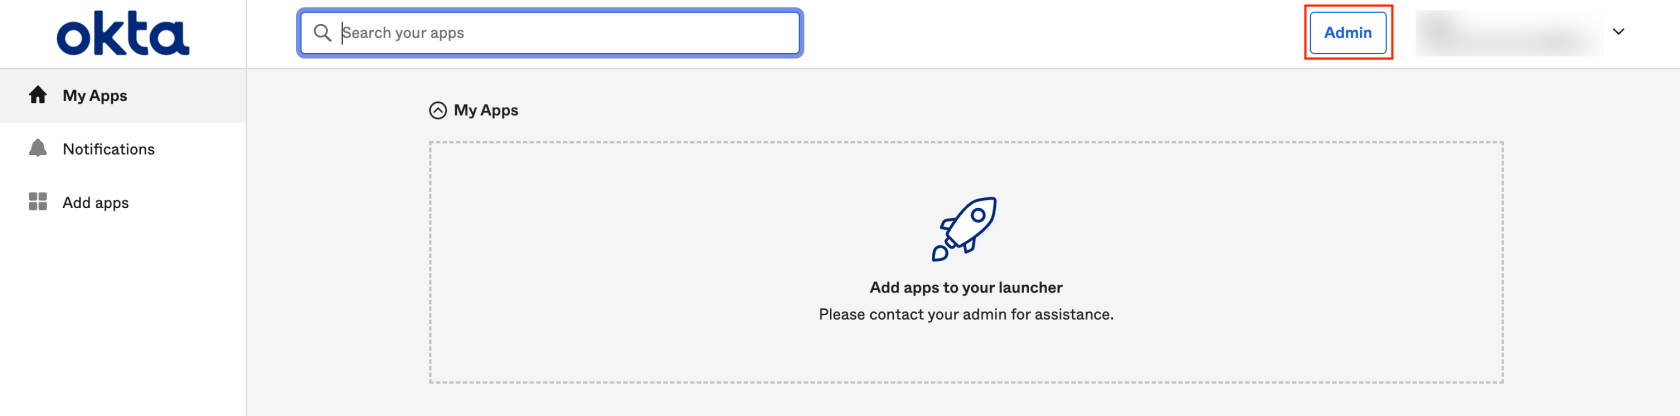
First ensure you have administrative privileges necessary for adding new applications in Okta. After logging into Okta, navigate to the Admin panel:
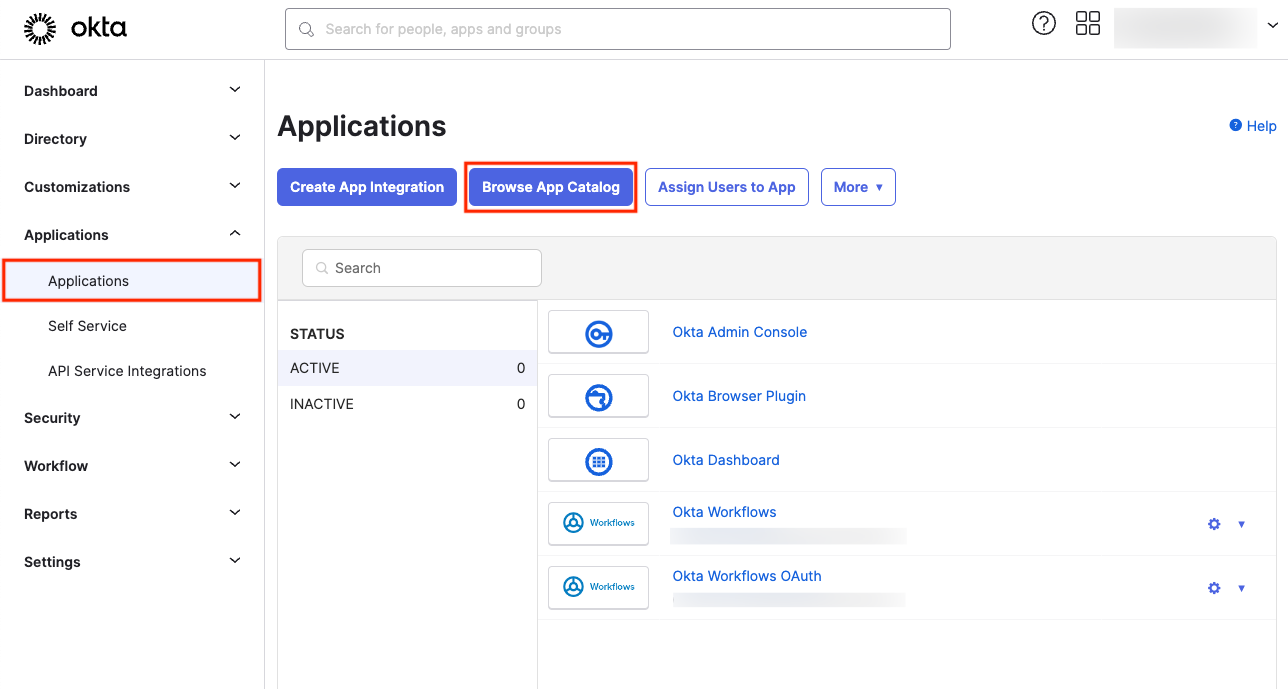
Within the admin section, navigate to the Applications tab on the left side, and select Browse App Catalog. The applications listed in the catalog are come with pre-configured settings for ease of use. Alternatively, you could opt for a more complex route of developing your own application, though that topic is not covered in this article.
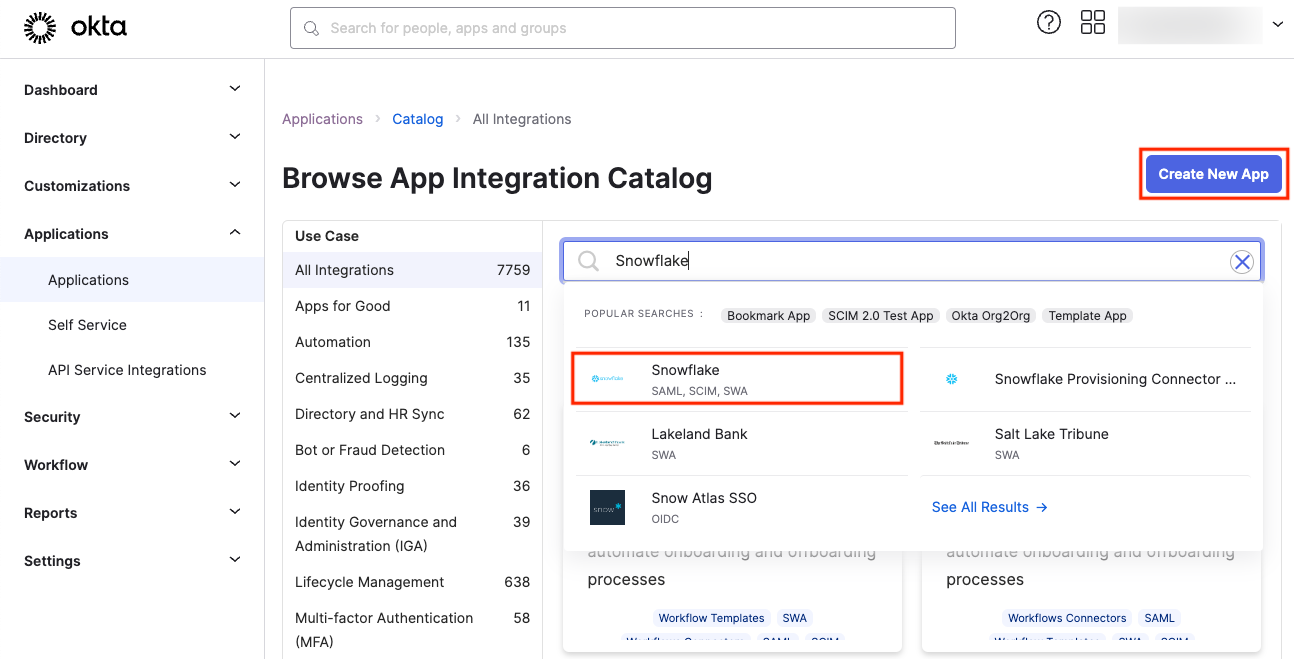
If you decide to follow the recommended approach, search for Snowflake in the catalog:
Select Snowflake from the results and click on Create New App:
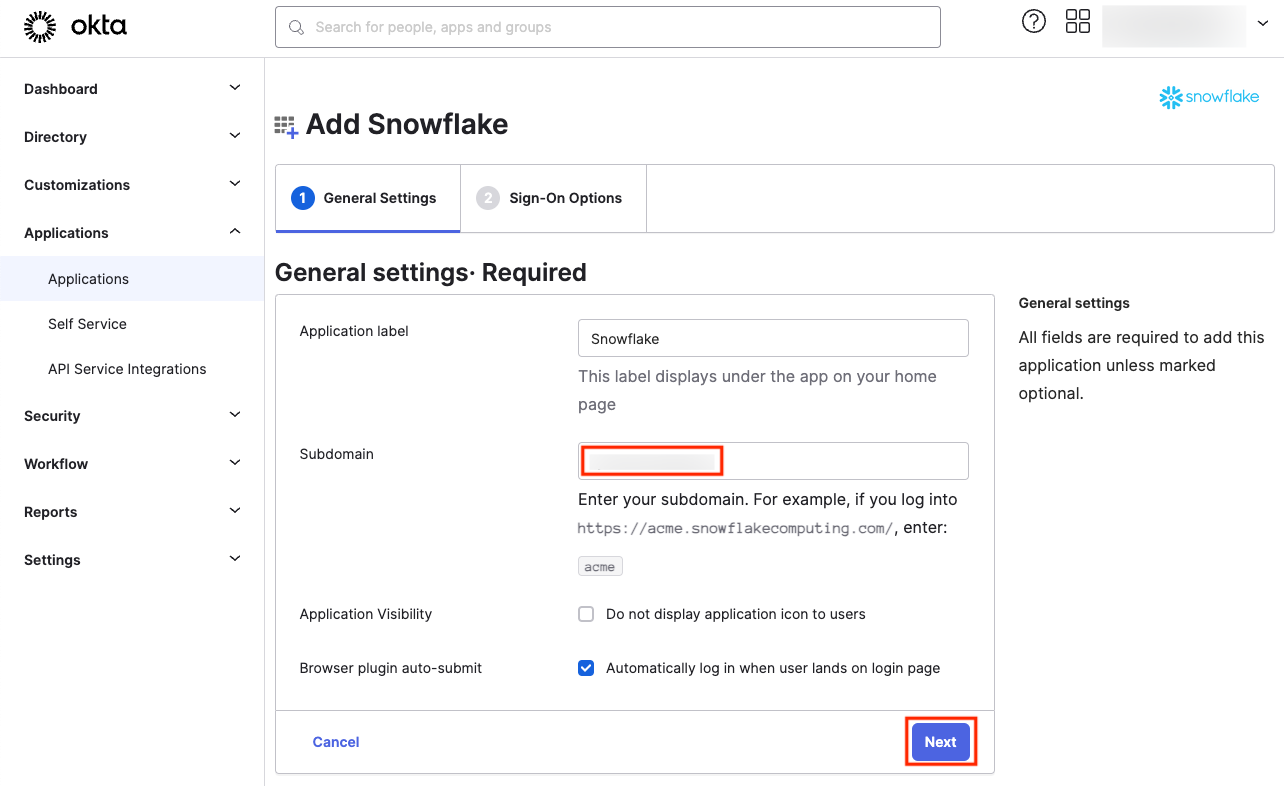
Proceed by clicking on Add Integration. Next, assign a name to your application by filling in the Application Label. Then, enter the subdomain, which is the part of your Snowflake account URL that sits between https:// and .snowflakecomputing.com/. Follow by clicking Next:
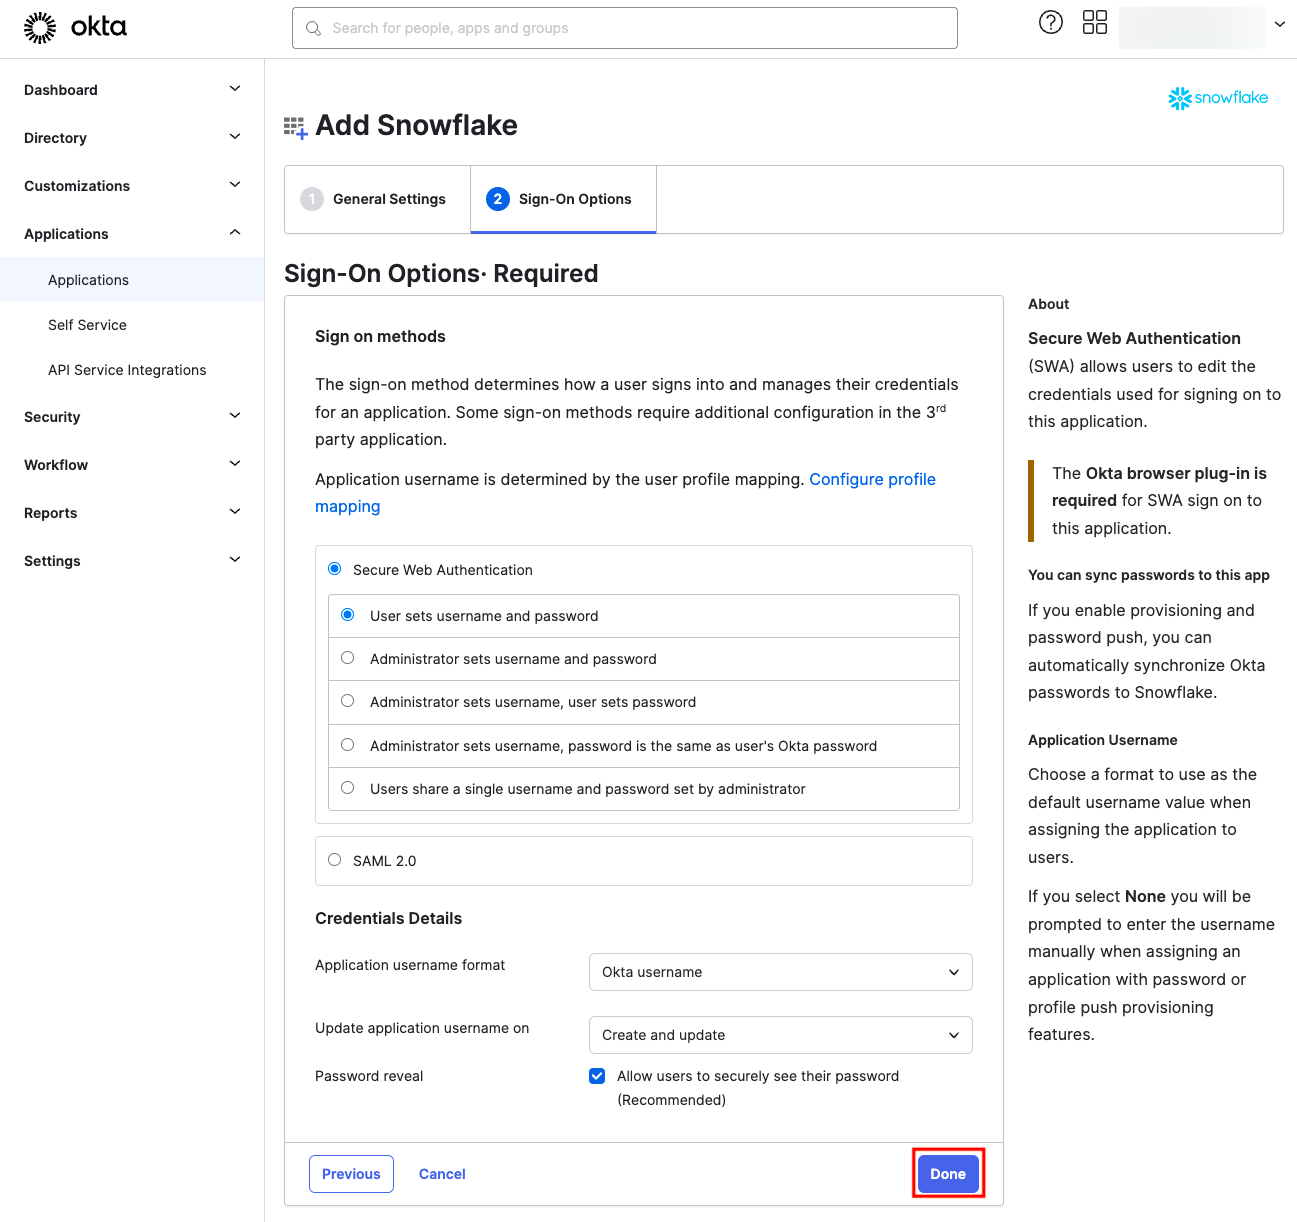
In the Sign-On Options tab, you can configure who sets the username and password (user or admin), and the format of the username.
By adjusting the Update application username setting to Create only or Create and update, you control whether the application will only create usernames for new users, or also update them if changes happen in Okta. If you opt for the Create and update option, make sure to manually select it. This is important because, by default, Okta will select Create only if no explicit choice is made.
Next, click Done. We will dive into SAML 2.0 setup in the second part of our blog series.
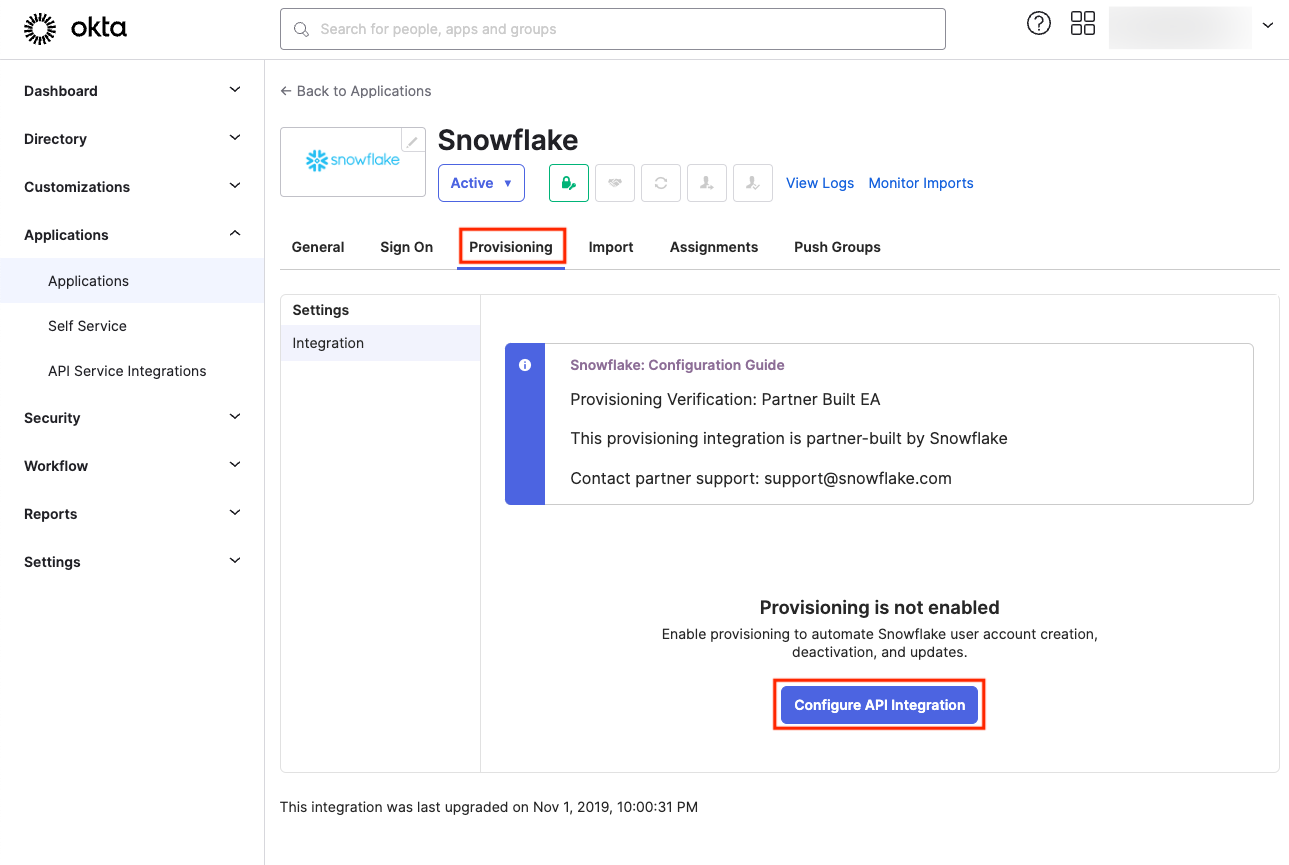
Now, move to the Provisioning tab and click on Configure API Integration:
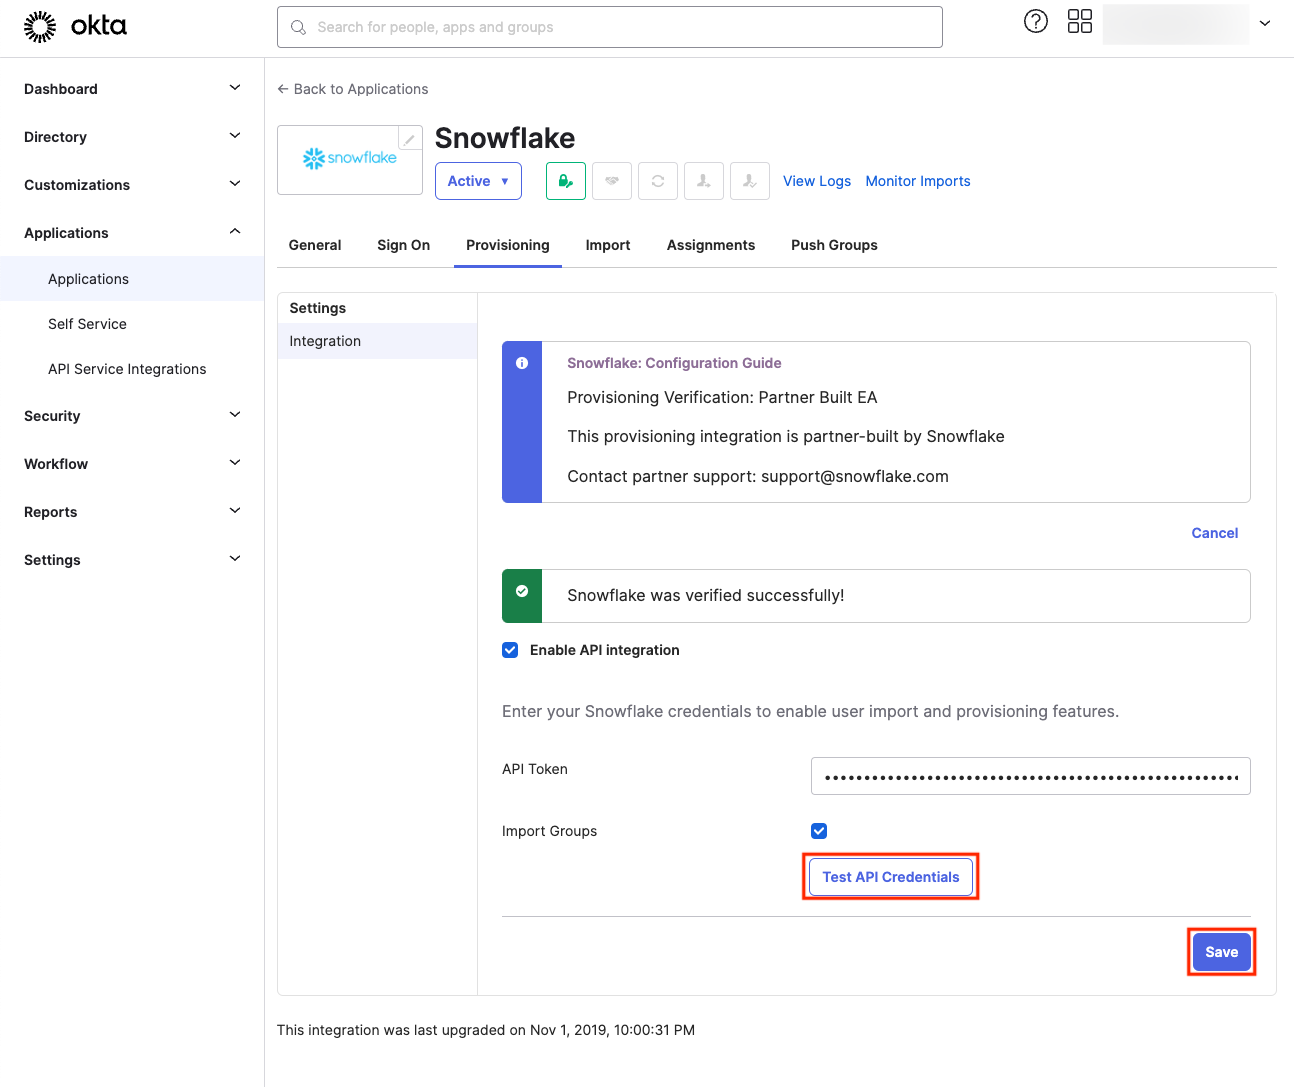
Here, activate the Enable API Integration option and insert the API Token you generated earlier. Click on Test API Credentials. Upon seeing a green notification and the message “Snowflake was verified successfully!“, click Save:
Lastly, to enable provisioning to Snowflake, you’ll need to select certain options:
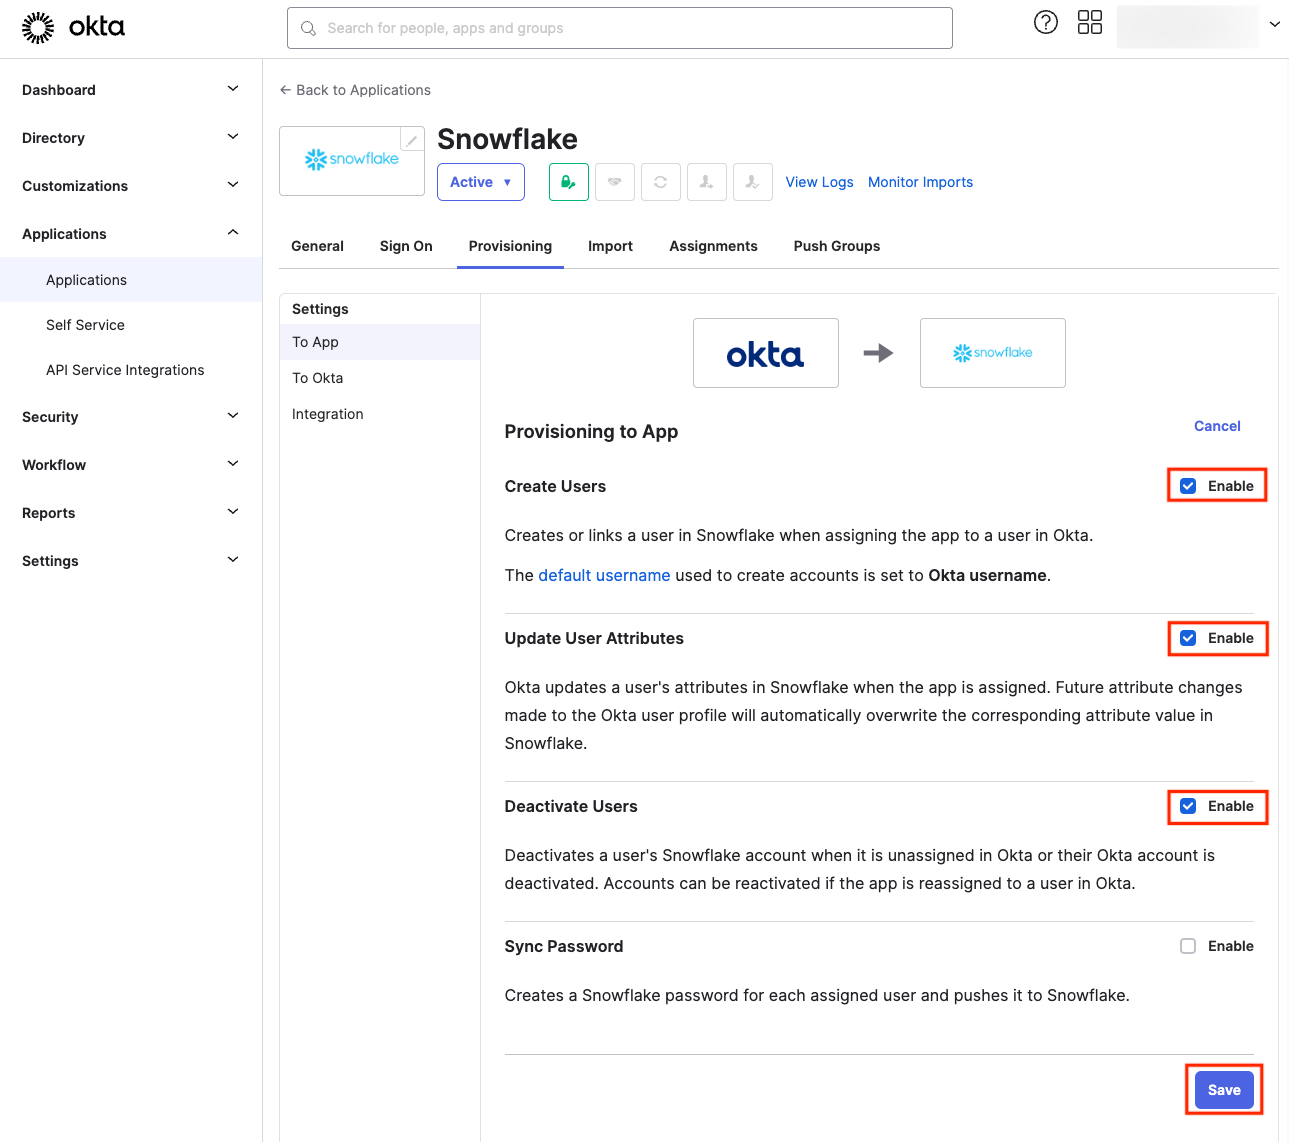
If you decide not to check the Sync Password box, all users provisioned from Okta will be passwordless and will only be able to sign in using SSO. We’ll proceed with this option, as we plan to enable SSO.
Provisioning Example
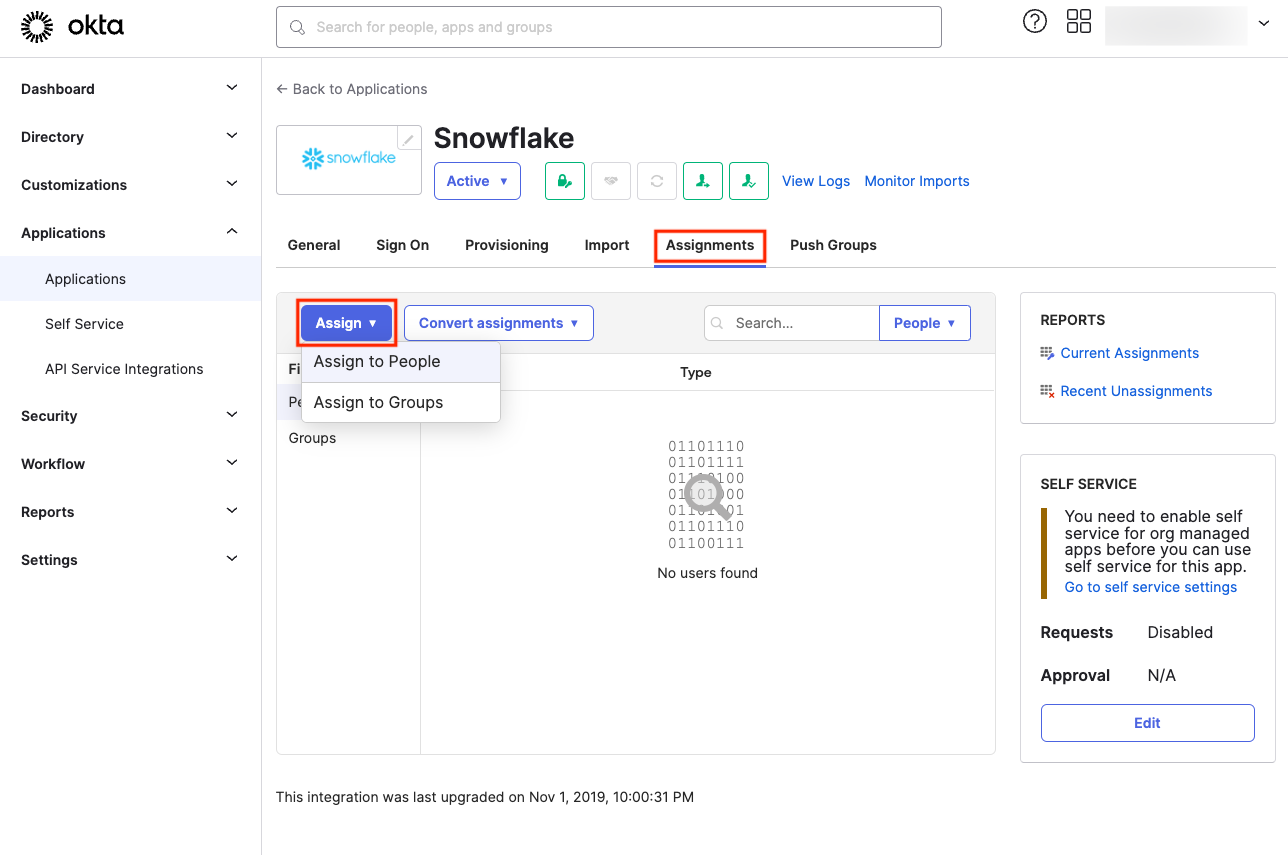
After completing the setup, you’re ready to begin provisioning by assigning users and/or roles (groups) to the Snowflake app:
Creating a Role via Okta
In our example, we’ll provision a group named DATA_VIEWER. Post-provisioning, this group must be pushed to Snowflake using the Push Groups tab. There are two options for this: either link the group to an existing role in Snowflake or let Snowflake automatically create a new role with the same name as the group, which we are using (default).
Granting Privileges to the New Role
The next step involves granting the necessary privileges in Snowflake to DATA_VIEWER role. This is done using SQL commands in Snowflake like:
GRANT USAGE ON DATABASE <your_database> TO ROLE DATA_VIEWER;
GRANT USAGE ON SCHEMA <your_schema> TO ROLE DATA_VIEWER;
GRANT SELECT ON ALL VIEWS IN SCHEMA <your_schema> TO ROLE DATA_VIEWER;
GRANT SELECT ON FUTURE VIEWS IN SCHEMA <your_schema> TO ROLE DATA_VIEWER;
Adding Members to the New Role
You can assign members to the group DATA_VIEWER either by manually adding them through the group’s Assign People option or by setting up a Rule that automatically assigns users based on specific user attributes. To offer a more practical, real-world example, the screenshot provides an example of such a Rule:
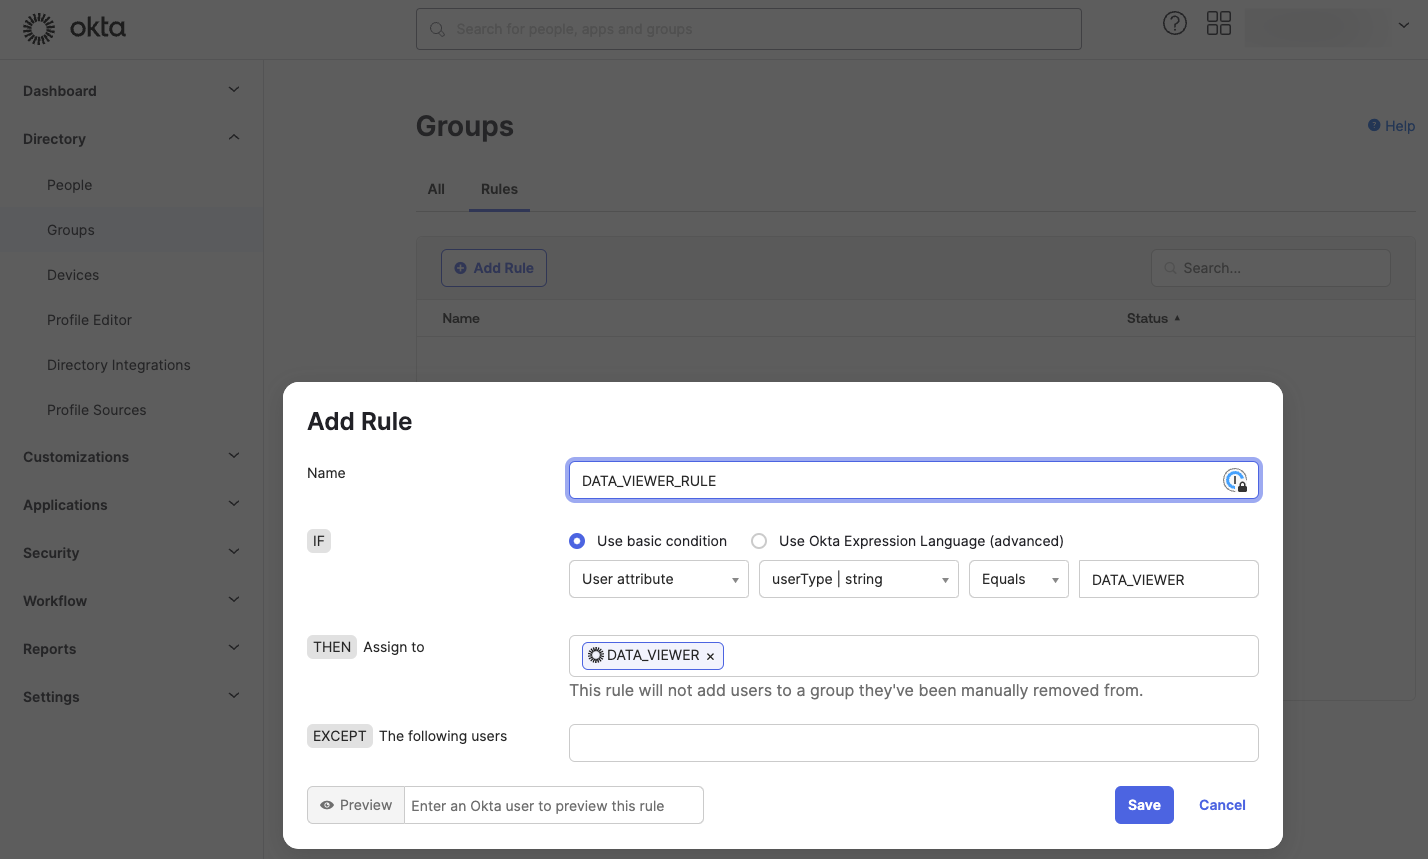
Post-creation you need to activate the Rule by clicking on Activate in the Actions menu.
From the Profile tab, we’ll assign the Okta User John Doe the DATA_VIEWER attribute as his userType:
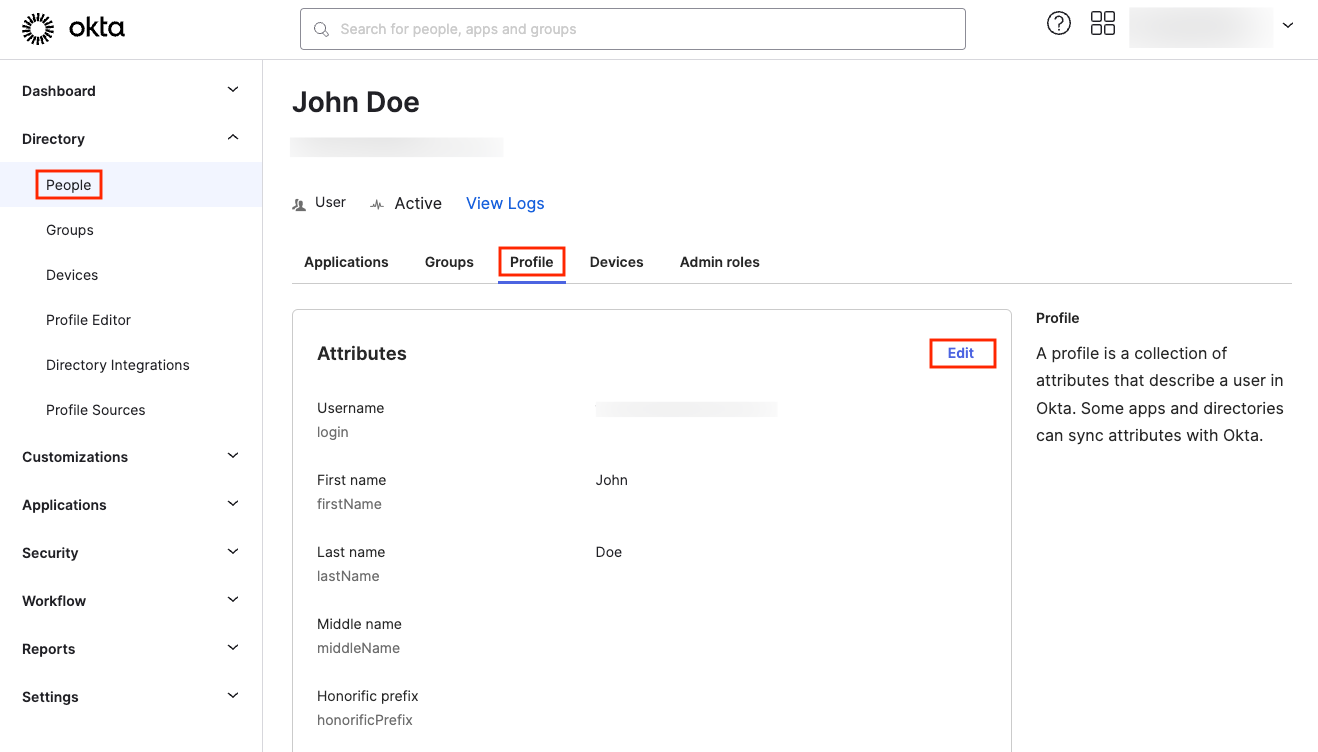
This action automatically places John Doe in the DATA_VIEWER group in Okta, and consequently, he will be created in Snowflake and granted the DATA_VIEWER role.
Validation
Let’s go to snowflake and validate the existence of the user John Doe:
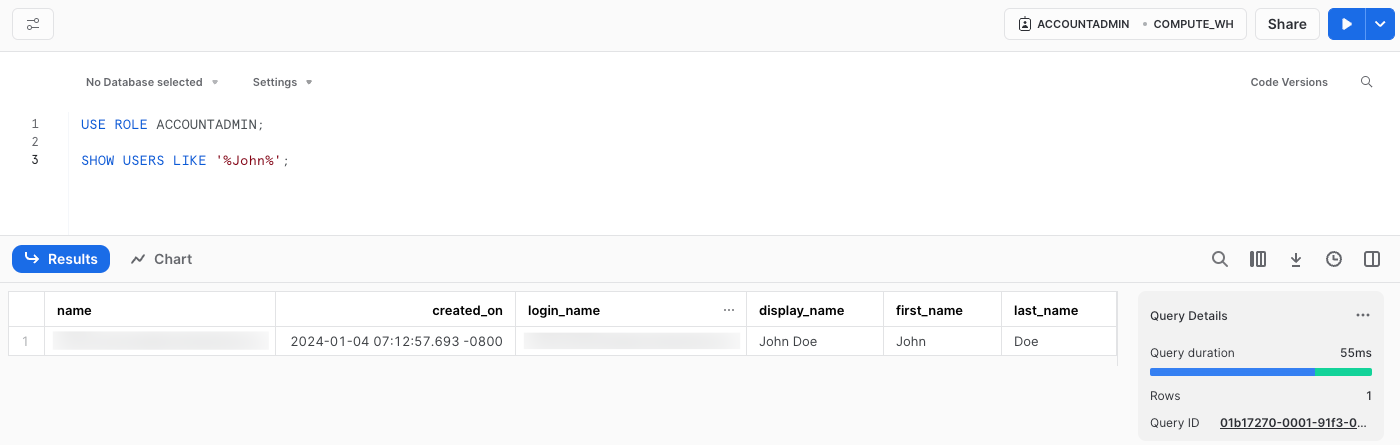
Next Up
Now, John Doe exists in Snowflake with the DATA_VIEWER role assigned but doesn’t have a Snowflake password. The next step is to enable SSO for him to access data in Snowflake. Stay tuned for the next part of our blog series where we’ll cover this.