
This is the second and last part of the series on managing Snowflake users and roles via Okta.
In our first part, we introduced a user named John Doe in Okta and assigned him the attribute DATA_VIEWER. Our Okta Rule then zipped John right into an Okta group also called DATA_VIEWER, which we already had pushed to Snowflake as a Role. In Snowflake, we granted this role specific privileges to access data. Pretty cool, right? But wait, there’s still one issue: John is now given all the access he needed, but he still doesn’t have a Snowflake password. Therefore, our next objective is to enable Single Sign-On (SSO) for him, ensuring he can access data within Snowflake. Stay tuned and let’s get started.
Enabling SAML 2.0 in Okta
First, you will need to enable SAML 2.0 in Okta by checking the box next to SAML 2.0 in the Sign On tab from the Applications panel, as shown in the screenshot:
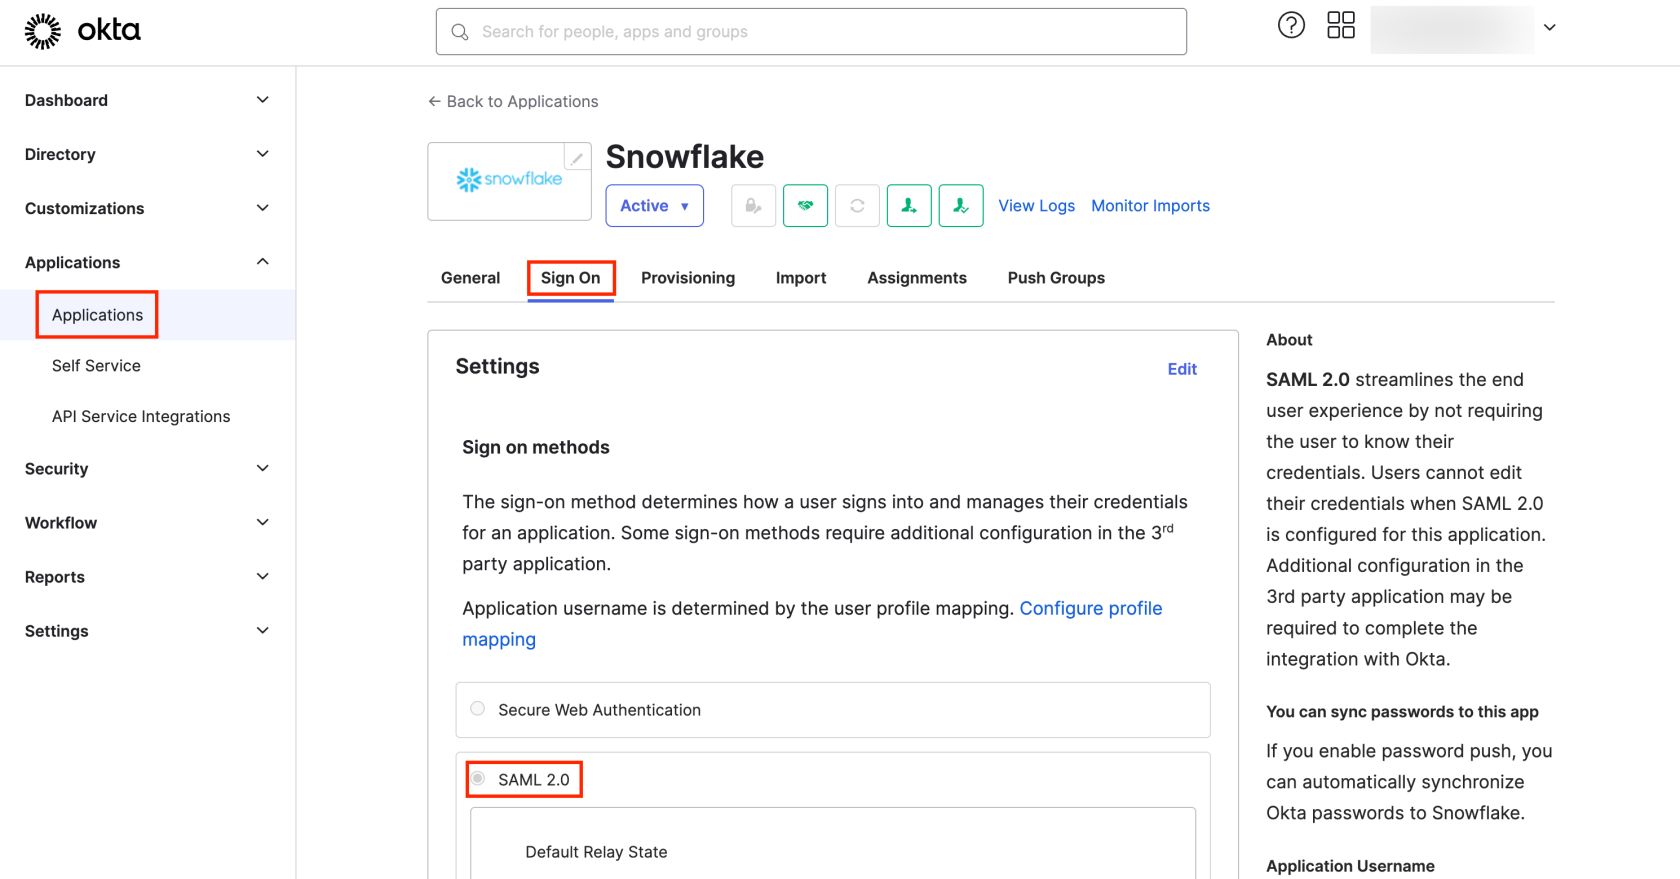
SAML 2.0 enables users to log into Snowflake without needing to remember their credentials. By enabling Okta’s password push, Okta’s passwords are synced automatically with Snowflake, facilitating passwordless access, which we are applying in this article. You can choose a username format for assigning Snowflake to users. If you select None, you’ll manually enter usernames for each assignment.
Creating a Security Integration
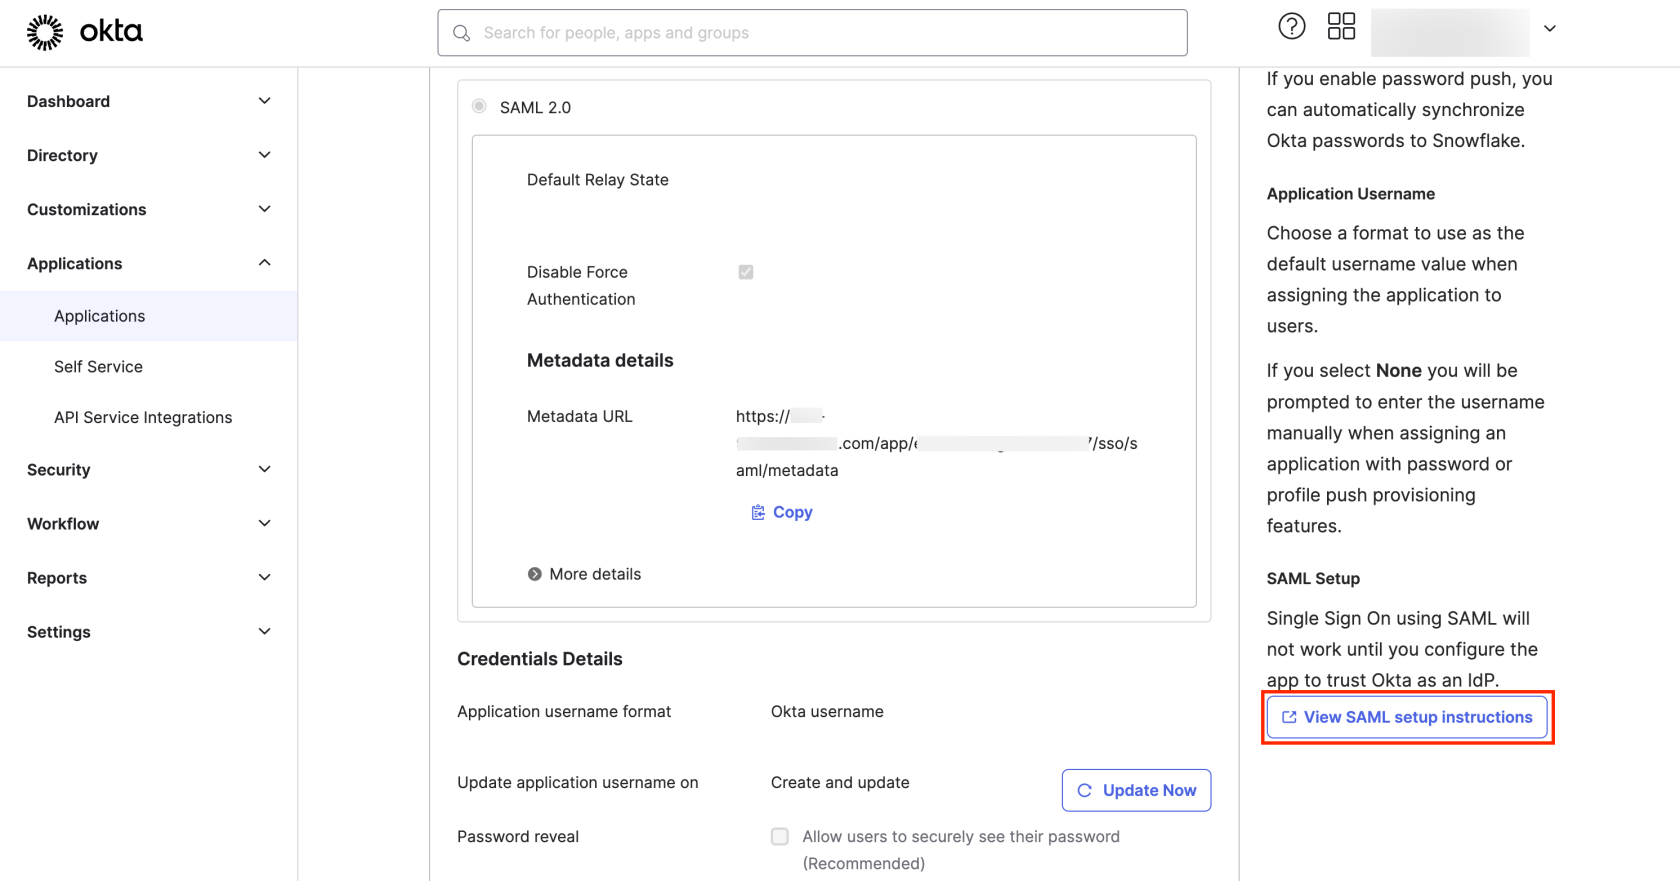
To set up your security integration, start by accessing the SAML2_ISSUER and SAML2_SSO_URL values. You’ll find these by clicking View SAML setup instruction as highlighted in the screenshot:
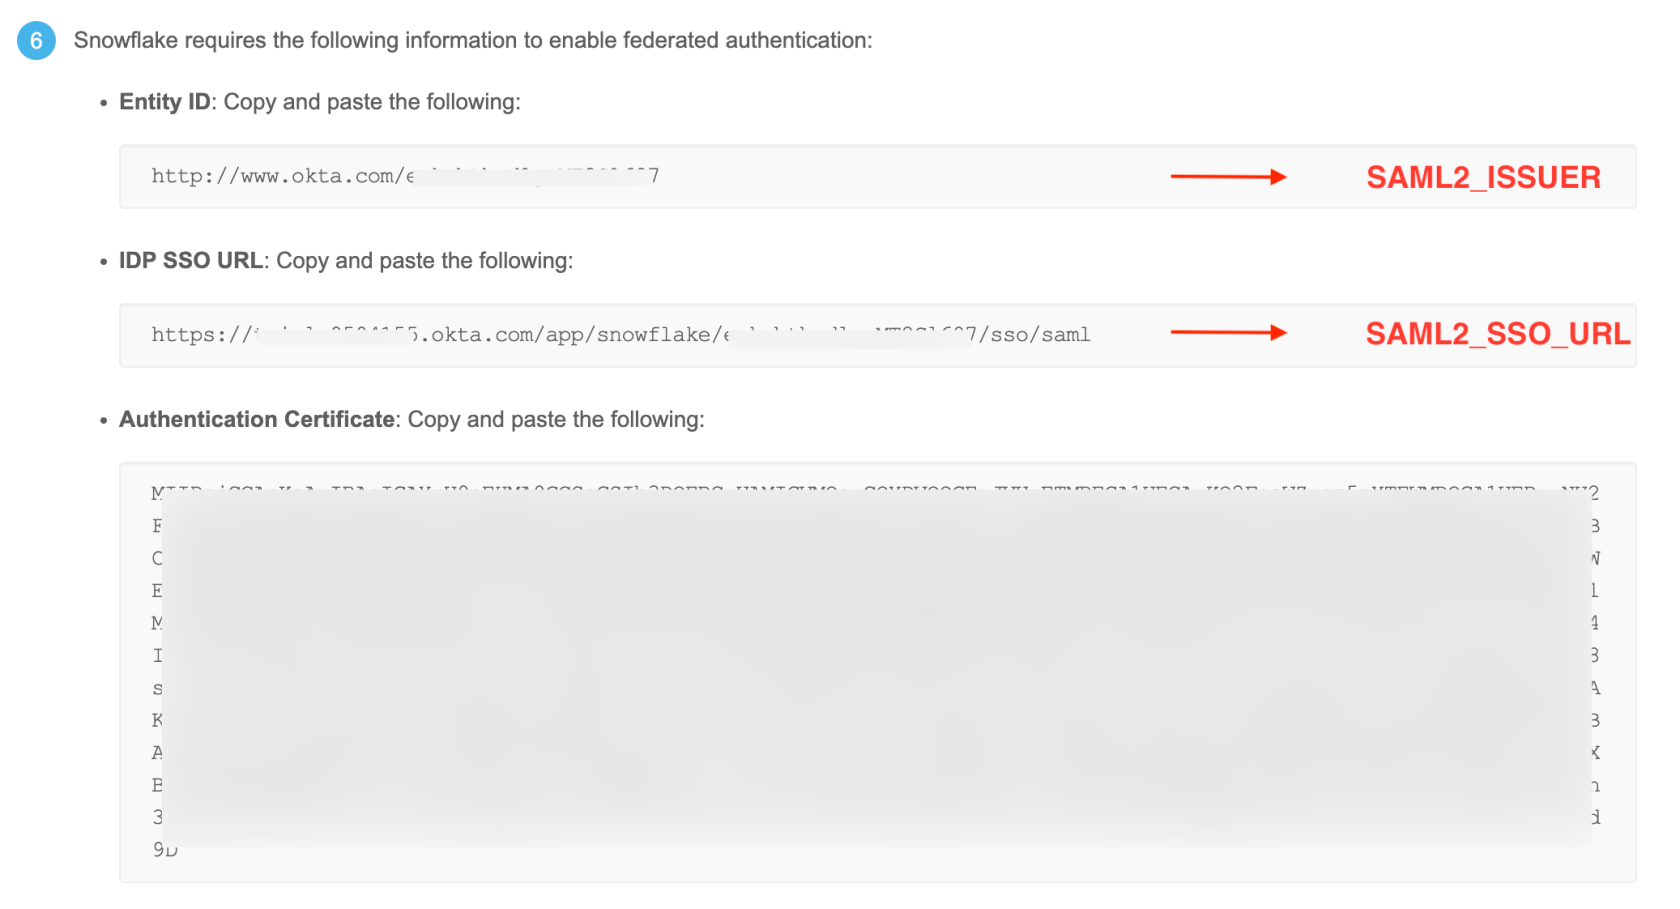
This action will open a new tab in your browser. Scroll down and look in section 6 for the fields labeled Entity ID and IDP SSO URL and copy them as you will need them to create the Security Integration later in Snowflake. The following screenshot shows the exact values you need to copy:
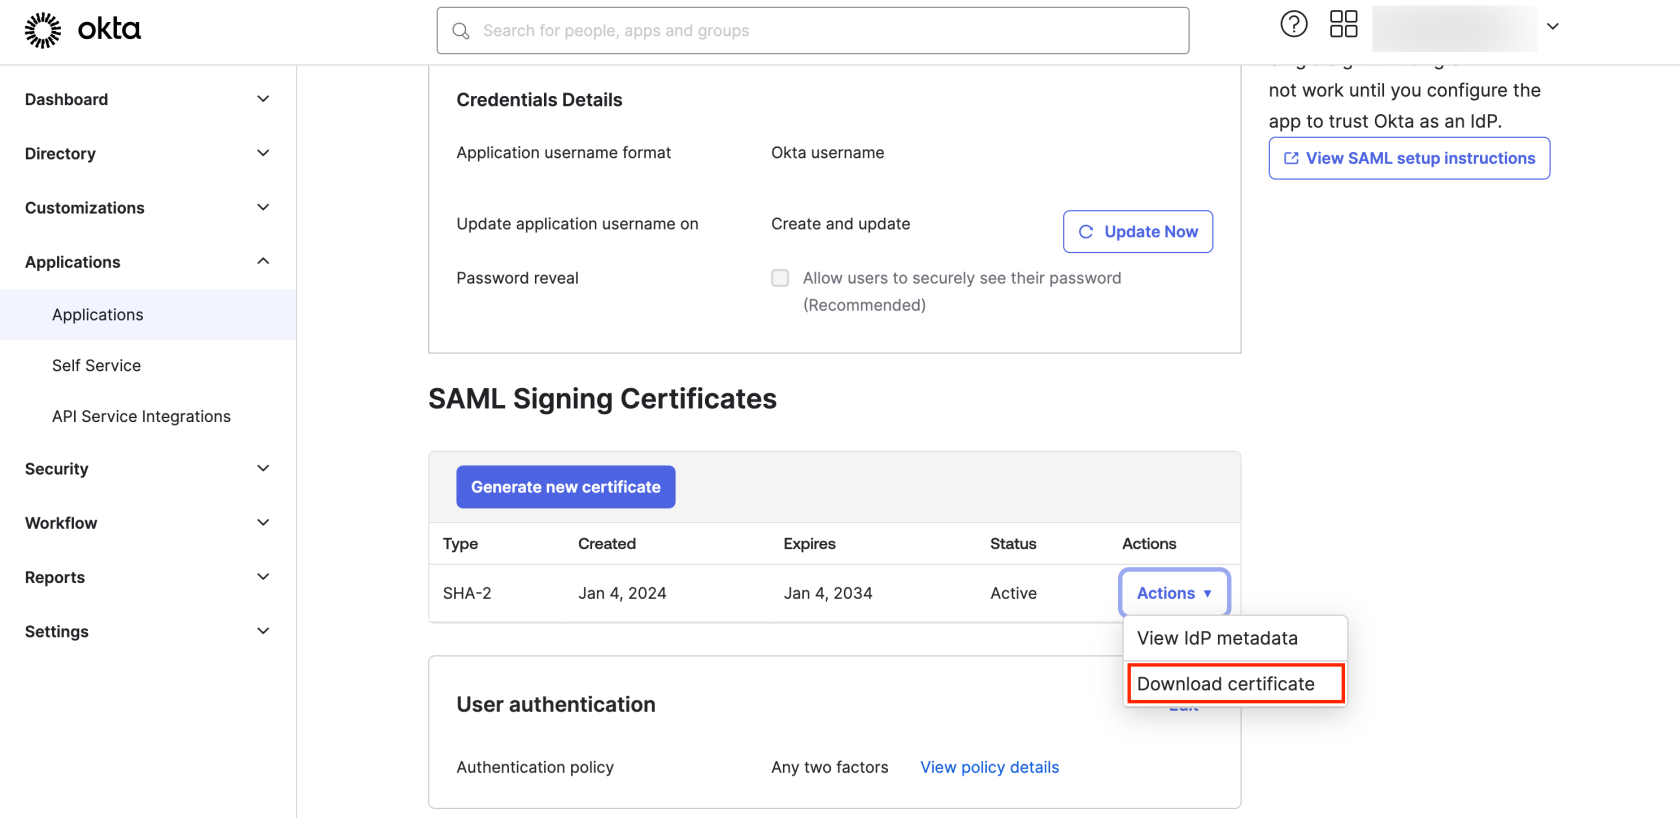
The next step involves obtaining the SAML2_X509_CERT. There are many ways of retrieving this certificate. We tested them out and some of them caused an Error 400 Bad Request with the message: Our apologies for the inconvenience. The requested you made couldn’t be completed.

To avoid this issue, download the certificate as shown in the screenshot, open it with your favourite text editor and copy the content found between —–BEGIN CERTIFICATE—– and —–END CERTIFICATE—–.
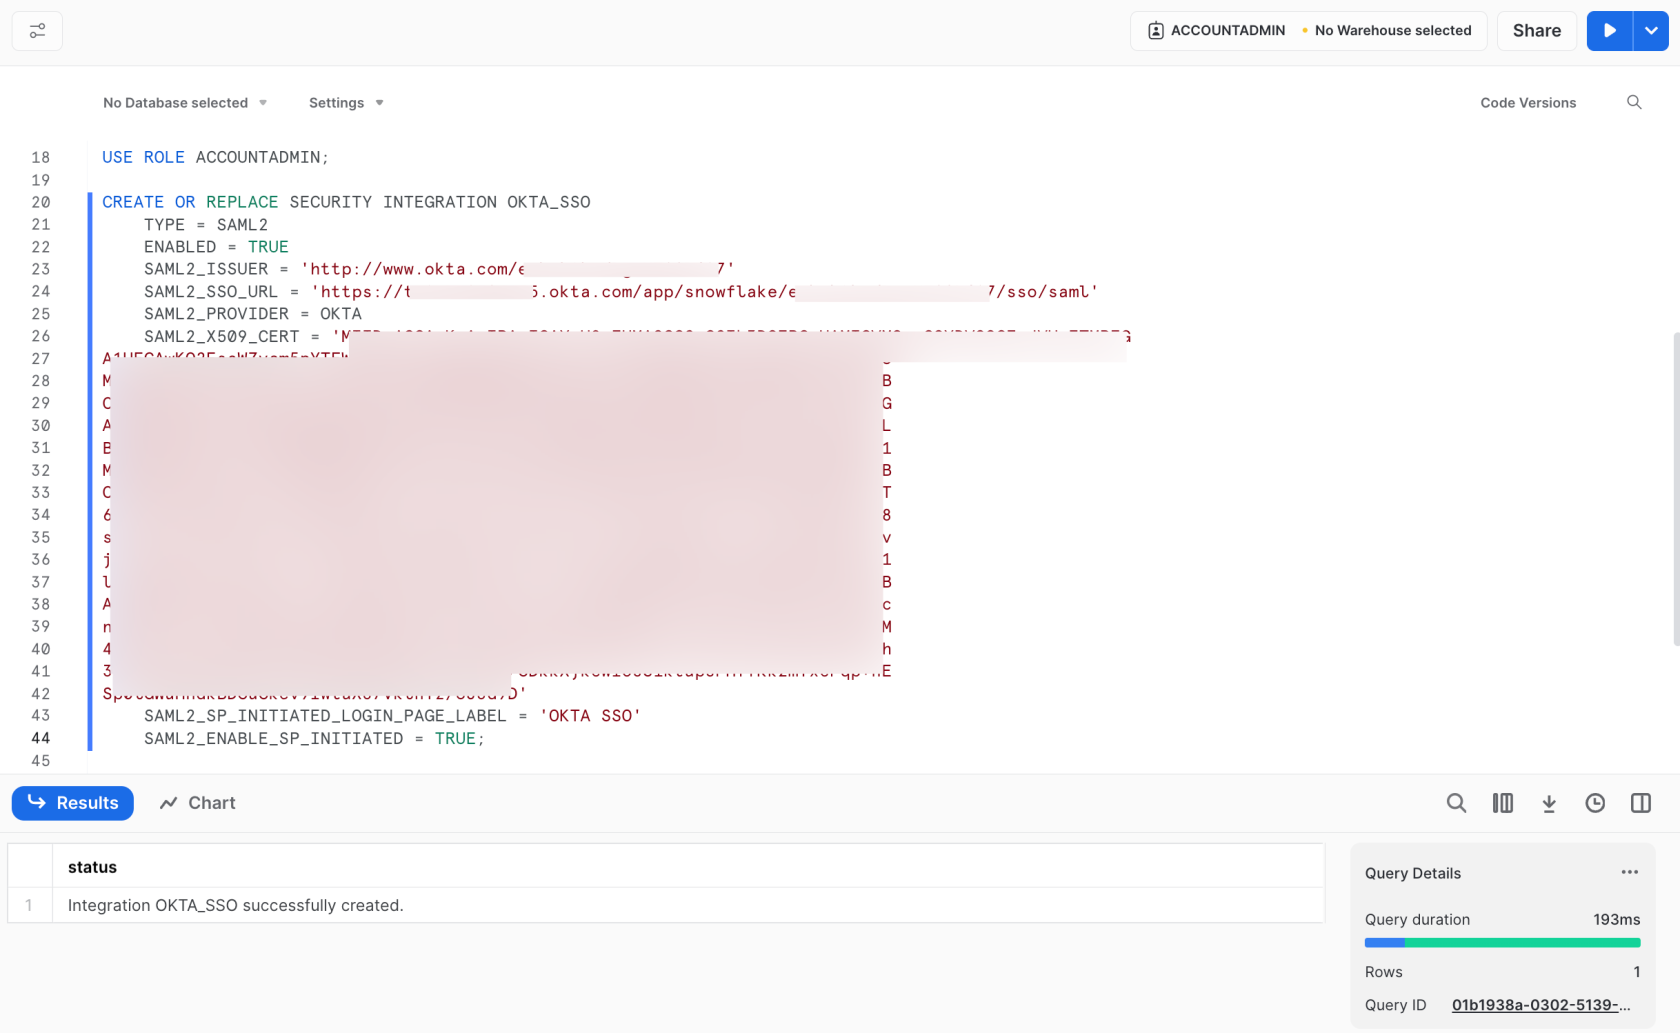
Once you have the three values, replace the place holders in the following SQL command to create the Security Integration:
USE ROLE ACCOUNTADMIN;

CREATE OR REPLACE SECURITY INTEGRATION OKTA_SSO
    TYPE = SAML2
    ENABLED = TRUE
    SAML2_ISSUER = '<YOUR_SAML2_ISSUER>'
    SAML2_SSO_URL = '<YOUR_SAML2_SSO_URL>'
    SAML2_PROVIDER = OKTA
    SAML2_X509_CERT = '<YOUR_SAML2_SSO_URL>'
    SAML2_SP_INITIATED_LOGIN_PAGE_LABEL = 'OKTA SSO'
    SAML2_ENABLE_SP_INITIATED = TRUE;
Next is a screenshot showing how the code could look like with the values filled in:
Altering the Security Integration
The Snowflake Organizations feature changes the format of your Snowflake URL. After this change, you’ll need to update your Security Integration settings by adding two new details:
- SAML2_SNOWFLAKE_ACS_URL: your Snowflake URL followed by /fed/login/.
- SAML2_SNOWFLAKE_ISSUER_URL: your Snowflake URL.
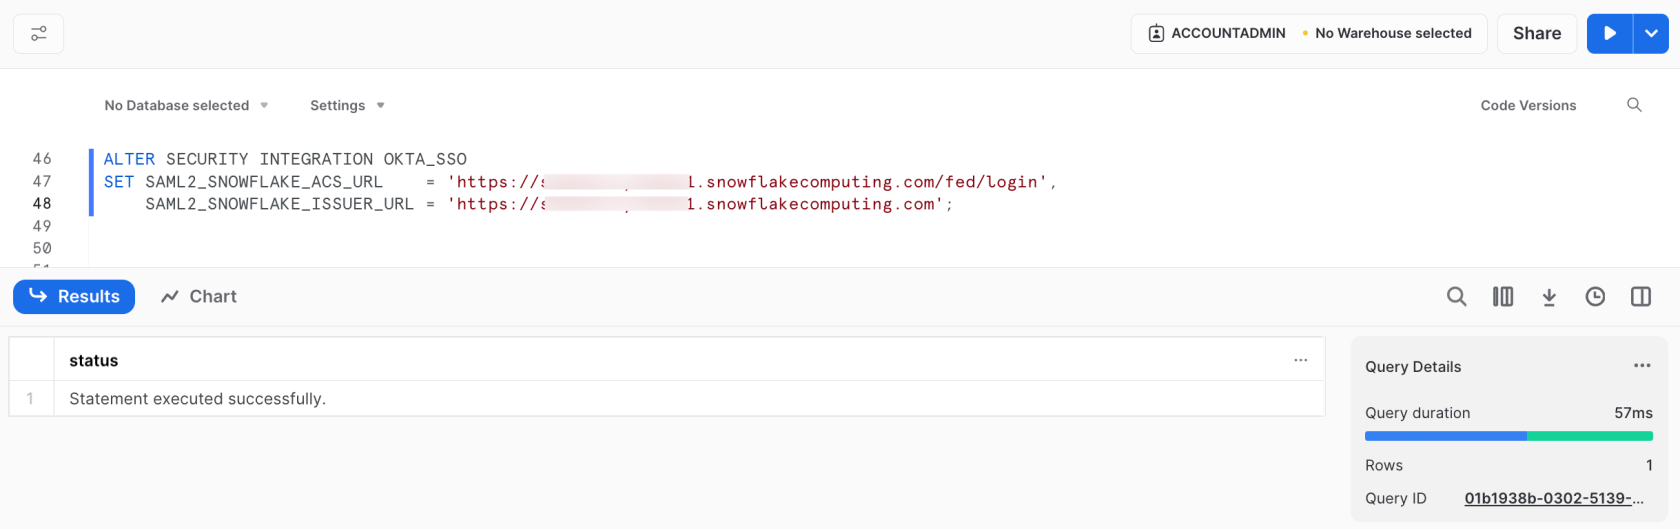
You can use the following SQL command to do these adjustments:
ALTER SECURITY INTEGRATION OKTA_SSO
SET SAML2_SNOWFLAKE_ACS_URL    = 'https://<your_subdomain>.snowflakecomputing.com/fed/login',
    SAML2_SNOWFLAKE_ISSUER_URL = 'https://<your_subdomain>.snowflakecomputing.com';
Next is a screenshot showing how the code could look like with the values filled in:
Once these adjustments are made, the Sign in using OKTA SSO button should appear on the Snowflake login page, indicating successful integration:
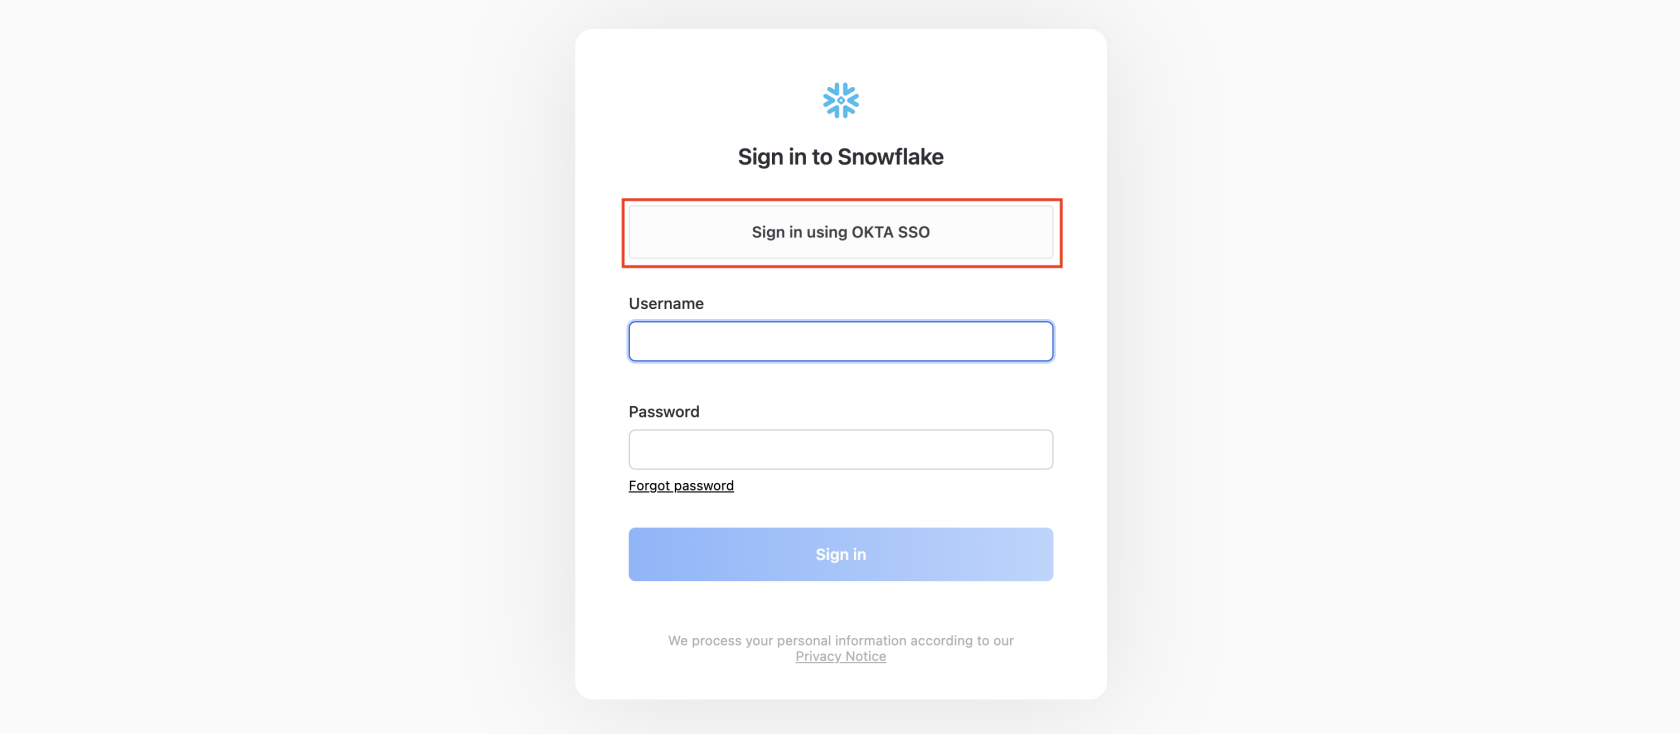
If a user has Okta Verify set up, they can directly log in; otherwise, they need to install the Okta Verify app and scan the QR code.
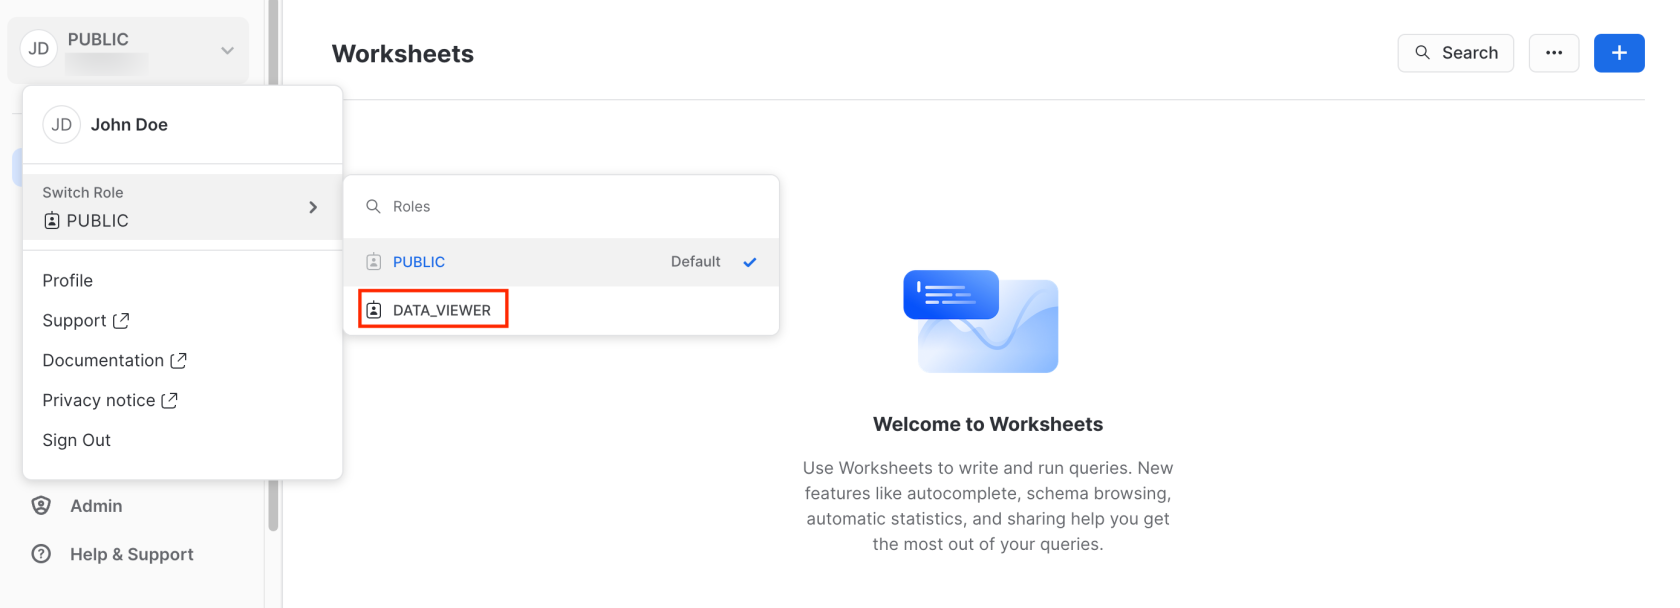
Once logged in, John Doe can access data with the DATA_VIEWER role simply by having the DATA_VIEWER attribute added to his profile, and this is possible without needing a Snowflake password:
Wrap Up
Our series showed how to manage users and roles in Snowflake via Okta. Using Okta, an admin can easily make immediate changes to user’s role(s) in Snowflake by updating their profile attributes. This is especially beneficial in large-scale environments with many users, roles or multiple Snowflake instances. An example is data mesh architectures, where users need access to various Snowflake accounts.
If managing through the UI becomes complex, automating with the Okta API can make operations smoother, reduce errors and save time. For assistance in implementing this approach in your organization, please feel free to contact us.