There are several ways to develop, debug and deploy serverless applications to Amazon Web Services (AWS). One of my favorite tools to achieve this locally is the AWS Toolkit for VSCode because it streamlines the application development process in a simple and pain-free manner. For example, users can develop and deploy an AWS Lambda Function that populates a Snowflake table via Snowpark all as a single package automatically (more on this in a later article). Gone are the days of having to develop applications in the AWS Console and having to upload .zip files containing the external libraries leveraged by your application. So, without further ado, let’s dive into the process of connecting VSCode to you AWS account!
Downloading the AWS Toolkit for VSCode
Prior to diving into AWS and selecting the appropriate connection method, let’s take care of an installation upfront in VSCode. In order to establish a connection to AWS using VSCode, you will have to install the AWS Toolkit for VSCode. You’ll find the directions for the installation outline below.

- In the Extensions menu search for AWS Toolkit, select the AWS Toolkit and click on Install.
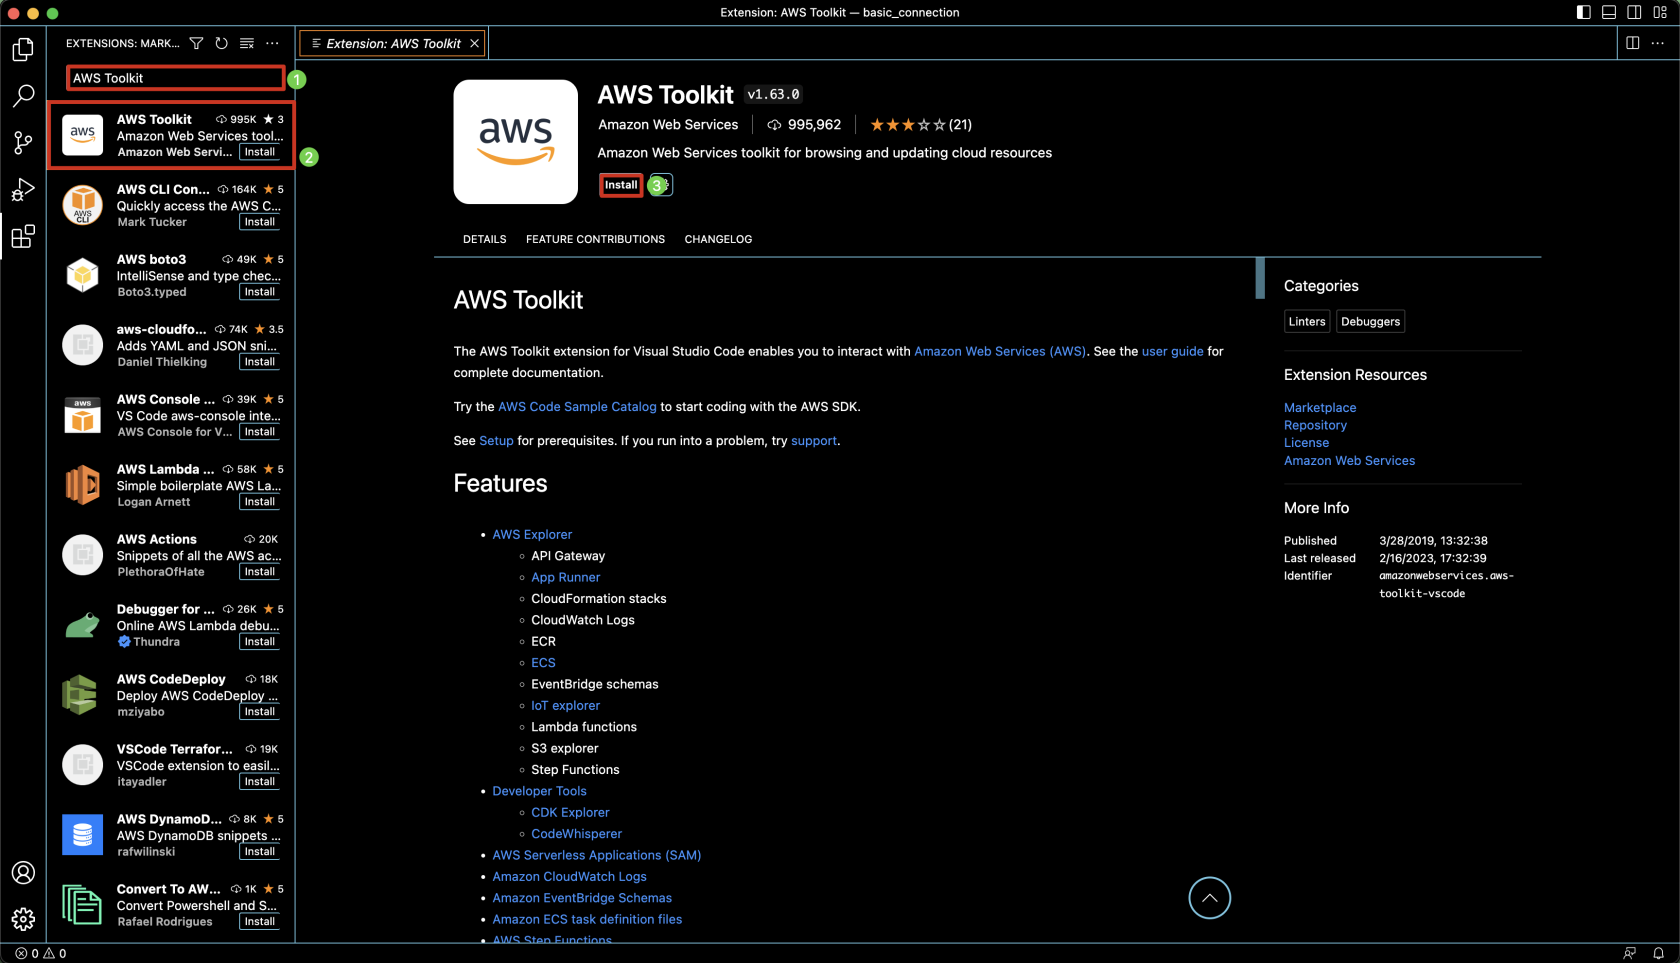
- The install should complete relatively quickly and once it is done navigate to the AWS icon on the left-side menu to open the AWS Toolkit.

Now that we have the AWS Toolkit for VSCode installed, let’s take a look at the two methodologies for establishing a connection between AWS and VSCode.
Inputting Your AWS Credentials into VSCode
There are two methods for establishing a connection between VSCode and your AWS Account. The first method establishes a connection using IAM Identity Center credentials (the successor to AWS Single Sign-On). Enabling the IAM Identity Center requires access to the root user account, and the account must be part of an AWS Organization. While this method does provide enhanced security, I will be focusing on the second method of connecting for the sake of simplicity in this article. However, you can read more about getting started with the IAM Identity Center here. The second method requires AWS access keys to establish the connection and is outlined in-depth below.
Setting Up Your Credentials with AWS Access Keys
Creating an IAM User and IAM User Group
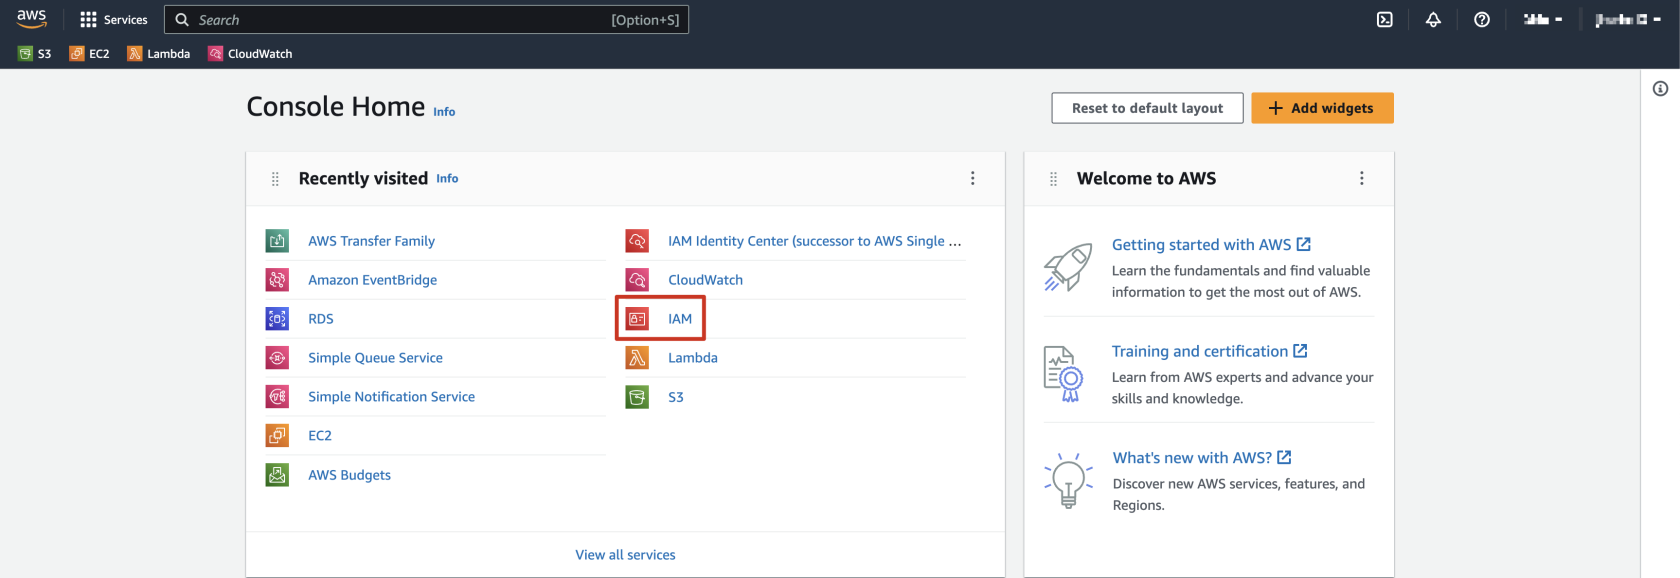
- Log into your AWS Account via the AWS Console and navigate to the IAM Console.
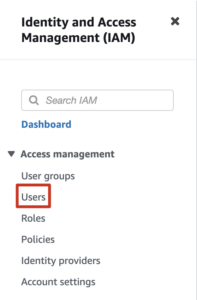
- Create an IAM User by selecting Add users.

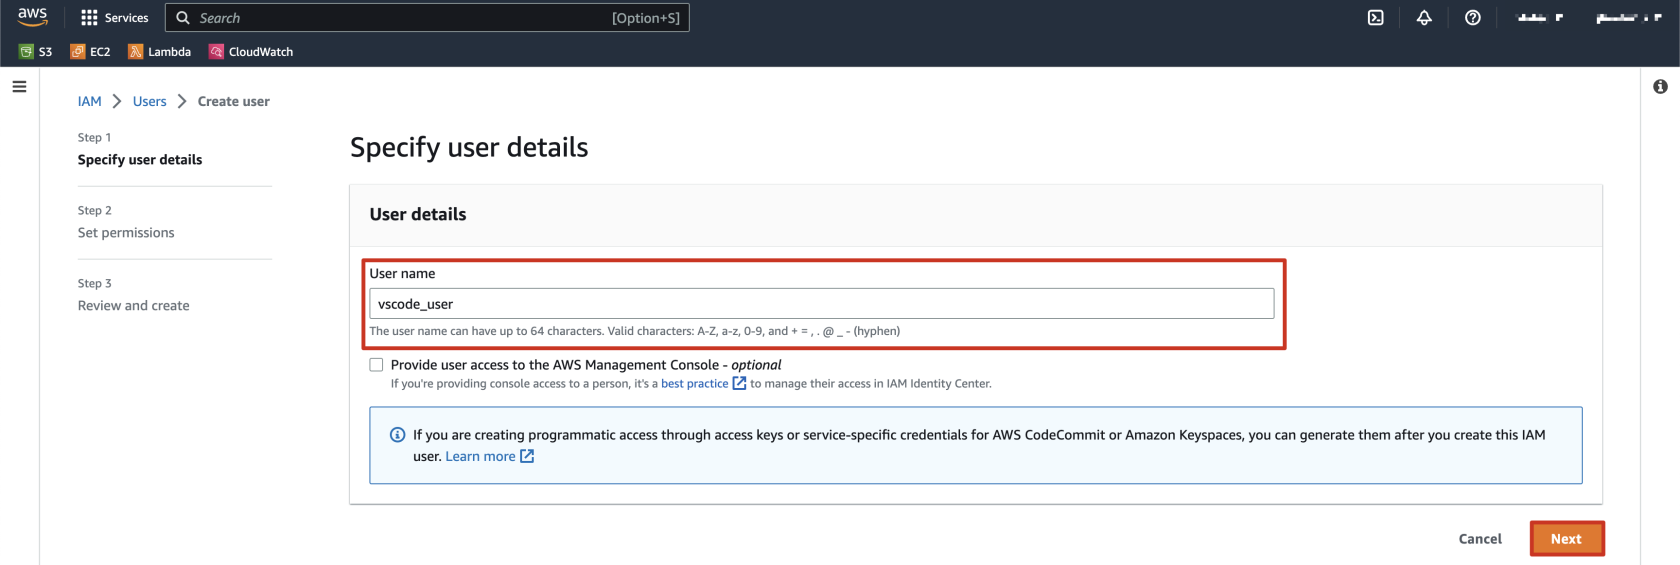
- Assign a descriptive username and click Next.
NOTE: Since this IAM User will only be developing via VSCode you do not have to grant them access to the AWS Management Console.
- Select or create an IAM User Group with a descriptive name to attach the appropriate IAM Policies to the IAM User. Once you have selected the IAM User Group, click Next.
NOTE: As a security best practice be sure to grant the least amount of privileges necessary for a group / user to complete their necessary tasks. For this example I will be granting full access to AWS Lambda for this user group.
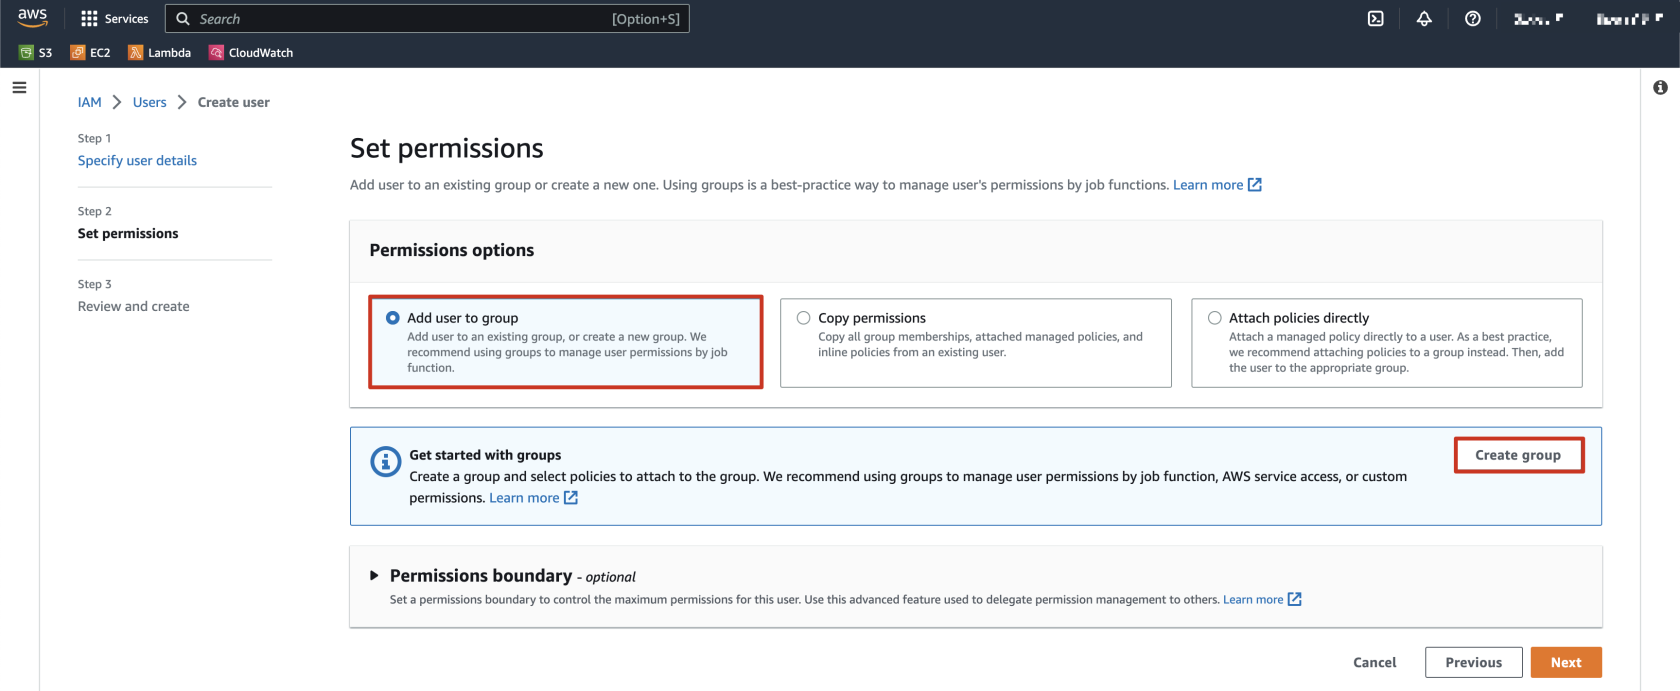
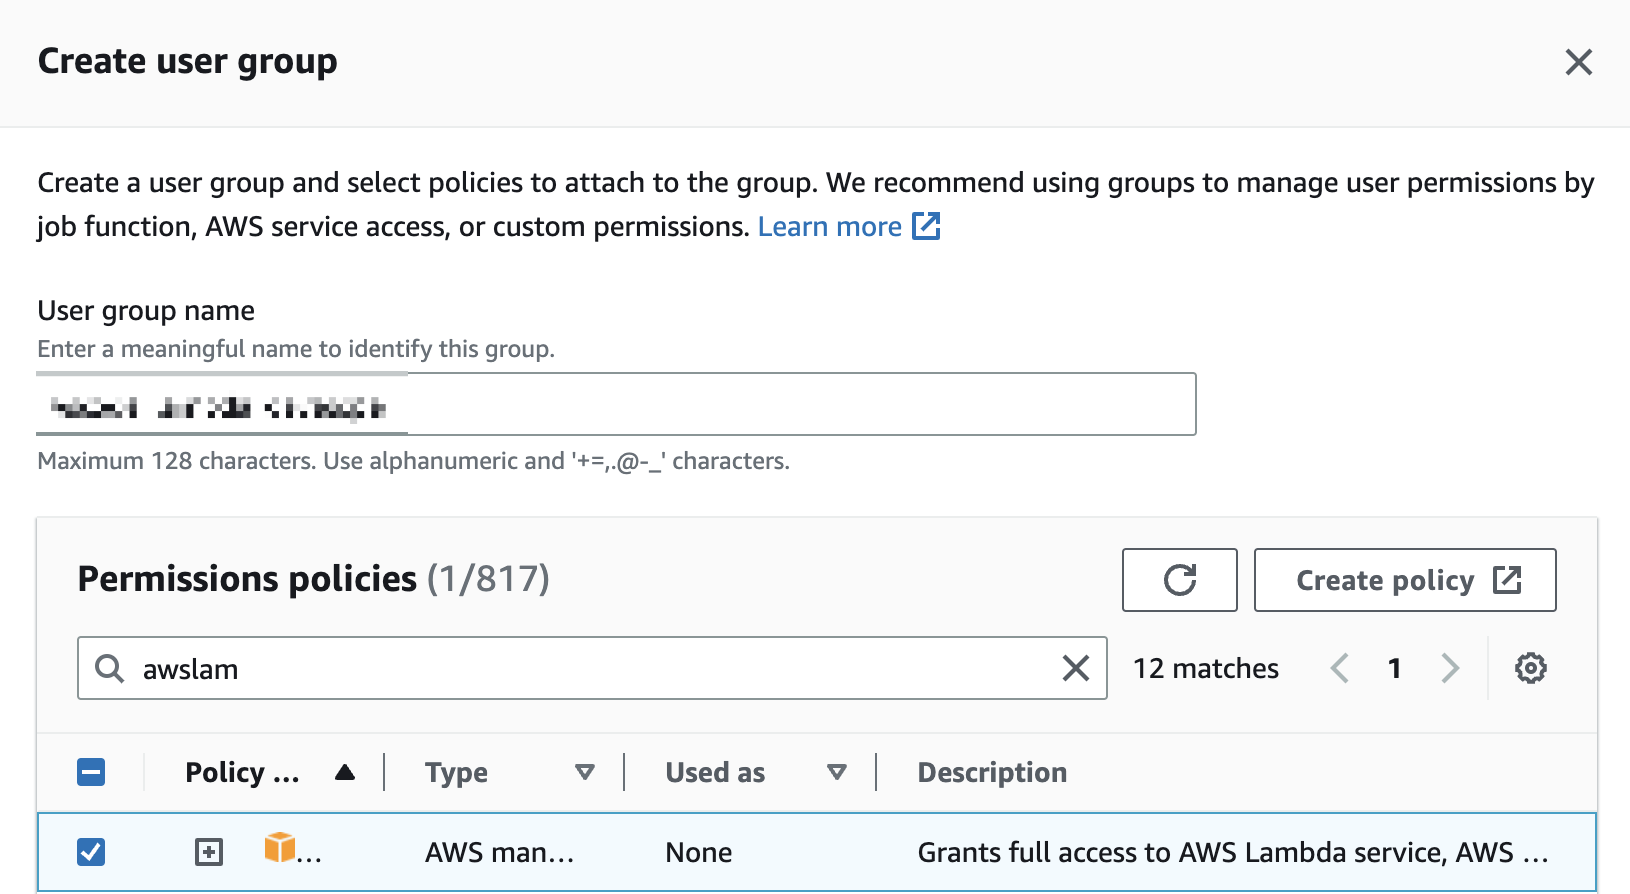
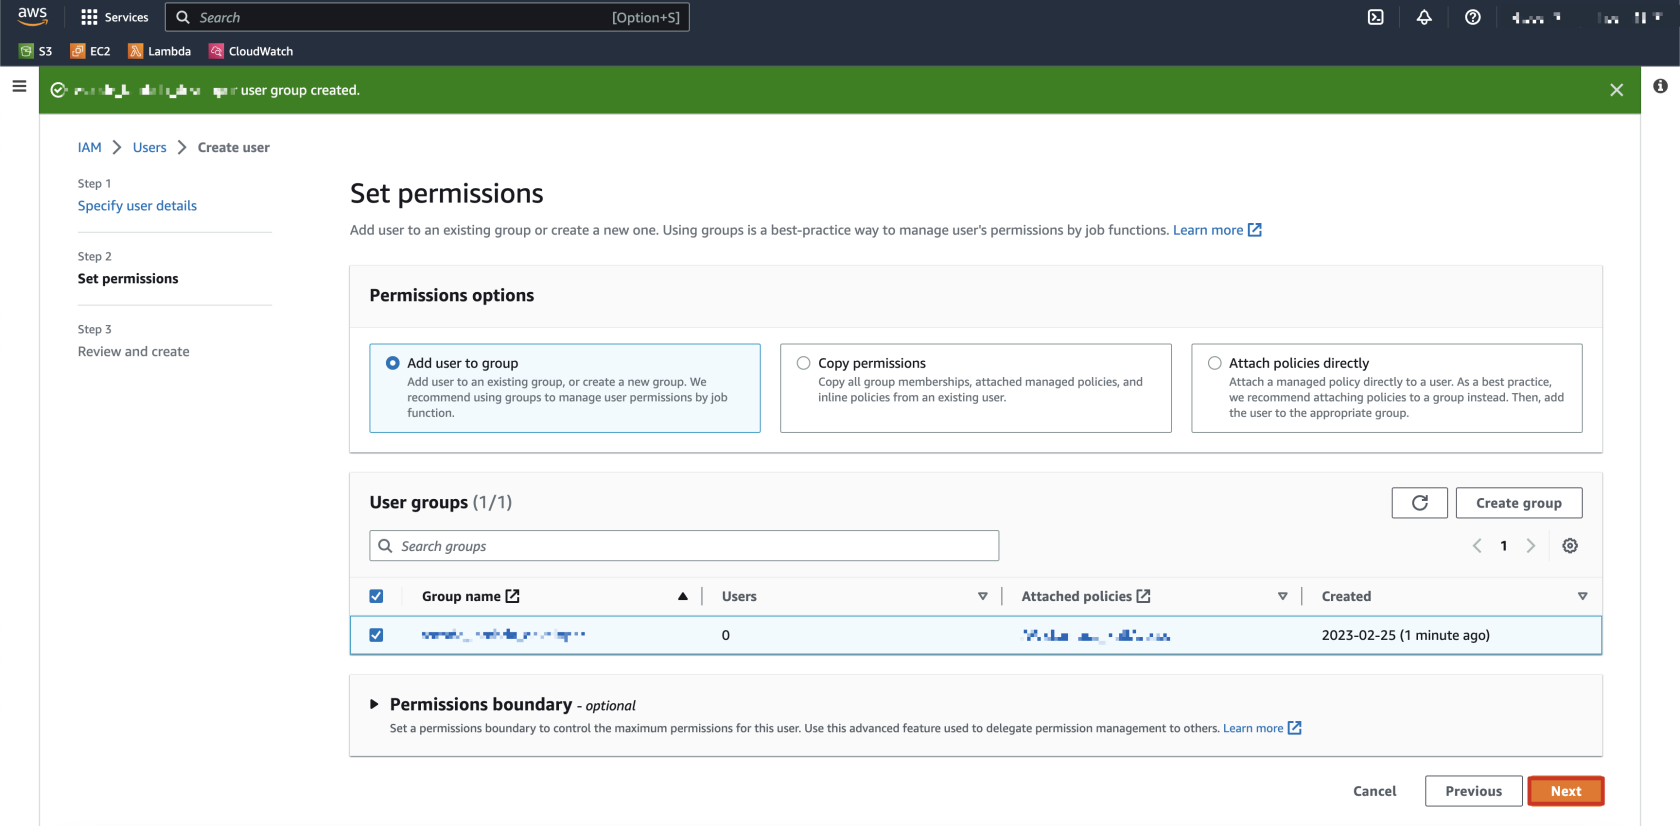
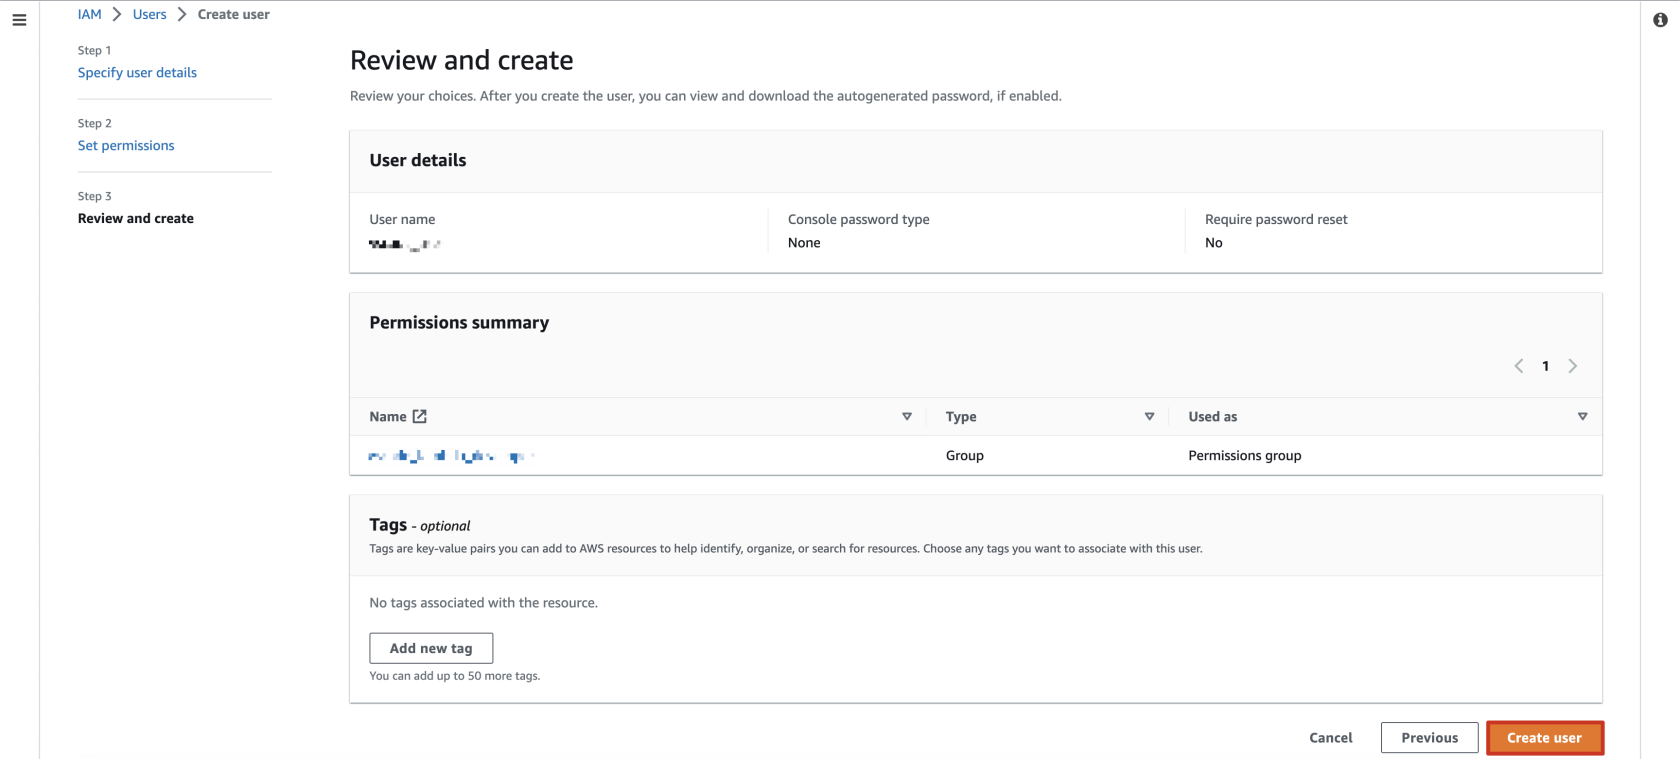
- Once you have configured the permissions for the new user, review the user’s configuration and then click Create User.
Create an AWS Access Key for Your IAM User
- Back on the IAM Users menu, select the user that you just created and navigate to the Security credentials tab. Inside of this tab, scroll down select Create Access Key.


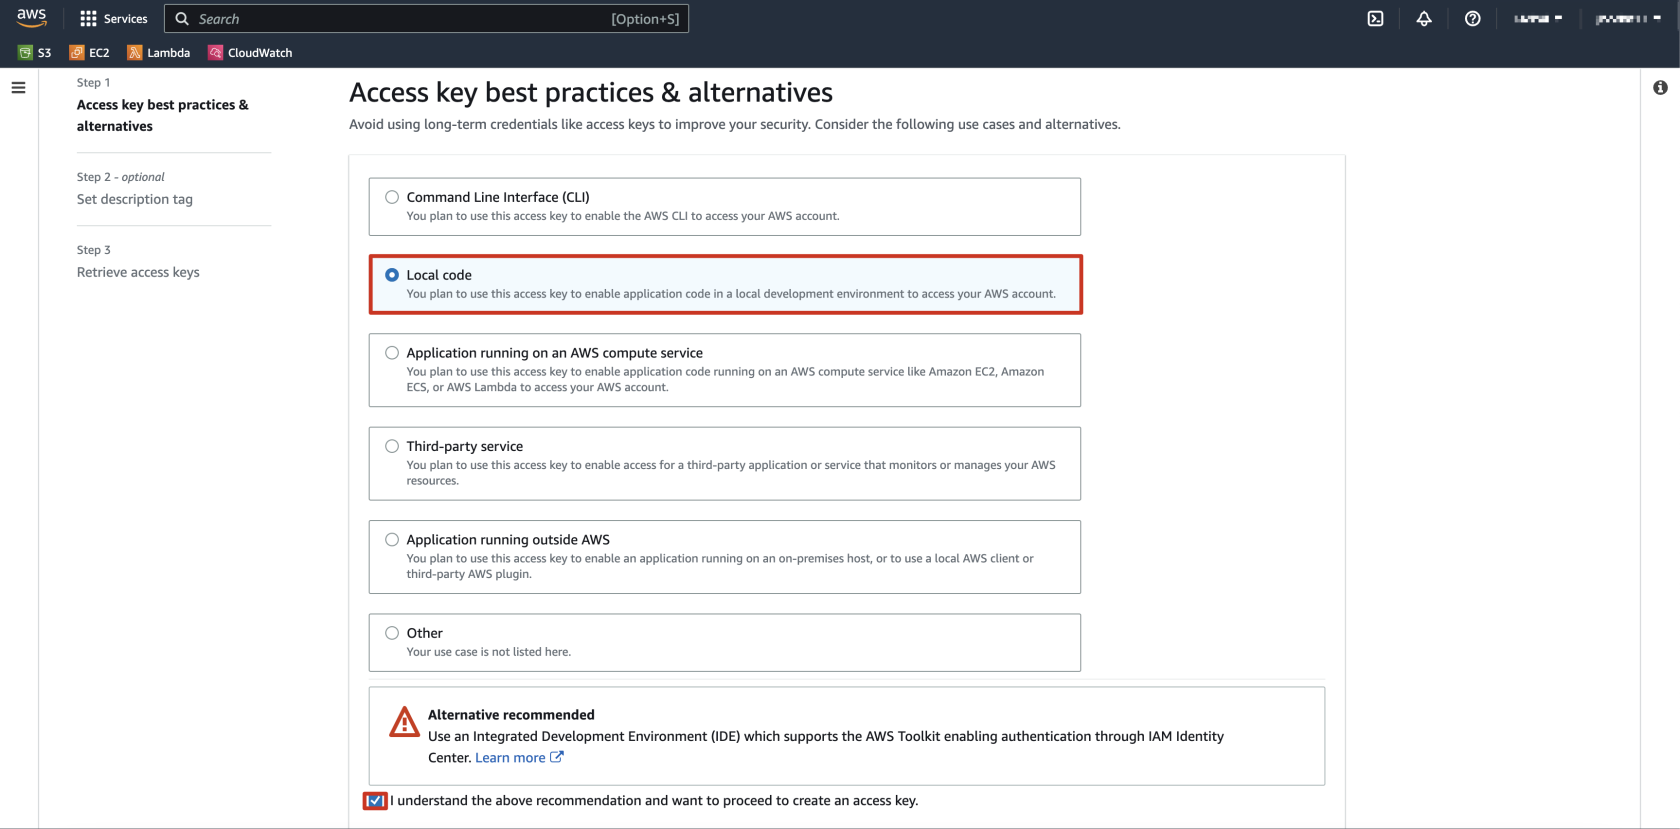
- The AWS Access Key for this user will be used to develop and deploy AWS Lambda applications via VSCode, so the appropriate response is Local Code. AWS will recommend using the IAM Identity Center instead, so check the box stating you understand the recommendations and click Next to proceed.
- Input a descriptive tag for the purpose of this AWS Access Key and select Create access key.

- Make a note of your Access key and Secret access key to input into VSCode.
NOTE: You must write down your secret key at this stage as it is impossible to retrieve it once you click Done.
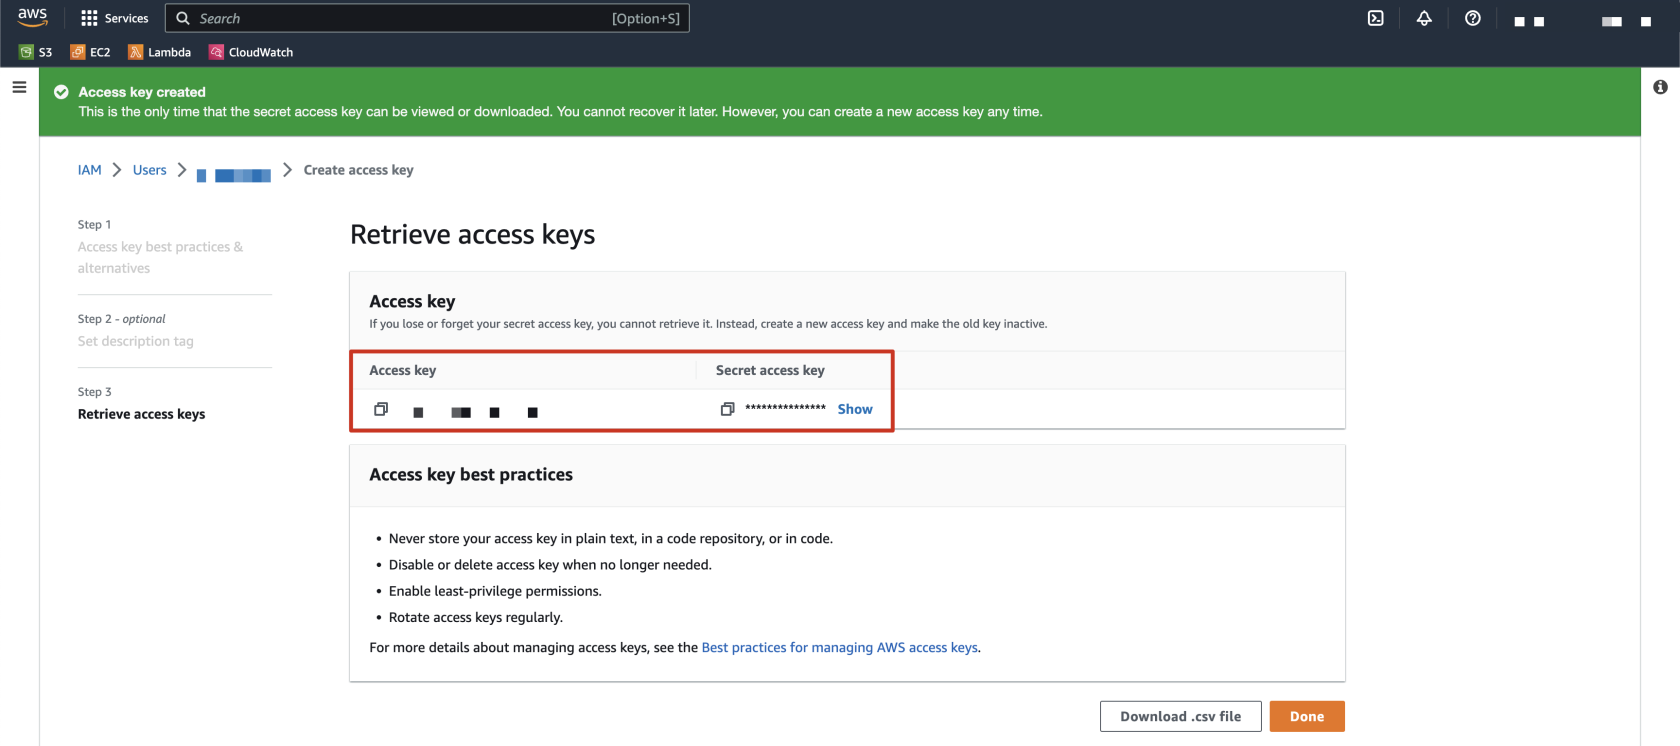
Now that you have created the IAM User and Access Key credentials in the AWS Management Console, it is time to establish a connection to VSCode.
Inputting Your AWS Credentials and Establishing a Connection
- Open the Command Palette and type in AWS: Create Credentials Profile.
NOTE: The first established connection between VSCode and AWS is given the name Default. Each subsequent connection will have an additional step of creating a unique name for that connection.

- Input the AWS Access Key you created earlier.

- Input the AWS Secret Key you created earlier.

- Upon inputting your AWS Access Key and Secret Key, you will have established a connection to your AWS Instance. This can be verified by checking the left-side menu for the confirmation text, Connected with profile:default.
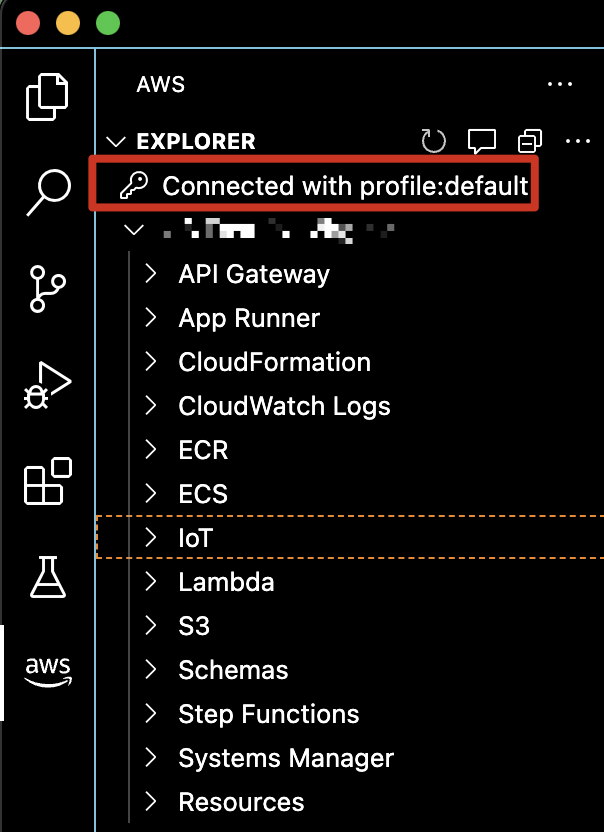
And there you have it! You have established a connection between VSCode and your AWS Account by leveraging the AWS Toolkit. Now before you can start developing code locally to be deployed to AWS, you must install Docker. This is a relatively painless process that is outlined below.
Installing Docker
To use the AWS Toolkit in VSCode you have to have Docker installed. The process below outlines how to install Docker.
Navigate to the Extensions tab on the left-side pane and input Docker.
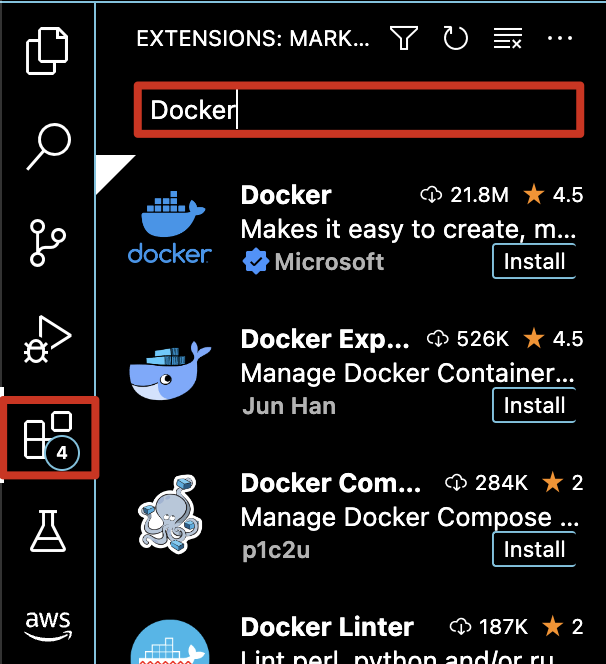
Select the first option and click Install.

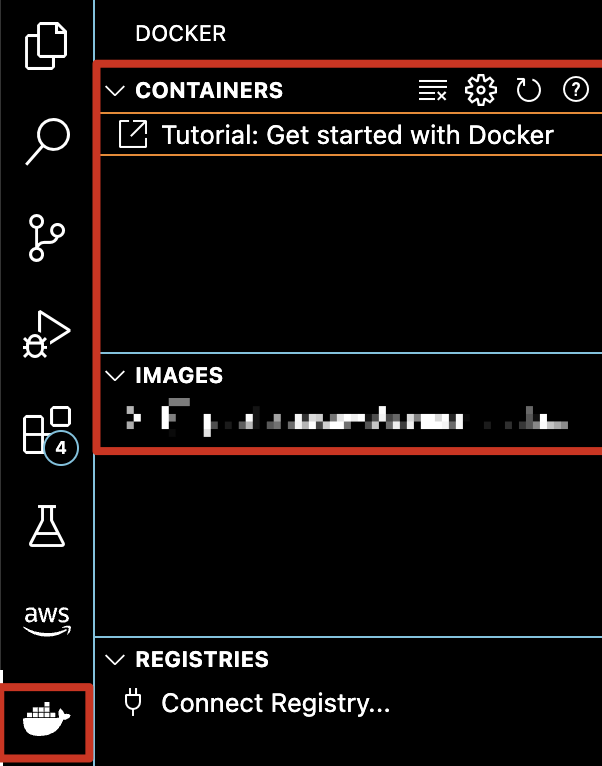
Once the extension is installed navigate to the Docker tab on the left-side pane. Your Docker extension should look something like the image below.
NOTE: If the Docker application is not installed on your local machine, then you will be prompted to do so in the bottom-right corner.
Now that you have Docker installed and you have established a connection to AWS, it is time to start developing code locally to be deployed to AWS. In my next article, I’ll use this connection to develop and deploy an application that establishes a connection to Snowflake via Snowpark. If this is a solution that you’d like to learn more about, or believe your business could benefit from, then please feel free to reach out to us at InterWorks here.

