Tableau Deep Dives are a loose collection of mini-series designed to give you an in-depth look into various features of Tableau Software.
In the first article on the Deep Dive on Dates, I introduced some of the basic concepts of dates. Specifically, we covered discrete vs. continuous dates, dart parts vs. date values and some basic date functions (DATEPART, YEAR, MONTH and DAY). In this article, we’ll cover more ways to work with dates.
Most of the time, dates will import into Tableau flawlessly and be ready to go as soon as you connect to a data source. Sometimes though, they won’t. There are a couple of options. The first option is to correct the issue in the data source either by changing how the date field formats or creating a summary table to fix the issue there. The second option is to fix the date format within Tableau.
And that’s where the date parse function proves its worth.
DATEPARSE()
Date parse takes a string and converts it to a date. The function allows for the user to specify which characters of the string are assigned the different date part. Let’s assume that our data source has a date field that looks like this:
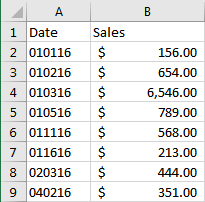
The first date represents January 1, 2016. This date field will not come in as a date data type in Tableau because it looks too much like an integer. To convert this to a date using DATEPARSE, we have to make sure it is the string data type and a dimension.
In formatting the field for DATEPARSE, remember to use the following designations on how Tableau is going to recode your data into a date field:
d day
M month
y year
H hour
m minute
s second (lower case s)
S fractional seconds (upper case S)
The biggest mistake with this function is to use a lower case “m” for month, which is actually the designation for minutes. For our date above, here’s the following formula to convert it to an actual date field:
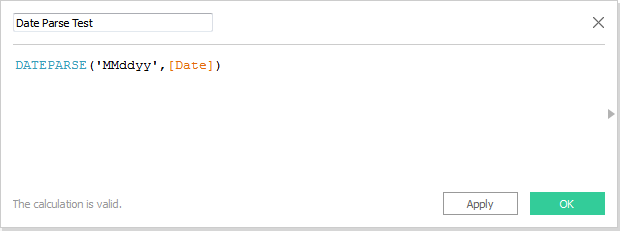
By default, Tableau is going to create a date & time field with the time element set to 12:00:00 AM if it’s not specified in your calculation. You can change the data type in the data pane to just be date or you can wrap the calculation above with the DATE() function, which hard codes the new field as the date data type.
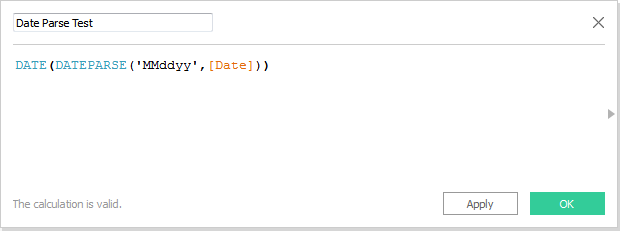
If you have separate fields that represent month or year, then concatenate them as a string field using the STR() function and then use DATEPARSE.
DATENAME()
We covered the DATEPART function in article #1, which returns a designated part of the date as an integer. Think of DATENAME as the opposite. It returns a part of the date as a string. Consider the following calculation:
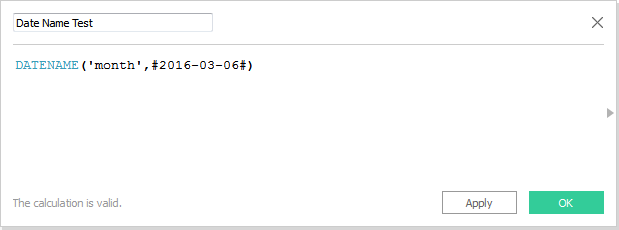
This would return the following result of ‘March’. DATENAME has real world practicality if you’re using it in combination with a parameter to change the level of detail of your view.
Let’s say I wanted to return the weekday name of a particular date in my data source. DATENAME to the rescue!
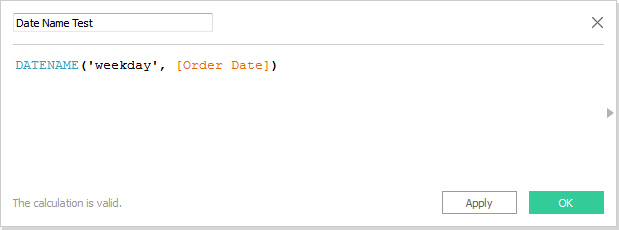
Here’s how it looks in a view:
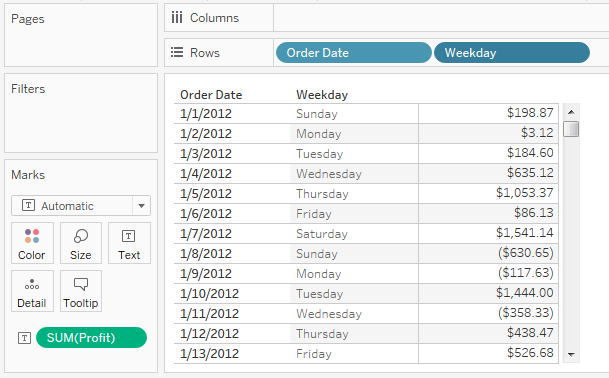
You can accomplish the same result as the above by selecting discrete weekday for your date field, but knowing the DATENAME function will allow you to use in combination with more complex logic to create different types of calculations.
Let’s assume we want to create a group within our weekdays that combines Saturday and Sunday into a group of Weekend. Notice that when you right-click on a date field in the data pane, you do not have the option of creating groups off of different date parts. DATENAME gives us an easy solution:
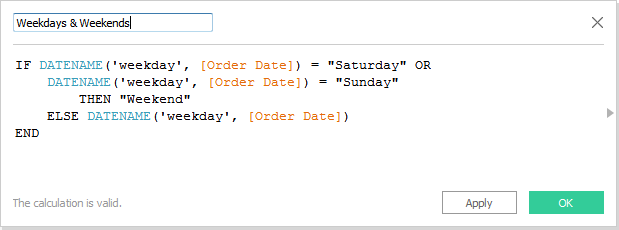
This will group our data into Monday, Tuesday, Wednesday, Thursday, Friday and the weekend.
What’s Next?
In our next article, we’ll examine the DATETRUNC, DATEADD and DATEDIFF functions. As always, we’ll put together some real world use cases so you can see how they can be used beyond just a technical description of the function. Until then, let me know if you have any questions or thoughts in the comments section below.

