Tableau Deep Dives are a loose collection of mini-series designed to give you an in-depth look into various features of Tableau Software.
In this article, we’re going to go into detail on all of the different properties in the Create Parameter window.
Parameter Properties
The Create Parameter window looks like this:
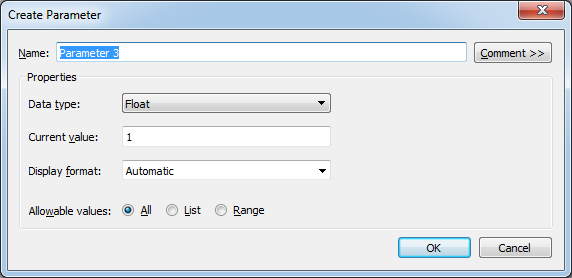
Let’s explore each of these parameter properties:
Name
The name of your parameter. This is how it will appear throughout the Tableau interface and within your calculated fields (purple). As always, name it something that will make it easy to identify. As parameters can be re-used, try not to make the name too specific to your current use. You might find that you can use the same parameter over and over again.
Comment
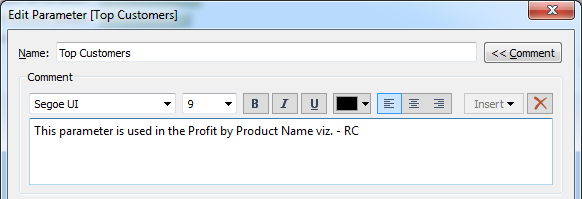
Clicking on the button at the end of the Name input field opens up a text area with formatting options where you can add an optional comment. You can add comments to document what your parameter is doing, etc. I recommend this if you have multiple people accessing the same workbooks or if your parameter is being used in multiple worksheets.
Data Type
There are six different data types: float, integer, string, Boolean, date and date & time. For Boolean, you can change the aliases for these values. For instance, if you’re testing profitability, TRUE might read Profitable and FALSE might read Not Profitable.

Current Value
This value is what will be used as the default value when the visualization is loaded.
Display Format
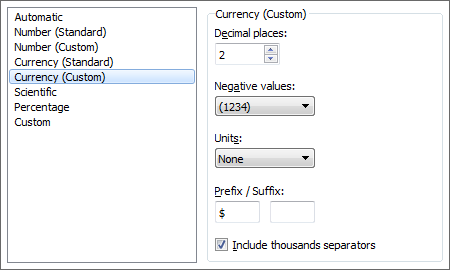
You can format your parameter to display any of the standard formatting types, i.e. Standard Currency, Scientific, etc. when appropriate for the data type. I recommend mirroring the display format that is present in your view.
Allowable Values
There are three options here: all, list or range. These options are not available for Boolean naturally. The All radio button is easy. It allows the report consumer to enter any value into the parameter control. The input will ignore anything entered that does not correspond to the selected data type.
The List option is a list that you can define. You can even separately define the aliases for this list. For instance, let’s say I want use three different values of 1, 2 and 3, but I want the user to see a list of breakfast choices. The Value must correlate to the data type, but the Display As can be anything.
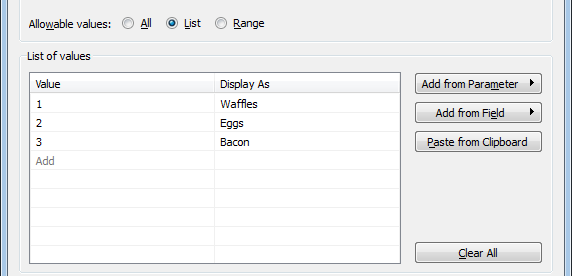
You can copy values from another source by using the Paste from Clipboard button to the right of your list.
The Range option is available for float, integer, date and date & time. Imagine your parameter control as a number line. Range allows you to define the starting point of your line, the end point and the increment in between each notch on that line.
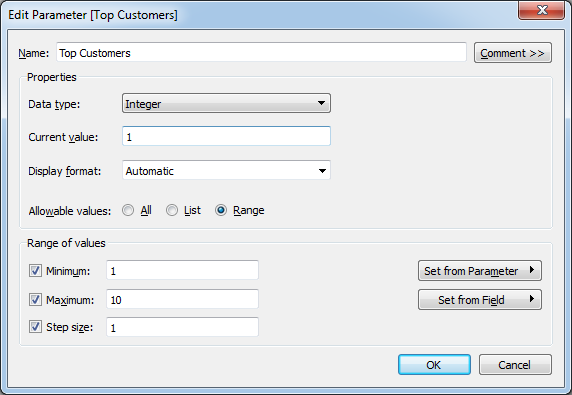
You can import these values from another parameter using the Set from Parameter button.
Set/Add from Field
The last option is the Add from Field (also known as Set from Field depending on your selected parameter properties). You can use this for either the List or Range option for Allowable Values. For instance, if you wanted to populate your list with all of the values in the Product Category dimension, you can select that field with this button to bring over those values.
Remember, parameters are static. The current values of your field will populate your parameter. Even if the values in that field change inside your data source, your parameter will not.
These options give you a great deal of control in how you build your parameter.
What’s Next?
Now that we’ve got all the foundational knowledge on when and how to use a parameter, let’s put all of this into practice. In the following articles, we’ll use parameters in filters, calculated fields, histograms and reference lines.
For the time being, let me know if you have any thoughts or questions on anything we’ve covered today. Looking forward to hearing from you!

