
There has been a lot of movement in and around Alteryx over the past couple of years. In the past, the Alteryx universe was pretty much limited to Designer (desktop) and Gallery or Server. Designer on desktop is still the core product of Alteryx (which is, for me, the Swiss army knife of data wrangling.) However, Alteryx has more recently been acquiring companies left and right, and developed/rebranded these products to become part of the Alteryx ecosystem.
One of the bigger acquisitions and rebrands has been Trifacta, which Alteryx quickly rebranded as Alteryx Designer Cloud powered by Trifacta. You can read more about my first impressions in this blog over here. The main point from that first impression assessment was that this product didn’t look or feel like Alteryx Designer in the slightest. The interface was quite different and you didn’t have tools that you connect from input to output like Alteryx Designer. Instead, you had recipes to transform your data, where individual recipe steps are the equivalent (more or less) of tools in Alteryx Designer.
In addition to the acquisition and rebranding of Trifacta, some of the other additions to the Alteryx ecosystem are Auto Insights and Machine Learning. These new cloud additions that Alteryx have added in recent years are still pretty much stand alone tools. But now, together with Designer Cloud, Alteryx has ventured into combining it all (and adding some extras) to create the Alteryx Cloud Platform, and I’m lucky enough to have access to the early preview.
Alteryx Designer Platform – Landing Page
When landing on the new Alteryx Cloud Platform experience, you can immediately see it is still a preview. There is nothing on the overview page apart from some “Get Started” info. At the top of the screen, we see menu options that refer to elements that where available in Trifacta, such as Plans, Data, Connections and Schedules. I have covered these in the previous blog, but just a quick recap:
Plans are a way to orchestrate flows, Trifacta’s equivalent of a workflow, so you can make flows run in a series or parallel, and make some flows depend on the outcomes of other flows. Then, in the “Schedules” module, you can schedule those plans to run at certain times and intervals, so they can be used together to automate data streams. “Connections” is where you can set up connections to sources of data, such as (cloud) databases and applications, which in turn you can use to set up data sources in the Data view.
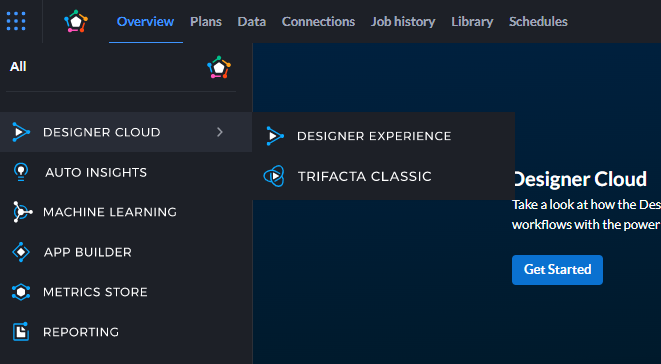
However, the most interesting button (after adding some data), is the “Menu” button on the left hand side. This opens up the different tools Alteryx is now starting to offer in the Cloud Platform. This includes Auto Insights, Machine Learning and Designer Cloud in the new Designer UI skin or in the Trifacta UI, plus new tools like Metric Store and App Builder.
Moving between tools is not as seamless as it looks initially, but that is to be expected in an early preview. The interface changes slightly between tools and options appear or disappear. For Auto Insights, it even asks me to login again. Also, Designer Cloud comes in either the Trifacta or the new Designer flavour, but anything you built in one of the two flavours cannot be opened or edited in the other one. Something to keep in mind. I will focus on the Designer Experience of Designer Cloud later in this blog, but we first need to get some data going.
Alteryx Designer Cloud – Connections and Data
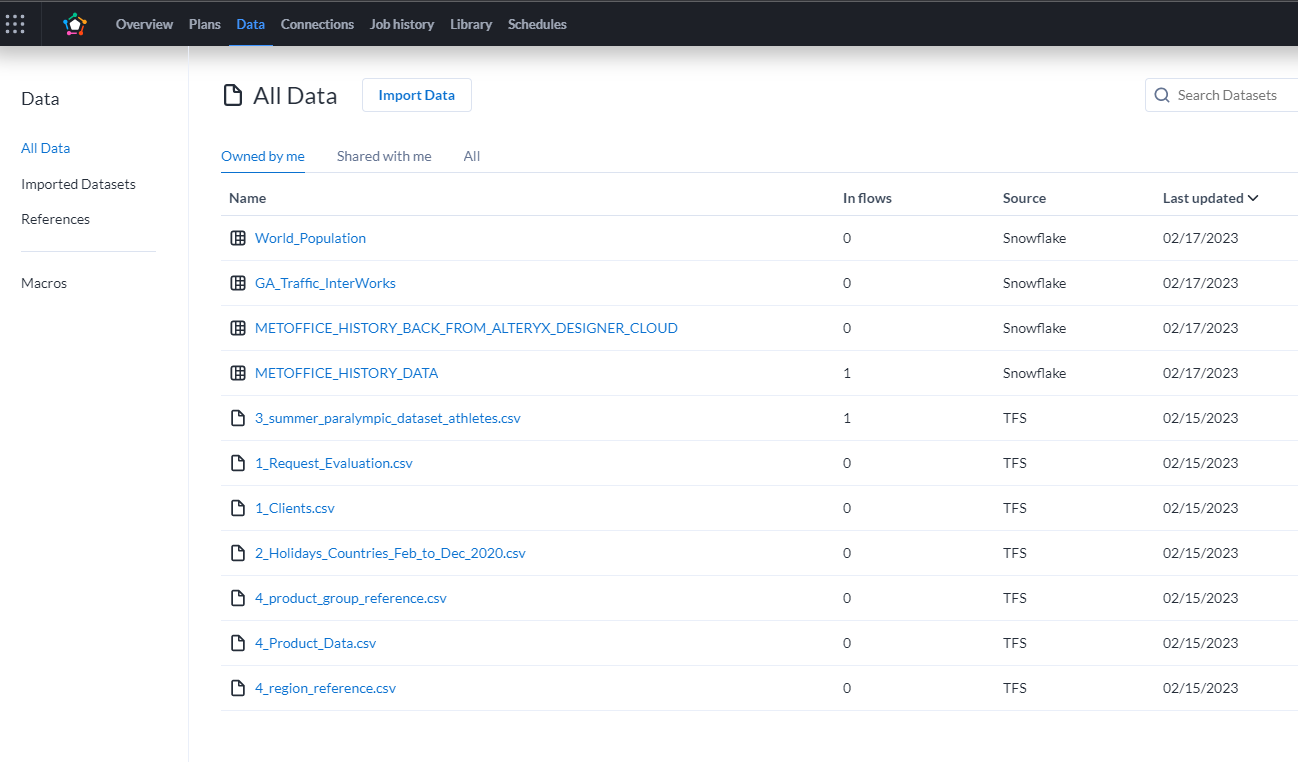
In Alteryx Designer desktop, most workflows will start with an Input tool and end with an Output tool, which will help with getting data to and from local files or databases and sending them straight in the workflow. In the Alteryx Designer Platform, connections and data sets sit separate from flows in Designer Cloud or any of the other tools or modules. You can upload small-ish files under 1GB, set up a connection to an S3 bucket for bigger files or set up connections to a whole range of databases, applications and APIs.
Uploading a file is straightforward: You head off to the Data tab, go to “Import Data” and hit “Upload.” Now you can just drag and drop files into the window. Or, you can upload a file via the Input tool — it will still end up in the list of Data sources in the Data tab. Setting up a connection is also easy enough from the same view, “Import Data.” You can click “New” at the bottom-right and it will show you a list of all possible connections, although they are stored in, and can also be created through, the Connections tab. Then, you can set up a Data source in the Data tab using this connection; depending on the connection, this can also be a file stored in S3, or a table, view or even a bit of custom SQL if using a database connection. In simple terms, in the Connections tab are all connections to systems that contain data, whereas in the Data tab are all the Data sets to be used in Flow and other Alteryx Cloud modules, either using a Connection or just an uploaded file.
In the screenshot below, you can see a number of uploaded files where the source says TFS (Trifacta File Storage) as well as some tables in Snowflake connected. I can start a new flow straightaway from here; however, it will end up in the Trifacta Classic interface:
Alteryx Designer Cloud – Designer Experience
Let’s jump into the new Designer Cloud experience, the tool we have all been waiting for:
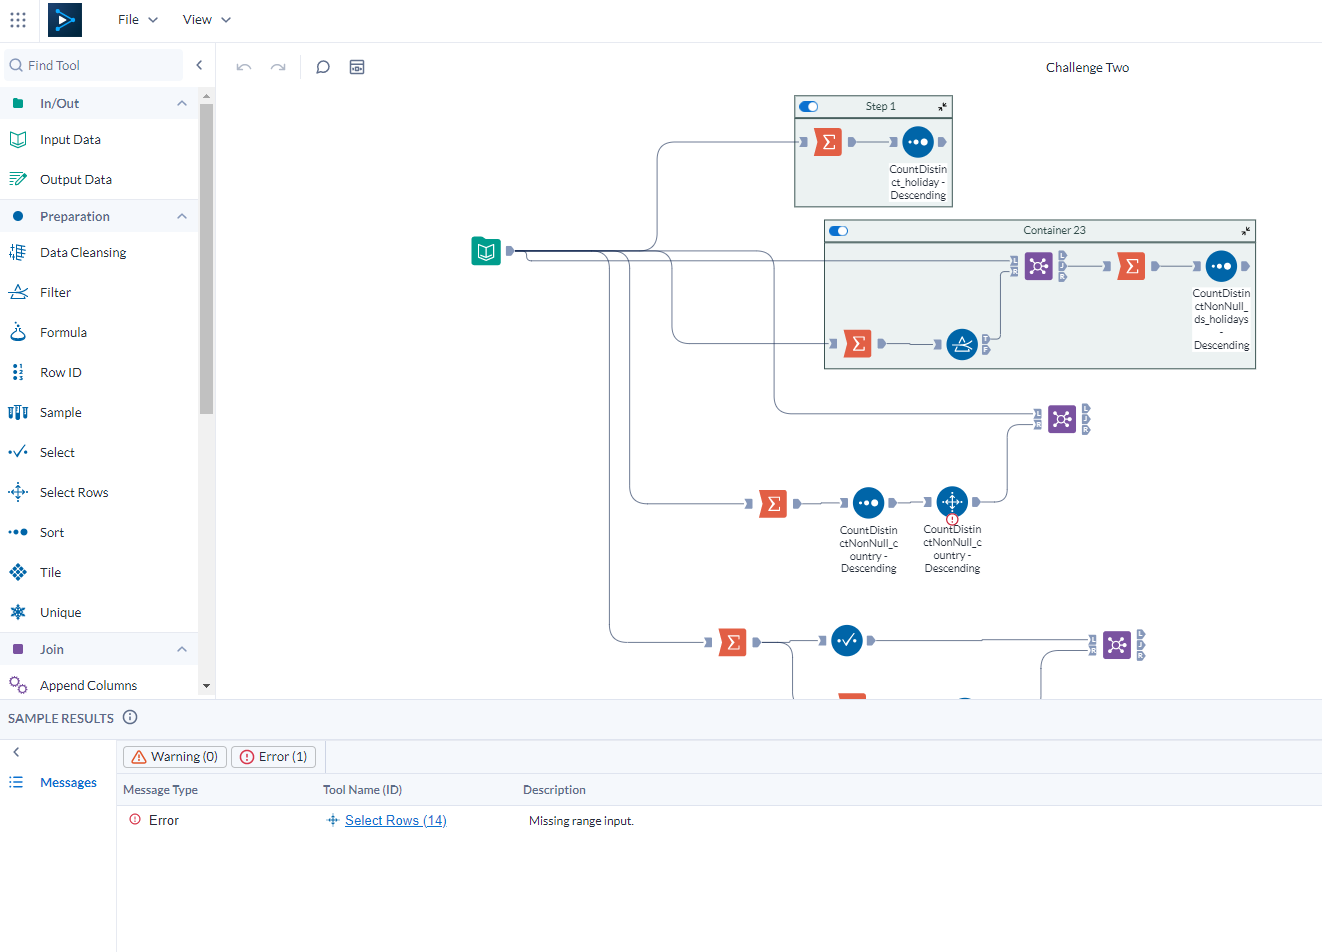
If you are familiar with Alteryx Designer desktop, you can see a lot of familiar things in this view, like the tool names and icons, the way they are connected, containers, messages at the bottom of the screen. One big difference is, there is no Browse tool (cue internal screaming!). But the good thing is, this isn’t necessary anymore. Alteryx Designer Cloud is still using Trifacta technology under the hood, which is obvious from a couple of things, one being the fact that your input data is sampled along the way of the flow. Clicking on any tool in your flow will show you the sample results from the output of that tool. So, there is no need to run the workflow over and over again, just to see if you tools and configuration is right for what you’re trying to achieve. I have been told you can change sample sizes, but that doesn’t seem to be available yet:
Only a selection of (basic) tools can be used right now; any spatial or more advanced tools are missing and I am especially missing the Multi-Row formulas and it’s partner, the Generate Rows tools. Spatial tools being missing is also disappointing, but not surprising as Trifacta had no spatial tools at all. That said, although not available yet in the Cloud Platform preview, a Location Intelligence application should also be in the pipeline.
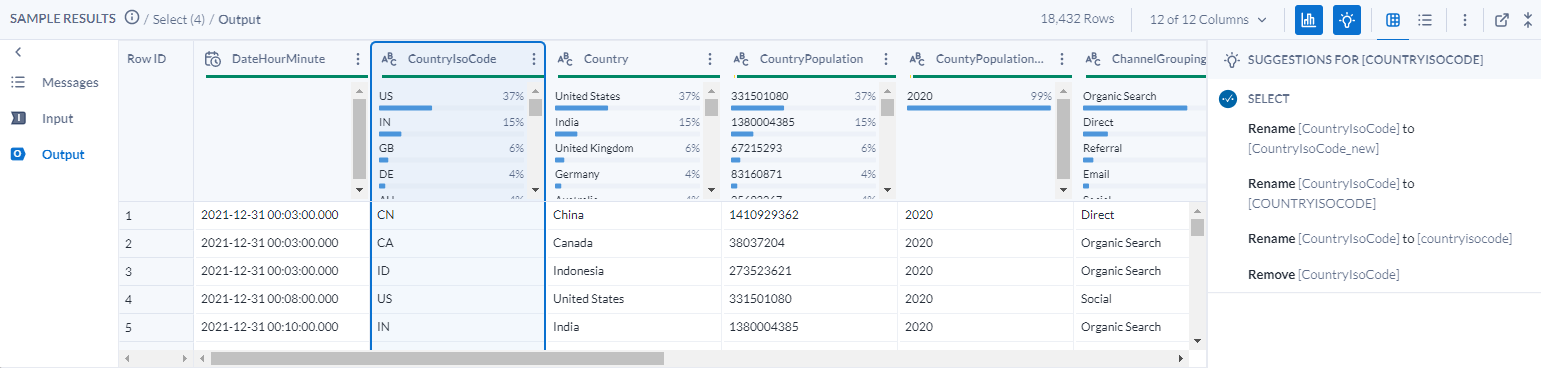
Two cool features you won’t find in Alteryx Designer Desktop are the Profiler and Suggestions that you can find in the results pane. These are actually features borrowed from the Trifacta interface. There aren’t many (useful) suggestions coming up yet, but based on what I’ve seen in the Trifacta interface, this can actually be a pretty powerful feature for formatting dates automatically or splitting strings into individual parts based on certain patterns, so hopefully this feature will resemble how it works in the Trifacta interface a bit more in the near future. Profiler will tell you a bit more about the data in individual columns such as how often a unique value appears or what the range of values is without having to use a summary tools to get the information. It will also reveal some information about data quality in a blink of an eye, as it will count null values or values that do not match a certain pattern based on the majority of values in the field:
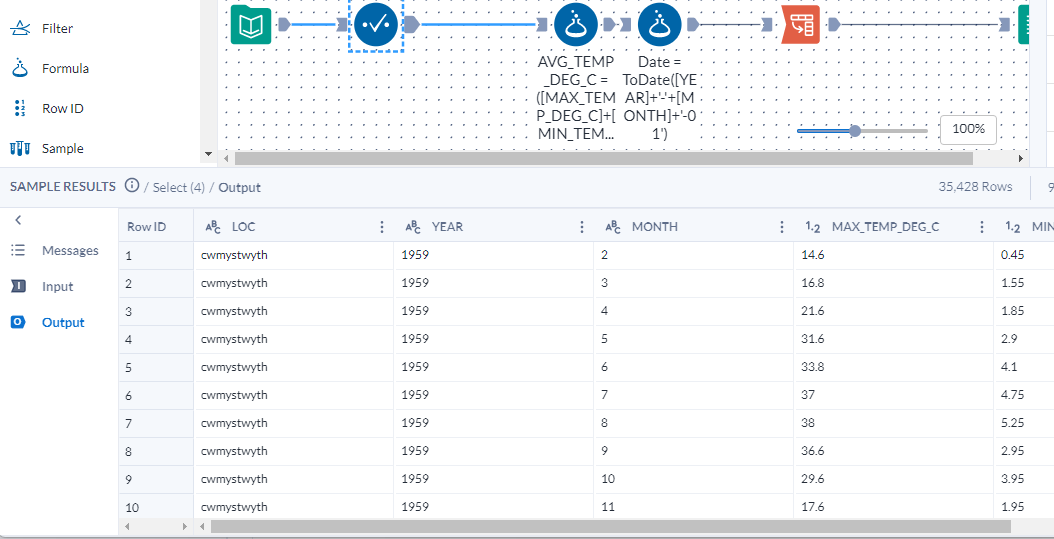
Apart from these new features and the missing tools, the new UI works pretty much the same as the Desktop variant of Alteryx Designer; drag-and-drop tools to create you flow. The selection of tools is visible on the left hand side of the canvas and the tool configuration appears on the right-hand side of the canvas when clicking a tool. I have run a couple of simple tests by making small workflows; there are a few hiccups I reported but no big show stoppers as of yet. The results pane can be opened in a separate window, maximising the canvas space whilst enabling you to keep an eye on the (sampled) results on a separate screen:

My first impressions of the new Designer experience of Designer Cloud have been very positive. Yes, there are lots of tools missing and I cannot yet replicate most of my workflows yet, so for now, I cannot (yet) uninstall Alteryx Designer Desktop. However, Alteryx has made some very big strides toward becoming Cloud first and I am super excited about what the future will bring for the full Alteryx Cloud experience, enabling sharing and collaboration on projects and integration between different modules in the Cloud platform.