
Snowflake OpenFlow is a native data integration capability that brings Apache NiFi-style pipeline orchestration directly into the Snowflake ecosystem. If you want a solid introduction to what it is and what it can do, I strongly recommend starting with this post from the InterWorks blog. Here, I’ll assume you’re already across what OpenFlow (OF) is capable of and jump straight into an implementation.
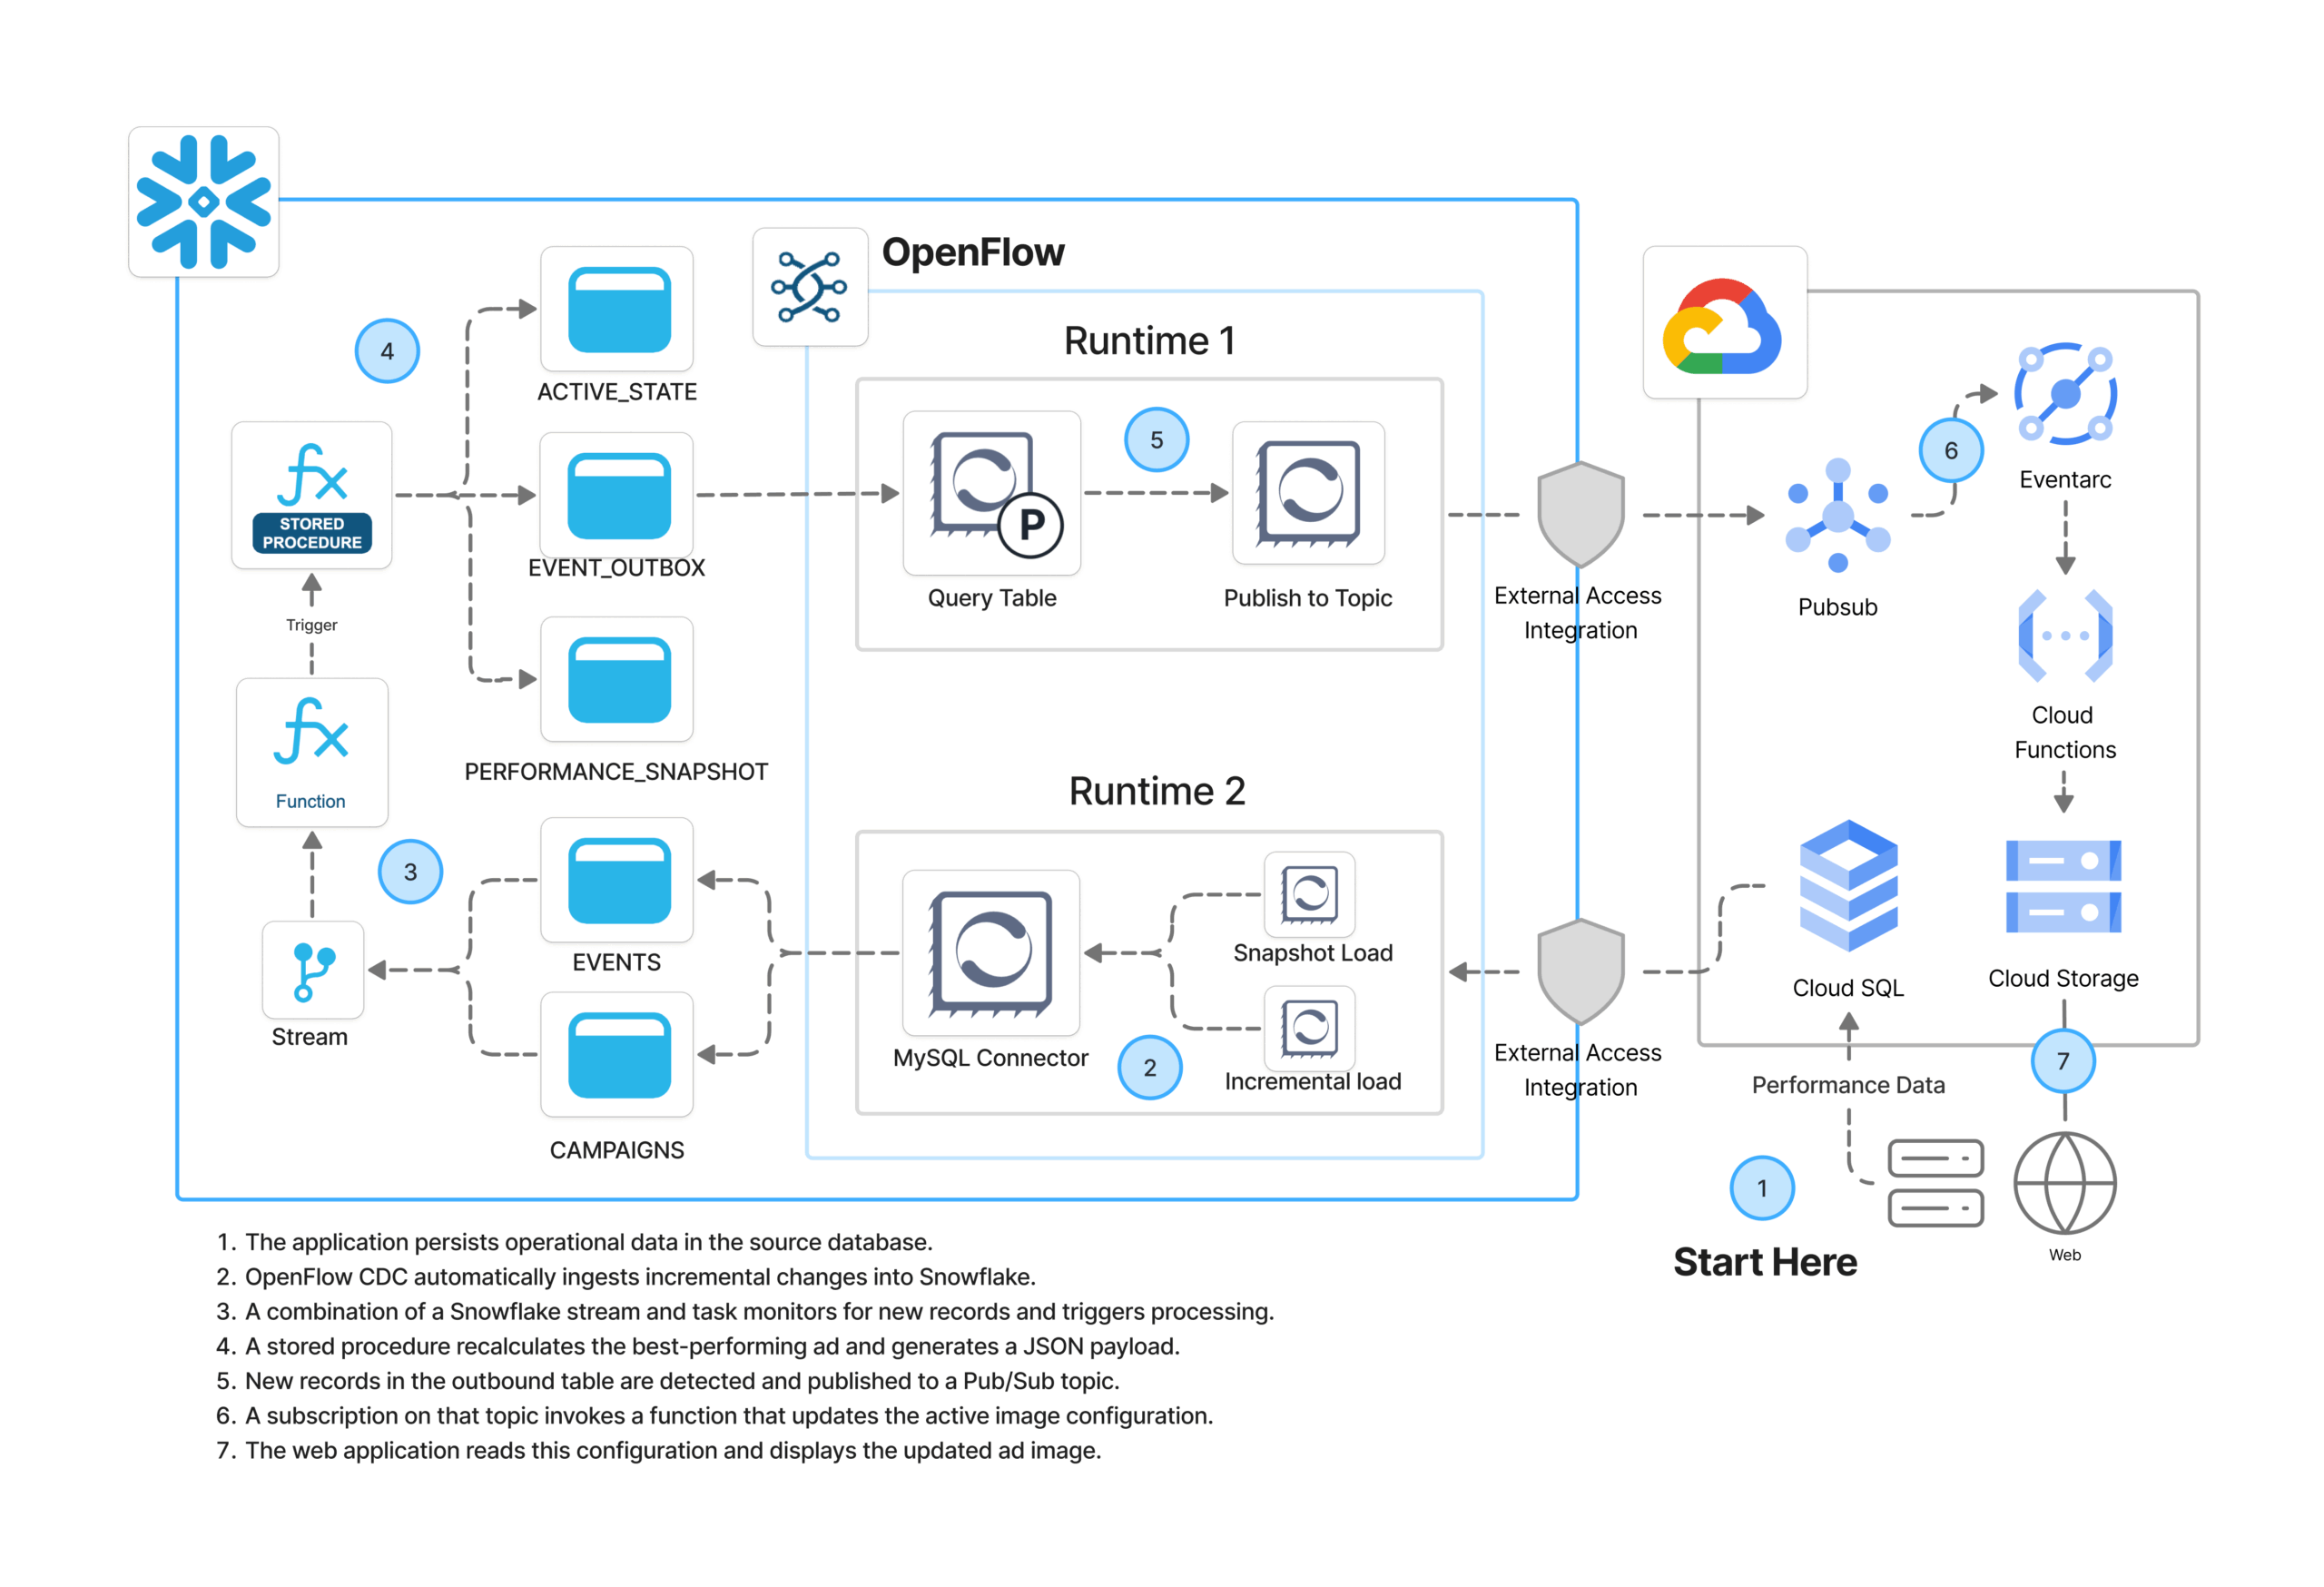
In this article, I’ll walk through an architecture I’ve built using Snowflake OF and Google Cloud Platform (GCP), showing how they come together in an event-driven data flow.
Sunglasses, Clicks and a Self-Optimising Feed
A sunglass brand is running two advertising campaigns on social media, each with two ad creatives. An external application captures impressions and clicks as they happen and persists that data into a MySQL database hosted in GCP.
The goal is simple but powerful — as performance data flows in, Snowflake automatically recalculates which ad has the highest click-through rate (CTR) and re-generates a delivery payload. That payload then triggers a downstream flow that updates the active ad displayed on the web application. No manual intervention. No scheduled batch jobs. Just a continuous feedback loop driven by live data.
I represented the overall architecture in the diagram above, but here’s the high-level flow::
- A third party application persists operational data (impressions and clicks) in the source MySQL database.
- OpenFlow CDC automatically ingests incremental changes into Snowflake.
- A Snowflake stream and task monitor for new records and trigger processing.
- A SPROC recalculates the best-performing ad and generates a JSON payload.
- OpenFlow detects new records in the outbound table and publishes them to a GCP Pub/Sub topic.
- A subscription on that topic invokes a Cloud Function that updates the active image configuration.
- The web application reads that configuration and displays the updated ad.
On the Snowflake OpenFlow side, this is a Snowflake-managed deployment (SCCS), meaning Snowflake provisions and manages the compute infrastructure for OpenFlow runtimes. No separate NiFi cluster to worry about.
Setup Overview
There are five areas of configuration involved. Most are one-off tasks:
- Google Cloud Platform — Infrastructure
- Google Cloud Platform — MySQL networking and configuration
- Snowflake — Networking and security
- Snowflake — RBAC, DDL and configuration
- OpenFlow — Deployment, runtimes and pipelines
Let’s go through each.
Google Cloud Platform — Infrastructure
I have already deployed the GCP infrastructure that supports the downstream side of this solution. The setup consists of the following components:
- Cloud SQL MySQL instance that acts as the operational data source
- Pub/Sub topic that receives payloads published by OpenFlow
- Eventarc-backed Cloud Function triggered by new messages on that topic
- A Storage bucket where all the web assets live, including the active ad configuration
The Cloud Function is the key piece on the GCP side. It processes incoming Pub/Sub messages, determines which ad image should currently be active, normalises that into a public URL and a JSON configuration payload, and writes it to the Cloud Storage bucket. The web application then reads from that bucket to decide which creative to display. The function runs as an event-driven, serverless workload, isolated to only write to its target bucket.
From an authentication perspective, I’ve created a GCP service account with the minimum permissions needed to allow OpenFlow to interact with Cloud SQL and Pub/Sub. You’ll need the JSON key for that service account handy — it gets referenced when configuring the GCP credentials controller service in OpenFlow later on. In production, it’s good practice to enable a mechanism such as a dead-letter topic on the Pub/Sub subscription to capture unprocessed messages; but I’ve skipped it here since this MVP only handles a small, controlled event stream and doesn’t require replay handling.
Google Cloud Platform — MySQL Configuration
Networking
OpenFlow needs to reach the MySQL instance over the network. To allow this, I’ve added the Snowflake egress IP ranges to the Cloud SQL allowlist. You can retrieve those ranges directly from Snowflake:
SELECT SYSTEM$GET_SNOWFLAKE_EGRESS_IP_RANGES();
Note: The above function applies to AWS-hosted Snowflake deployments. For GCP-hosted accounts, verify the correct egress ranges through your Snowflake account settings. One thing worth keeping in mind: the SSL mode you configure on the MySQL connection here needs to stay consistent with what you’ll define later in the OpenFlow JDBC connection URL e.g. If you disable SSL at the database level (please don’t) that same sslMode=disable flag needs to be reflected in your connector settings. Make a mental note of it as it’ll save you a head-scratch later.
Binary Logs
For CDC to work, MySQL needs binary logging enabled in ROW format. Most managed instances have this on by default, but it’s worth confirming. You can check via the GCP CLI:
# Confirm binary logging is enabled on your Cloud SQL instance
gcloud sql instances describe mysql-demo-db --format="value(settings.backupConfiguration.binaryLogEnabled)"
The binlog configuration should look like this when you’re done:
-- Expected binlog configuration for CDC compatibility
SHOW VARIABLES LIKE 'log_bin';                 -- ON
SHOW VARIABLES LIKE 'binlog_format';           -- ROW
SHOW VARIABLES LIKE 'binlog_row_metadata';     -- FULL
SHOW VARIABLES LIKE 'binlog_row_image';        -- FULL
SHOW VARIABLES LIKE 'binlog_row_value_options'; -- Empty (relevant for JSON columns)
SHOW VARIABLES LIKE 'binlog_expire_logs_seconds'; -- Several hours
MySQL User and Grants
I’ve created a dedicated MySQL user for OpenFlow’s CDC process and granted it the minimum permissions required:
-- Grants for the OpenFlow CDC user
GRANT REPLICATION SLAVE, REPLICATION CLIENT ON *.* TO `of_cdc`@`%`;
GRANT SELECT, SHOW VIEW ON `YOUR_SOURCE_SCHEMA`.* TO `of_cdc`@`%`;
If you’re anything like me, those ON *.* grants will make you frown. MySQL only supports scoping these two privileges globally. More on this here.
MySQL Contents
The source database has two tables that the ad-serving application writes to. I’ll assume you have some content already in place in your instance.
CREATE DATABASE SOCIAL_ADS_SOURCE;
USE SOCIAL_ADS_SOURCE;

CREATE TABLE campaigns (
  campaign_id   INT AUTO_INCREMENT PRIMARY KEY,
  campaign_name VARCHAR(255) NOT NULL,
  ad_name VARCHAR(255) NOT NULL,
  channel       VARCHAR(50)  NOT NULL,
  start_date    DATE         NOT NULL,
  end_date      DATE         NULL
);

CREATE TABLE ad_events (
  event_id      BIGINT AUTO_INCREMENT PRIMARY KEY,
  campaign_id   INT          NOT NULL,
  event_type    VARCHAR(20)  NOT NULL,
  event_ts      DATETIME     NOT NULL,
  viewer_geo    VARCHAR(50),
  device_type   VARCHAR(50)
);
Snowflake — Networking and Security
On the Snowflake side, I’ve created network rules to allow egress traffic from OpenFlow runtimes to both the Cloud SQL MySQL instance and GCP Pub/Sub. These are then wrapped in an External Access Integration (EAI), which is what gets attached to the OpenFlow runtimes when we create them later.
-- Network rule: allow egress to Cloud SQL MySQL
CREATE OR REPLACE NETWORK RULE EGRESS__GCP_CLOUDSQL_MYSQL
  MODE = EGRESS
  TYPE = HOST_PORT
  VALUE_LIST = ('<INSERT_MYSQL_IP>')
  COMMENT = 'Used by OpenFlow runtime to access GCP Cloud SQL MySQL source.';

-- Network rule: allow egress to GCP Pub/Sub
CREATE OR REPLACE NETWORK RULE EGRESS__GCP_PUBSUB
  MODE = EGRESS
  TYPE = HOST_PORT
  VALUE_LIST = (
    'pubsub.googleapis.com', 'pubsub.googleapis.com:443',
    'oauth2.googleapis.com', 'oauth2.googleapis.com:443'
  )
  COMMENT = 'Used by OpenFlow runtime to access GCP Pub/Sub.';

-- External Access Integration combining both rules
CREATE OR REPLACE EXTERNAL ACCESS INTEGRATION EAI__OPENFLOW_GCP_CLOUDSQL_MYSQL
  ALLOWED_NETWORK_RULES = (EGRESS__GCP_CLOUDSQL_MYSQL, EGRESS__GCP_PUBSUB)
  ENABLED = TRUE
  COMMENT = 'External access integration for OpenFlow runtimes connecting to GCP.';
Snowflake — RBAC, DDL and Configuration
Before creating any objects, I’ve set up a dedicated service user and role that OpenFlow will use to authenticate with Snowflake and write data into the target schema. This same role will be referenced later when configuring the OpenFlow runtimes.
-- Create the OpenFlow service user, role and grant the minimum permissions needed to operate in the target schema

USE ROLE SECURITYADMIN;

CREATE USER IF NOT EXISTS OF_MYSQL_USER
  TYPE = SERVICE
  COMMENT = 'Service user for OpenFlow MySQL connector';

CREATE ROLE IF NOT EXISTS OF_MYSQL_ROLE;
GRANT ROLE OF_MYSQL_ROLE TO USER OF_MYSQL_USER;

-- Database and schema access
GRANT USAGE ON DATABASE <YOUR_DB> TO ROLE OF_MYSQL_ROLE;
GRANT CREATE SCHEMA ON DATABASE <YOUR_DB> TO ROLE OF_MYSQL_ROLE;
GRANT USAGE ON SCHEMA <YOUR_DB>.SOCIAL_ADS_SOURCE TO ROLE OF_MYSQL_ROLE;
GRANT USAGE ON FUTURE SCHEMAS IN DATABASE <YOUR_DB> TO ROLE OF_MYSQL_ROLE;

-- Warehouse access
GRANT USAGE, OPERATE ON WAREHOUSE <YOUR_WAREHOUSE> TO ROLE OF_MYSQL_ROLE;

-- Object creation
GRANT CREATE TABLE ON SCHEMA <YOUR_DB>.SOCIAL_ADS_SOURCE TO ROLE OF_MYSQL_ROLE;
GRANT CREATE STREAM ON SCHEMA <YOUR_DB>.SOCIAL_ADS_SOURCE TO ROLE OF_MYSQL_ROLE;

-- Data access on current and future tables
GRANT SELECT, INSERT, UPDATE, DELETE ON ALL TABLES IN SCHEMA <YOUR_DB>.SOCIAL_ADS_SOURCE TO ROLE OF_MYSQL_ROLE;
GRANT SELECT, INSERT, UPDATE, DELETE ON FUTURE TABLES IN SCHEMA <YOUR_DB>.SOCIAL_ADS_SOURCE TO ROLE OF_MYSQL_ROLE;
With a database, a schema and a user and role already in place, I’ve next created the objects that power the Snowflake side of the pipeline. This involves four types of objects, each playing a specific role in the solution:
- Stream on the AD_EVENTS table in append-only mode, capturing new rows as they arrive from MySQL via OpenFlow CDC. This table records ad impressions and clicks, along with details such as timestamp, device type and viewer location.
- Task that monitors the stream and fires the stored procedure whenever new data is detected.
- Stored procedure that recomputes CTR metrics, identifies the best-performing creative, updates the active state table and enqueues a JSON payload into the outbox.
- Supporting tables:
- AD_PERFORMANCE_SNAPSHOT — persists a CTR snapshot on every procedure execution, one row per ad creative.
- AD_ACTIVE_CREATIVE_STATE — single source of truth for which creative is currently live per platform.
- AD_DELIVERY_EVENT_OUTBOX — append-only outbox that OpenFlow polls for new payloads to publish downstream. One addition worth making before taking this to production is a simple retention policy on this table. Because OpenFlow already uses a high-watermark on CREATED_AT, old rows are never re-read, making them safe to delete. A lightweight scheduled task that clears older records is all it takes to keep the table lean without introducing any additional complexity or risk.
The stored procedure is the most interesting piece here. It runs three logical steps in sequence: First it calculates impressions, clicks and CTR for each ad creative based on the full event history. Then, it applies a straightforward rule — the creative with the highest CTR wins — and updates the active state table accordingly. Finally, it constructs a JSON payload from that state and inserts it into the outbox table, ready for OpenFlow to pick up.
CREATE OR REPLACE PROCEDURE DB_NAME.SOCIAL_ADS_SOURCE.SP_RECOMPUTE_AD_METRICS()
RETURNS STRING
LANGUAGE SQL
EXECUTE AS CALLER
AS
$$
DECLARE
  v_changed BOOLEAN DEFAULT FALSE;
BEGIN

  -- Step 1: Recompute metrics and insert new snapshot
  INSERT INTO DB_NAME.SOCIAL_ADS_SOURCE.AD_PERFORMANCE_SNAPSHOT
  SELECT
    CURRENT_TIMESTAMP() AS SNAPSHOT_AT,
    PLATFORM,
    IMAGE_OBJECT,
    IMPRESSIONS,
    CLICKS,
    CTR
  FROM (
    WITH recent_events AS (
      SELECT *
      FROM DB_NAME.SOCIAL_ADS_SOURCE.AD_EVENTS
      WHERE EVENT_TYPE IN ('impression', 'click')
    ),
    campaign_events AS (
      SELECT
        e.CAMPAIGN_ID,
        c.AD_NAME  AS IMAGE_OBJECT,
        c.CHANNEL  AS PLATFORM,
        SUM(CASE WHEN e.EVENT_TYPE = 'impression' THEN 1 ELSE 0 END) AS IMPRESSIONS,
        SUM(CASE WHEN e.EVENT_TYPE = 'click'      THEN 1 ELSE 0 END) AS CLICKS,
        CASE
          WHEN SUM(CASE WHEN e.EVENT_TYPE = 'impression' THEN 1 ELSE 0 END) = 0
            THEN 0
          ELSE
            ROUND(
              SUM(CASE WHEN e.EVENT_TYPE = 'click'      THEN 1 ELSE 0 END)
              / SUM(CASE WHEN e.EVENT_TYPE = 'impression' THEN 1 ELSE 0 END)::FLOAT,
              4
            )
        END AS CTR
      FROM recent_events e
      JOIN DB_NAME.SOCIAL_ADS_SOURCE.CAMPAIGNS c
        ON e.CAMPAIGN_ID = c.CAMPAIGN_ID
      WHERE c.CHANNEL = 'instagram'
      GROUP BY e.CAMPAIGN_ID, c.AD_NAME, c.CHANNEL
    )
    SELECT * FROM campaign_events
  );

  -- Step 2: Identify the highest performing ad from the latest snapshot
  LET v_new_high_performer STRING := (
    SELECT IMAGE_OBJECT
    FROM (
      WITH latest AS (
        SELECT MAX(SNAPSHOT_AT) AS SNAPSHOT_AT
        FROM DB_NAME.SOCIAL_ADS_SOURCE.AD_PERFORMANCE_SNAPSHOT
      ),
      ranked AS (
        SELECT
          IMAGE_OBJECT,
          CTR,
          IMPRESSIONS,
          ROW_NUMBER() OVER (
            PARTITION BY PLATFORM
            ORDER BY CTR DESC, IMPRESSIONS DESC
          ) AS RN
        FROM DB_NAME.SOCIAL_ADS_SOURCE.AD_PERFORMANCE_SNAPSHOT s
        JOIN latest l ON s.SNAPSHOT_AT = l.SNAPSHOT_AT
        WHERE PLATFORM = 'instagram'
      )
      SELECT IMAGE_OBJECT FROM ranked WHERE RN = 1
    )
  );

  -- Step 3: Check what is currently active
  LET v_current STRING := (
    SELECT ACTIVE_IMAGE
    FROM DB_NAME.SOCIAL_ADS_SOURCE.AD_ACTIVE_CREATIVE_STATE
    WHERE PLATFORM = 'instagram'
    AND IS_ACTIVE = TRUE
  );

  -- Step 4: Only proceed if the winner has changed
  IF (v_new_high_performer != v_current) THEN
    v_changed := TRUE;

    -- Mark the current active row as inactive
    UPDATE DB_NAME.SOCIAL_ADS_SOURCE.AD_ACTIVE_CREATIVE_STATE
    SET IS_ACTIVE = FALSE
    WHERE PLATFORM = 'instagram'
    AND IS_ACTIVE = TRUE;

    -- Insert the new winner as the active row
    INSERT INTO DB_NAME.SOCIAL_ADS_SOURCE.AD_ACTIVE_CREATIVE_STATE (
      PLATFORM,
      ACTIVE_IMAGE,
      IS_ACTIVE,
      LAST_SWITCHED_AT,
      NOTES
    )
    VALUES (
      'instagram',
      :v_new_high_performer,
      TRUE,
      CURRENT_TIMESTAMP(),
      'rule: prefer higher CTR from latest snapshot'
    );

    -- Enqueue payload into outbox only if creative changed
    INSERT INTO DB_NAME.SOCIAL_ADS_SOURCE.AD_DELIVERY_EVENT_OUTBOX (
      CREATED_AT,
      PLATFORM,
      IMAGE_OBJECT,
      IMAGE_URL,
      PAYLOAD_JSON
    )
    SELECT
      CURRENT_TIMESTAMP()                                                          AS CREATED_AT,
      'instagram'                                                                  AS PLATFORM,
      :v_new_high_performer                                                                AS IMAGE_OBJECT,
      'https://storage.googleapis.com/instagram_ads_delivered/' || :v_new_high_performer  AS IMAGE_URL,
      OBJECT_CONSTRUCT(
        'platform',     'instagram',
        'image_object', :v_new_high_performer,
        'image_url',    'https://storage.googleapis.com/instagram_ads_delivered/' || :v_new_high_performer
      )                                                                            AS PAYLOAD_JSON;

  END IF;

  RETURN CASE
    WHEN v_changed THEN 'creative changed to ' || v_new_high_performer || ' — snapshot inserted, state updated, payload enqueued'
    ELSE                'no change — ' || v_current || ' remains active, snapshot inserted, no payload enqueued'
  END;

END;
$$;
OpenFlow — Deployment and Runtime Setup
The above completes the setup in Snowflake itself. Now, we will shift gears.
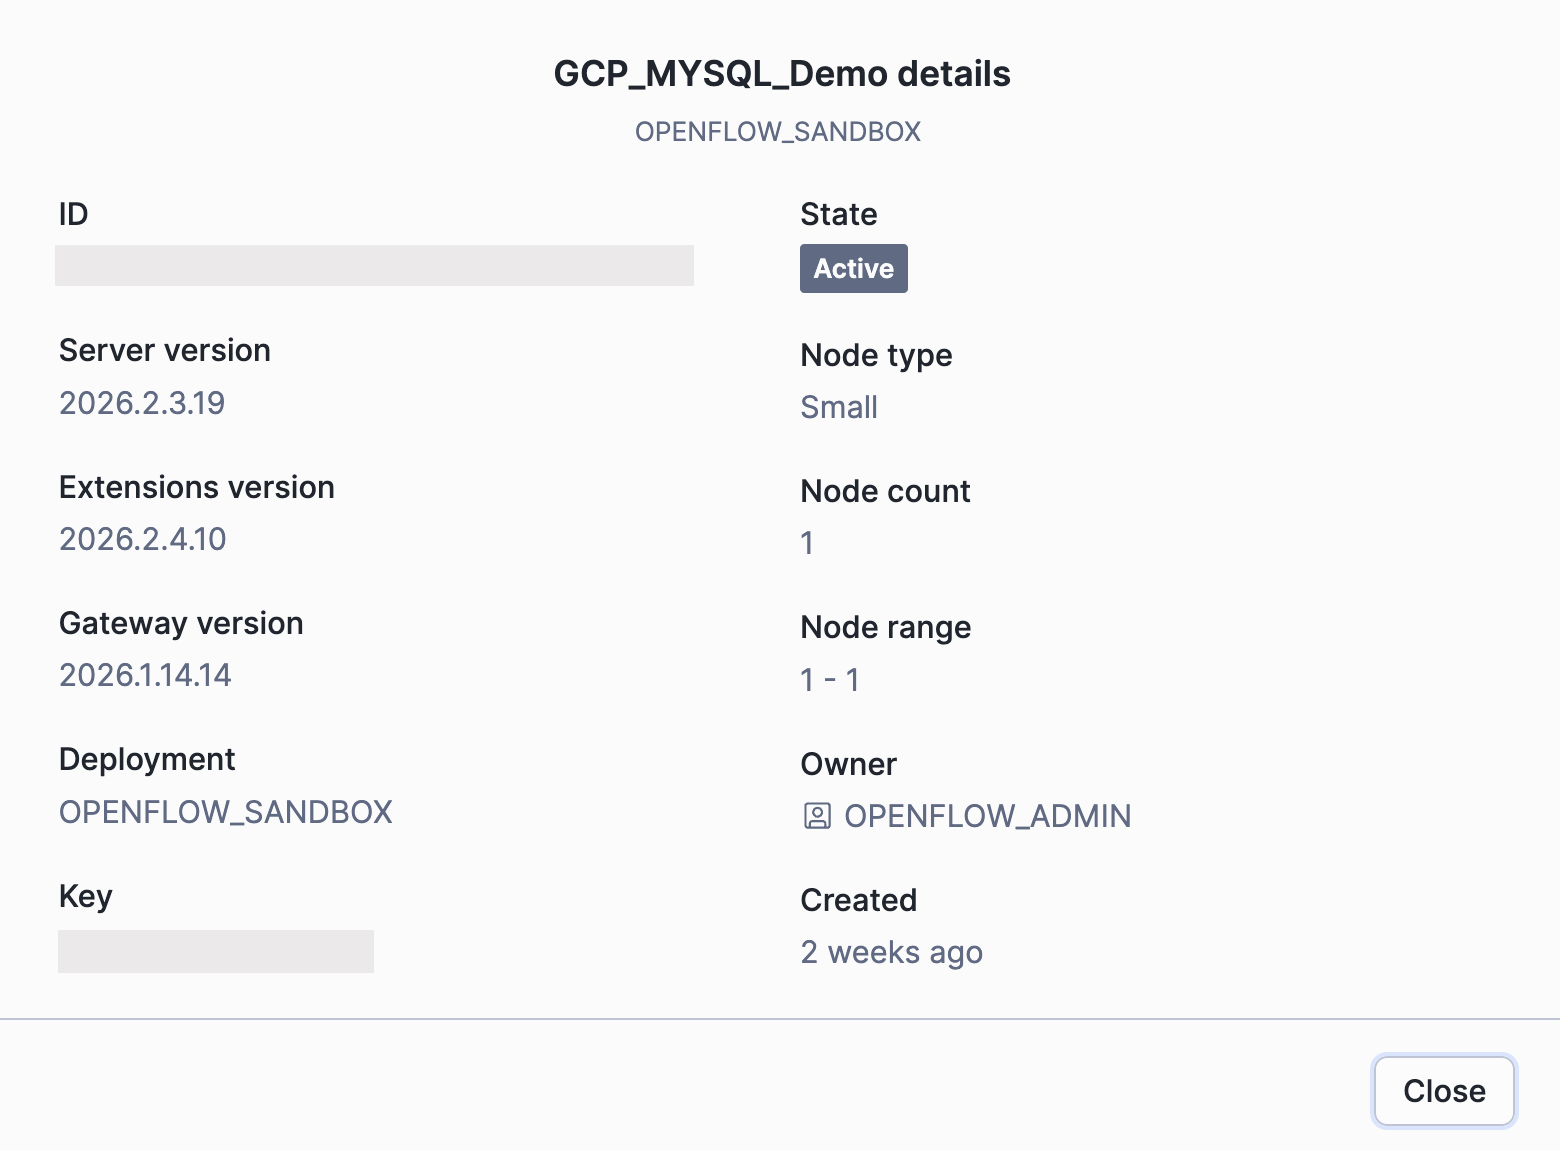
OpenFlow comes in two flavours: BYOC (Bring Your Own Compute), where you manage the underlying infrastructure, and Snowflake-managed deployment, where Snowflake provisions and runs everything for you. I’ve gone with the latter option here.
Creating a Deployment is fairly simple. First you will need to create a couple of Snowflake specific resources with SQL. You can find here the specific steps. Second, you will create the actual deployment itself with just a few clicks. Exact steps here.
In my deployment, I’ve created two separate runtimes: one for the MySQL pipeline and another for publishing to Pub/Sub. The setup steps for both are identical. I’ve separated them mainly to demonstrate how OF can support independent runtimes for different workloads and to make it easier to observe and tune each stage of the pipeline during the MVP phase. In a production setup, a single runtime could also handle both if resource isolation and iterative testing are less of a concern. When configuring each runtime, I’ve used the minimum resource settings and, importantly, selected the EAI created earlier under “External access integrations.” This is what gives the runtimes permission to reach out to GCP services.
Above: Basic configuration of an OpenFlow runtime.
With the runtimes ready, I’ve installed the native MySQL connector into the MySQL runtime from the Featured Connectors section of the OpenFlow overview. This does most of the heavy lifting for us, but we still need to make a few adjustments.
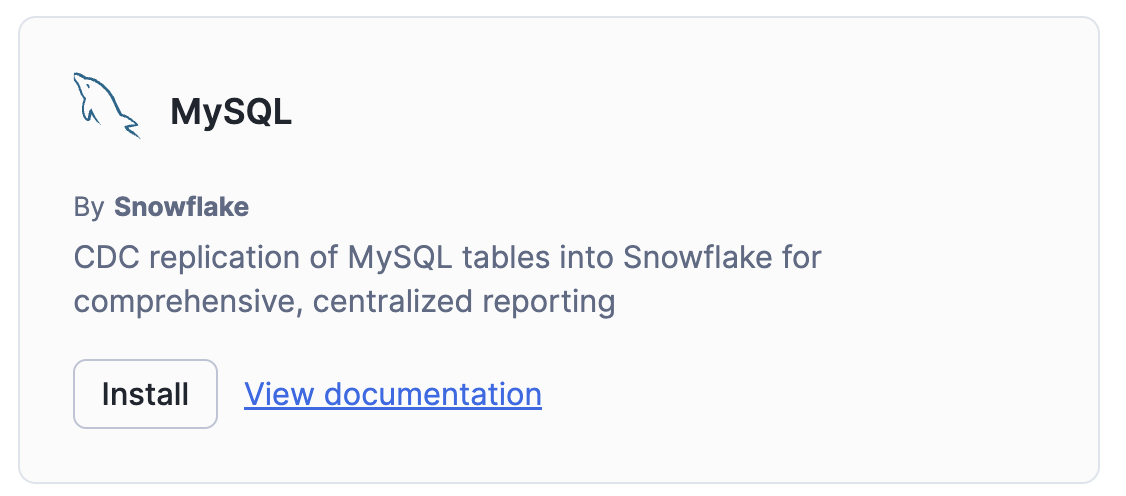
Above: MySQL native OpenFlow connector.
OpenFlow — Pipeline Setup
Runtime 1: OpenFlow and MySQL
The MySQL native connector handles a lot of the complexity for you: it takes an initial snapshot of your source tables and then switches seamlessly to incremental CDC via the MySQL binary log. You don’t need to build that logic yourself.
Within the runtime itself, the first thing to configure is a GCP credentials controller service, which OpenFlow will use to authenticate with GCP. First, right-click on the canvas background (not on a processor).
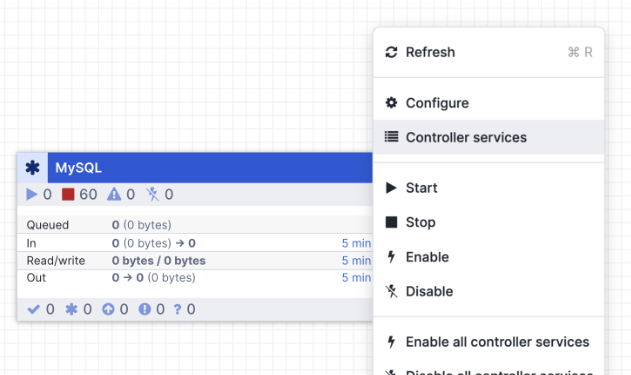
Above: Open Controller Services in OpenFlow canvas.
In the Controller Services section, click the plus sign and add a GCPCredentialsControllerService. Configure it as follows:
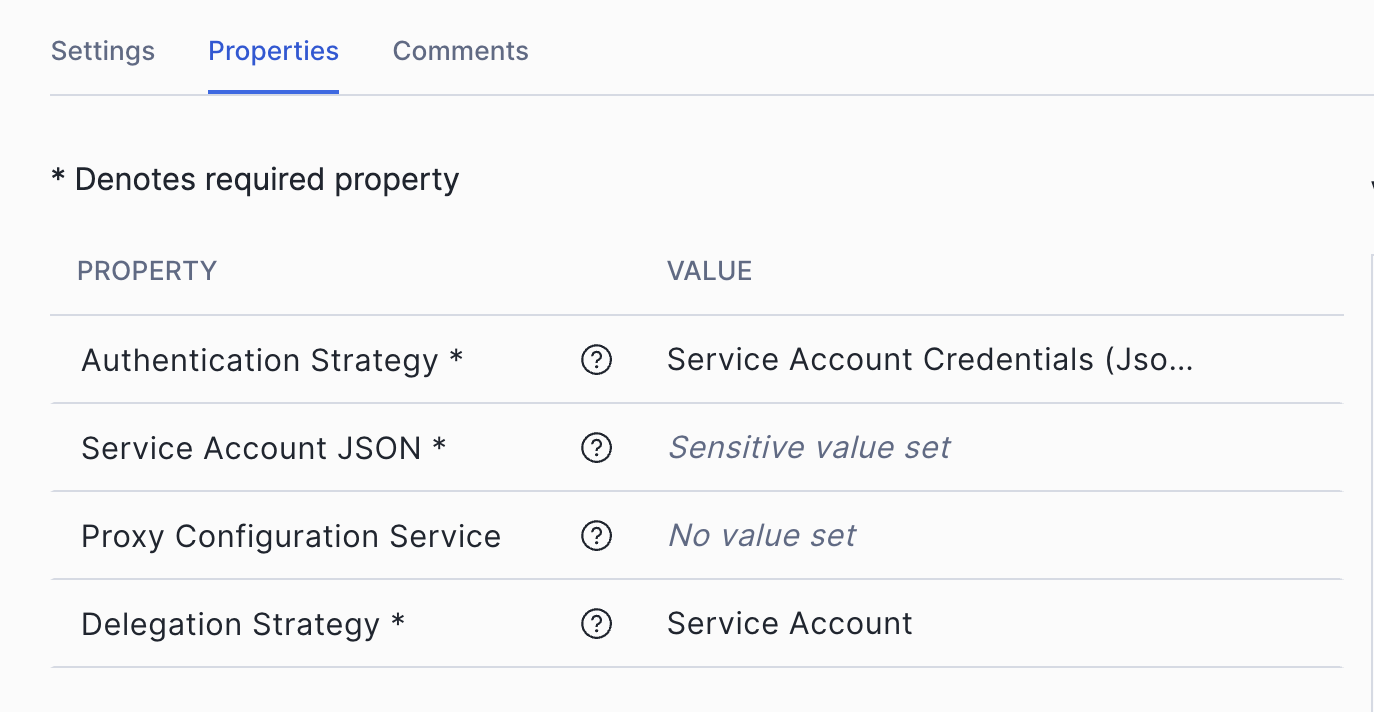
Above: OpenFlow canvas — Controller Services configuration.
Next, go back to the canvas, right-click on the MySQL processor itself and open Parameters. This is where you tell OpenFlow which tables to ingest, how to connect to MySQL and where to land the data in Snowflake. The key fields I’ve configured are:
MySQL Ingestion Parameters
- Column Filter JSON:
[ { “schema”: “SOCIAL_ADS_SOURCE”, “table”: “campaigns”, “includedPattern”: “.*” }, { “schema”: “SOCIAL_ADS_SOURCE”, “table”: “ad_events”, “includedPattern”: “.*” } ] - Destination Database: <YOUR_SNOWFLAKE_DATABASE>
- Included Table Names: YOUR_SOURCE_SCHEMA.campaigns, YOUR_SOURCE_SCHEMA.ad_events
- Ingestion Type: full
- MySQL Connection URL: jdbc:mariadb://<MYSQL_HOST_IP>:3306/<SOURCE_DATABASE>?sslMode=disable&allowPublicKeyRetrieval=true&permitMysqlScheme=true
- MySQL JDBC Driver: mariadb-java-client-3.5.3.jar
- MySQL Username: of_cdc
- Object Identifier Resolution: CASE_INSENSITIVE
- Starting Binlog Position: Latest
- Snowflake Account Identifier: <YOUR_ACCOUNT>
- Snowflake Authentication Strategy: SNOWFLAKE_MANAGED
- Snowflake Role: OF_MYSQL_ROLE
- Snowflake Warehouse: <YOUR_WAREHOUSE>
Tip. MariaDB driver for MySQL: You’ll notice the JDBC connection URL uses the jdbc:mariadb:// scheme, and the driver is the MariaDB client JAR. This is intentional. The MariaDB Connector driver is fully compatible with MySQL and is the driver that Snowflake recommends for OpenFlow MySQL connections. You’ll need to upload the JAR into OpenFlow before it becomes available as an option. Don’t let the naming catch you off guard. To upload the JAR, simply go to the Parameter Context of the processor and select Manage Assets.
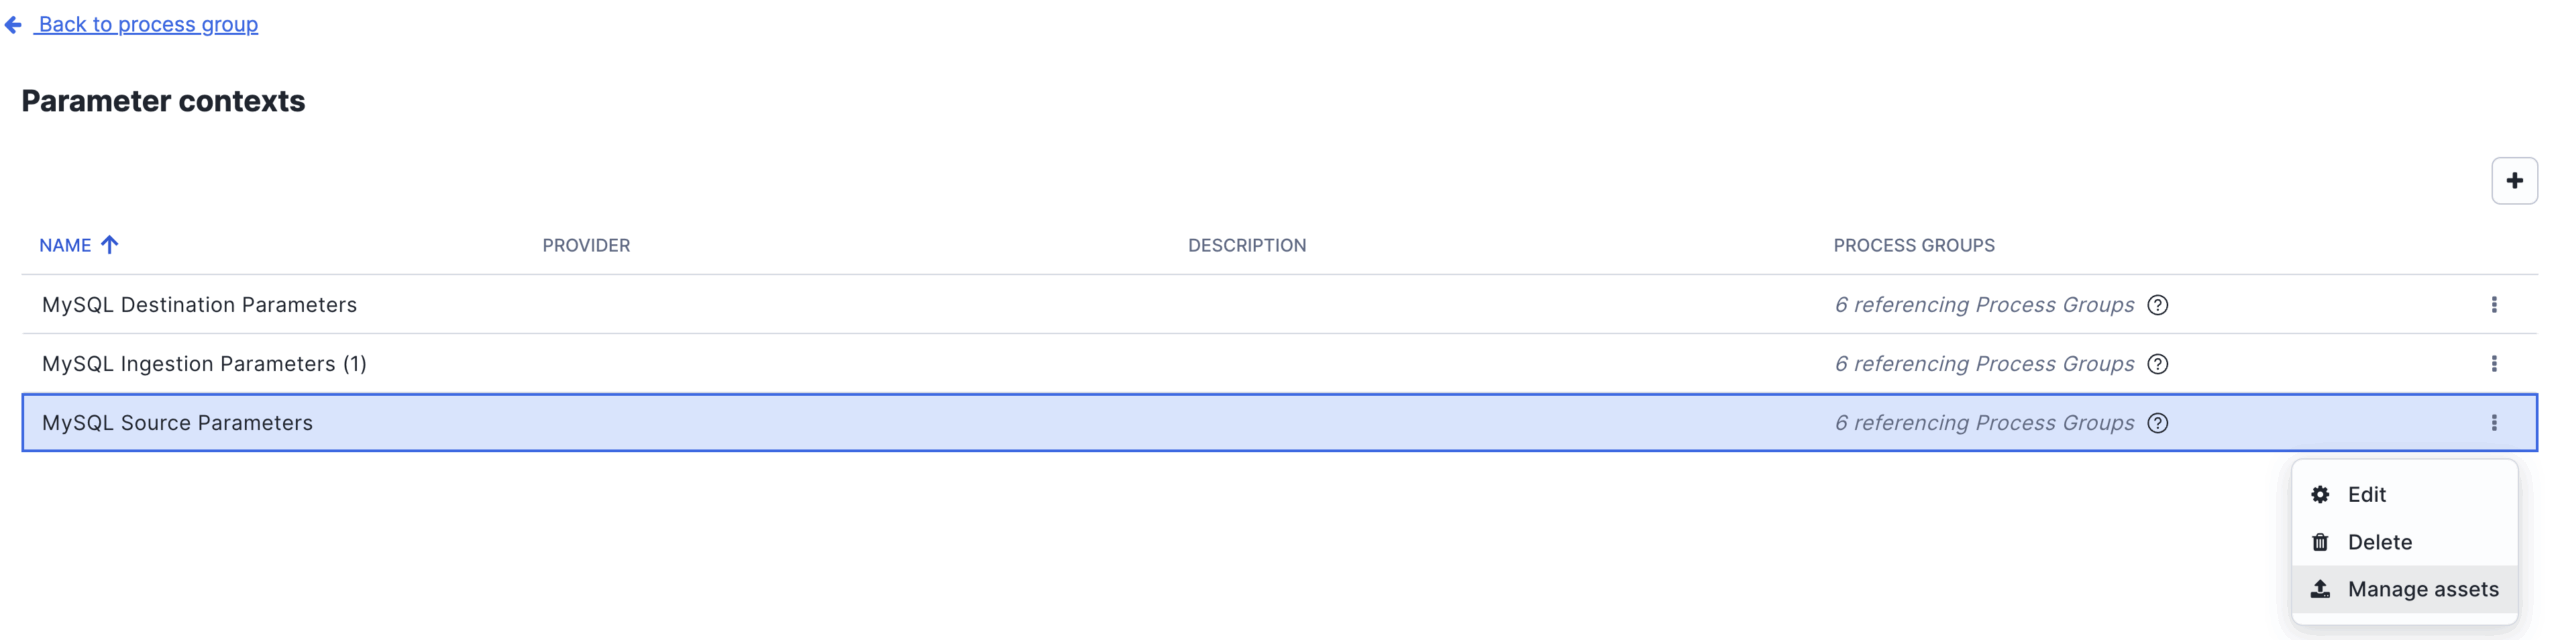
Above: OpenFlow canvas — Parameter Context configuration. Manage Assets.
The same parameters context has two additional sub-sections which are pretty self explanatory:
- MySQL Source Parameters is where you define the connection details back to the MySQL instance itself. You will need to input again the same JDBC URL, driver and user credentials.
- MySQL Destination Parameters is where you specify where in Snowflake the data lands — the account identifier, the Snowflake role we created earlier, warehouse and target database. For authentication I’ve used SNOWFLAKE_MANAGED, which means OpenFlow delegates authentication entirely to Snowflake rather than managing credentials itself. It’s the simplest and most secure option when running on a Snowflake-managed runtime, as there are no keys or passwords to rotate on the OpenFlow side.
Go over these three sections thoroughly and ensuring you input the correct details, as any mismatch here is usually the first thing to debug if the connector doesn’t start cleanly.
With this in place, OpenFlow is now ready to handle the initial full snapshot of both source tables and then switch automatically to reading from the binary log for all subsequent changes. Any insert, update or delete in MySQL should flow through to Snowflake within seconds.
Runtime 2: OpenFlow and GCP Pub/Sub
The second runtime has a different job: it watches the outbox table in Snowflake for new records and publishes each one as a message to a GCP Pub/Sub topic. This is what closes the loop between Snowflake’s decision-making and the downstream web application.
Before wiring up the processors, I’ve created four controller services that the processors in this runtime depend on. Most fields are left at their defaults. The ones worth calling out are:
- GCPCredentialsControllerService: The configuration here is identical to the one set up in Runtime 1 with delegation Strategy set to Service Account.
- JsonRecordSetWriter: Serialises processor output as JSON. Schema Access Strategy is set to Inherit Record Schema with output grouped one line per object.
- SnowflakeConnectionService: Connects to Snowflake using a managed token, pointed at the target database, schema and the OF_MYSQL_ROLE we created earlier.
- SnowflakeDatabaseDialectService: No custom configuration needed. It works out of the box and is referenced by the query processor to handle Snowflake-specific SQL dialect.
With those in place, back to the canvas I’ve created two processors together in sequence:
a)QueryDatabaseTableRecord
This processor generates a SELECT query against the outbox table in Snowflake, using a high-watermark strategy on CREATED_AT so it only pulls rows that have appeared since the last execution. Most fields are populated automatically once the controller services above are linked. The specific fields to set manually are:
- Table Name: AD_DELIVERY_EVENT_OUTBOX
- Columns to Return: ID, PAYLOAD_JSON
- Maximum-value Columns: CREATED_AT
- Initial Load Strategy: Start at Current Maximum Values
- Max Rows Per FlowFile: 1
- initial.maxvalue.created_at: 2025-01-01 00:00:00
Setting Max Rows Per FlowFile to 1 is a deliberate design choice. It guarantees each Pub/Sub message carries exactly one ad delivery event, which fits my data frequency pattern and keeps the downstream Cloud Function logic predictable.
b)PublishGCPubSub
Once a FlowFile is produced, this processor picks it up and publishes it to the Pub/Sub topic. It references GCPCredentialsControllerService for authentication — no need to re-enter any credentials here. The fields to configure manually are:
- Project ID: <YOUR_GCP_PROJECT_ID>
- Topic Name: <YOUR_PUBSUB_TOPIC_NAME>
- Delegation User: <YOUR_SERVICE_ACCOUNT_EMAIL>
- API Endpoint: pubsub.googleapis.com:443
With both processors configured, connect the QueryTable processor to the PublishGCPubSub processor by hovering over it until the connection handle appears, then drag the arrow onto the next processor. This is how data flows between processors in OpenFlow — each connection defines the route a FlowFile takes through the pipeline.
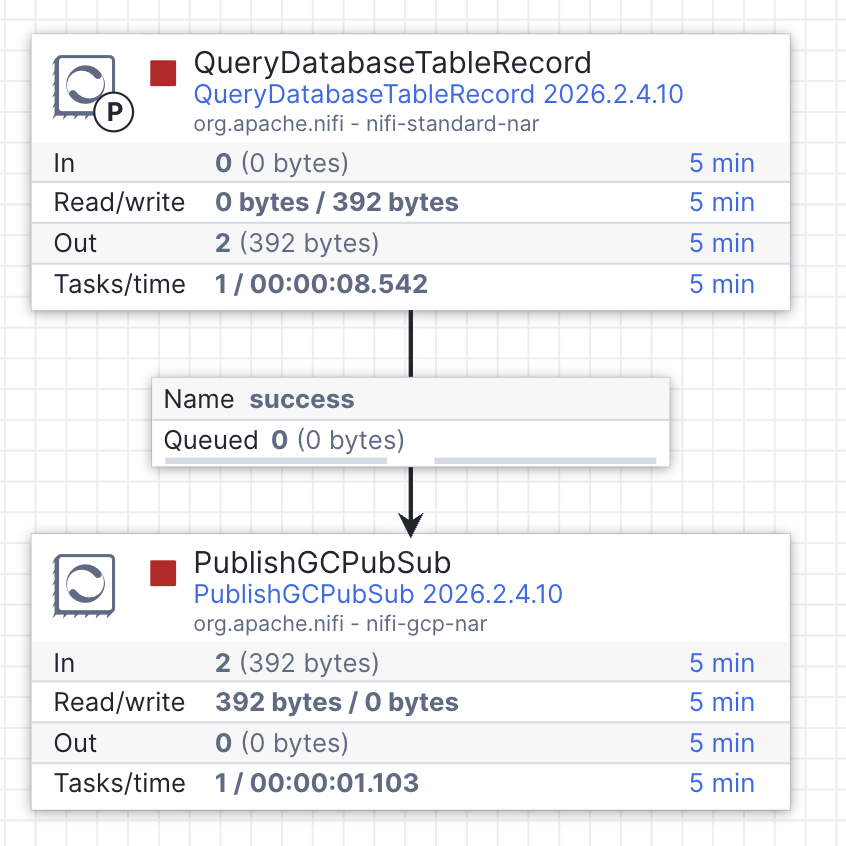
Above: QueryDatabaseTableRecord connected to PublishGCPubSub in the OpenFlow canvas.
Testing the Pipeline
With both runtimes configured, right-click on each processor group and select “Enable all controller services,” then hit Start. Within a few seconds, you should see the initial snapshot tables created and populated in Snowflake. That alone is already a nice win — CDC running natively within Snowflake, no external tooling required. But the snapshot is only half the story, so let’s now test the full end-to-end flow.
If I inspect my tables in Snowflake, I can see that the pipeline has calculated that ad-1002-B has the highest CTR at 0.58 based on the seeded data.

Above: Default CTR per campaign in the initial snapshot.
If I head over to the GCP-powered website now, I can see it’s already displaying the default ad — the one with the highest CTR when the initial snapshot ran. That’s our baseline. Now, let’s shake things up.

Above: Highlighted in blue the default ad displayed on the website.
To simulate incoming ad performance data, I’ll insert directly into MySQL a few impressions (but not clicks) for the existing ad displayed. This will decrease its CTR. Within seconds, those rows land in Snowflake via CDC. The stream detects them, the task fires and the stored procedure recomputes CTR across all creatives. Notice how the highest CTR (0.4464) now corresponds to the ad 1144-A.

Above: New CTR per campaign after the inserted records.
With a different ad now with the highest click-through rate, the active creative state table gets updated, a new payload is dropped into the outbox, and OpenFlow’s second runtime picks it up and publishes it to Pub/Sub. That triggers the Cloud Function, which rewrites the JSON config in Cloud Storage. The website switches to the new ad automatically with no manual intervention anywhere in the chain. And sure enough, if I refresh the website, I can see the new ad is being displayed.

Above: Highlighted in blue the updated ad displayed on the website.
One last thing I wanted to call out about OpenFlow is its data provenance view. It was extremely useful to monitor and track the transit of data packets (or FlowFiles, as they’re called). It acts as a lineage log across every component in the pipeline, showing you exactly how each FlowFile moved through the system, which is invaluable for debugging and for demonstrating end-to-end traceability. See example below.
| Event Time | Type | FlowFile UUID | File Size | Component Name | Component Type |
| 02/26… | RECEIVE | 4c55c60b-… | 6.16 KB | Read MySQL CDC Stream | CaptureChangeMySQL |
Above: Example of OpenFlow data provenance view.
And that’s the full loop closed. A row inserted in MySQL rippled through CDC, a Snowflake-native decision engine, a Pub/Sub message, a Cloud Function and a storage update — all the way to a live website switching its creative in a matter of seconds and without a single manual step. That’s the kind of automation that used to require a lot of glue code and a lot of moving parts to maintain. Here, it’s just the platform doing what it’s designed to do.
If this is useful for your own work or you’d like to chat through the implementation, feel free to reach out.