
If your organization already utilizes VMware’s vSphere and you have a need for load balancing in your infrastructure, you’re in luck. VMware incorporated Avi Networks’ load balancing software into their NSX solution. Formally called NSX Advanced Load Balancer, or NSX-ALB (but familiarly just known as “Avi”), this powerful L4-L7 load balancer is easy to deploy, powerfully efficient even across multi-site environments (including cloud) and, best of all, the licensing for the Avi Basic Edition comes with vSphere’s NSX licensing.
For this reason, many organizations are taking the opportunity to phase out their existing load balancers, such as F5 or Kemp, and make the switch to Avi. Not only does it cut costs and physical hardware ownership, it allows easier management and better visibility, as Avi connects directly to vCenter instances. Making the switch is relatively simple, thanks to both Avi and VMware’s extensive documentation, but I wanted to sum up the process here for those that may be interested. My experience with this process is mainly for a single site, balancing external and internal Horizon access, so that’s what I’ll cover, but Avi has support for multiple sites and network automation in addition to your load balancing needs, all extremely customizable.
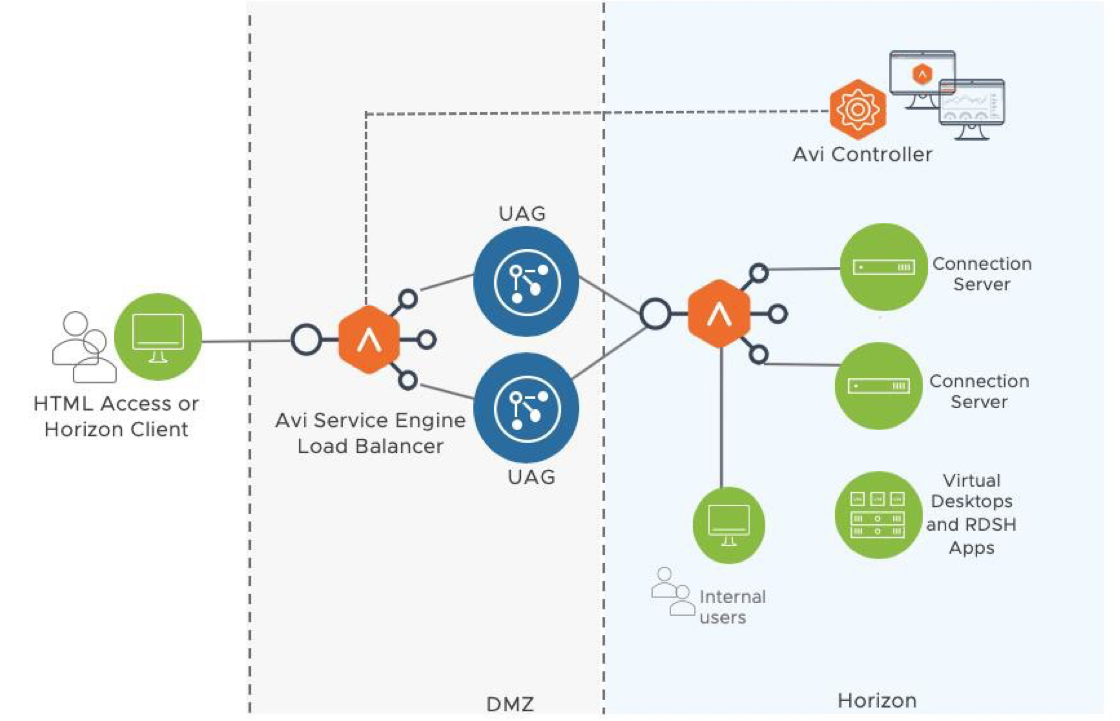
Figure 1: Avi topology for use with load balancing external and internal Horizon access
Installation and Configuration
The first step is to install the Avi appliance in your existing vCenter environment. There are two major components of Avi: the Controller, which will be the management appliance, and the Service Engines, which are additional appliances that do the actual work. These are normally automatically created via the Avi GUI during configuration, which requires linking the Controller to vCenter. Service Engines can also be manually created if needed. The Avi Controller can be set up in a high availability cluster with up to 3 Controller VMs. Here are the minimum VM requirements for both components:
 Table 1: VM requirements for Avi components
The Avi Controller OVA file is available in your VMware Downloads under NSX-Advanced Load Balancer and contains everything needed to install both the Controller and the Service Engines. In vCenter, you’ll right-click the cluster or datacenter where you want to install, select “Deploy OVF template,” then follow the prompts to install Avi. You’ll need a name for the appliance and a static IP address for management. Once installed, the Avi management GUI can be accessed by going to the IP address. Once logged in, you’ll see some initial setup screens to configure your admin password, DNS, email notification settings and multi-tenant site information. After the initial setup, you’ll see the Dashboard, which will eventually show any Virtual Services you’ve created, as in the example below:
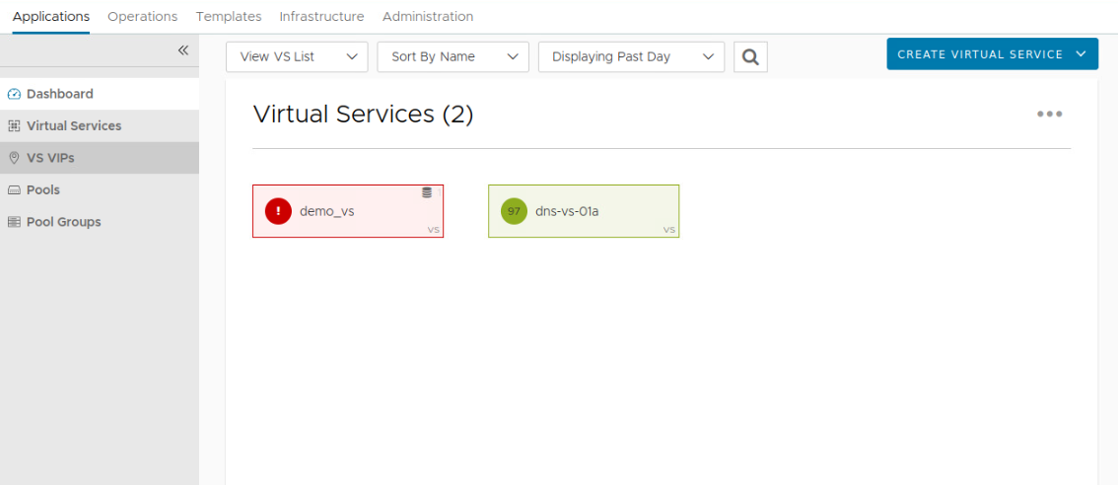
Figure 2: Example of Avi Dashboard
Next, you’ll want to head to the Infrastructure tab, select Clouds, select the Create button and select VMware vCenter/vSphere ESX to configure your environment. “Clouds” in Avi refers to available sites that will be connected, and can be an on-premise vCenter, an Azure Cloud instance, AWS, Linux Server, etc. For vCenter, you’ll need account credentials and the vCenter IP address. Once the Cloud is created, if everything is connecting properly, the Status will show green.
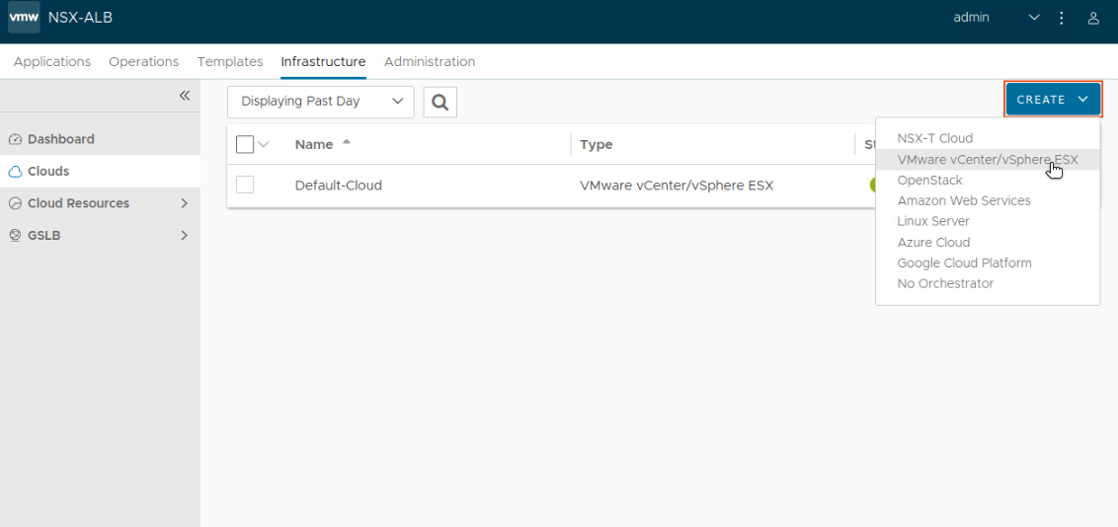
Figure 3: How to create a Cloud in Avi
Setting Up Avi for Horizon
Once your initial link to vCenter is up, you’ll set up Avi for your Horizon environment. This includes creating all the components we’ll need for the Virtual Service, and then creating the Virtual Service itself. For the components, we’ll create a virtual IP (VIP), create a custom health monitor to monitor uptime of Horizon servers, create pools for the Horizon servers, create an SSL profile and install your SSL certificate. Once the Virtual Service is in place, the Avi Controller will automatically create Service Engines based on the parameters of that service.
First, you’ll need to create a virtual IP that your users will point to. This will be the front address that the user sees that Avi will then redirect to the load balanced servers. On the Applications tab, select VS VIPs and click Create. You’ll enter a name for the VIP and add the IP and DNS record for the IP.
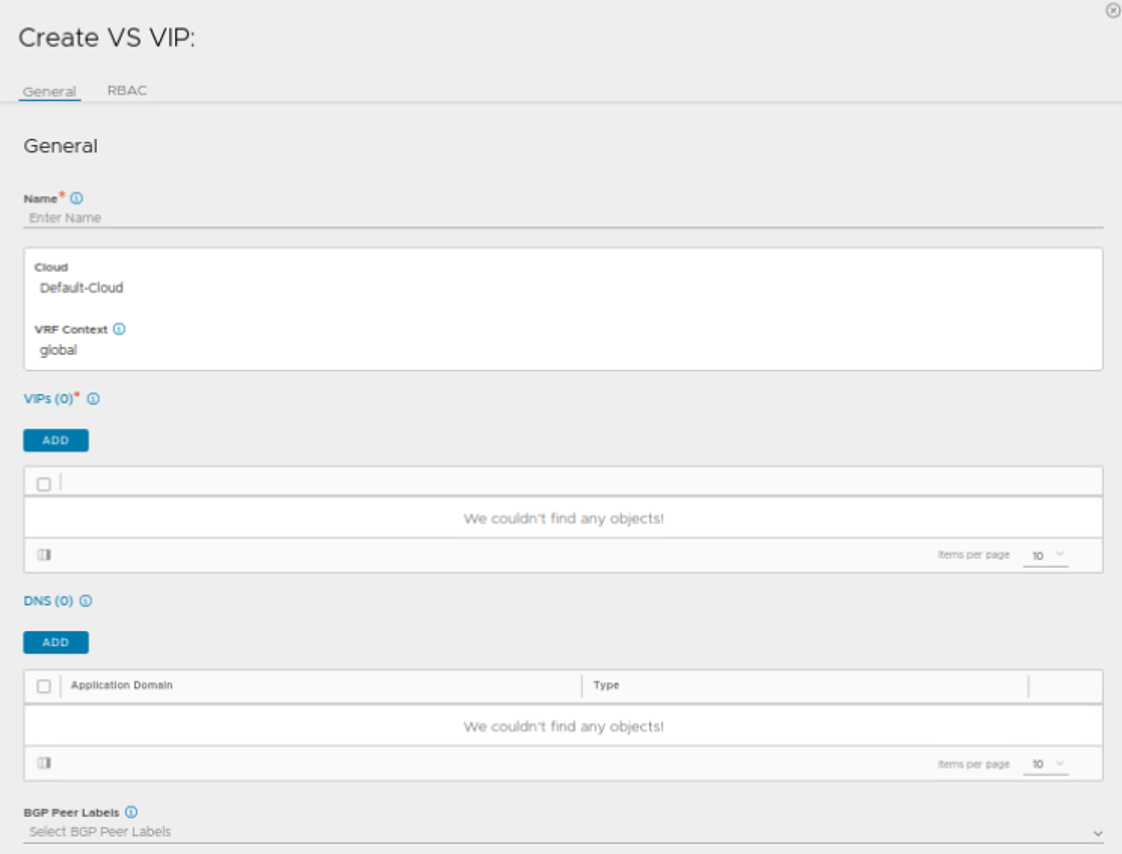
Figure 4: Creating a Virtual Service Virtual IP
Next, you’ll need to set up a custom health monitor to monitor the status of your Unified Access Gateways (UAGs), or your internal Horizon Connection Servers. Go to the Templates tab, select Profiles and then Health Monitors. Click Create to create a new monitor. Select your vCenter instance, and then name the health monitor and configure the rest of the settings. The Send Interval will be 30 seconds, with a Receive Timeout of 10 seconds. The Health Monitor Port will be 443, and you’ll add the following under Client Request Data and Response Code and click Save:
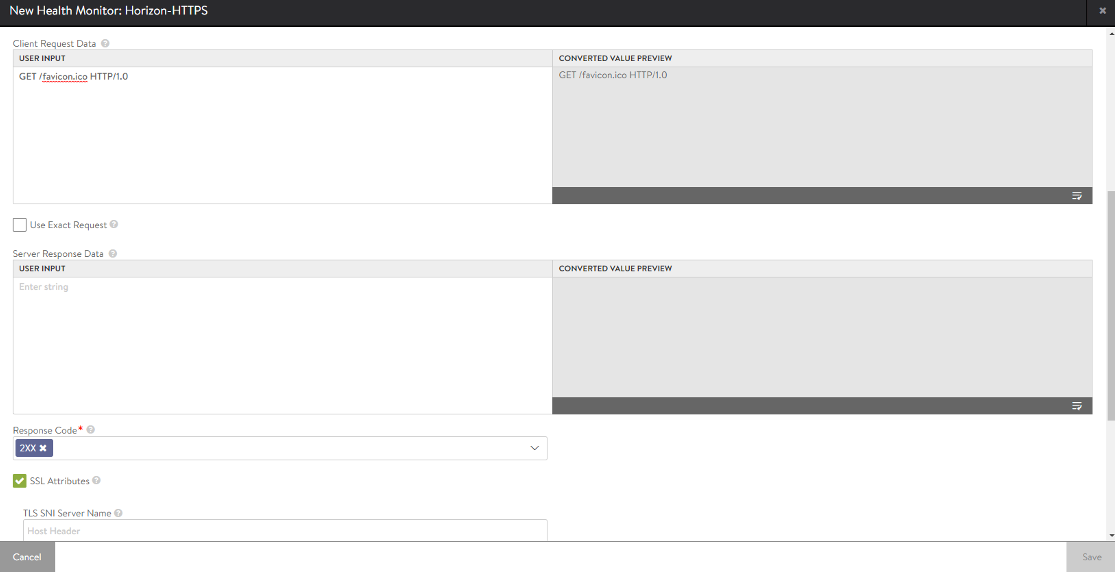
Figure 5: Settings for the Avi custom health monitor
The next step is to create an SSL profile and install your SSL certificate. Go to the Templates tab, then SSL/TLS Profile and select Create. Select Application Profile, and then create a name for the Profile. The Type will be Application, Accepted Versions will be TLS 1.2, and you will Enable SSL Session Reuse. For the Ciphers, you will select the following from the list and click Save:
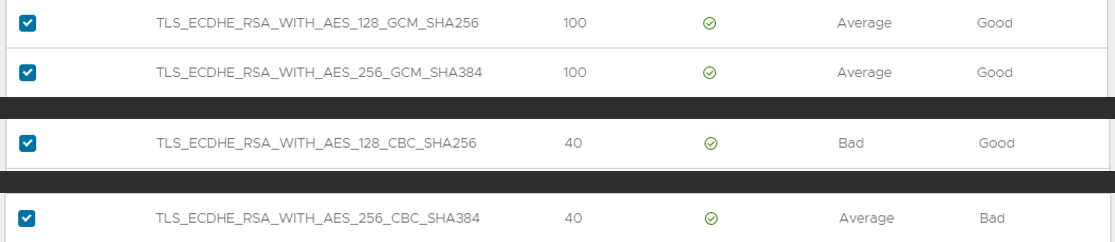
Figure 6: Ciphers needed for a Horizon SSL Profile
To install your SSL certificate, select SSL/TLS Certificates at the top. Here, you’ll have the option to create a Root/Intermediate CA, Application Certificate or Controller Certificate. For Horizon, you’ll want to upload your Root CA, and SSL certificate as an Application Certificate. For Type, you’ll select Import, and then you’ll have the option to Upload your Certificate and Key files in the PEM format. (Note that if your certificate is in PFX format, it will need to be converted to PEM with the KEY extracted using openssl or something similar.) Once the information is entered, click Validate and make sure the certificate has a green status.
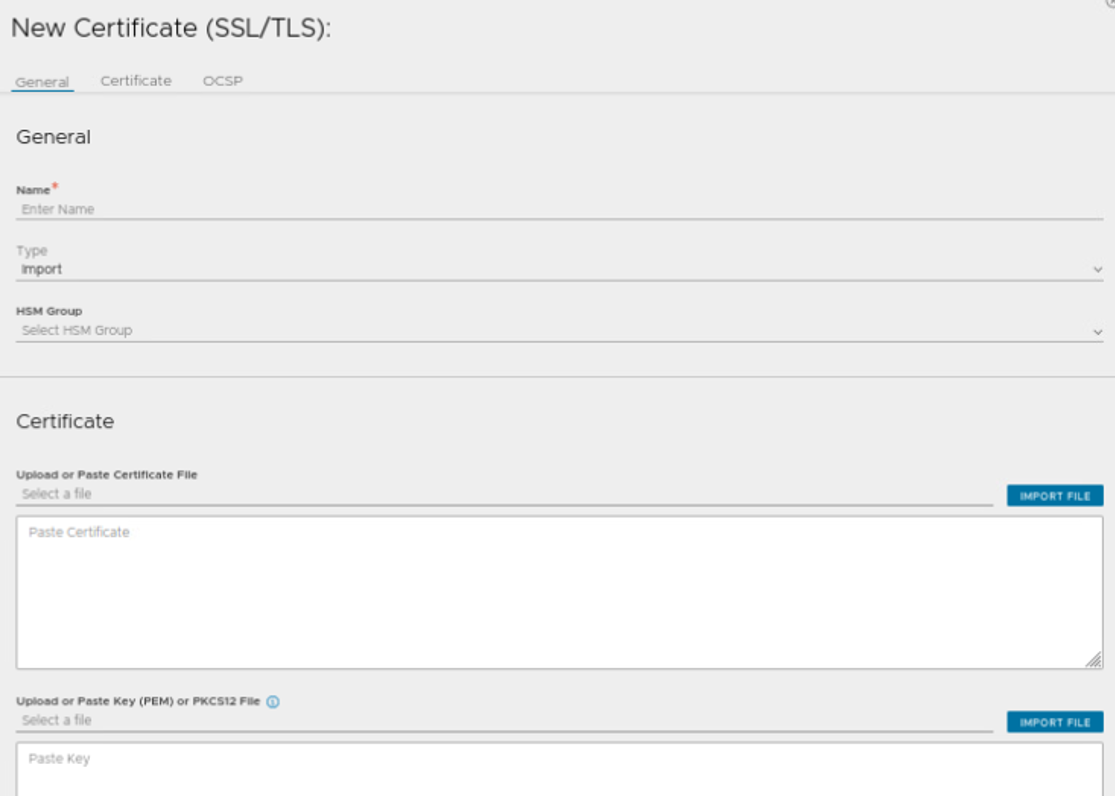
Figure 7: Importing an application SSL certificate
Next, we’ll create a pool that includes all the servers you want to load balance. In this case, we’re using UAGs, but you can create a second pool to load balance your internal Connection Servers as well. Go to the Applications tab and select Pools. Make sure the vCenter Cloud is selected, then click Next and then Create Pool. Here on the Settings tab, you will create a pool name, select Passive Health Monitor and enter the custom health monitor you created, and select your Load Balance option. With Horizon, the preferred load balancing method is Least Connections.
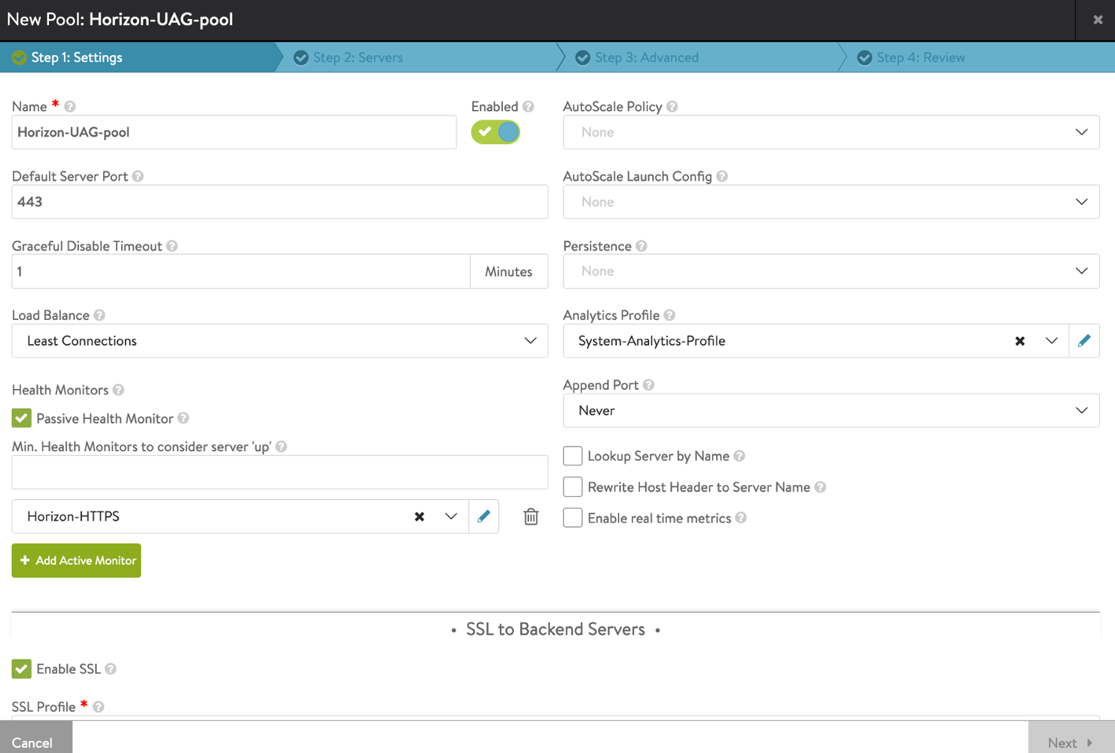
Figure 8: Avi pool settings for Horizon UAGs
Select Enable SSL and select the SSL profile that you created earlier for Horizon. Click Next to go to the Servers tab. This is where you’ll add the servers to the pool using FQDN or IP address. After the servers are entered, click Next and then Next again through the Advanced tab, and then Save.
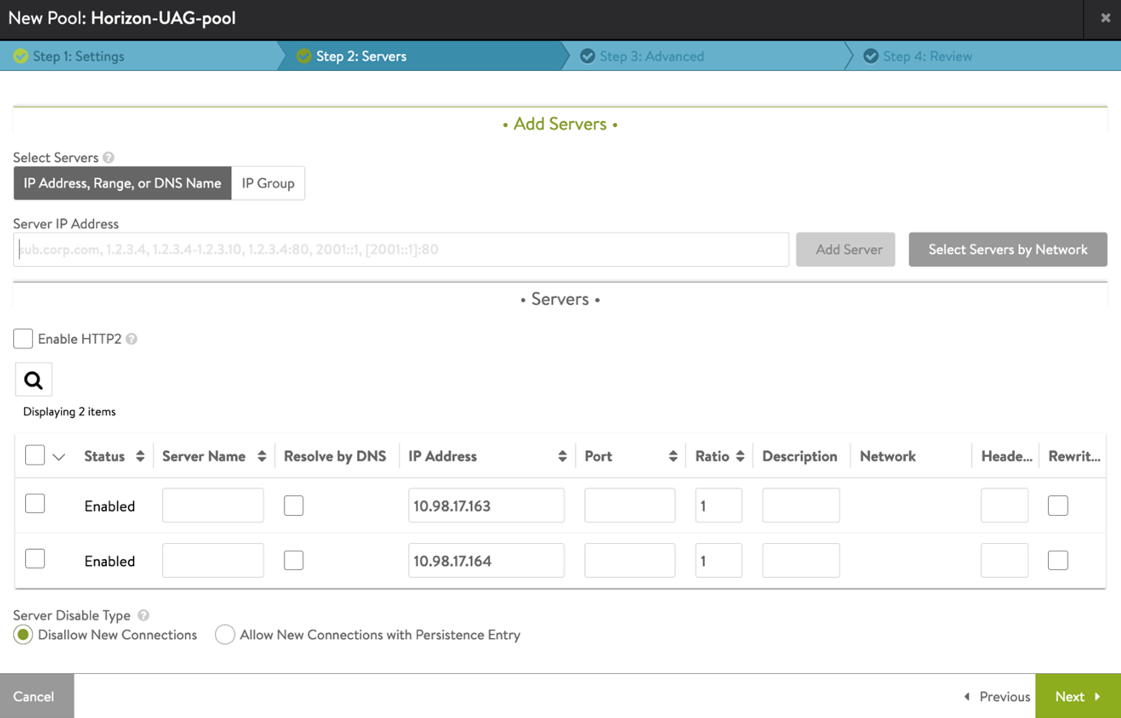
Figure 9: Add servers to the pool
Now we are ready to create the virtual service using all the above components. Navigate to Applications, Virtual Services and select Create Virtual Service. Select Advanced Setup. Create a name for the virtual service, and then select the VIP you created in the VS VIP box. Use the Application Profile “System-HTTP-Horizon-UAG.”
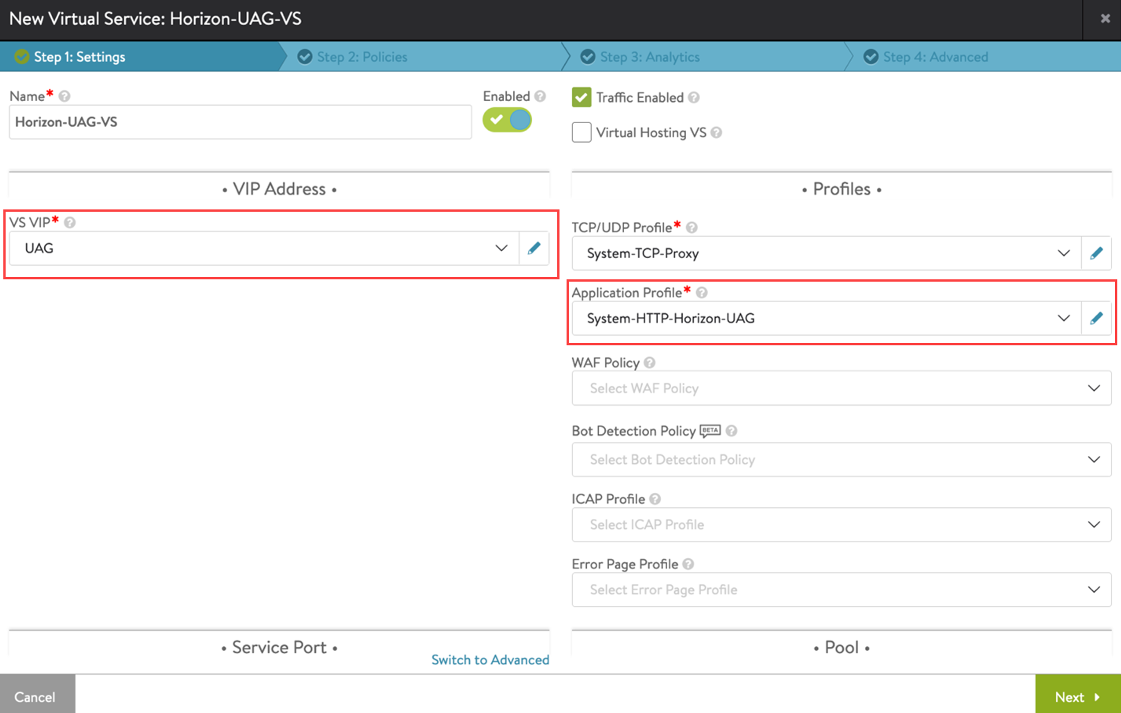
Figure 10: Settings for the Avi virtual service
In the Service Port section, click Switch to Advanced and enter the following service ports:


Figure 11: Service ports for Avi virtual service
In the Pool and SSL Settings sections, you’ll select the Pool we created earlier, and the SSL Profile and applicable SSL certificates. Hit Next through the next two pages and then Save the configuration. If all goes well, the virtual service will have a status of green and begin creating the Service Engines. If not, the status will be red and hovering over the status will show the current error.
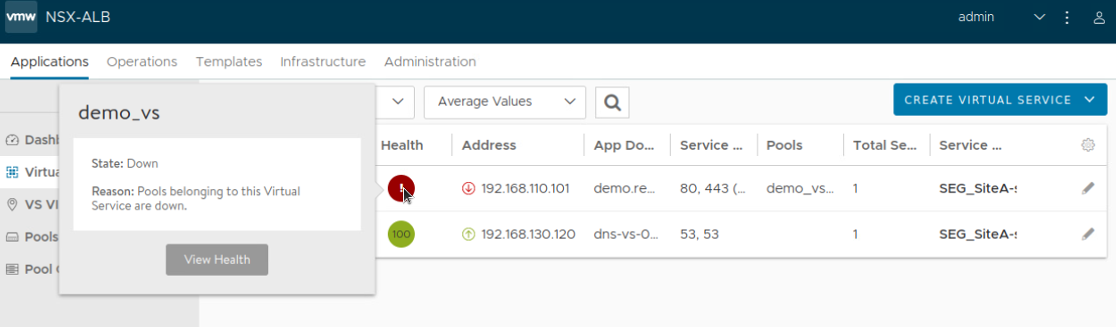
Figure 12: Example of virtual service error message
Clicking on the virtual service will show you an analytics dashboard with information about the traffic.

Figure 13: Virtual service analytics dashboard
Once the Service Engines have been created, you may need additional configuration for their NICs and IP addresses. They’ll need static IPs for management, and static IPs in your Horizon subnet for accessing the UAGs via the DMZ or the Connection Servers via the LAN. The Service Engines can be edited by going to the Infrastructure tab, then selecting Cloud Resources and then Service Engine. Additional NICs may need to be added via vCenter settings.
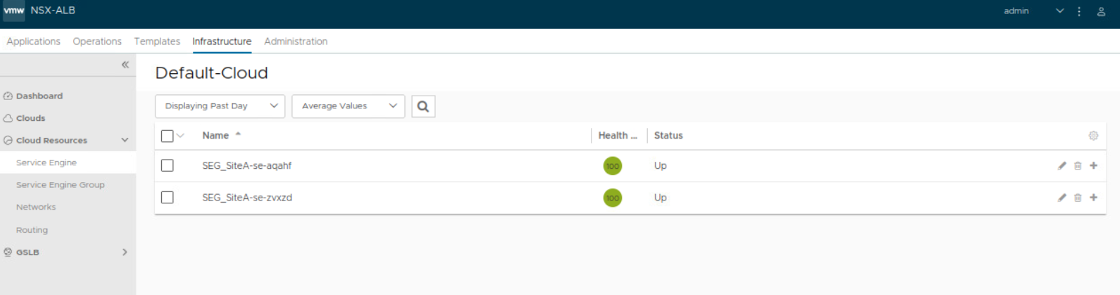
Figure 14: Service engines in Avi
Once load balancing in Avi has been tested and is working properly, you are now safe to disable any other load balancing solutions and switch DNS to your new virtual IP, if applicable. After cutover, virtual services can be easily monitored for traffic and efficiency levels. Avi is a powerful solution, combining load balancing and network automation that offers easy management, while still allowing you to customize as much as you need for your environment.
Read more about Avi and its capabilities on the following pages:
- NSX Advanced Load Balancer
- Installing AVI Vantage for VMware vCenter
- Deploy Avi for Load Balancing UAG Servers
If you want to work with us on your VMware needs, or any other IT-specific projects, feel free to reach out!