
This blog post is Human-Centered Content: Written by humans for humans.
When delivering dashboards for our clients, it’s easy to get caught up in the layout, containers and design while ensuring the experience is up to corporate standards and is “production” ready.
For me, it’s oftentimes the little things that matter most in life. And with dashboards, it’s more of the same. As filters generally sit atop a dashboard, or along the left rail, users are promoted to limit the data and visualizations to the details that are most relevant to their department, role, function or business unit.
Through self-service controls, an end user will be able to get answers to the data questions they have by narrowing the report’s results. Many of these filterable data fields are going to be in the form of discrete dimensions such as T/F, location, time period, category, etc. As changes are made to dropdowns provided, only the chosen relevant details are displayed.
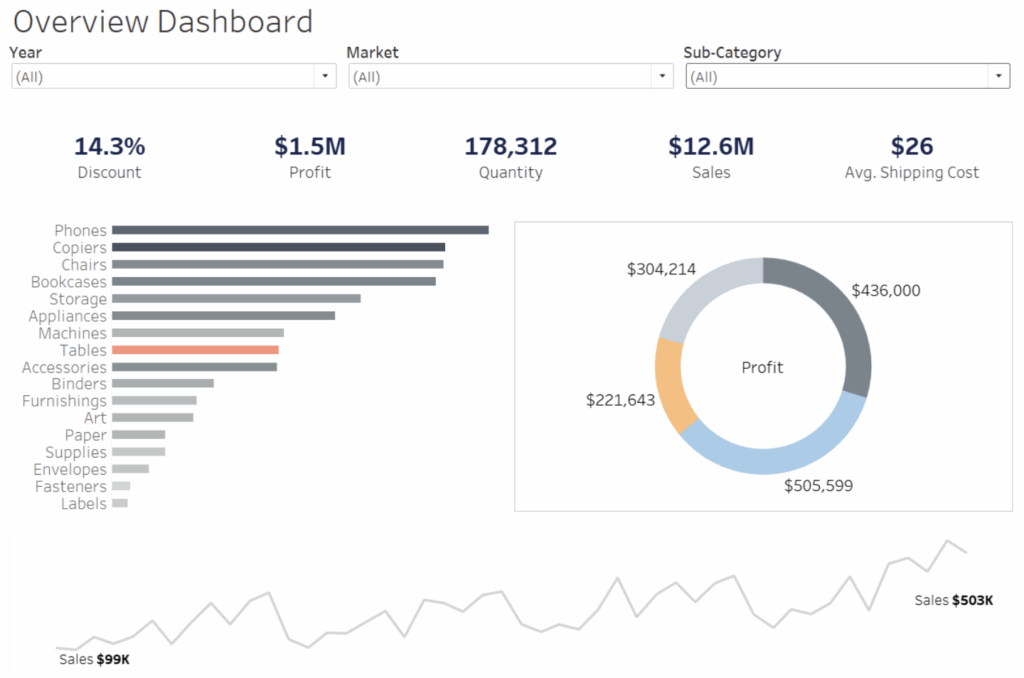
These overview-style dashboards are oftentimes developed to serve a broad audience and are indeed best practice, but sometimes they can be flooded with up to a dozen filters or more for the viewer to choose from. Going through a series of filters one by one might lead to a desired finding, but what happens when the user wants to put all of the filters back to their original “All” or default filter values?
Undoing filter selections one at a time can double the amount of time to start a new analytics journey. And time is money. Thus, I wanted to share a 7-step post on how to generate your own “Reset All” filters button, starting with a completed dashboard:
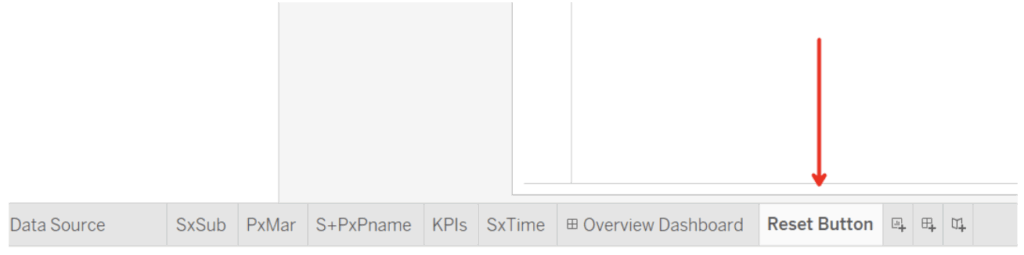
Step 1: Create a new sheet called “Reset Button” in your Tableau Workbook:
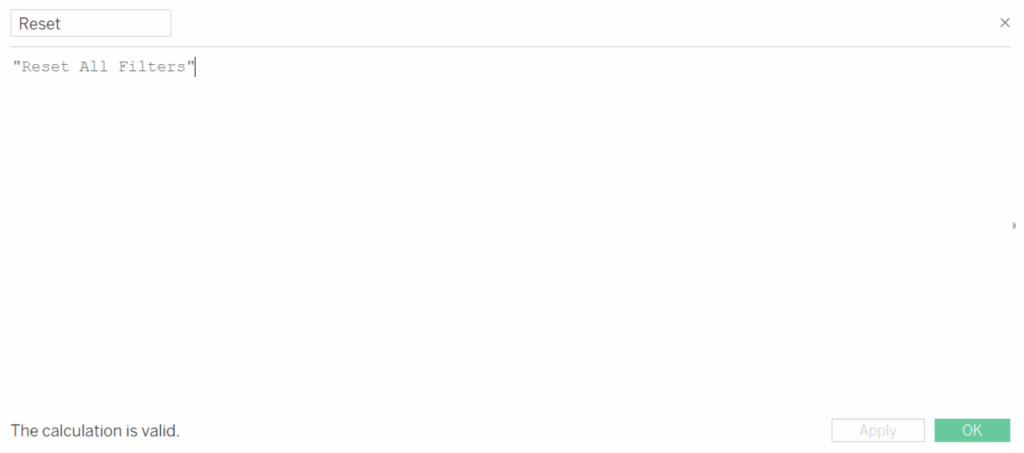
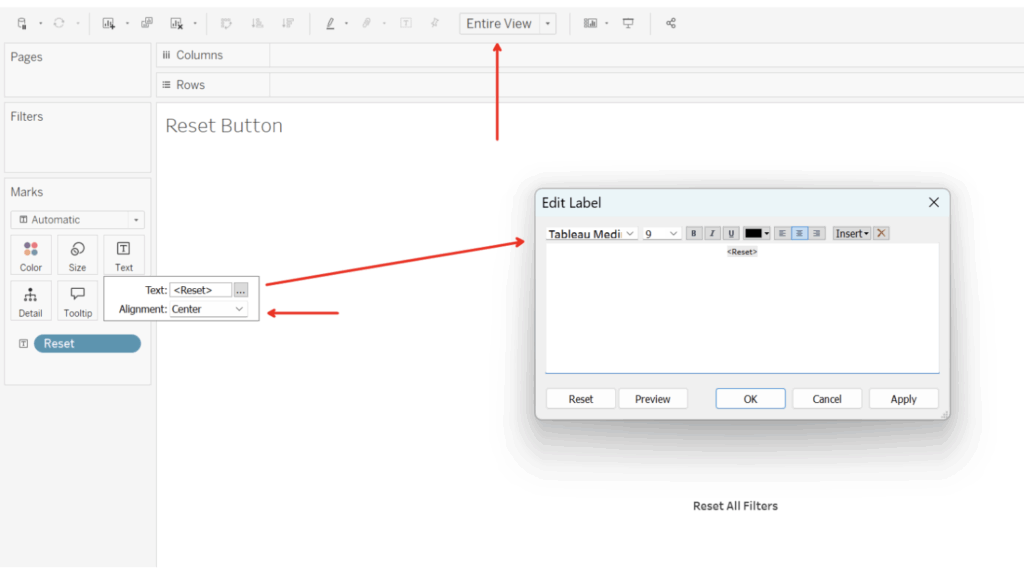
Step 2: Create a new Calculated Field called “Reset” and simply type out “Reset All Filters” in the calculated field area:
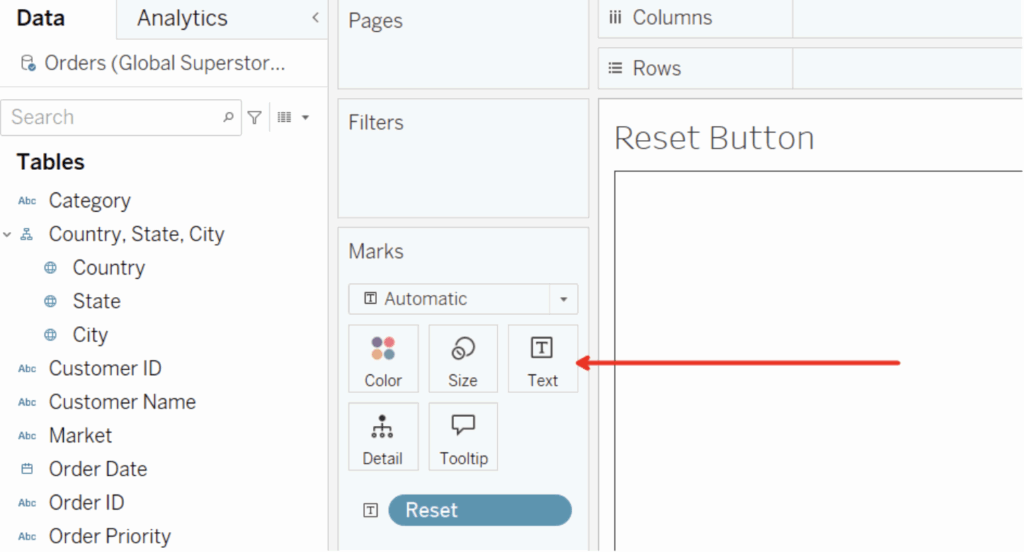
Step 3: Drag the newly created “Reset” calculated field from Step 2 onto the Text Label card:
Step 4: Adjust sheet to use Entire View (for your own sanity), align Text Label to Center and edit Text Label with the Color/Font desired:
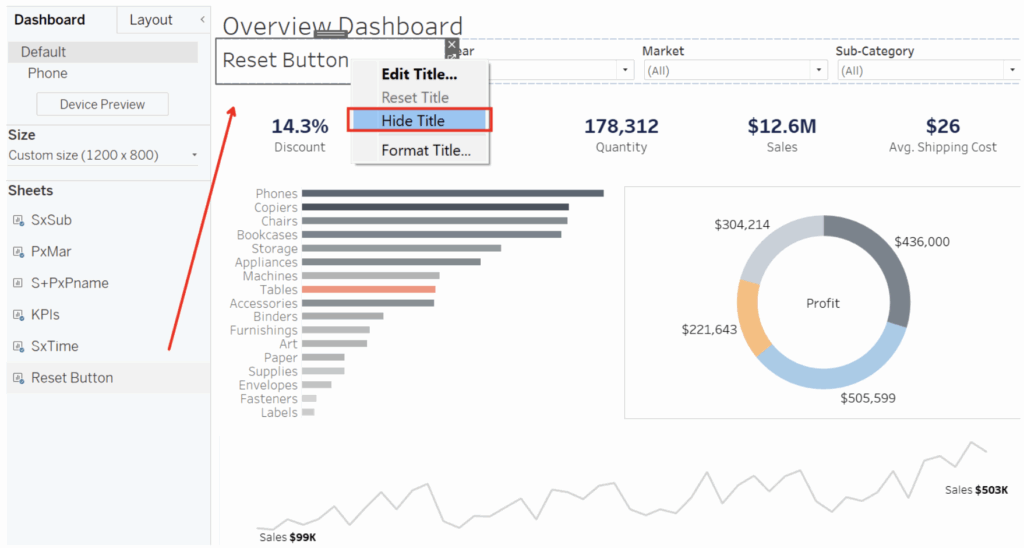
Step 5: From your completed dashboard, drag the newly created Reset Button sheet into the horizontal/vertical container row/column that houses all of your filters and right-click to Hide Title for the sheet:
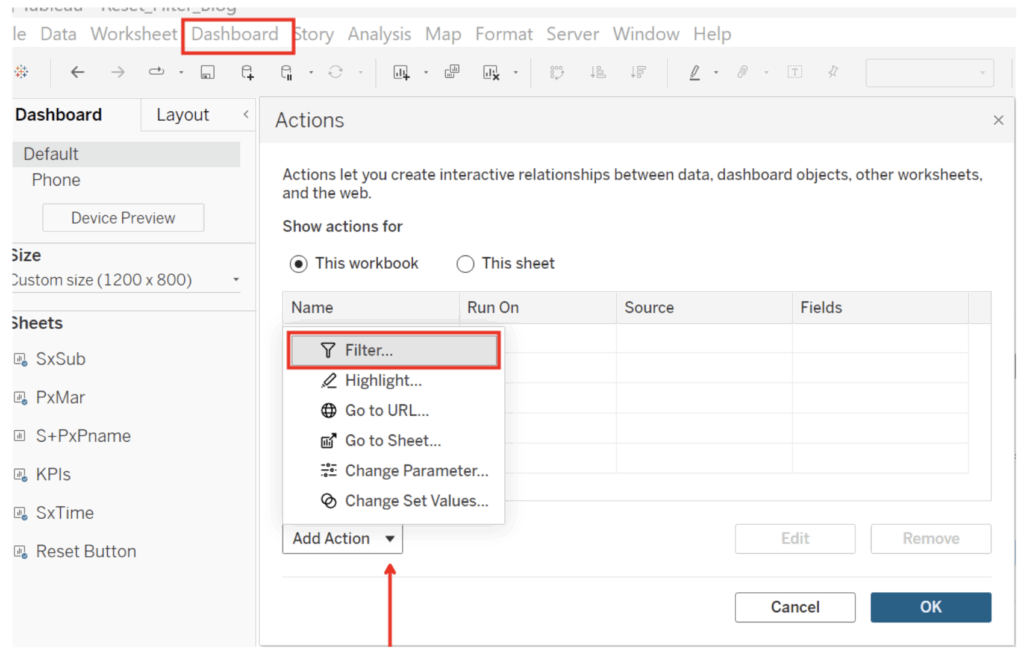
Step 6: Click the Dashboard tab at the top of your workbook and select “Actions.” Choose the “Filter” action from the Add Action dropdown:
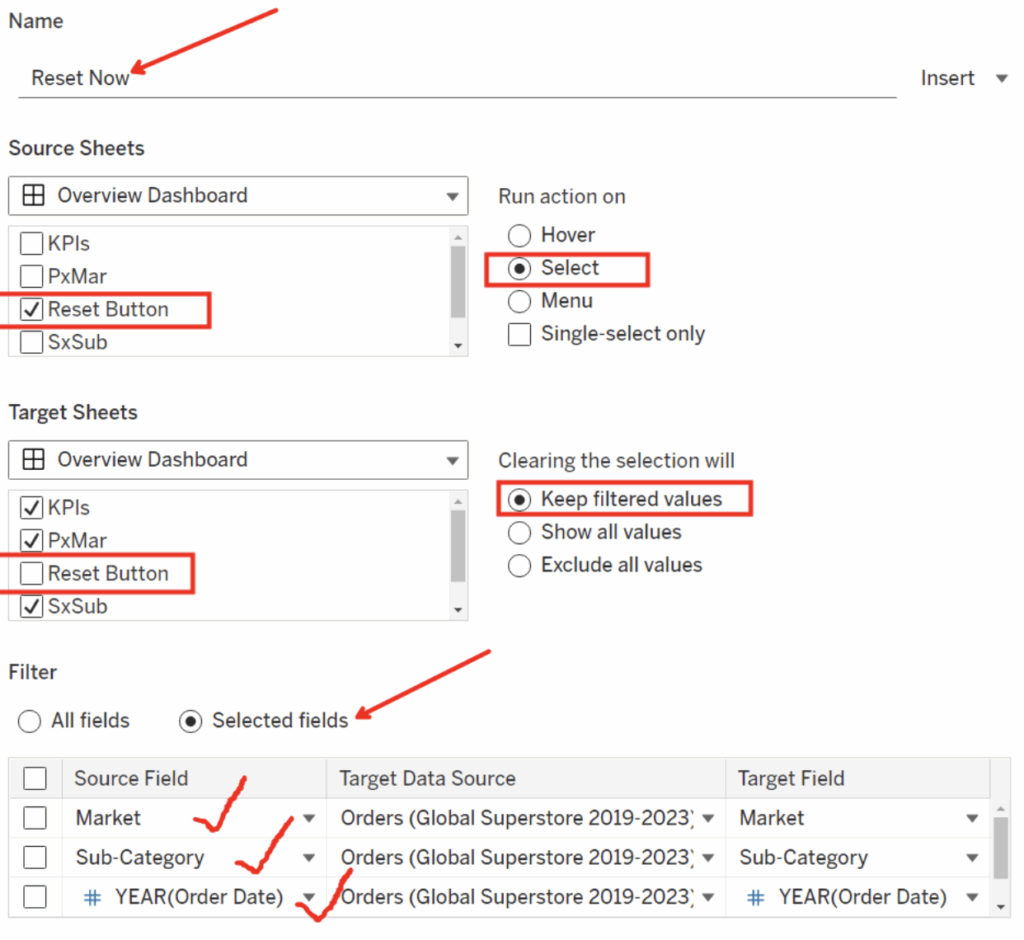
Step 7: Set up your new Dashboard Action Filter. First, give it a name (mine is “Reset Now”). For the “Source Sheets,” leave only the Reset Button sheet selected (deselect the others). Use the “Run action on” Select option. For “Target Sheets,” deselect the Reset Button sheet only. And for “Clearing the selection will,” use Keep Filtered Values. Choose Selected fields at the bottom and match each source field with the fields used as filters on the dashboard:
That’s it! From here, you can go into full screen mode to test it out and mirror a user’s experience:

In my example, it’s easy to choose the wrong date field. You have to specify in the selected fields the exact date part or value being used, as that depends specifically on the behavior chosen. Mine seems to work perfectly, and I hope yours does too. Let us know if you have questions and enjoy the extra time saved from your latest Tableau dashboard innovation.