So far in our Tableau Bridge blog series, we’ve identified What is Tableau Bridge and whether you need it for your deployment of Tableau Cloud. We then dove into Setting Up Tableau Bridge and the considerations needed to ensure success in refreshing your private network data, including Pooling . If you’ve arrived at this article and find yourself feeling uncertain about its relevance to your Tableau environment, we recommend you begin with the first blog in this series, Tableau Bridge: What Is It (and Do I Need It?),which should get you up to speed right away!
Assuming you’ve now identified Tableau Bridge is required within your analytics environment, you may be asking, “How do I schedule refresh extracts for my on-premises data?” This is a valid question that we’ll cover next.
Let’s Get Schedule Savvy
To inform our later discussion about Bridge Security, we’ll lay the foundation for Bridge Refresh Schedules, which are required to refresh extracts of private network data. It’s worth noting that the default timeout limit for each Bridge client is 24 hours, after which the task is cancelled. Any virtual connections or extract refreshes not requiring Bridge will be limited to a two hour time out period. As for Bridge concurrency, each client can load balance up to ten refresh jobs at one time, though this is configurable up to 100 if needed.
There are two primary reasons that you might create an extract of your on-premises data:
- Tableau requires it for Cloud-compliance. The two sources that fall into this category are File-based data and Statistical files, both of which are supported as Extracts only.
- You wish to improve performance of your data or take advantage of functionality not available in your original data. An example of this might be SQL Server, in which Tableau Cloud supports a live connection, but the extract makes your workbooks more performant.
As of the date of publish on this article, Tableau offers two types of refresh schedules: Online or Bridge (Legacy).
As the name suggests, Bridge (Legacy) schedules were the original means of refreshing private network data, with limitations around REST API and virtual connections. Online schedules solved for these needs, while introducing Pooling, which load balances data freshness tasks among available Bridge clients (thereby lessening the intervention required if a given Bridge client can’t perform the task). As of Bridge 2021.4.3, Online schedules are also capable of refreshing file-based data sources in Windows-based Bridge deployments (previously only conducted by Legacy schedules).
As you plan your Bridge deployment, our recommendation is to use Online scheduling, which now supports all functionality once delivered by Bridge (Legacy) schedules, Pooling, and more.
And possibly the most convicting case for Online schedules?
Tableau has asserted that support for Bridge (Legacy) schedules will eventually be removed (and they’re not available for Bridge deployments on Linux).
Though we don’t know precisely when, it makes sense to equip your Cloud site with Tableau’s more capable and well supported Online schedules. So, let’s take a closer look.
You can set up an Online schedule in one of two ways:
1. At time of publishing…
- Create your data source in Tableau Desktop
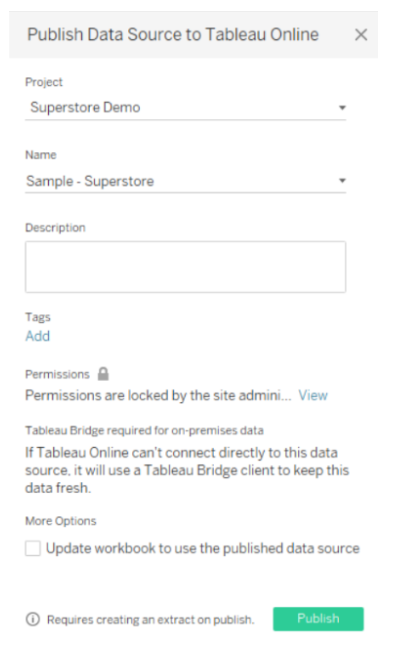
- Select Server > Publish Data Source
- Configure options for your data source, making sure to select the option to publish an extract if prompted (Note: if your data source requires an extract by Tableau Cloud – a file-based source for example, you will not be provided options here. Tableau will create an extract by default.)
- Click Publish
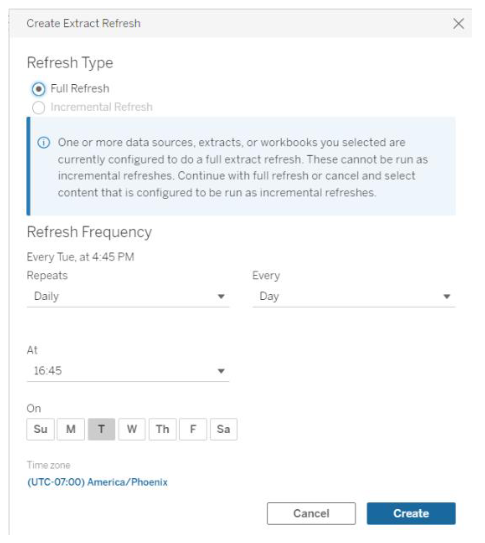
- In the Publishing Complete pop-up, click Schedule Extract Refresh
- Configure your schedule and click Create

2. After publishing…
- Navigate to the data source page for the source you wish to create an Online schedule
- Click the Extract Refreshes tab
- Click New Extract Refresh
- Configure your schedule and click Create

Easy enough! The process to create an Online schedule is quite straight-forward and will feel native to the publishing procedure for the data source that you create.
If your organization has pre-standing Bridge (Legacy) schedules, you might consider migrating to Online schedules both to mitigate the concern over a loss in future support of your Bridge (Legacy) schedules, and to take advantage of Pooling.
This migration is easily accomplished through three steps:
- Navigate to the Extract Refreshes tab of the data source page
- Select New Extract Refresh
- Configure and Create your Online schedule
How Do I Know if My Pre-Standing Sources are Using an Online or a Bridge (Legacy) Schedule?
The easiest way to identify an extract running on a Bridge (Legacy) schedule is by navigating to the source and clicking the Extract Refreshes tab. The third column header will either read “Bridge (Legacy) schedule” or “Schedule” (in reference to Online).
This source is using a Bridge (Legacy) schedule:

While this source is using an Online schedule:

What About My Prep Conductor Flows?
If your Tableau Cloud environment is equipped with Tableau Data Management, you may be curious about how to schedule your On-Premises Prep Conductor Flows for Bridge compliance. Let’s walk through that here while we’re on the topic of schedules.
- From Tableau Desktop, establish a connection to the on-premises data.
- From Desktop, publish the data source to Tableau Cloud.
- Create an Online schedule through the steps defined above, either during or after publish.
- In Tableau Prep Builder, connect to the published data source you’ve just created and build your flow.
- From Tableau Prep Builder, publish the flow to Tableau Cloud.
- In Tableau Cloud on your browser, schedule the flow task to run in Tableau Prep Conductor.
Confirming Successful Refresh
Tableau Cloud provides a few ways to confirm the status of your extract refresh, with considerations for whether that on-premises data sits as a Published data source on your Tableau Cloud Site, or is tucked inside your Tableau workbook as an embedded data source. In either case, status information can be found in the Jobs page as well as the Site Admin insights. Let’s examine how to interpret the insights for each type of on-premises data extract – Embedded versus Published.
The Jobs Page
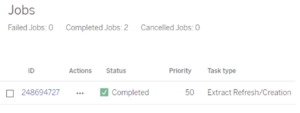
In cases of embedded connections to on-premises data, a Tableau Cloud backgrounder is engaged from start to finish. As such, when checking the Jobs page for completion status, expect the “Task Type” to be listed as “Extract Refresh/Creation.”
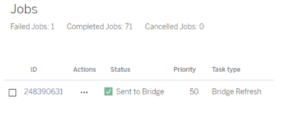
 On the other hand, Published connections to on-premises data are not technically considered an extract. Rather, these will appear as “Task Type” “Bridge Refresh” in the Jobs page. Their status will not read “Completed” as with embedded data sources, but as “Sent to Bridge” to indicate that the task has been allocated to the Bridge client.

Admin Insights
The other (more telling) place to discover cause for on-premises extract failure is the Admin Views, available under the “Site Status” page of your Tableau Cloud site. Knowing which report to look at can be a bit tricky.
We mentioned that Tableau Cloud engages a backgrounder for the entirety of an embedded data source extract refresh. In such cases, the Admin View to examine for embedded extract status is the one titled “Background Tasks for Extracts.”
For published data source extracts, see the Admin View titled “Bridge Extracts.”
In either admin view, the count of successful and failed refresh extracts will be available to help you identify the cause for failure before re-attempting the Bridge refresh.
In Conclusion
That about sums up your scheduling options with Tableau Cloud, including where to look to confirm extract refresh success or failure. Follow us to the sixth and final blog in our Tableau Bridge series to learn about Tableau Bridge security!

