Welcome to the third blog in our Tableau Bridge series. Here, we’ll discuss Tableau Bridge installation and setup. If you’re not sure whether Tableau Bridge is required for your environment, we suggest you visit the first blog in this series before you begin your installation. If you’ve been following along with us in this series and you’ve made it here, you must be ready to install Tableau Bridge so let’s do this!
Deploying Tableau Bridge.
Now that we’ve covered the data sources that Tableau Bridge supports, let’s get into the nitty gritty of your Tableau Bridge installation and configuration. This blog will discuss Tableau Bridge deployment on a Windows virtual machine. If you plan to deploy Bridge on Linux, and you’re okay with the data source limitations called out here, we invite you to check out the blog by our colleague, John Saunders, as he discusses Tableau Bridge on Linux.
It is important to note that only one Tableau Bridge client can be installed on a given machine at any time. This means that for as many clients as you wish to have available for refreshing your on-premises data, you must also have that many machines on which to install Tableau Bridge. Refresh concurrency for each Bridge client depends on your hardware and the nature of your data freshness task. We elaborate on a Tableau Cloud environment with multiple Tableau Bridge clients in the fourth blog where we discuss Pooling. For now, let’s examine the process to install one instance of a Tableau Bridge client on a Windows Virtual Machine.
First, Prepare the Tableau Cloud Site.
Ensure that your Cloud site is ready to go in three steps.
1. Activate your Tableau Cloud site through the link sent to your email:

2. Confirm the User Counts (Creator/Explorer/Viewer) align with your expectations.
3. Add a user to the Cloud site with Site Role: Site Administrator Creator or Site Administrator Explorer; this will be the account used to log into the Tableau Bridge client. We recommend using a service account for this purpose.
Then, Ready the Hardware.
Follow these steps to prepare your hardware for installation.
1. Identity a dedicated machine behind your firewall for each Bridge client you wish to install. See recommended software and hardware considerations here.
2. Install necessary drivers on the machine to communicate with the databases. To get drivers for connectors that Tableau Bridge supports, go to the Driver Download page on Tableau’s website. Pay careful attention to Tableau’s notes about which version number of a driver to use, if applicable.
3. Identify a Windows user account that will be used to run the Bridge client in service mode (recommended for uninterrupted functionality). Ensure that the Windows user account is a member of the local admin group on that machine, and that the account has access to all data sources that will be connected to.
And Finally, Install Tableau Bridge.
Spoiler alert – it’s a breeze!
1. Download and run the latest installer.
2. After the client is installed, start the client by double-clicking the Bridge shortcut on your desktop.
3. Sign in with the user account added to Tableau Cloud in Step 1, who’s been granted Site Administrator Creator/Explorer access:

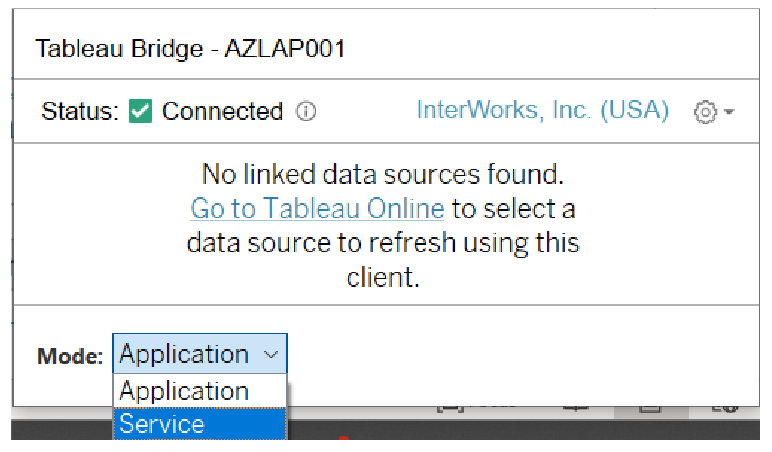
4. Change Mode to “Service”:

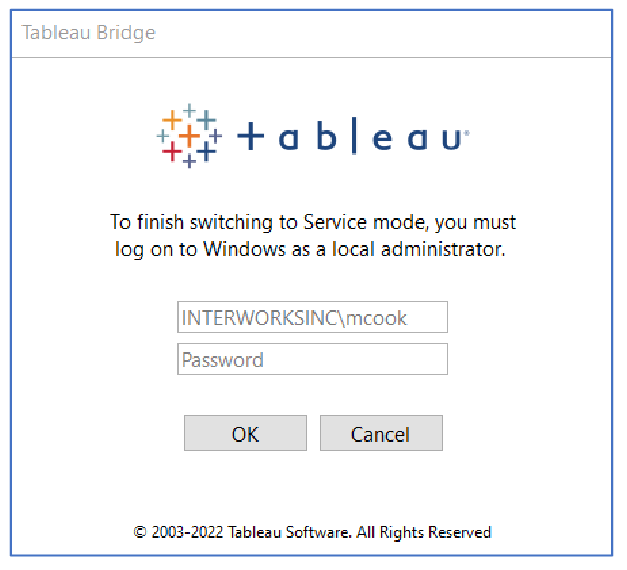
5. At this point, you’ll be prompted to sign into Tableau Bridge with the local admin account established previously:

With Bridge installed successfully, it’s time to explore Pooling. Follow us to the fourth blog in our Tableau Bridge series as we learn how Pooling load balances data freshness tasks for a better optimized site.

