
Congratulations! You’ve just rolled out Tableau and are beginning to onboard users. Everyone is excited and ready to get started using Tableau. People are off building dashboards and reports, but then the inevitable happens.
“Wait a minute, these numbers don’t look right.”
“Why does this dashboard say we had $28,000 in sales, but this one says $23,800? What formulas did they use?”
Building trust in our data and numbers is one of the most crucial steps in increasing Tableau (or any analytics tool’s) adoption. If people don’t trust the data or numbers they are being presented with, they are less likely to use them for analytics. That is precisely what we want to avoid.
Why Would We Want to Publish a Data Source?
Let me be clear – I am not suggesting that using published data sources is the single answer to the above scenario. To have a successful Tableau and analytics deployment, you do not need to work with published data sources; but for many of our clients, it makes sense to do so for certain scenarios.
The top reasons to use published data sources in Tableau:
- Leverage Tableau to standardize and govern your data
- Ease of access to data
- Standardize business calculations – create a single source of truth
- Administration and maintenance
Honorable mentions include:
- Data Source accessibility (via Web Authoring) on the go
- Tableau’s Data Management & Lineage features
There are other tools and ways out there to do this just as well, if not better; BUT, since you are already using Tableau as your visual analytics tool, continue reading. You may find these built-in features to be exactly what you are looking for.
One more thing before we get started: Published data sources should not be confused with embedded data sources. An embedded data source can be defined as the connection information to the original data source that is included or “embedded” in most Tableau file types. This includes .tds, .tdsx, .twb and .twbx-files. A published data source is a standalone data source that other users in our Tableau environment can connect to in order to build analysis. If this is at all confusing, please check out Rob’s blog post on the different Tableau file types and extensions.
Getting Started with Published Data Sources
First things first: Publishing a data source to Tableau Server or Tableau Online always starts in a Tableau Desktop workbook or Tableau Prep Builder. When would you use Prep Builder? If you are looking to connect to a data source, then do a lot of data transformation before publishing it, you could use Tableau Prep Builder. For the sake of this blog, we are going to use Tableau Desktop to create the workbook.
Important: When publishing and hosting a data source on Tableau Server, we have found it to be beneficial to dedicate one workbook to JUST hosting the data source connection. Do not use this workbook to build dashboards as that adds unnecessary layers of confusion. Now, let’s go!
Step 1: Log into your Tableau Server environment and create a new project folder. Name it Published Data Sources.
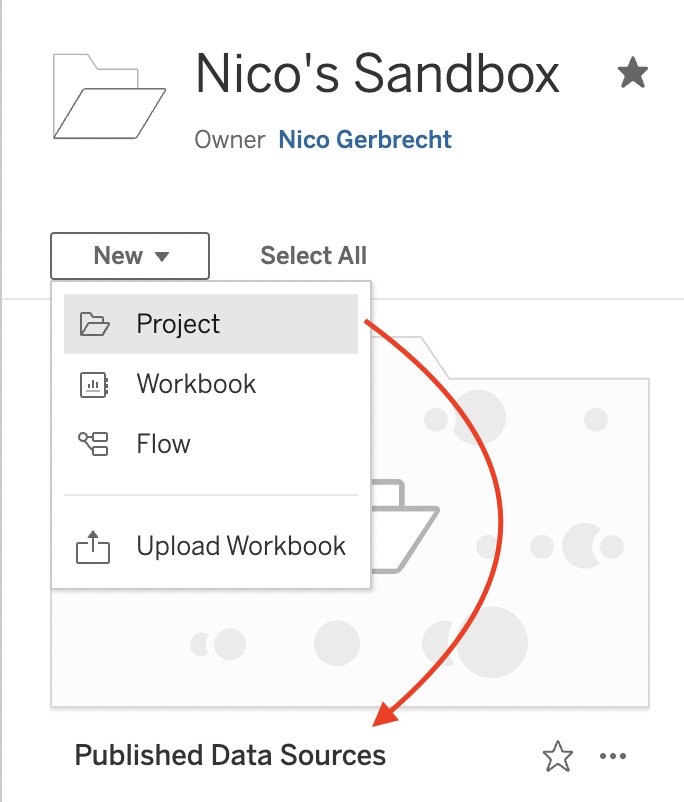
This will serve as the location in which we publish our data source. That way it will be easy to find, and it is in a dedicated place that no other types of content should be published to.
Quick note: Projects in Tableau are basically folders, so we are creating a folder here.
Step 2: Open a new workbook in Tableau Desktop.
Remember: Don’t use an existing workbook with other dashboards in it. It’s best to use a dedicated workbook to host this data source. This makes it easier to edit the data source and troubleshoot potential issues later.
Step 3: Connect to the underlying data source that you would like to use for publishing.
Either connect via the Connect to Data button or navigate to the Start Page and connect via the menu on the left-hand side. Connect with the relevant data source for you. I am using a simple Excel file in this example.
Step 4: Add any business calculations or transformations you want standardized for this data source.
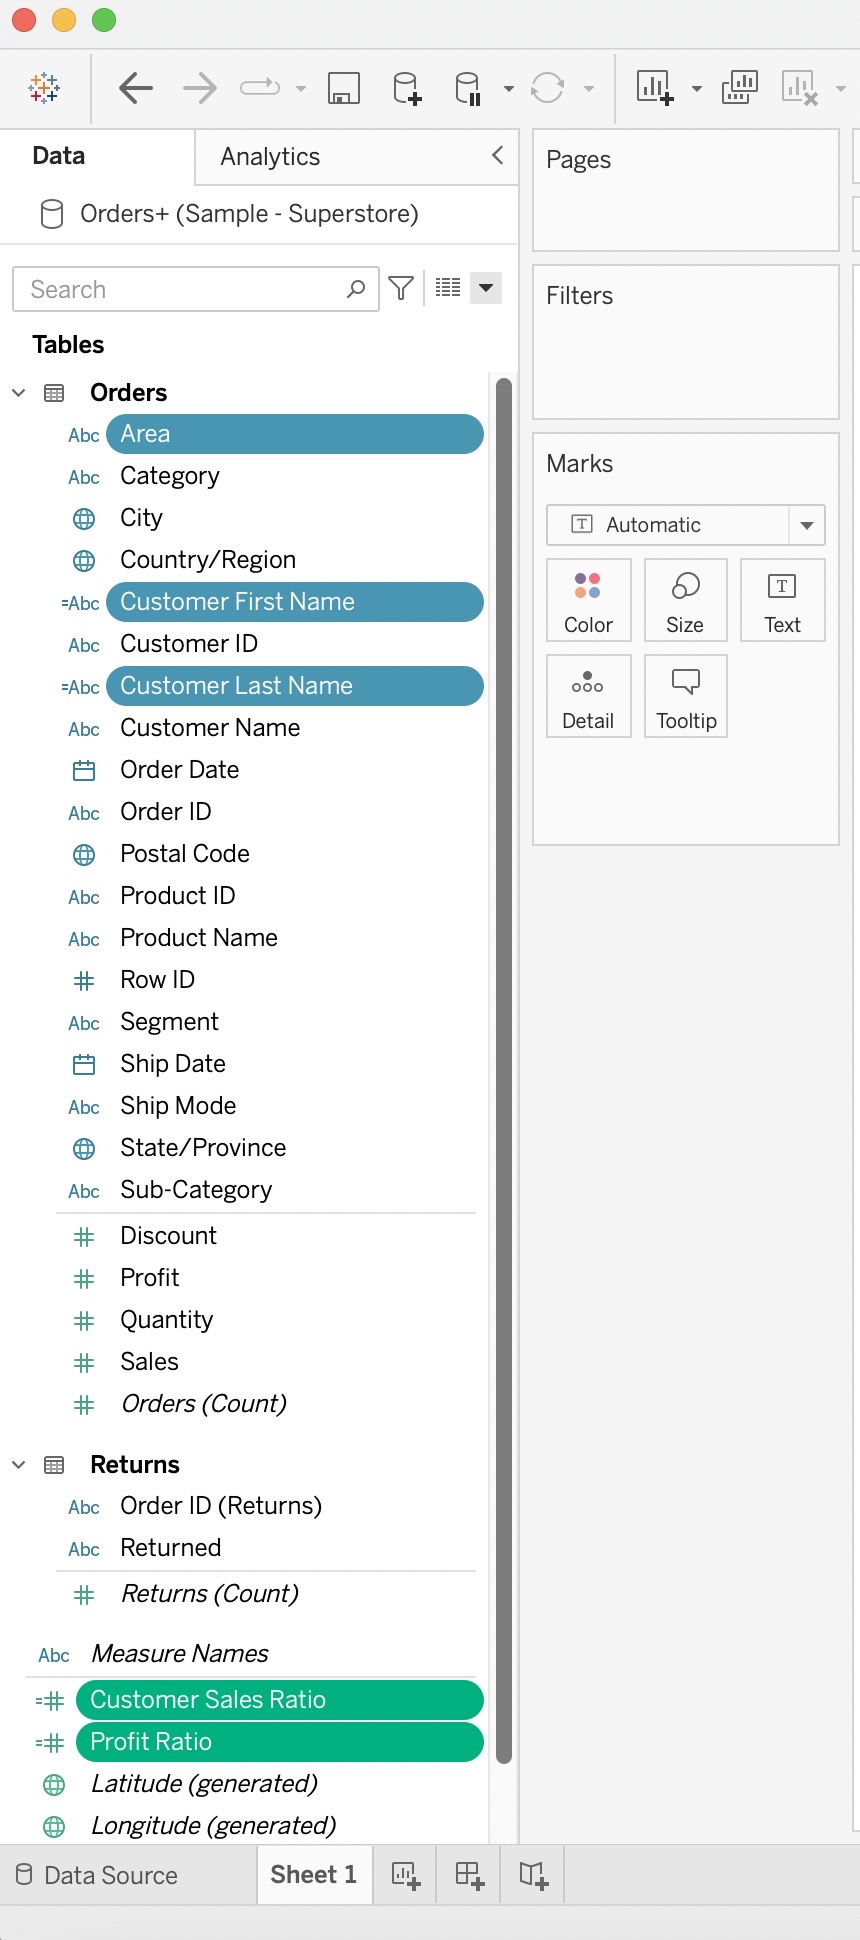
In the image above, I’ve made five changes to the data. If you’d like to follow along, I am using Tableau’s curated data set, the Global Superstore. I have renamed Region to Area, split out the full Customer Name into First and Last Name, and added two business calculations Customer Sales Ratio and Profit Ratio. These are all changes I want standardized for this data set.
One more thing that published data sources can be useful for is standardizing default properties of fields in Tableau. Any changes I make to the default properties of a field will also be reflected for my Tableau developers once the data source is published. Examples of this can include setting the default format for a ratio to a percentage instead of a number, changing default aggregations to AVG instead of SUM, or custom date formats.
Tip: When selecting the calculations, be selective on which ones you want standardized. Include business calculations that should not be changed. Also include data quality of life changes, such as re-naming fields due to naming conventions or light transformations. Try not to include workbook-specific calculations or parameters.
Step 4.1: Verify you are logged into your organization’s Tableau Server. If not, navigate to Server in the top menu > Log In, and sign into your Server (or Cloud) environment.
Important Note: If you are on a newer version of Tableau Desktop than your Tableau Server, then you will not be able to publish the data source. To do so, use the Tableau Desktop version that corresponds with your Server version. If you need to download a previous version of Tableau Desktop, you can find all releases of here.
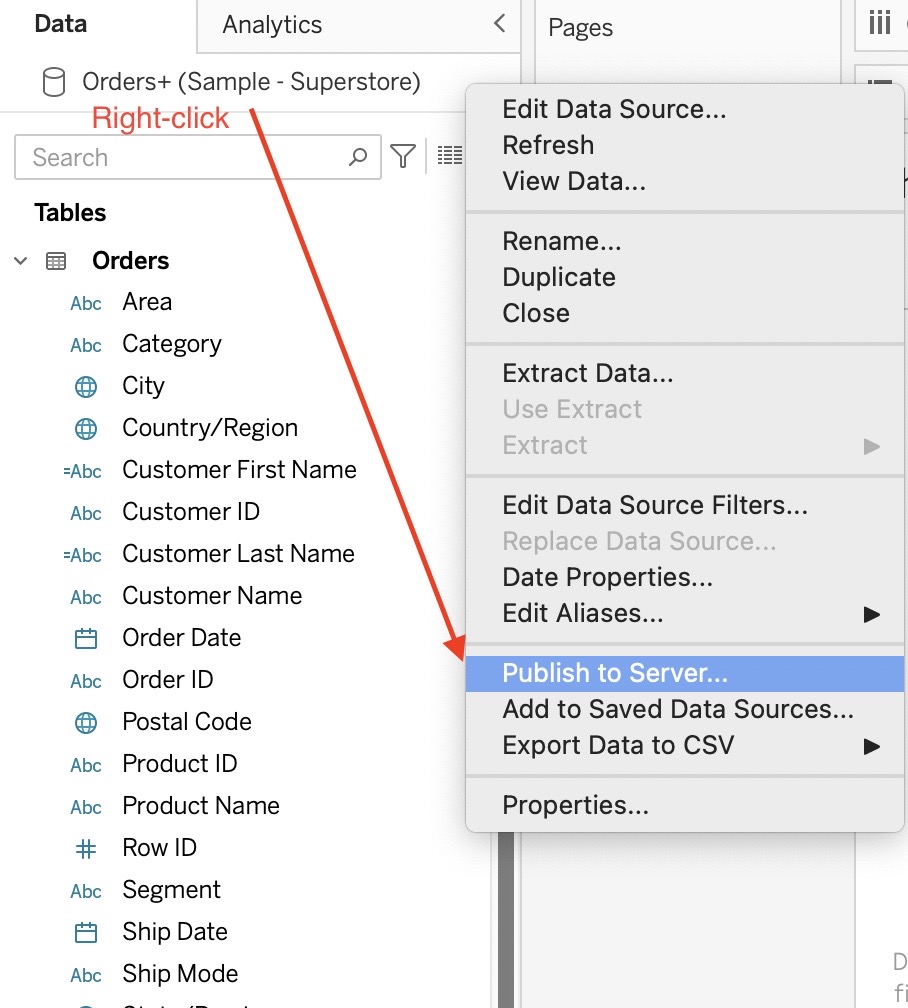
Step 5: Right-click on your data source, then select Publish to Server.
Step 6: Choose your settings and publish.
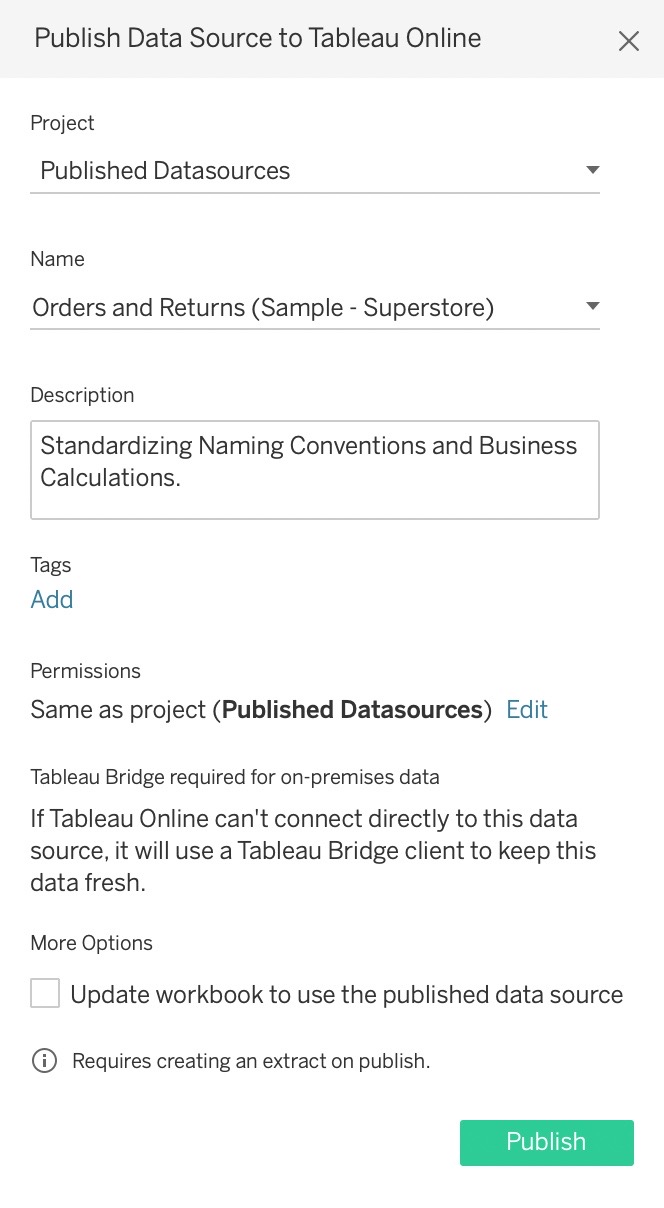
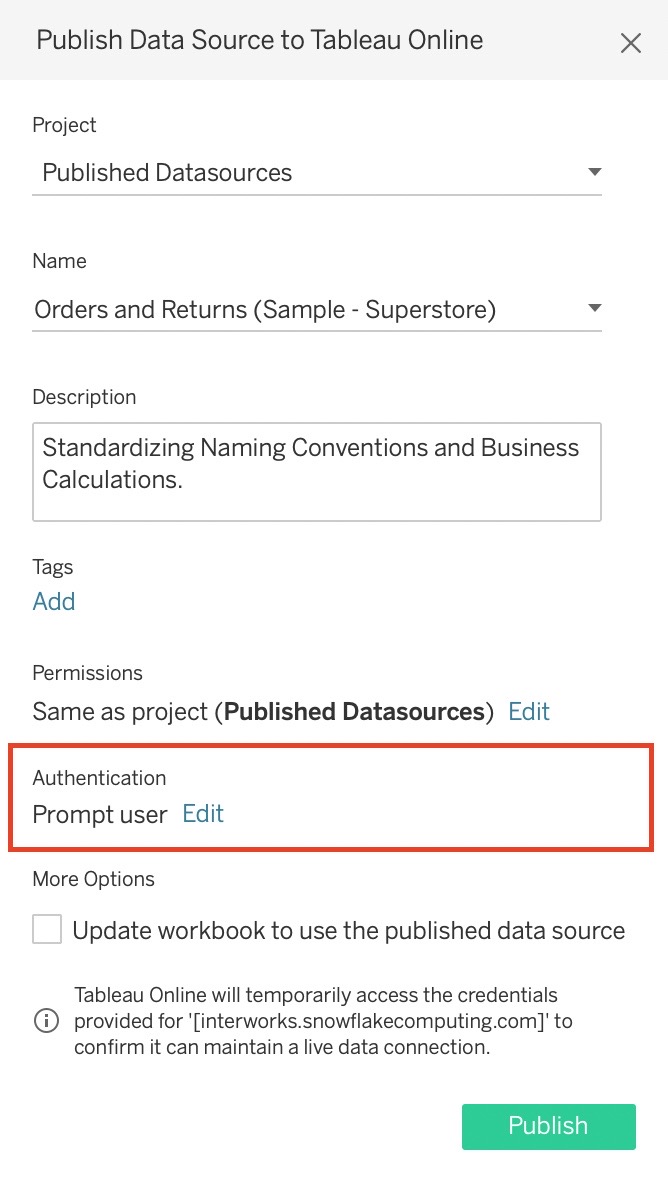
Choose the project folder the data source will be published in. We’ll use our previously created project folder from Step 1. Choose a name for your data source and add a description. Add tags as desired and set permissions for this data source. My recommendation is to leave the permissions set to Same as project. If you would really like to change them, do so in the Tableau Server interface, not here. Lastly, we have the option to replace the data source in our workbook from the direct connection to the newly created published data source. This is optional. When happy with our settings, let’s hit Publish.
A new browser window opens and shows us our newly created published data source on the Server. This data source now lives in the previously created project folder Published Data Sources we created in Step 1.
Note: When publishing a data source from a Server-based connection, you get an additional setting choice that lets you choose whether you want to embed your database credentials or if you would like Tableau to require a database login for each user trying to use this published data source. Choose Prompt User if you want people to have to log in. Choose Embed Credentials when you want them to be able to use this data source without having database credentials. Please note that often only data engineers, architects or admins have database credentials. Most times, we want to embed the credentials so users can access the data source without also needing database credentials.
Step 7: Verify and test on Tableau Server/Cloud.
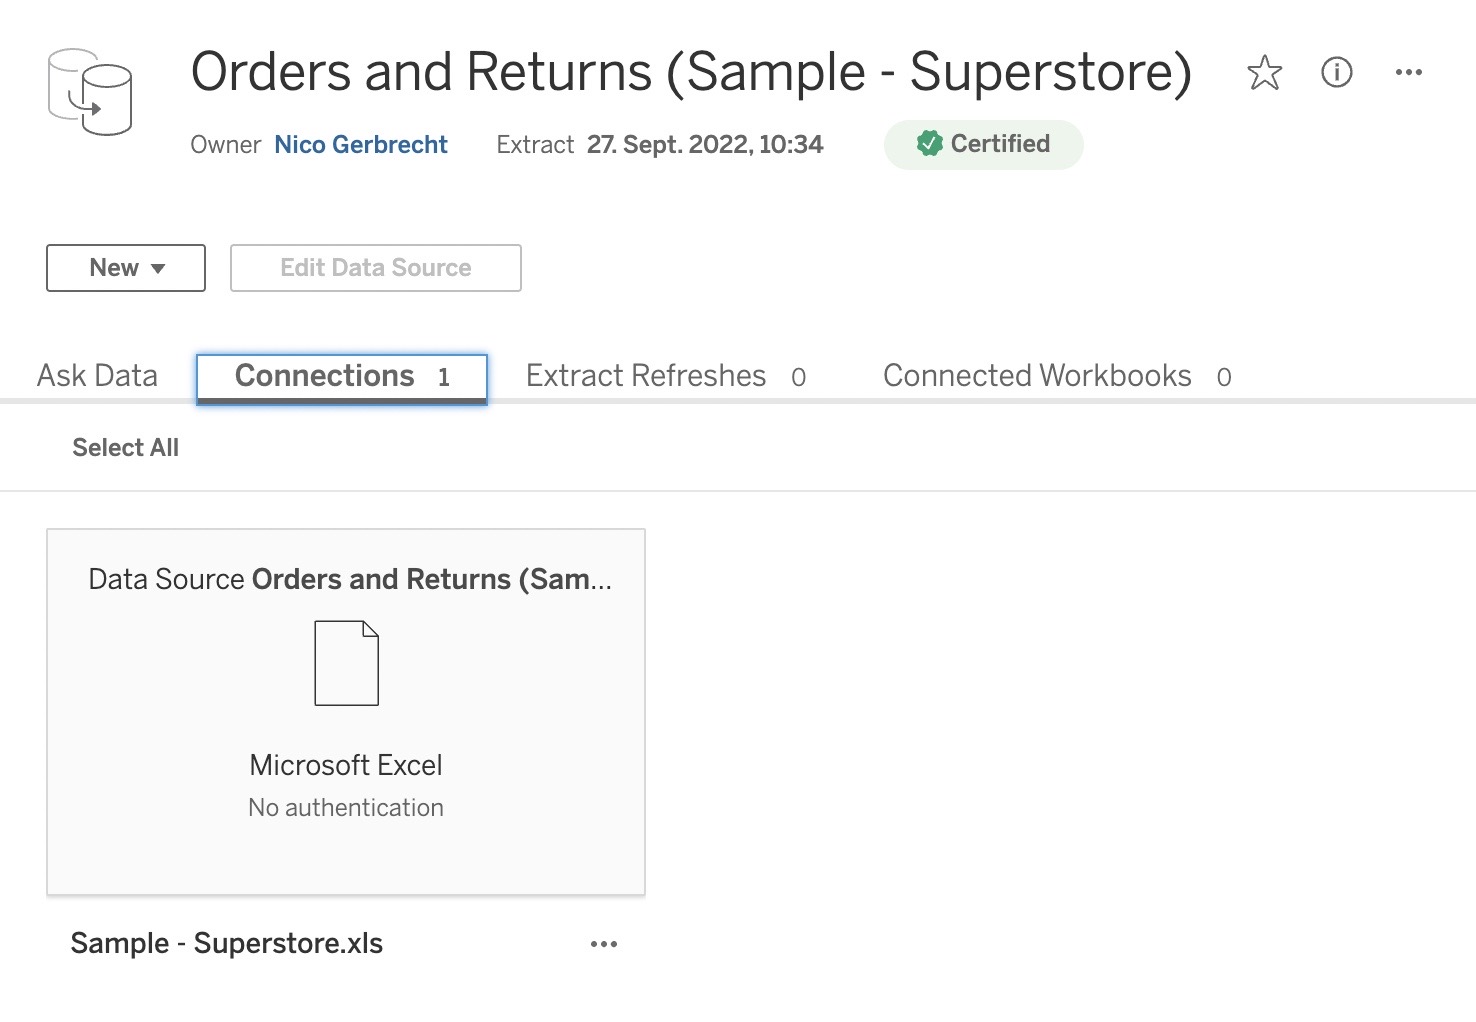
Navigate to the Published Data Sources project and you should now see your published data source. Checking the Connections tab, we see that we now have our connection established and working. Don’t get scared by the No Authentication text – all it means is that since we used a file-based data source, users connecting to our new data source will not need any credentials to use it.
Now, let’s make sure all our changes are properly reflected within our new data source:
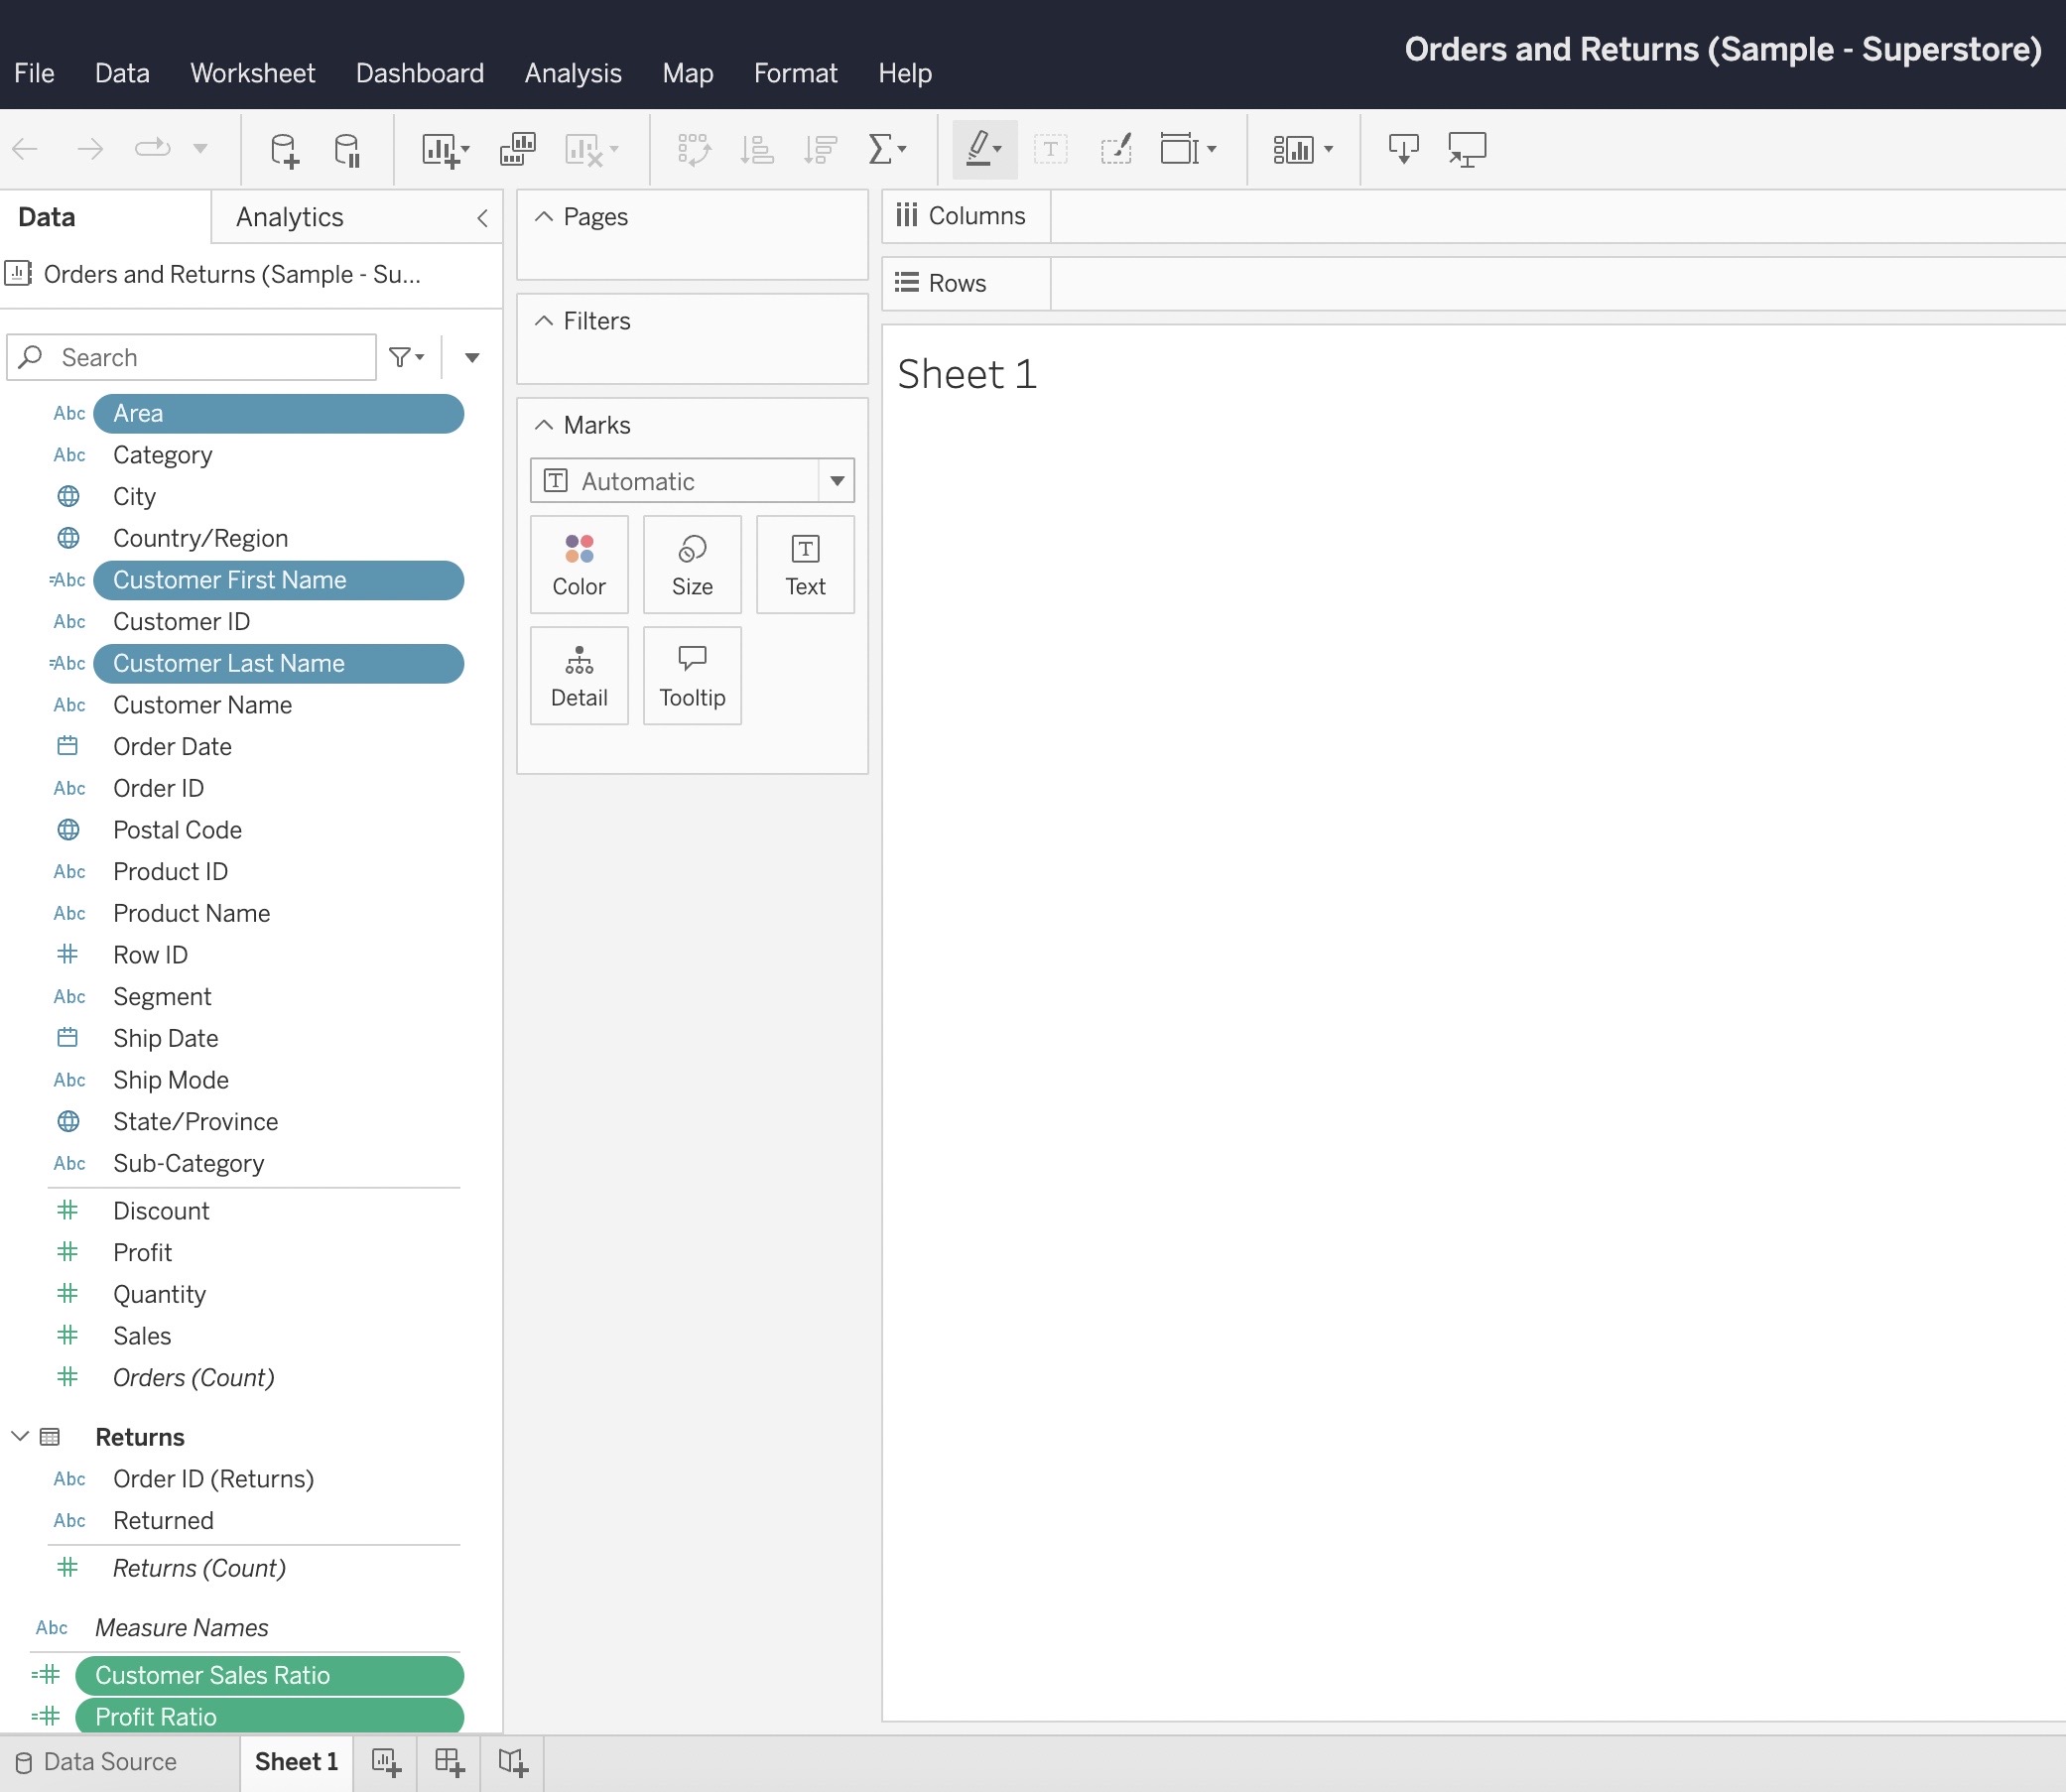
As we can see, when creating a new workbook from this data source connection, all our changes are properly reflected and applied in the data pane. This means no more “What is the correct calculation for Profit Ratio again?” – All our users can now leverage these standardized calculations. At the same time, we can rest assured that we won’t have 5 different answers to the same question anymore.
Let’s recap
How did this work? When creating a published data source, Tableau is essentially creating a .tdsx file that is published up to the server. A .tdsx file is a ZIP-file that contains any local file data used, as well as the information necessary to connect to the original data source, in form of a .tds file. The latter contains no actual data, but the data source connection information and all metadata changes and transformations in regards to the data source, meaning calculated fields, parameters used in calculations, default properties, data model, join constructs, extract information and data source filters. combined, this gives us a everything we need to create a working data source for our users to interact with.
I hope this was a helpful introduction and gave you some insight into why you might want to use published data sources in Tableau and how to set them up.
Up Next
There’s a few more things to cover, so please come back to the next part of this blog series to learn about the following topics we didn’t cover today:
- Certifying Tableau Data Sources
- Editing a Published Data Source
- Tableau Web-Authoring
- Creating Content from Published Data Sources
- Ask Data
- Lineage (Part of Tableau’s Data Management)
- Virtual Connections (Data Management) and Published Data Sources