Those of us who have been in the backup realm a long time remember when Veeam Backup and Replication (Veeam B&R) was one of the top backup vendors for virtualized environments. Fast-forward to today: Veeam B&R is now considered to be an enterprise-grade solution that is one of the leading backup vendors. They can now backup physical workloads (servers, desktops and laptops); integrate seamlessly with a large variety of cloud vendors (including AWS and Azure); and can integrate with a variety of SAN vendors. With the release of the highly anticipated Veeam B&R version 10, Veeam’s product now has the capability of backing up NAS environments as well.
Although I like reading about new features (which can be found here on Veeam’s website), there is nothing quite like getting some hands-on experience. I recently had an opportunity to deploy the new NAS functionality on an enterprise-grade NAS device—in this case, Isilon. After some extensive testing, I found that there were a couple of different ways that the NAS functionality could be implemented depending on what kind of security settings I wanted to apply. Below, I have highlighted the two methods for backing up an Isilon via an SMB share.
Understanding Your Isilon Configuration and Access Zones
Before diving into two configurations, it is important to have a basic understanding of how your Dell EMC Isilon is configured as this will determine how you may want to configure your Veeam NAS backups. Isilon can be partitioned into virtual containers called ‘access zones’ that allow an IT admin to isolate data and who can control what data in each zone.
A basic Isilon configuration will contain a built-in ‘System’ zone that is designated as a management access zone and a general ‘Data’ zone (the name Data is subject to change based on the implementor) that is more designated for general user access. More advanced setups can contain additional zones that act as additional ‘Data’ zones.
In the screenshots below, the Isilon has two separate IP ranges designated for external network access. For our purposes today, assume that we have an IP range of 172.16.0.1 – 172.16.0.254:
- Data_Pool (Data Zone)
-
- IP RANGE: 172.16.0.11 – 172.16.0.21
- DNS NAME: isilondata.domain.local
- Mgmt zone (System Zone)
- IP RANGE: 172.16.0.31 – 172.16.0.46
- DNS NAME: isilondata.domain.local
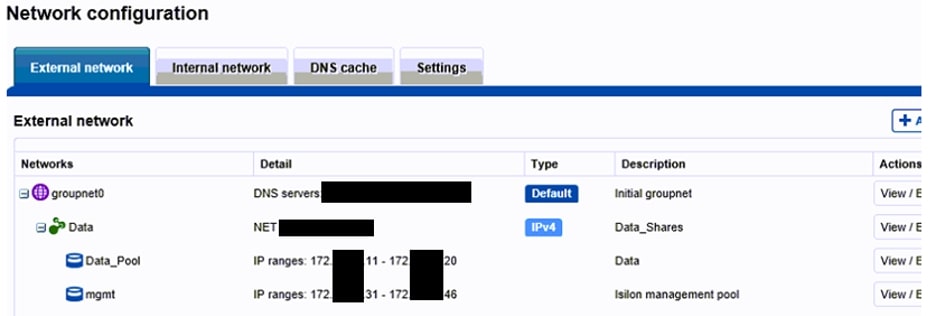
By clicking View/Edit on the far right of the screenshot, I can validate that the ‘Isilon’ has the .11 – .20 range in the Data Access Zone, and the .31 – .46 range in the System Access Zone:
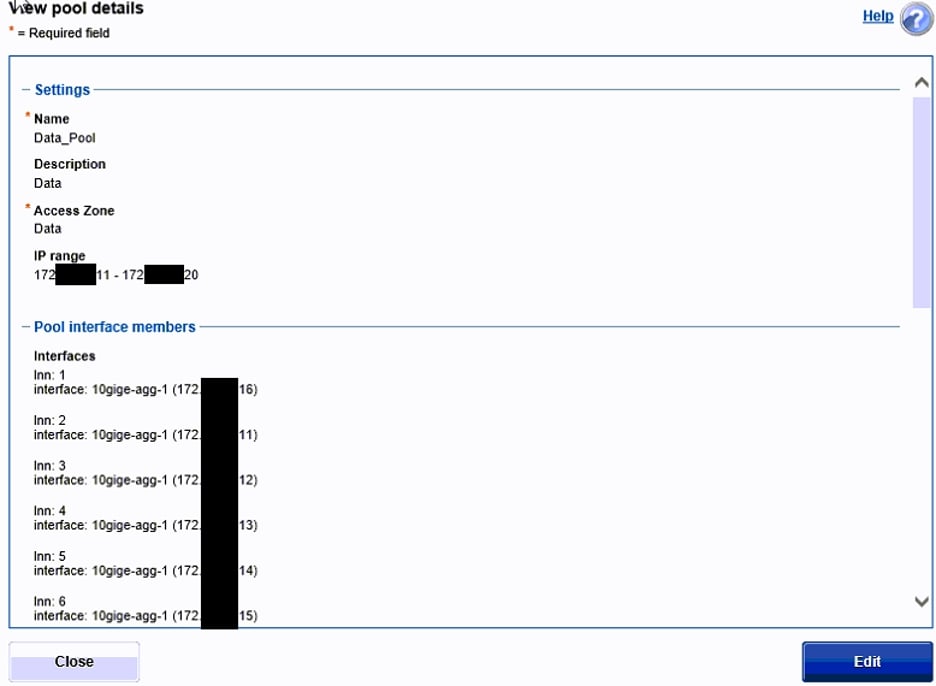
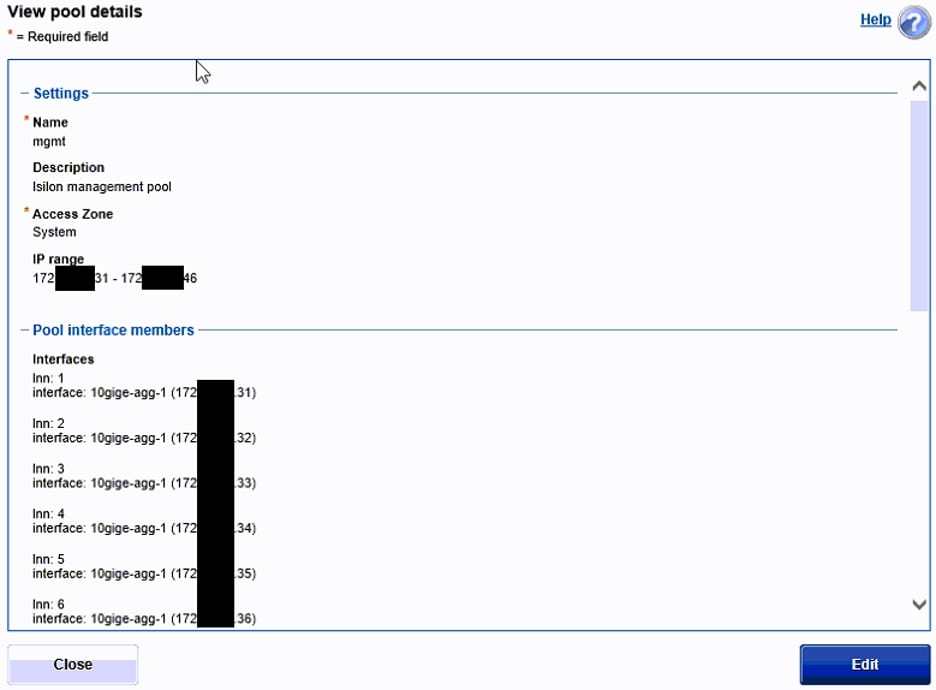
Make sure to take note of each of these Access Zones as they will determine which method can be utilized.
Method 1: Veeam and Isilon – BackupAdmin Role and the Ifs Share
Method 1 will discuss creating a backup service account on the Isilon that will have access to all folders. This article method further elaborates the requirements listed in the Veeam Help Center article and, specifically, the snippet below on Isilon built-in user roles:
1 If you use a Dell EMC Isilon storage system in the CIFS Share Access mode, make sure that you have assigned your service account to the built-in BackupAdmin role within Isilon. Otherwise, the access to the share will be denied.
As a general best practice, it is always strongly encouraged to make service accounts versus using any sort of default built-in root/administrator user. For our integration, we have created an Isilon-veeam service under the System zone. If an Isilon is on the domain, the service account can be a Domain Account.
Under the Roles section and for the System zone, a built-in BackupAdmin role already exists. Note that the built-in BackupAdmin role does not exist on any ‘Data’ zones:
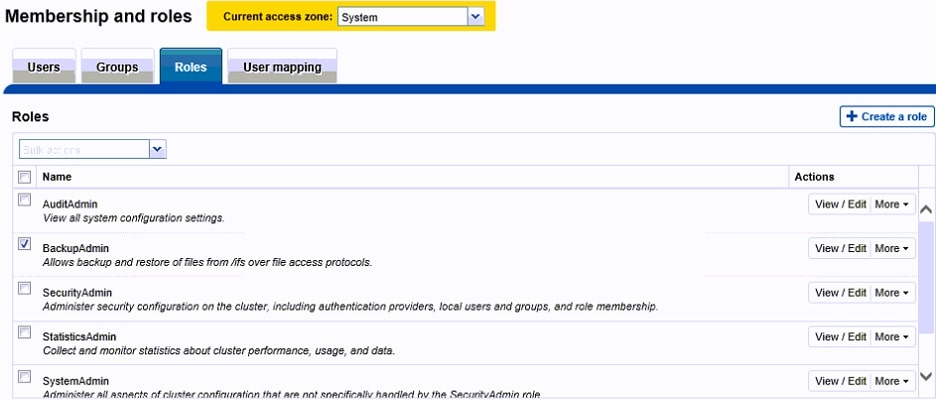
Modify the BackupAdmin role, and add the newly created Isilon-veeam service account or domain\Isilon-veeam service account:
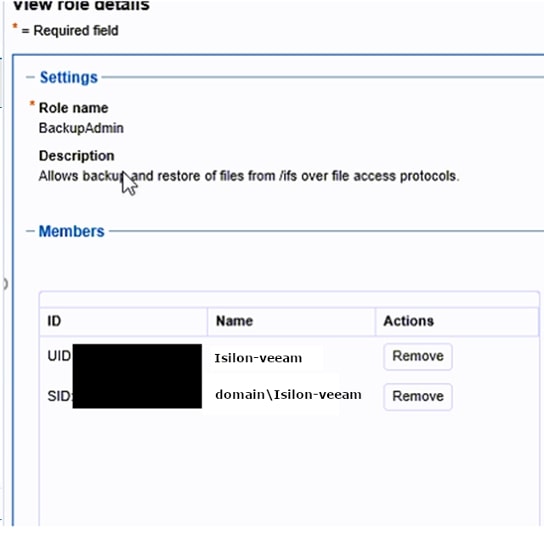
This will grant access to the default /ifs share (or other shares on the System zone) to be able to back up and restore data:
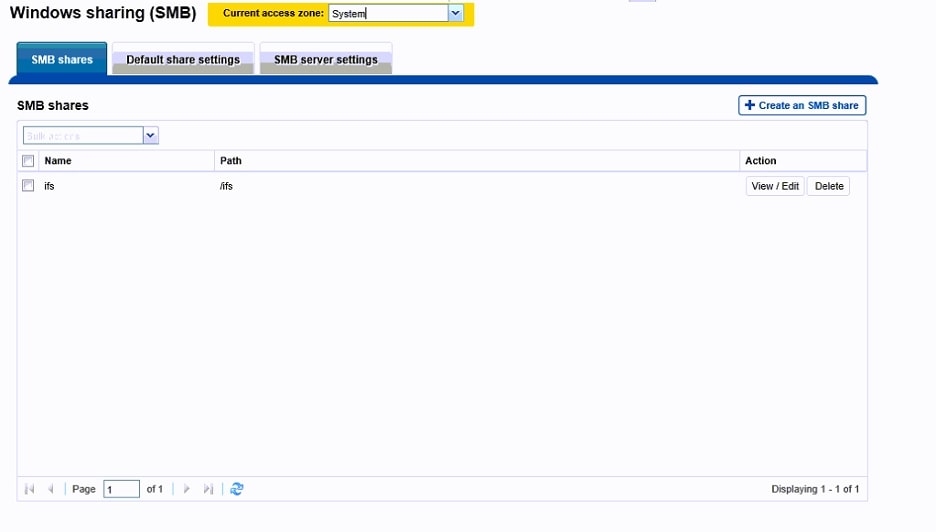
Proceed to the section labeled Setting up an SMB Share in Veeam for next steps.
Method 2: Veeam and Isilon – Configuring Access to a Specific Share
If granting access to a share in the System zone, or the IFS share is something that is not desired at this time, access to a direct share can be configured instead. For example, if I want to grant access to the Users$ directory that lives in my Data zone, I need to navigate to the SMB share, modify the share and make sure I add the service-account that I created.
Note: Keep in mind that the service-account to be used can live in multiple zones including the System Access zone; however, with this method, since I am trying to access the Users$ folder that is in the Data zone, the service-account I plan on using must be in the Data zone as well:

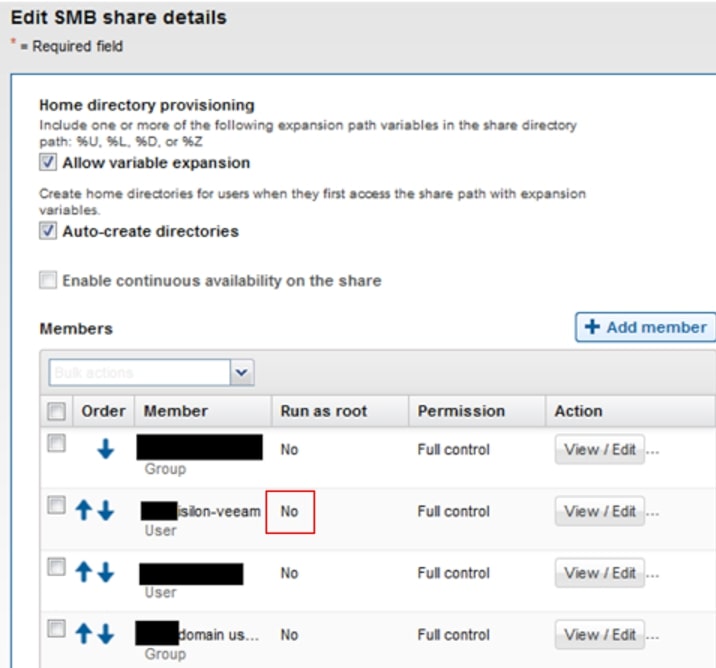
Since I want my DOMAIN\isilon-veeam account to have access to the Users$ share, I must grant root access for Veeam to be able to backup and restore to the SMB share. If only Full control has been granted, you will be able to traverse the directory, but access will be denied to the directory:
Setting up an SMB Share in Veeam
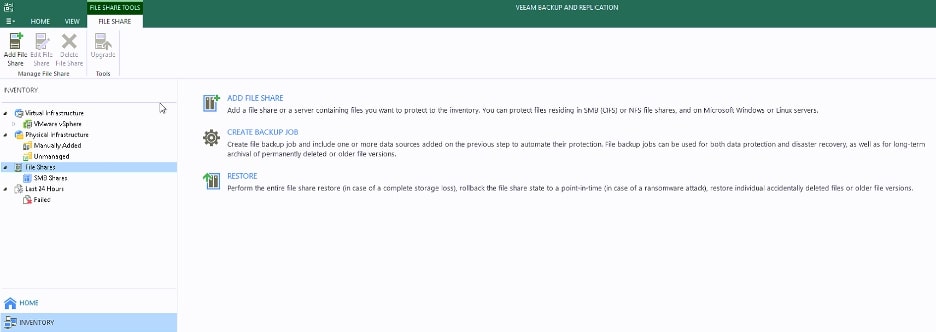
To add a share to manage within Veeam, navigate to the INVENTORY tab and FILE SHARE:
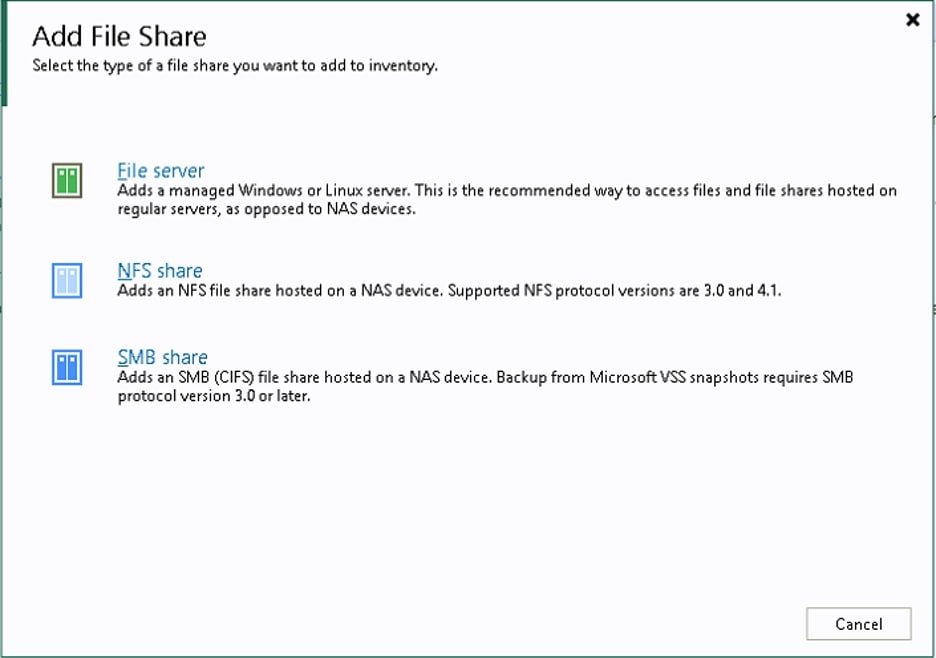
Next, add the type of file share. In this case, since we have an SMB share configured on Isilon, the SMB share option will be selected:
Like the VMware Backup Proxy that processes data from a VMware environment, Veeam has introduced a File Backup Proxy that will process the majority of the backup functions from an NAS device:
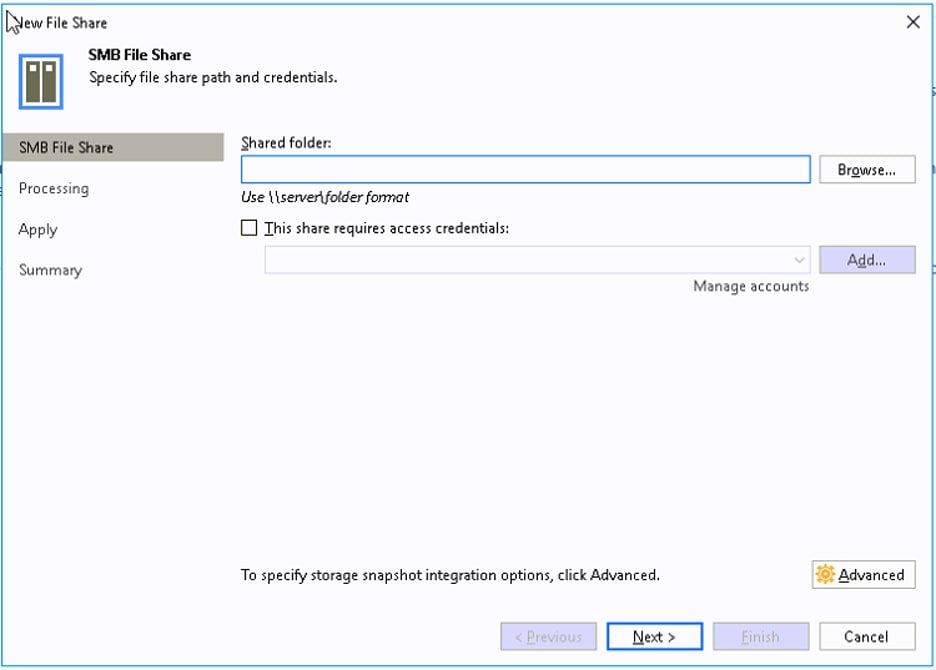
The Shared Folder and access credentials are going to depend on which method was used earlier in this article.
Note: Keep in mind that the File Backup Proxy must be able to access the IP range for the Access Zone on the system.
In the example shown in this blog, the end goal is to make sure that the user’s directory is backed up. In this use case, the path to access the data is either /ifs/domain/Isilon/Data_Access_Zone/Users (shown under the Data Access Zone above) or \\isilondata.domain.local\Users$ if I am directly accessing the share.
Using Method 1
A quick recap of our known System Zone info:
- Mgmt zone (System Zone)
- IP RANGE: 172.16.0.31 -172.16.0.46
- DNS NAME: isilonmgmt.domain.local
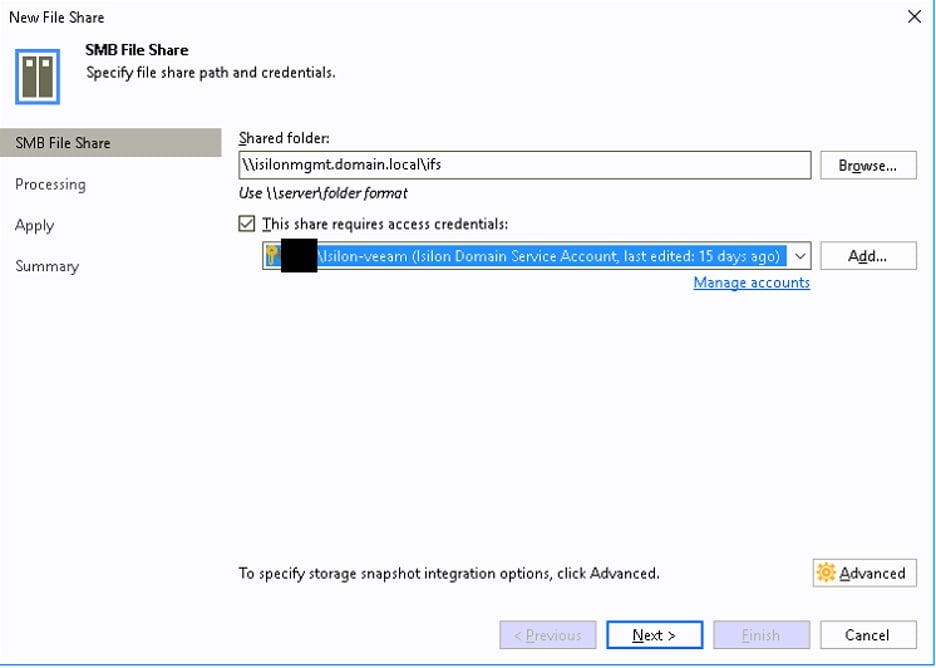
When setting up the share, typically NAS devices have multiple IP addresses and use some sort of Round Robin configuration, so the DNS name is preferred for greater flexibility: isilonmgmt.domain.local. However, if an IP address is preferred, any of the IP addresses from the .31 – .46 range in the example can be utilized.
In the example below, the shared folder was configured with \\isilonmgmt.domain.local\ifs, and the user was a BackupAdmin in the System Zone:
Using Method 2
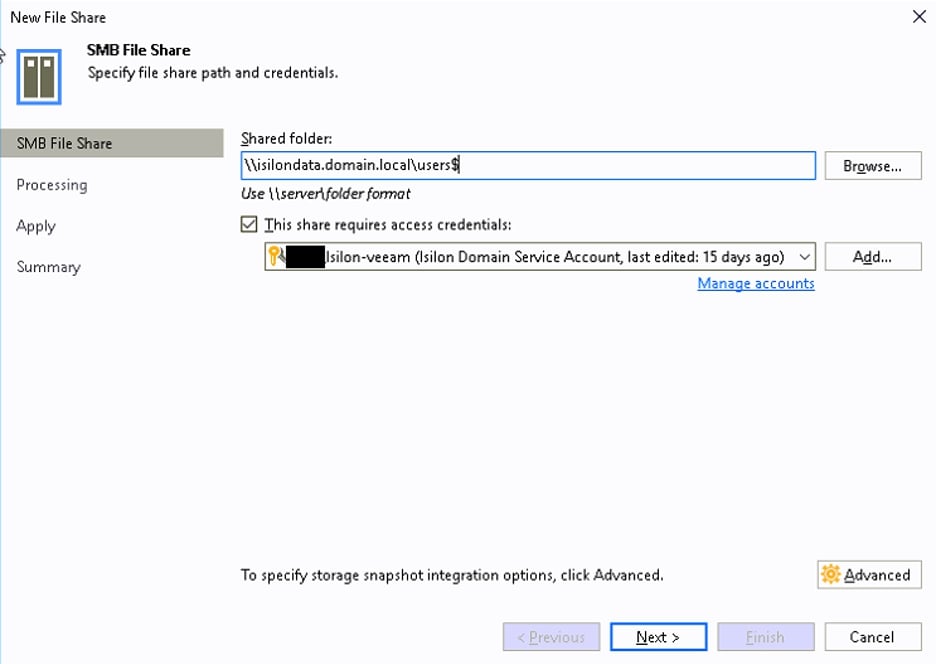
The share path that end users utilize (done through the Data Access Zone) is done by using the path \\isilondata.domain.local\users$.
NOTE: Keep in mind that the File Backup Proxy must be able to access the IP range for the Data Zone on the system.
- Data_Pool (Data Zone)
- IP RANGE: 172.16.0.11 – 172.16.0.21
- DNS NAME: isilondata.domain.local
Similar to the System Zone setup previously mentioned, it is highly recommended to use a DNS name for greater flexibility and because of the nature of how NAS devices work.
In the example below, the shared folder directly accesses the share created on the Isilon via \\isilondata.domain.local\users$, and the user was configured with full control or must be able to run as root.
Something critical to note is that in some use cases, a service account configured with full control will be able to authenticate with the Isilon and traverse the directories in the share. However, this user will not be able to back up or restore files. Either Method 1 must be utilized, or the service account must be granted run as root:
The screenshot below shows an example of both SMB file shares:
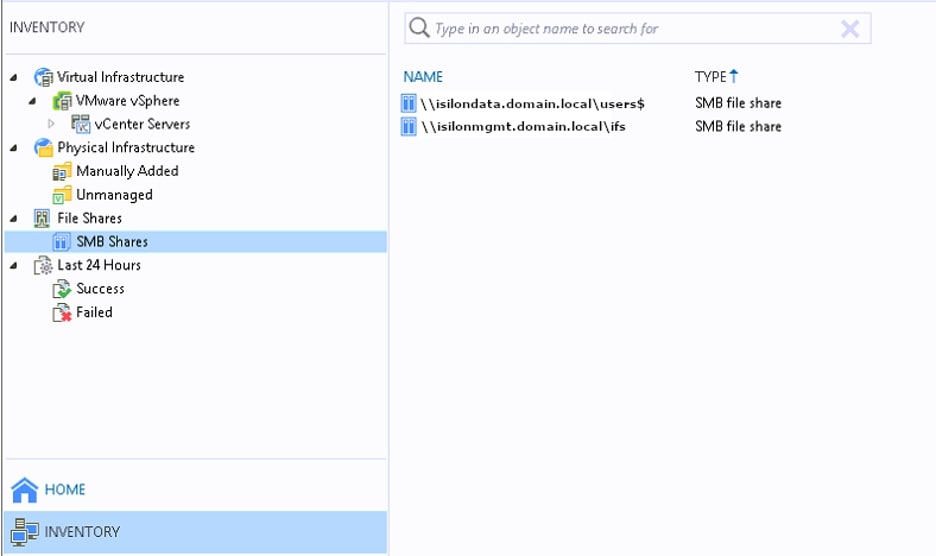
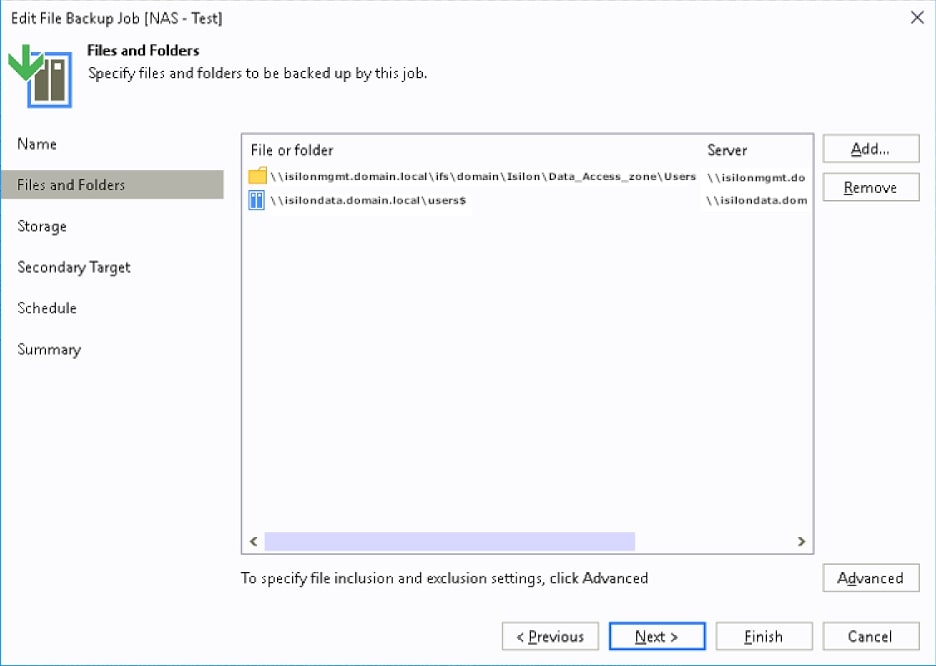
Once the SMB file shares appear within the INVENTORY tab in Veeam, a job can be created and the appropriate files or folders can be selected for the backup. In the example shown, both SMB shares have been added to the job for example purposes:
I hope this helped you see firsthand your options when it comes to the Veeam B&R and its new NAS functionalities. Let us know if you found this helpful, and reach out if there’s something specific we can do to assist you.

