
Last week, I posted a blog about how to connect Tableau Server on Linux to the Okta Universal Directory. This is a companion piece to that, but it’s geared toward accomplishing this process for Tableau Server on Windows instead. Much of the process will look the same, but there are some differences in the approach.
To connect your Server to Okta on Windows, go through the process in my other post all the way through setting up your Okta environment and creating the JSON template. We’ll pick up at the point of saving it your server.
So you’ve got your JSON file using your values and template provided in the previous post. Now, save this file to your desktop—I called mine idstore.json—on the server where Tableau will be installed. The rest of the work will be performed on the server itself.
Setting up Tableau Server on Windows
Download the desired version of Tableau Server and install it. Once the installer has completed, it will open up a browser window that would typically allow you to perform the server initialization through a GUI interface. Since we need to make some customizations, this will not be an option for us. But don’t worry; there are only a few steps required to get the server up and running!
Open up a command prompt as admin, and register the server. You can get a template out by typing tsm register – – template > registration.json and move that file to the desktop. Open it up in Notepad, and fill out the different fields accordingly. Once the file is filled out, you can enter tsm register – – file and then drag the file onto the command prompt window. This will automatically fill in the path to the file for you, so you don’t need to type it out. Hit enter and the server will register itself with Tableau Server.
We will need to register the server next. If you don’t already have your key then you can activate the server as a trial and add the key later. Activate your license using tsm licenses activate -k <Product Key Here> or activate the trial by using tsm licenses activate – – trial.
Once the server has an active license, we can import our custom Identity store settings by entering tsm settings import -f and dropping the idstore.json file onto the command prompt the same way we did the registration file. Once those settings are successfully imported, we can test a user mapping by entering tsm user-identity-store verify-user-mappings -v <your okta username>; tsm will return the info it was able to find on your user. If it returns an error, verify your settings are correct (edit the idstore.json file), reimport it and test the verify user again. You’re also able to verify group mappings by using tsm user-identity-store verify-group-mappings -v <group-name>.
Once things are looking good, we can go ahead and initialize the server by entering tsm initialize and then waiting for the server to finish initializing. Once it’s completed, we can start the server, open up a web browser and connect to http://localhost. You’ll be prompted to enter credentials to create a server administrator account. Use your Okta username and password and then click Sign In. You’ll be logged into server, and the server will be connected to Okta’s LDAP interface.
The next steps of setting up your Active Directory and prepping it so that it can sync with Okta are the same as those laid out in my other blog post. Where the paths diverge is after you’ve added Tableau Server and set up SAML.
Once you’ve saved your .xml file to the Tableau Server, log into the TSM interface and navigate to the Configuration tab inside of User Identity & Access, and click on the Authentication Method tab:
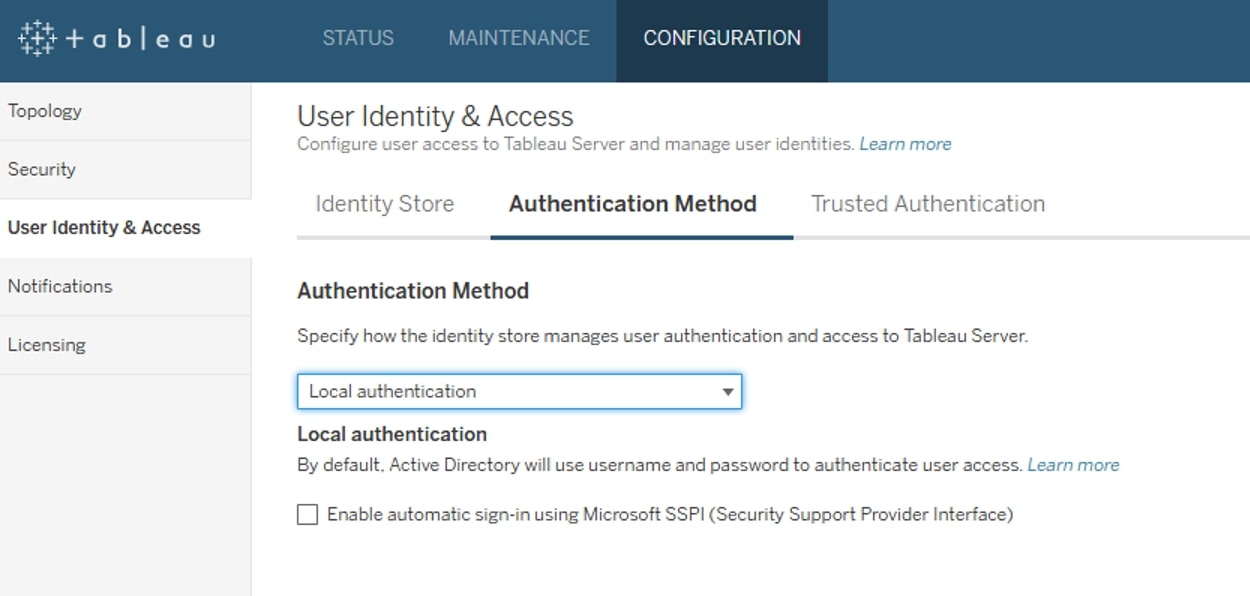
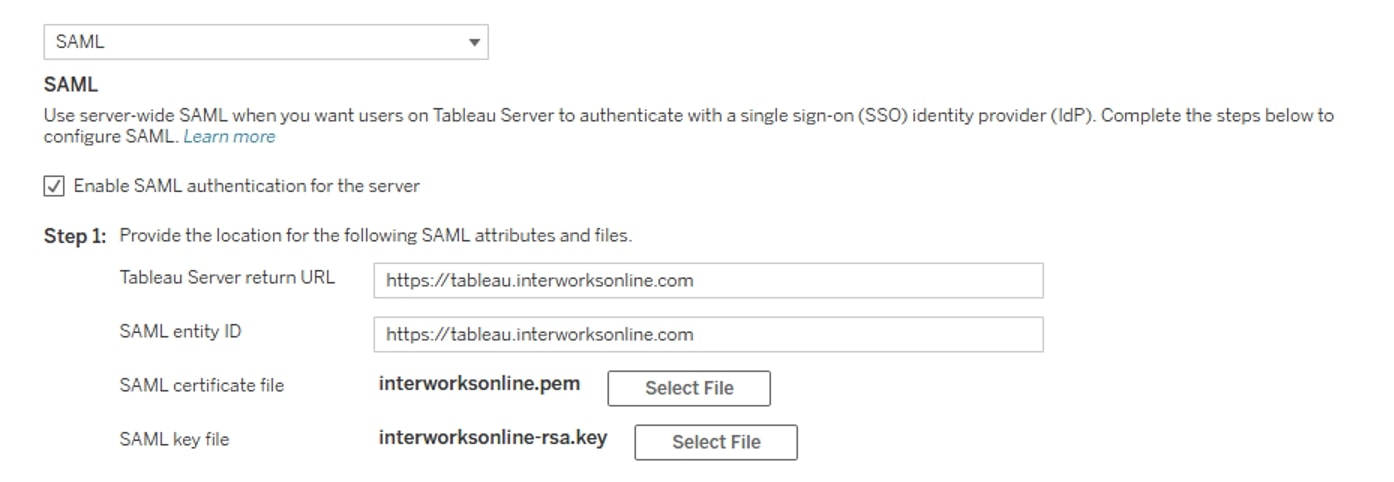
Change the drop-down menu to SAML, and click the checkbox for Enable SAML authentication for the server. Fill in the Tableau Server return URL and SAML entity ID with the same https:// URL we used in Okta. Then choose the same SSL certificate and RSA key file from enabling SSL:
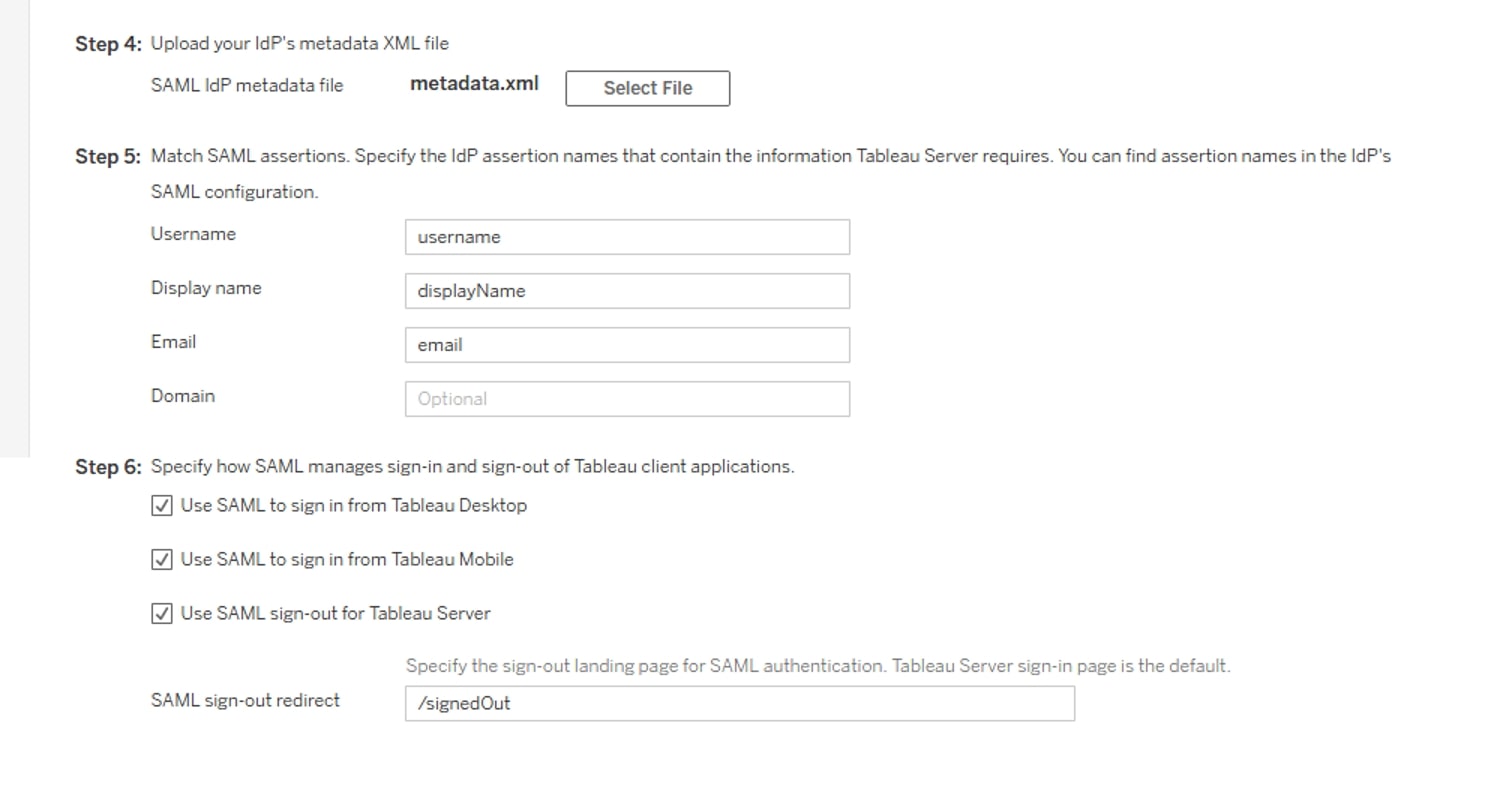
We can skip downloading the XML Metadata file from the Tableau Server. Under Step 4, we will upload the metadata XML file we got from Okta and leave the rest of the page the same:
Click Save Pending Changes at the bottom and then apply the changes and the server will restart. Once you’ve done this and the server has restarted, you can test access by connecting to the Tableau Server URL in an incognito window (making sure cached credentials aren’t an issue), and you should be redirected to the Tableau Server.