
I had a situation with a client where they had a new AWS account and wanted to create an online storage folder area where a third party could upload JSON files, that could then later be ingested into Snowflake. They had no experience with AWS, so I walked them through setting up an S3 bucket on their account, and a new user account for their third party that could access the bucket.
Order Matters in AWS
AWS is very flexible but also pretty complicated, and you need to set up the pieces in the right order. The order I’ll be describing in this post is one I’ve found that works. This is more of a high-level overview of the overall process, but you can find more detailed step-by-step instructions in AWS’ documentation.
At a very high level, the overall sequence is:
- Create bucket
- Create a policy to access the bucket
- Create a group and assign the policy to the group
- Create a user and make the user a member of the group
Let’s look at the process in a bit more detail.
Create the Bucket
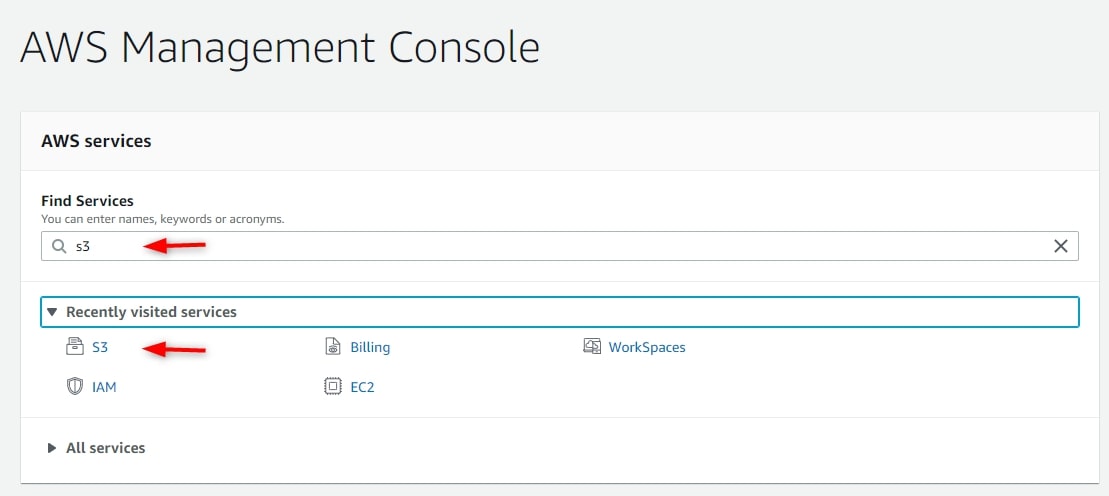
Make sure the client has an AWS account and is able to log in to it. Log into AWS Management Console using the client’s high level account, and use the S3 service to create a new bucket. The bucket name has to be unique across all AWS S3 instances:
Pick a Region for the bucket. Normally, this would be the same region as your Snowflake instance. Leave Block all public access on:

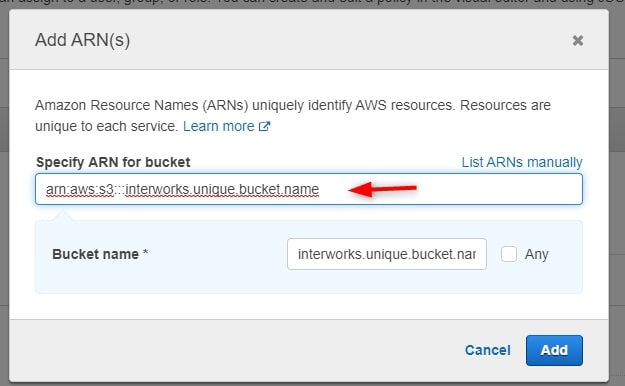
Select the bucket and click Copy ARN then paste to Notepad (The ARN is the Amazon Resource Name. It’s the full formal name for the bucket):
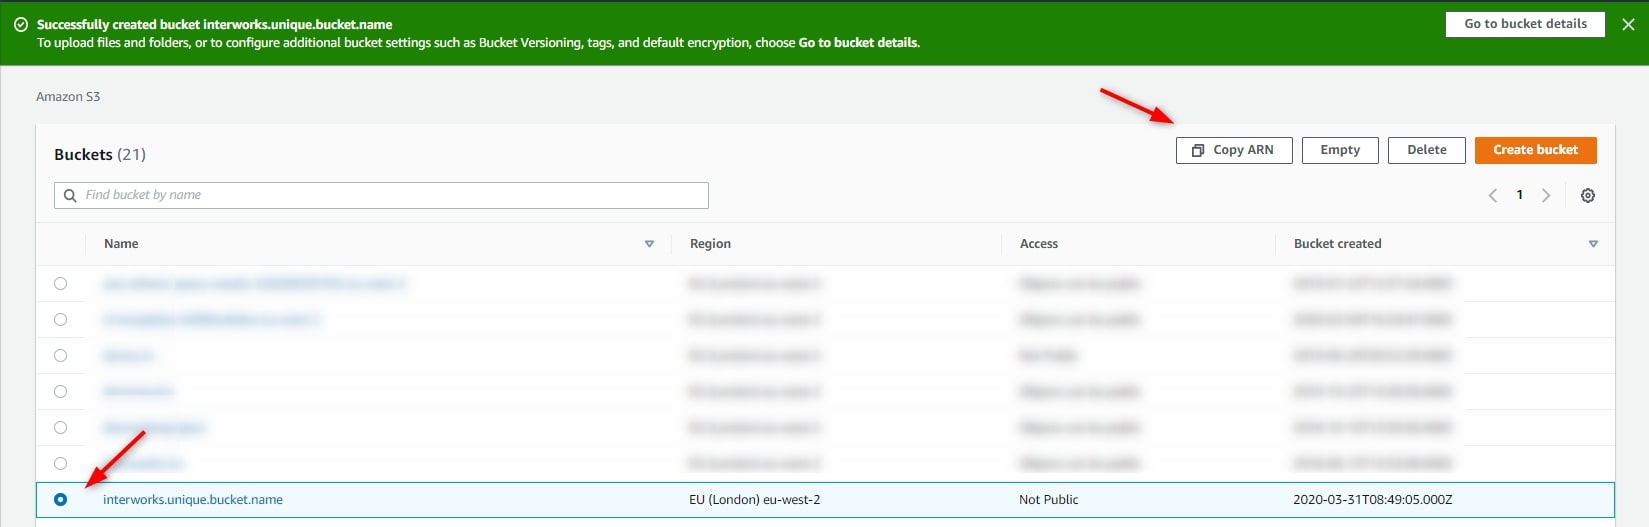
In this example, the ARN for interworks.unique.bucket.name is arn:aws:s3:::interworks.unique.bucket.name.
Create IAM Objects
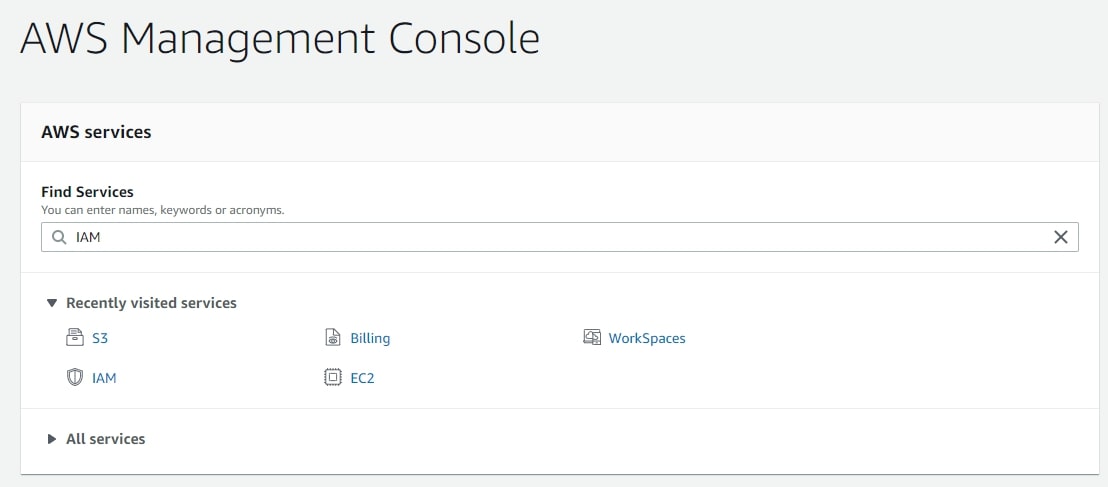
Go back to the top level, and select the IAM service (Identity and Access Management) to configure policies, groups and users:
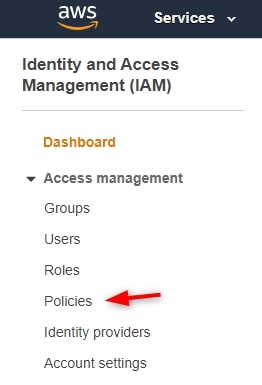
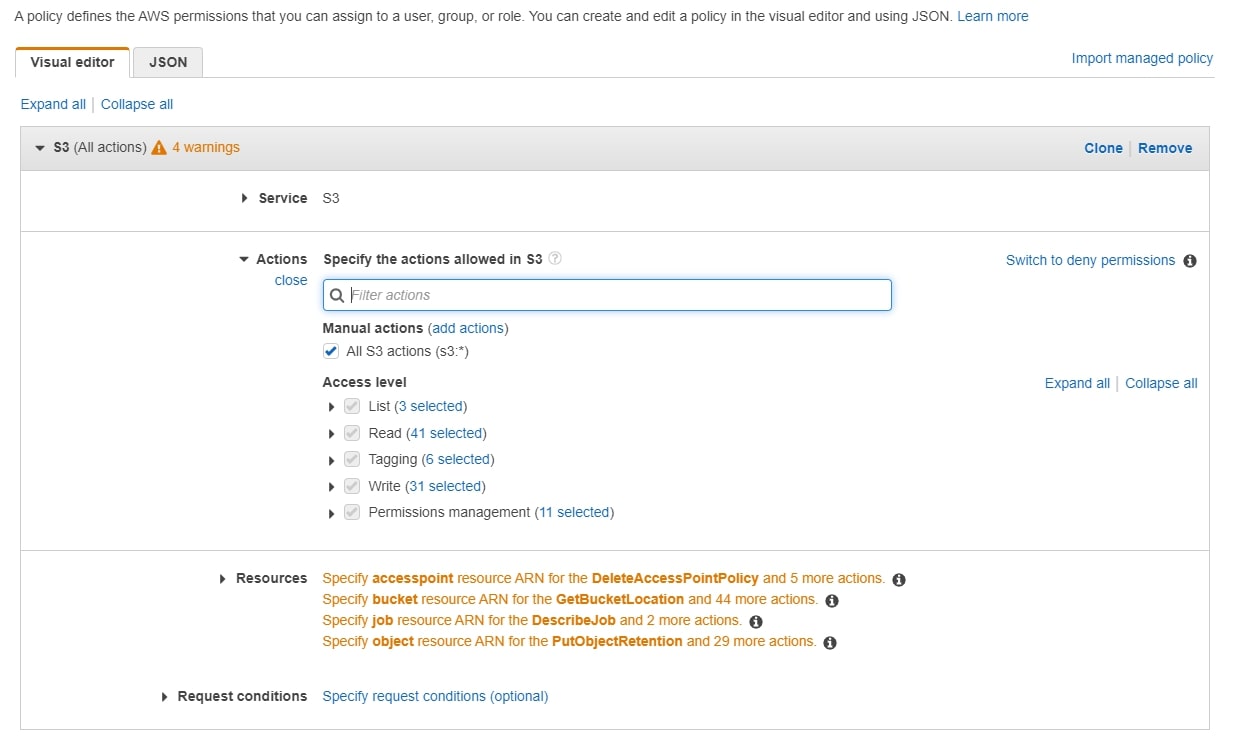
Use the menu on the left to select Policies:
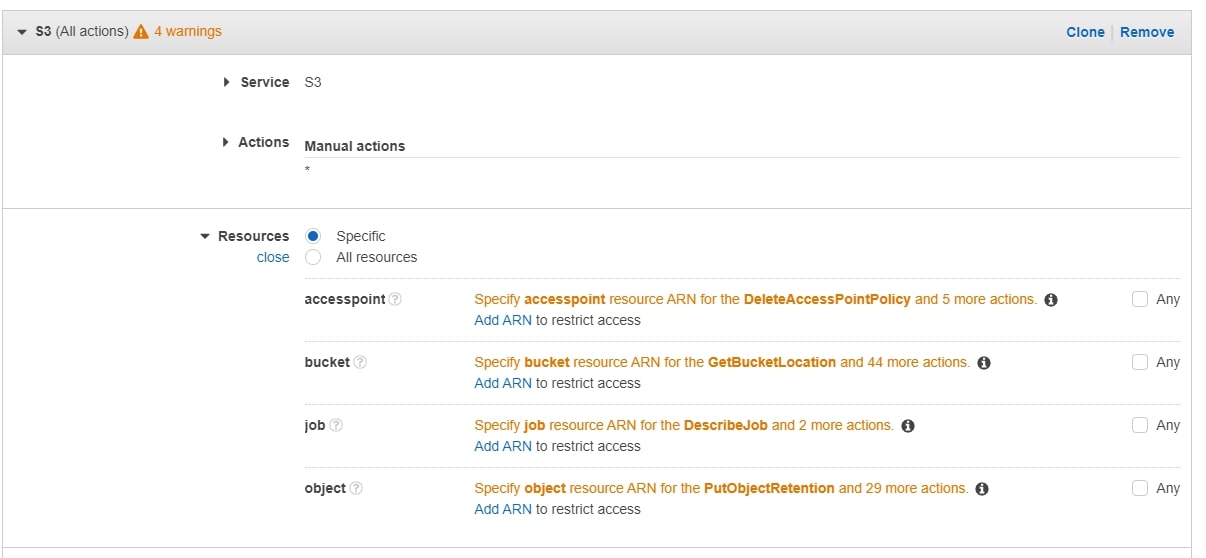
Select the S3 service, and add all S3 actions to the policy. In the Resources section, click bucket to specify the bucket ARN:

Create Group and User
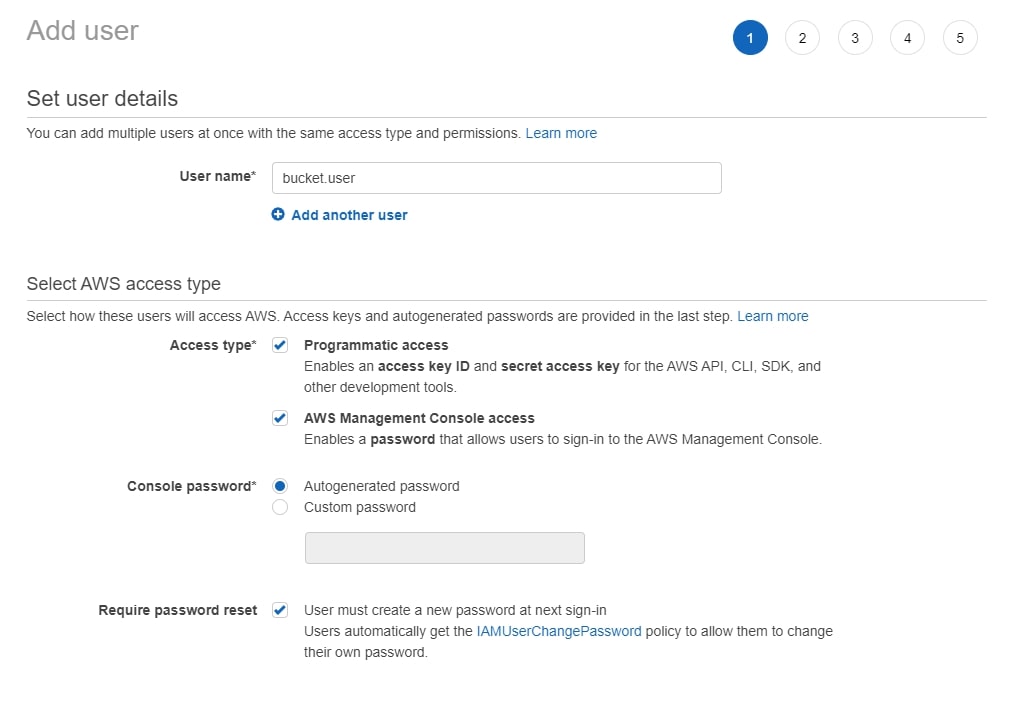
A user can be added with or without AWS console access. Enabling console access will allow the third-party user to log into the console and see some limited information about the account. In my view, console access should be enabled unless there is a clear reason not to:
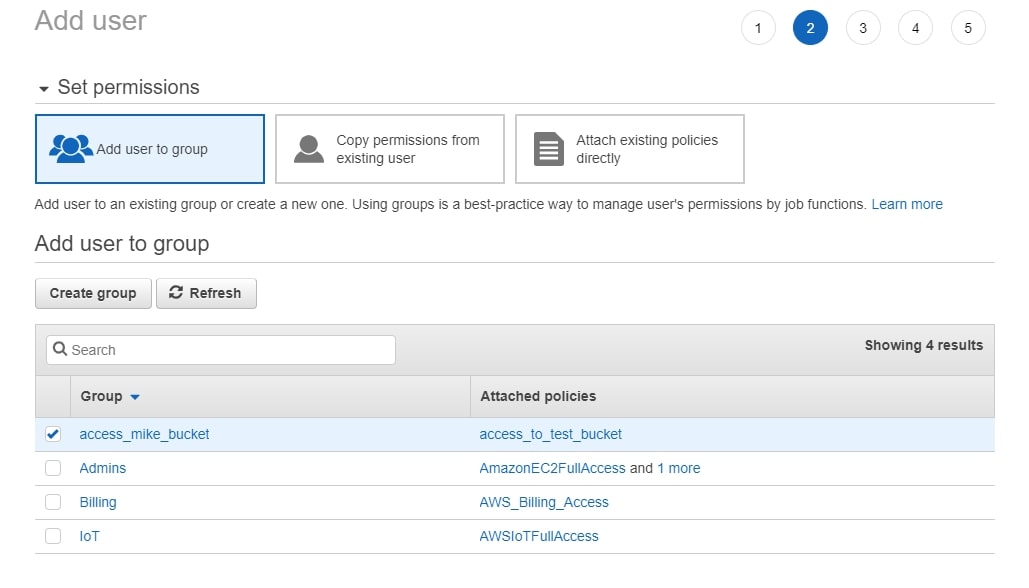
When creating the user, make sure to add them to the group you created above:
Once the user is created, you get a confirmation screen:
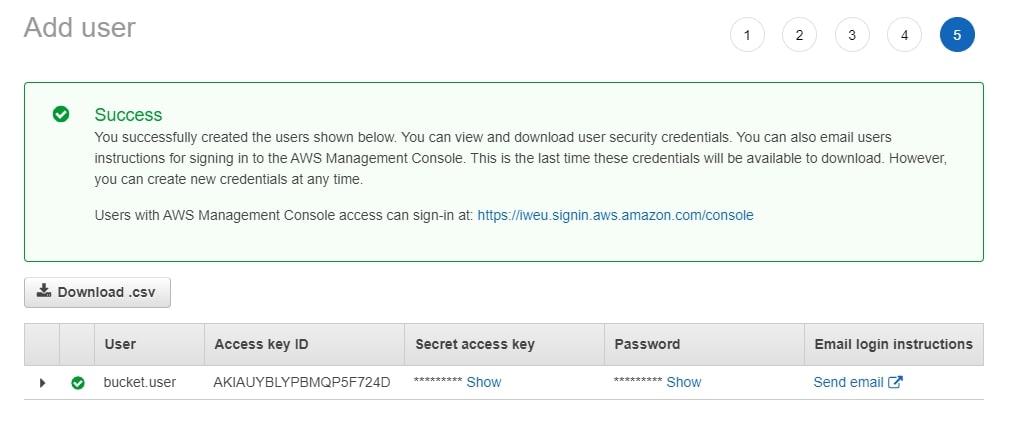
At this point, you can download the .csv file, which contains credentials, and share it with the user. The process is complete!