One of the great things about virtualization and VMware is the ability to take snapshots of a virtual machine. The snapshot feature allows an IT administrator to make a restore point for a virtual machine that is crash consistent. This feature is particularly useful when performing something such as an upgrade, as if anything goes wrong during the upgrade process, an IT admin can quickly go to a stable restore point.
Snapshots are great for quick restores, but can have devastating effects to an environment if kept long term. There are a number of reasons why snapshots should not be kept for long term backups, such as potential I/O performance problems (http://kb.vmware.com/kb/1008885). A list of best practices for snapshots can be found at http://kb.vmware.com/kb/1025279. This article shows 1 method to remove snapshots in a way that minimizes impact on a production machine.
The Issue: Noticing High I/O
As mentioned earlier, one of the disasters that can occur when leaving a snapshot active for too long is that it is possible to experience very heavy I/O workloads. In the example below, after taking a look at the virtual machine, the “Revert to Current Snapshot” is no longer grayed out, so it is apparent that a snapshot exists.

Before deleting the snapshot, I checked the size of the deltas to get an idea of how long the removal process will take.
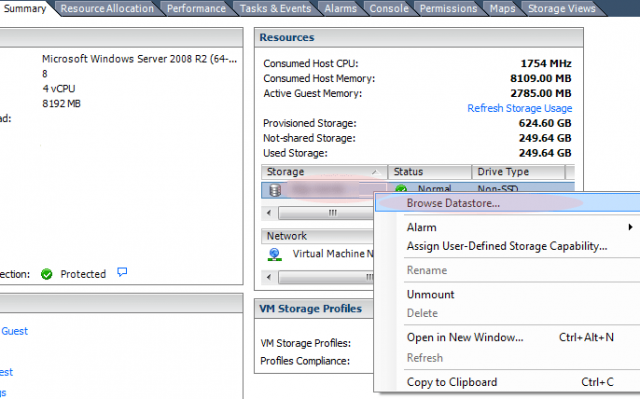
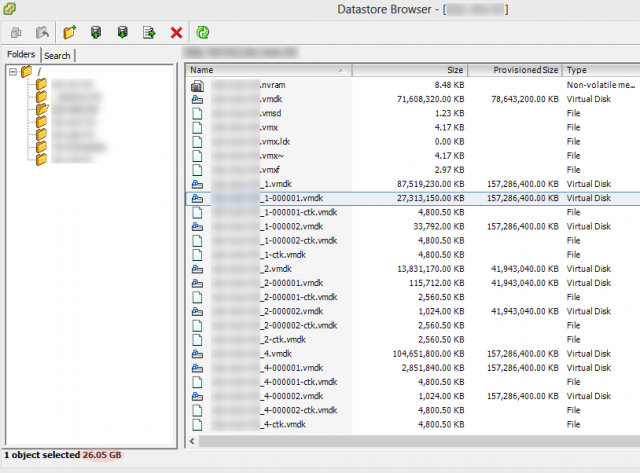
In this particular case, the snapshots are large. Disk 1 has 26GB of changes from the parent. If this were a non-critical server or a small snapshot, I would outright delete it, however this snapshot exists on a business critical server I want to take some precautions.
Why Take Precautions
Although snapshot removal has been substantially improved in ESXi 5.0 and ESXi 5.1, it is still possible for a virtual machine to appear something similar to a suspended state. See http://kb.vmware.com/kb/1031106 regarding ESX/ESXi 4.1. For a business critical application such as Microsoft Exchange that must remain active, this can have devastating effects as the snapshot removal process cannot be cancelled once it has been initiated.
To provide an example of what I have seen, one of my clients with a local IT staff noticed a snapshot had been sitting for about a week and for an Exchange server and decided to remove the snapshot. About 3 hours into the snapshot removal, their Exchange server became unresponsive for the next hour of the removal process and users all across the company began calling their IT staff wondering why Outlook was prompting to reconnect.
Removing a Large Snapshot
Although it can be labor intensive, a common way of removing a large snapshot is to take a new snapshot. This will add a degree of separation from the base image to the child.

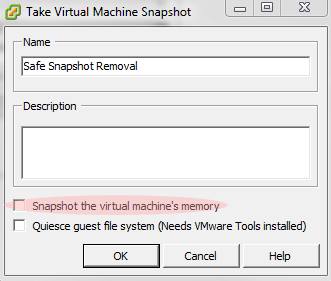
In the example below, Snapshot the Virtual machine’s memory has been unchecked and the Snapshot was named Safe Snapshot Removal. By unchecking the box shown below, this will assist in removing the “Safe Snapshot” once the other snapshot was removed.
With the current example, there are now 2 existing snapshots.
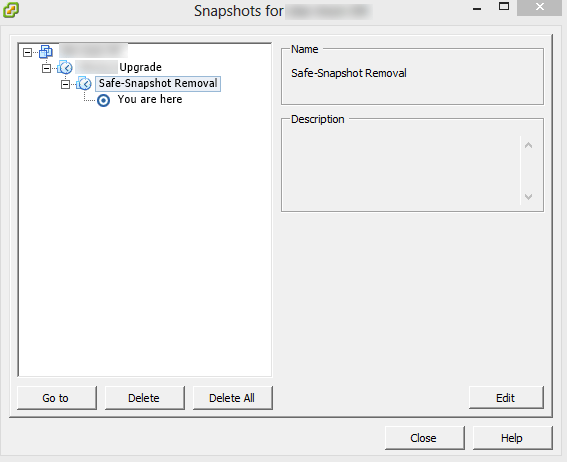
Next, remove the large “Upgrade” snapshot. This will roll this snapshot back into the parent and will no longer cause any downtime. Note that this can potentially cause greater I/O penalties, so calculate the risks before proceeding with this method.
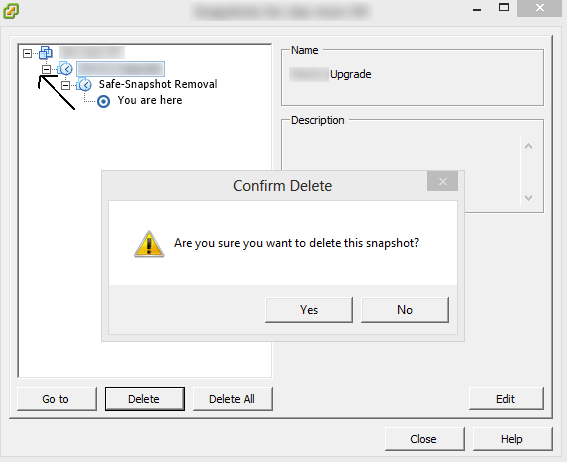
Once the Upgrade snapshot has been deleted, I do a quick check to verify that the Safe-Snapshot Removal snapshot is fairly small. If no, repeat the process. If yes, the Safe-Snapshot Removal snapshot can be deleted.

