
So, you finally decided to virtualize your desktops. Plus, you want to reuse your old desktops as Thin clients. You’re not alone. This kind of thing happens all the time, and there are options for you. My favorite so far is the use of Windows Thin PC. It connects to your domain, it’s easy to manage and you probably already own the licenses for it if you’re running Microsoft Virtual Desktops.
Here’s the Lowdown on Windows Thin PC
Thin PC is a dumbed down version of Windows 7 that is very similar to Windows Embedded. You are only allowed to install remote desktop clients, management applications, security applications and media players on it. You can connect it to the domain and push out GPOs. You cannot install any productivity applications like Microsoft Office. It does not have Windows Search, and you cannot install any other Windows Features. Sounds like everything you need in a Thin client.
You cannot buy Windows Thin PC licenses by themselves. To get them, you must purchase Windows 8.1 with Software Assurance or the Windows VDA license. Windows 8.1 with SA licensing has some strange legality issues when it comes to VDI. We tend to go for VDA licensing instead.
Overview of the Method
I know what you’re saying, “But Trey, I don’t want to go around and install this on hundreds of computers. I would have to walk around to all of them and run through the install. Then, I would have to install my antivirus and remote connection software.” Well, I didn’t want to do that either. I found an easier way to deploy it. Here are the detailed steps for you.
My colleague, Noor, wrote a blog post for those of you who would like to deploy via DVD or USB stick. It should be out shortly.
Here’s what you will need:
- A server with Windows 2012R2 installed on it. This can be virtual. 2008R2 will work too, but 2012R2 has some really good enhancements. My guide is going to focus on 2012R2.
- Windows Active Directory domain.
- A 32 bit computer or server to install the windows AIK kit. I had a LOT of problems trying to create the autounattended.xml files on the 64 bit version. Just to make things easier on yourself, find a 32 bit OS somewhere. A virtual machine with windows 7 32 or Windows Server 2008 should work fine. You can get the AIK here: http://www.microsoft.com/en-us/download/details.aspx?id=5753. It is a really large download. About 1.7 GB.
- A virtual machine to install Thin PC and configure our custom image. You can use a physical computer, but it is going to make your life so much easier if you can virtualize it. That way, you can take a snapshot every time you make a change and revert back if you make a mistake. Chances are, if you are installing VDI, you already have some sort virtualization server and know how to use it. So, I’m not going to go into a lot of details about this here.
- Thin PC license and installation CD. As discussed in the Thin PC low down section, you get these with Windows VDA licenses.
- A lot of time to tweak your images and get everything perfect.
Let’s Set Things Up
1. Windows Deployment Server
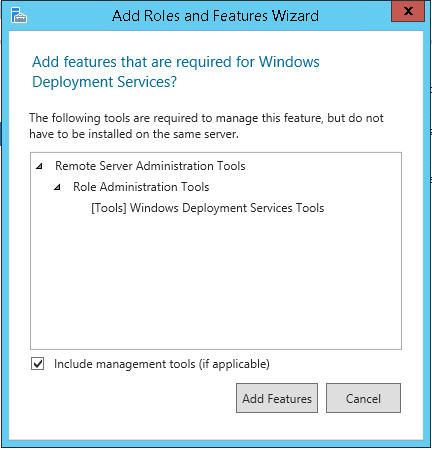
Try not to install it on a server with DHCP server installed. It just makes things harder. Install the Windows Deployment Service and any recommended features.
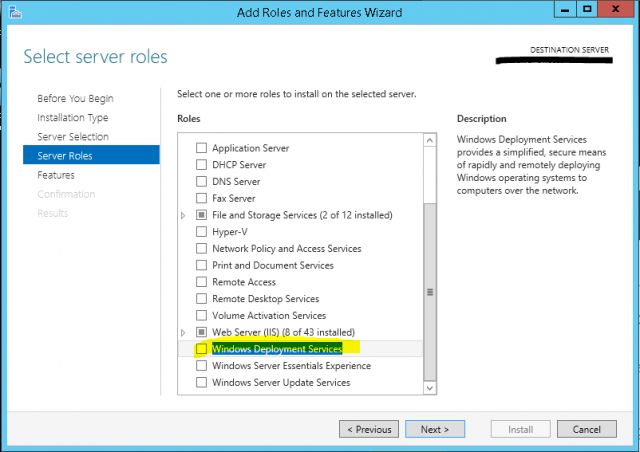
Once that finishes, open up the Windows Deployment Service console. That will bring you to the screen below. Notice that under Servers it has the name of your sever with a yellow exclamation point. Right-click that and select Configure Server.
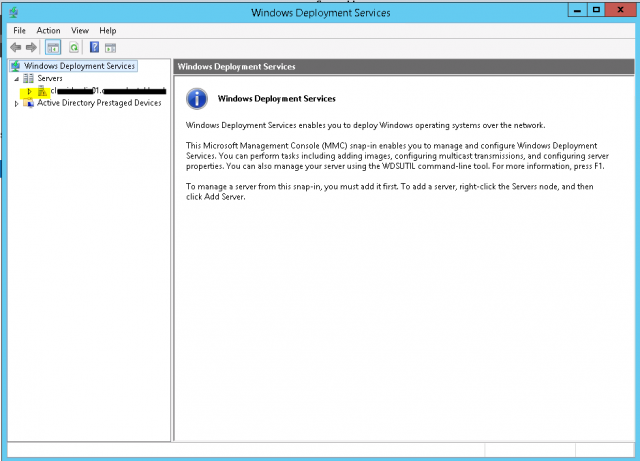
This will bring up the wizard. Select Integrated with Active Directory and click Next. On my servers I like to change the remote installation path to a data drive D:RemoteInstall. You are welcome to put this folder in a location of your liking. It will create a shared folder that WDS needs to work properly.
Select Respond to all computers known and unknown and click Next. Do not check the box to require administrator approval. Uncheck Add images to the server now and click Finish.
Now you get a page similar to this:
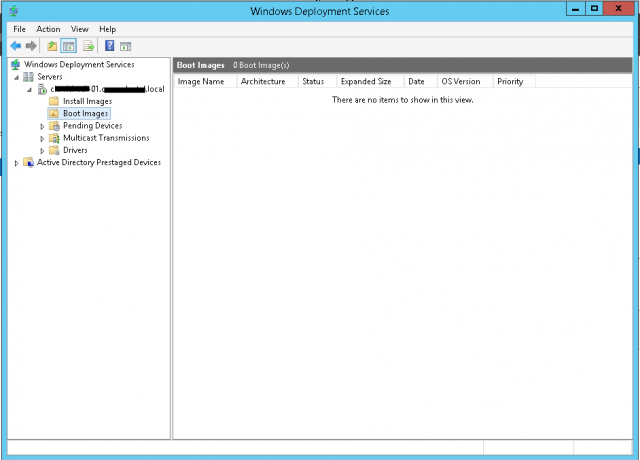
Right-click on Boot Images and select Add Boot Image. You want to browse to your CD location and navigate to the Sources folder. Find Boot.wim and select that. You’re welcome to change the name here, but it’s not necessary. Next through that wizard to finish.
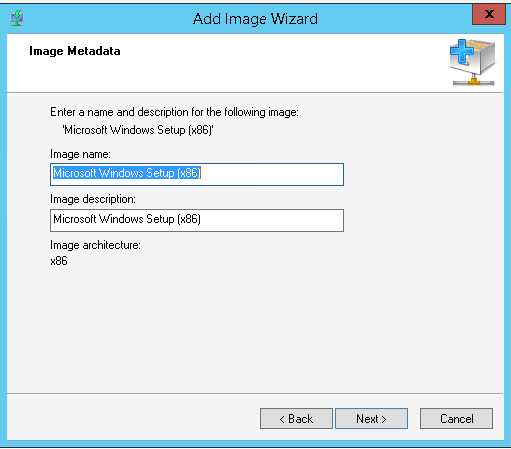
What you just did was pull over the Windows PE image from the Thin PC installation DVD. If you don’t know much about Windows PE search Google to learn some more. It’s just a really small version of Windows that you can boot into from the CD. It has several cool tools to work on computers. The part we are concerned about here is using it to copy images to a computer.
Now that we have the regular boot image, we want to create a boot image specifically for capturing custom images. To do that, right-click on the boot image you just created and select Create Capture Image.
You will likely want to change the name of this image to show that it is a capture image. That will come in handy later. For the location, I like to store it in the root of the Remote Install folder that we created earlier during the WDS wizard.
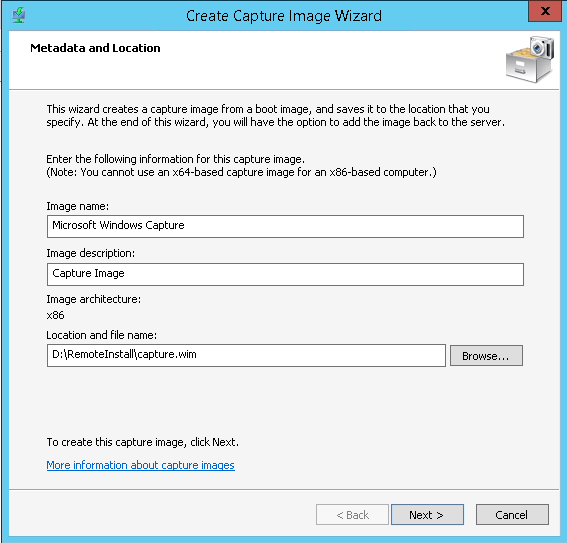
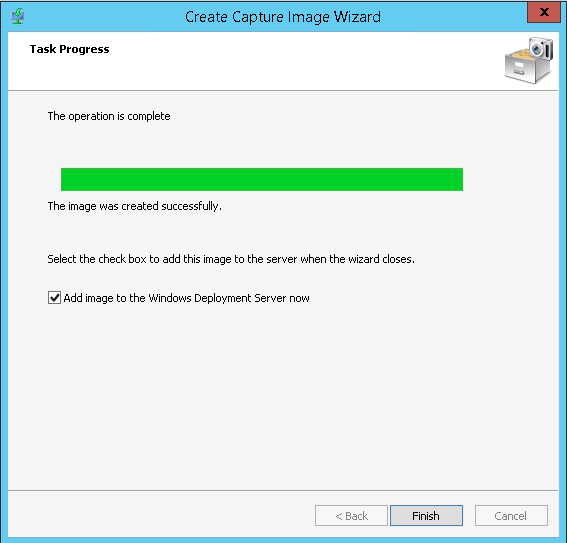
When you get to this point, make sure to click the box to add the image to the deployment server. Then, click Finish.
Select the location of the .wim file you just created and change the name as desired. This is the name that will show up in WDS. Next through the rest and then click Finish.
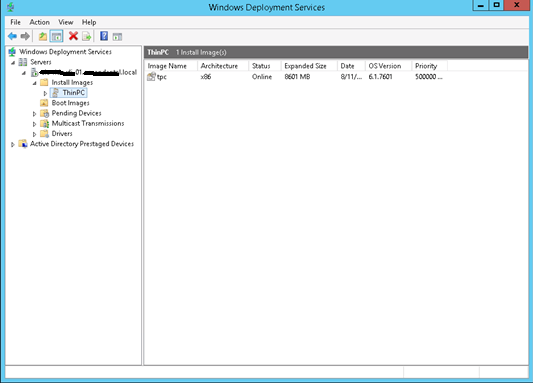
Now that the boot images are all set, it’s time to create our install image. Right-click on the Install Images folder and select Add Install Image.
This brings up a wizard and asks if you want to create an image group. Go ahead and create one. I named mine Thin PC.

For file location browse to sourcesinstall.wim on you installation media.
Next through everything and click Finish. You can change some names if you prefer. Note that I named mine tpc.
2. Create Your Custom Image
It’s time to create our custom image. I highly recommend creating this image using some sort of virtualization platform and taking snapshots as you go. It will make your life much easier in the future.
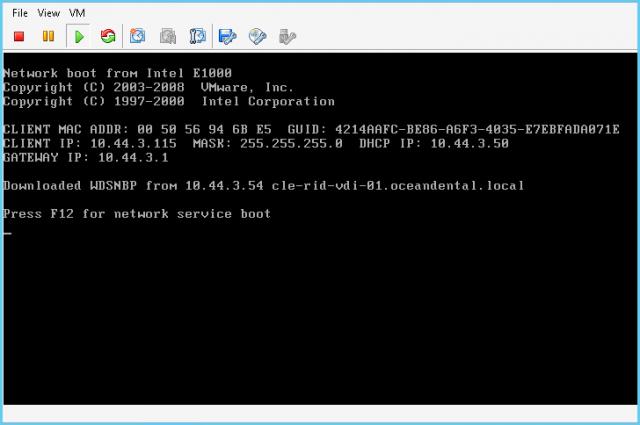
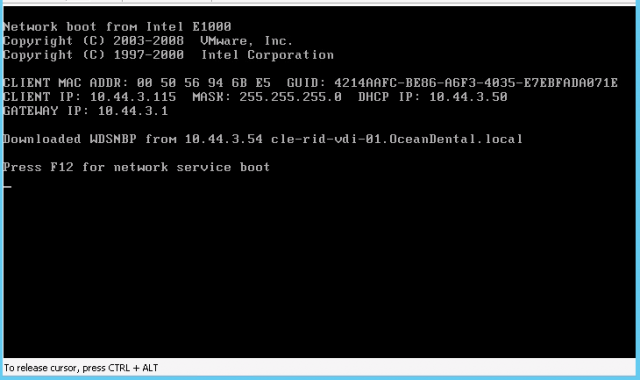
Let’s create your new virtual machine and set it to boot to the network card. I’m going skip all those steps since it may be different for everyone. If you are deploying VDI, you probably already know how to accomplish that. If you’re using VMware just use the E1000 NIC.
When the virtual machine boots, make sure to press F12 to boot into the WDS deployment.
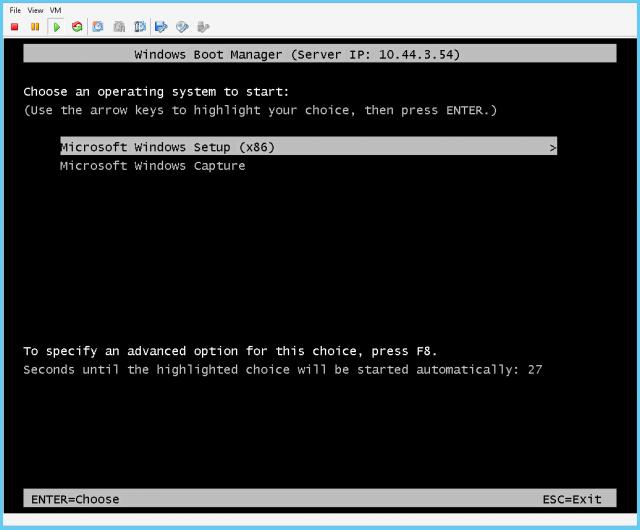
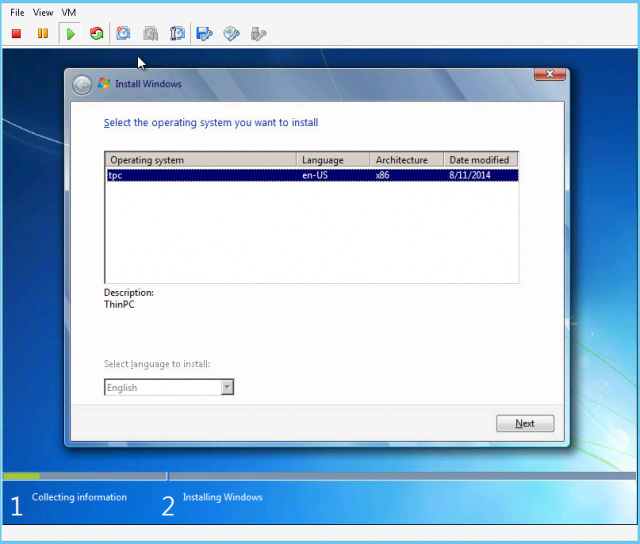
Select the setup image you created earlier.
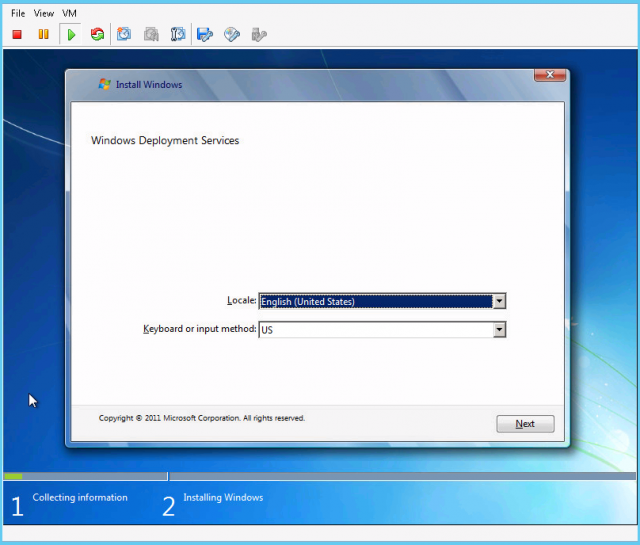
Select your language and keyboard.
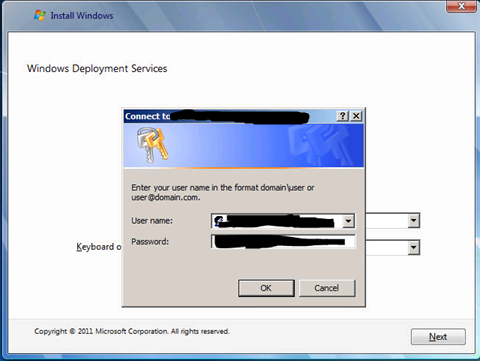
Put in a username and password that has access to the deployment server. Domain admin should work. in most cases.
Select the install image you created earlier and click Next.
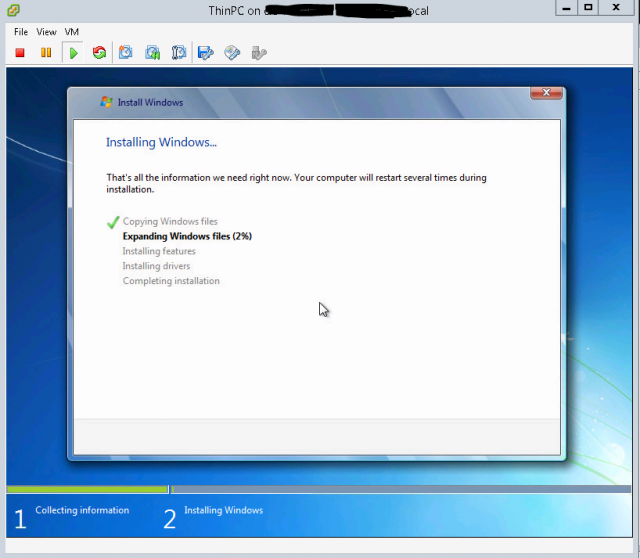
Format the drive with one large C: drive and click Next. Then, wait a long time for the install.
This next part is EXTREMLY IMPORTANT. Next through whatever you need to until you get to the section where you name the computer. Press Shift + CTRL + F3.

This will boot the computer into audit mode. This is where you will make all your changes and customizations. Take a snapshot right here in case anything screws up.
Go ahead and install any Windows updates, your connection software, any antivirus and anything that you would like on your custom image. That’s just a little tip. Later, we will set this profile to copy to the default profile. So, any changes you make to this profile will show up for everyone that logs into this computer. Also, if you reboot the machine, it will come back up in audit mode until we run sysprep.
Another EXTREMELY IMPORTANT STEP. Make sure to install KB2691967: http://www.microsoft.com/en-us/download/details.aspx?id=29237. If you do not install this, you will get all kinds of problems with your unattended installation later. It fixes an issue with Thin PC and the product key activation. Just trust me. If you forget this, it will make your life hell. Once you get everything exactly how you want it, take another snapshot.
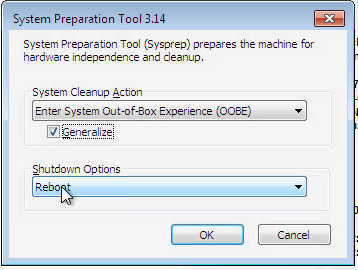
Now run c:WindowsSystem32sysprepsysprep.exe. Select Enter System Out-of-Box Experience (OOBE). Click the Generalize box and select the Shutdown Option to reboot. Get ready to press F12 after the computer reboots.
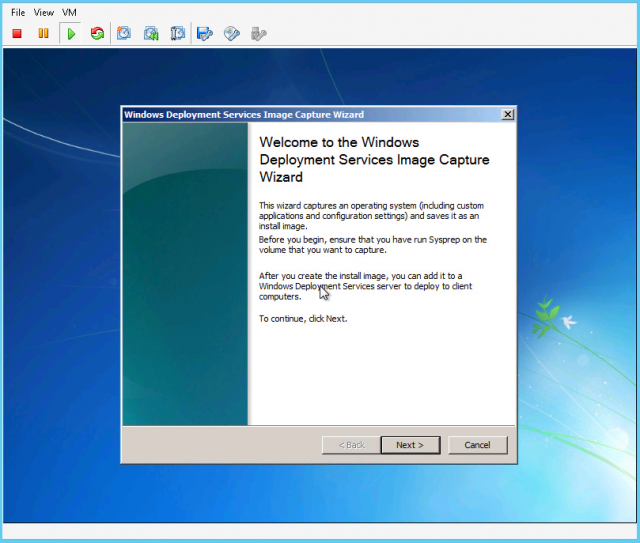
If you miss pressing F12, you will need to revert to your snapshot and try again. After you press F12, select the Capture Image.

The Capture Wizard will come up. Click Next.
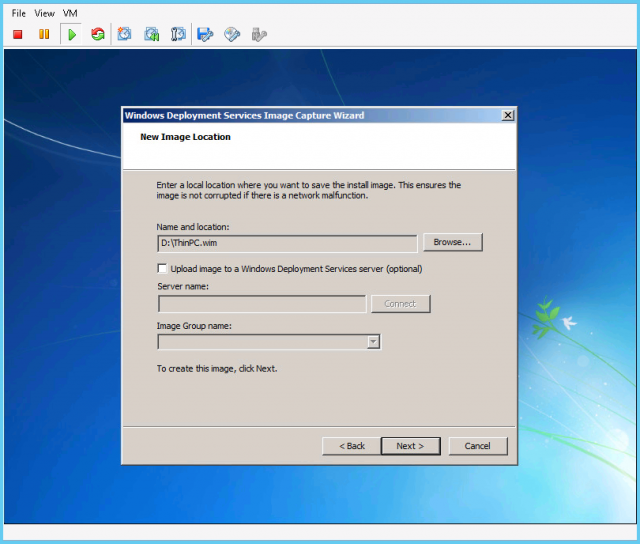
For the volume to capture, select the only one available (usually D:). If nothing shows up, then you messed something up on the sysprep because this will only show drives that have just been sysprep’d. Name the image whatever you want and pick a description. Click Next.

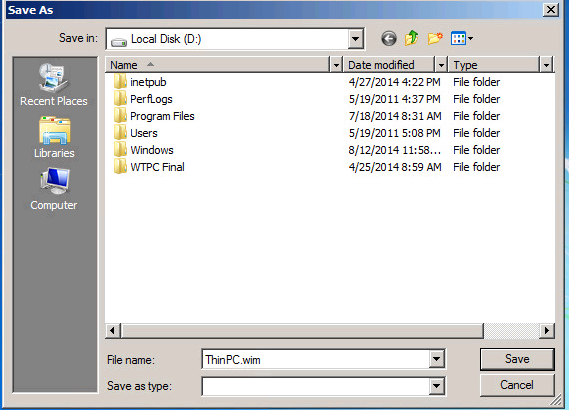
Browse for the location to store the image. Select the root of the D: drive (the main drive doesn’t show up as D: sometimes. Just make sure you save to the root drive of your Thin PC computer). Name the file whatever you want .WIM.
Don’t select the box to upload the image to a Windows Deployment Service server. I’ve tried this option, and it doesn’t work perfectly. You’re welcome to play around with it, but it’s easier to ignore this option. Go ahead and click Next.
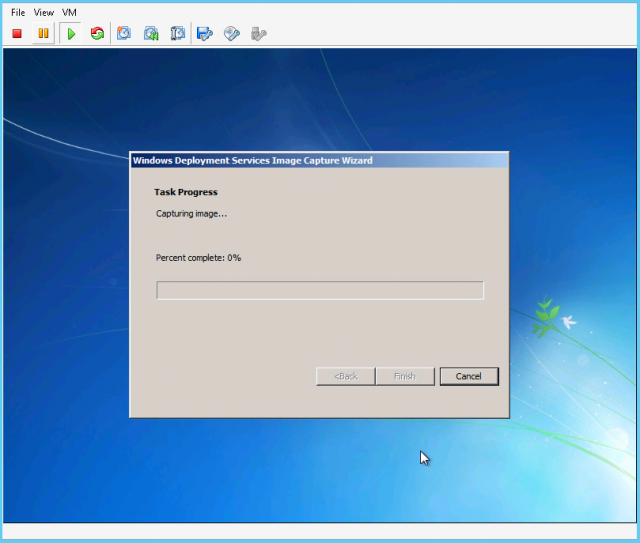
Now, wait for a while as the image gets captured.
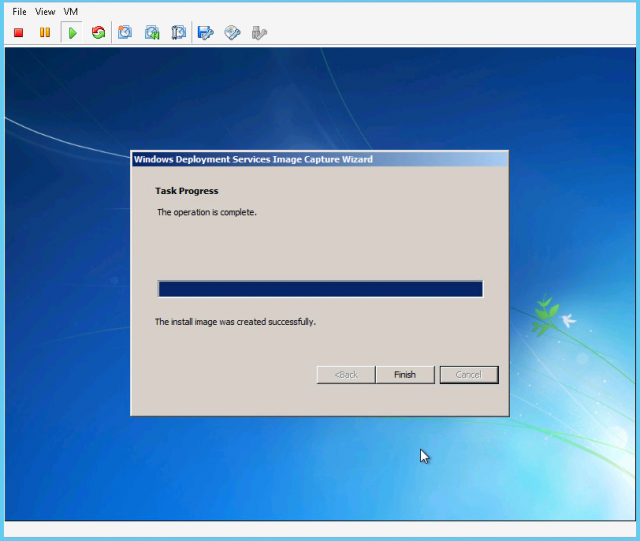
Once it finally finishes, click the Finish button.
Let the computer boot up and go through the sysprep process. If you get an error about not being able to parse the unattended answer file, press Shift +F10 to open the command prompt. Run regedit.
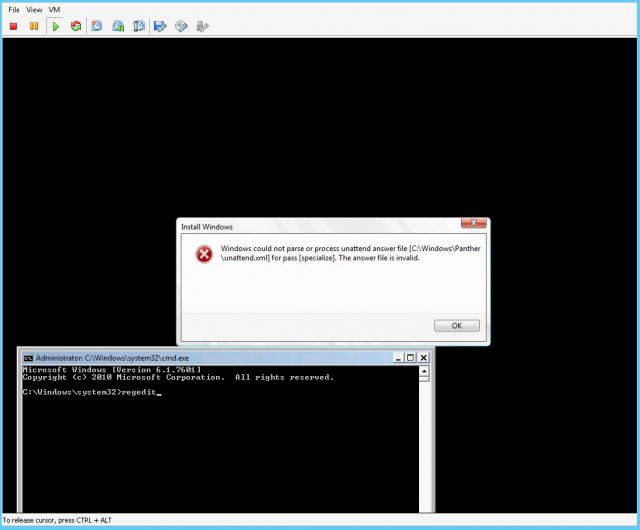
Once you get regedit open, navigate to HKLMsystemSetupChildCompletion and change Setup to a value of 3.
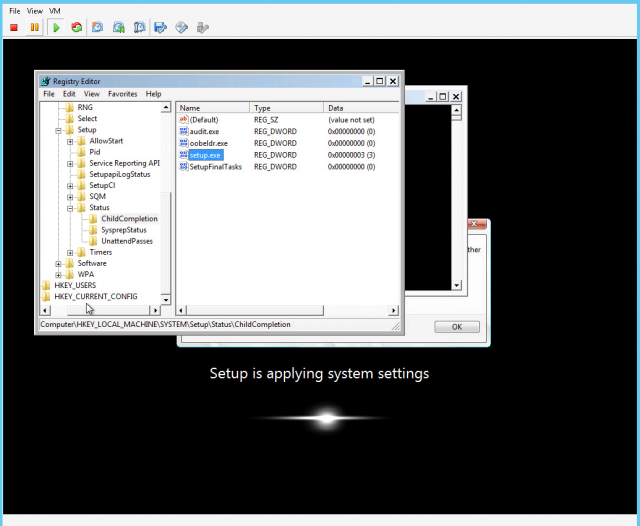
Close all those windows and click OK to reboot the computer. Note that if you don’t get this error, there’s no problem. Just continue on.
When it gets to the point where you are supposed to give the computer a name, press CTRL + Shift + F3 to boot into audit mode again. If you are going to use this computer in production, you could go ahead and give it a name and boot into the normal mode.

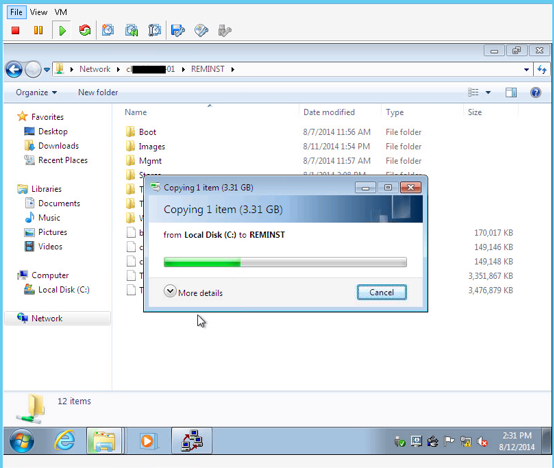
Once the computer boots up, we are going to copy the newly created image file to the WDS server. Copy C:whatever your newimage name is.wim to wdsserverREMINST.
Now, go back to your WDS server. We are going to add that custom image to the WDS server. Open the WDS console and expand Install Images. Right-click on the group you created and select Add and Install Image. Browse to the image file you just copied over and click Next.
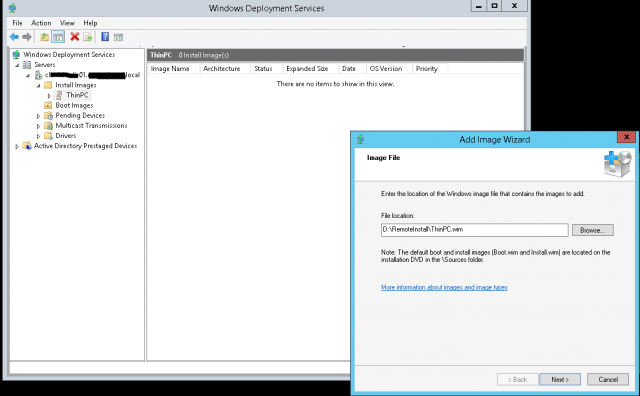
Next through the rest. Then, click Finish.
3. Create Unattended XML Files
Now it’s time for the hard part. Creating unattended files is always a pain. I’m going to put my unattended files on this blog to help you guys save some time. You can find and download them at the bottom of the post. If you need more details about why I picked everything, you can check out some of the other blogs on the internet. Most of the settings for the Thin PC unattended XML files are the same as Windows 7, and there are millions of Windows 7 unattended XML blogs out there.
For WDS there are two different unattended files you will need. One of them is for the Windows PE section. It will format the hard drives and tell the deployment server what image to use.
First off, let’s install the Windows AIK on a 32 bit operating system. From the install wizard, you only need to select Deployment Tools, Windows Preinstallation Environment, Windows Performance Tool Kit, and Windows Assessment Toolkit: http://www.microsoft.com/en-us/download/details.aspx?id=5753
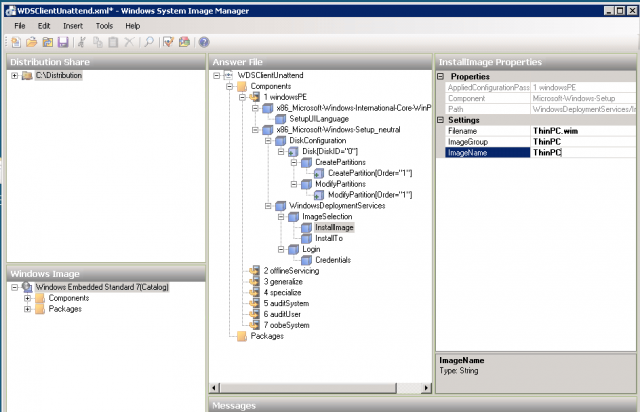
Open up Windows System Image Manager. Click on File > New Answer File.
It will ask you if want to open a Windows image now? Click Yes and select the install.wim file from the Thin PC installation DVD.
Make sure to select Windows Thin PC.
Download this template XML file: WDSunattended.xml. The link is at the bottom of the page. Now, select File > Open. Then, open the file you just downloaded.

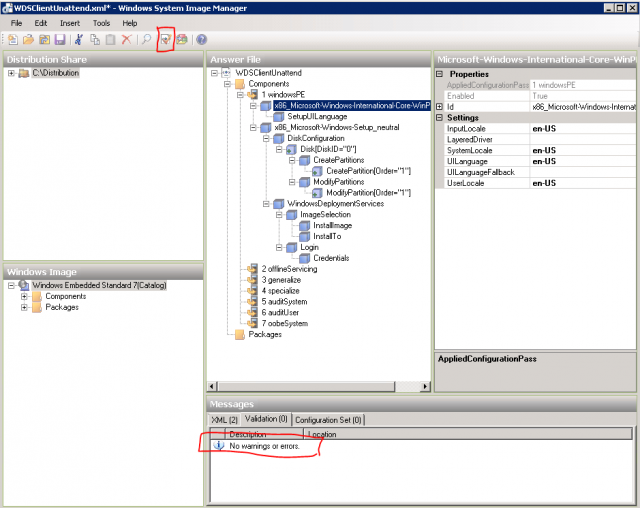
Go back to the machine that has AIK installed on it and select x86_Microsoft-Windows-Setup__neutral/WindowsDeploymentServices/ImageSelection/InstallImage. Change the corresponding settings based on the image properties that you just looked up.
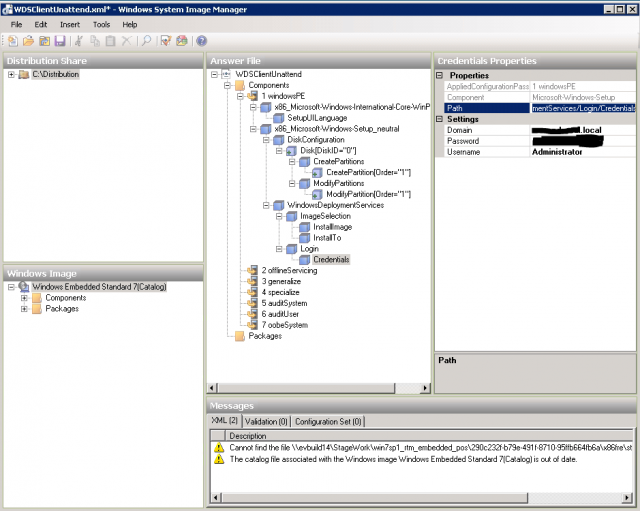
Now, navigate to x86_Microsoft-Windows-Setup__neutral/WindowsDeploymentServices/Login/Credentials. This is going to be an account that has credentials to WDS server. In my example, I’m just going to use the Administrator account because I know it has rights. If you’re security conscious, you can create a special service account for this. Luckily. with Windows Deployment Server. It never saves the unattended file on the client computer. So, there is not as big of a security risk with having end users gaining access to the account.
Click Validate Answer File. Make sure no warnings come up.
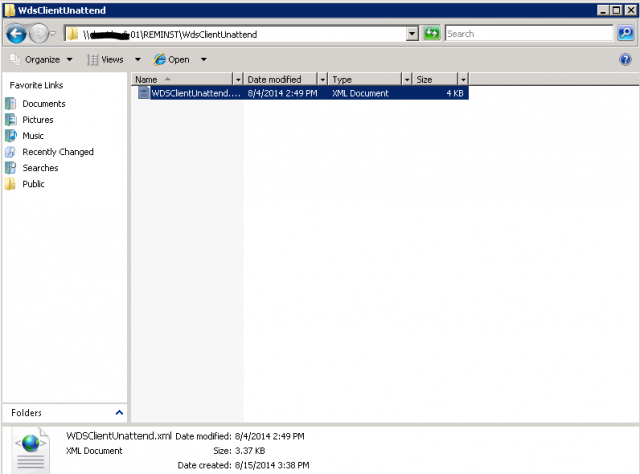
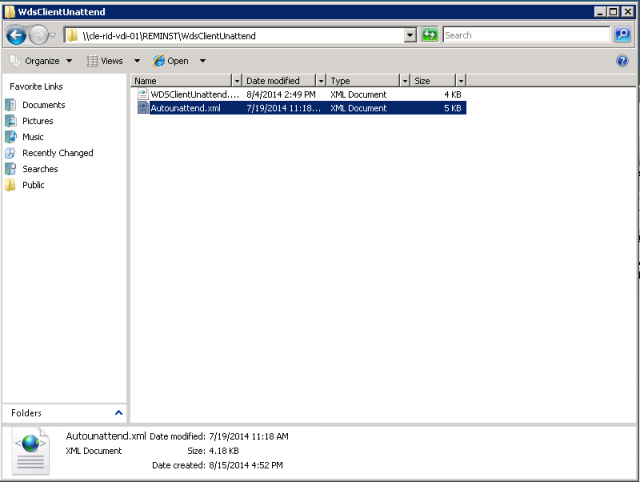
Save that file somewhere and copy it to the WDS server. I prefer to copy it to WDS serverREMINSTWdsClientUnattendWDSClientUnattend.xml Note that I had to create the WdsClientUnattend folder.
Just leave it there for now. We will use it later.
Now it’s time to make the unattended file for the Windows installation. Copy autounattend.xml from the link at the bottom of the page and open it in Windows System Image Manager.
If you are in a different location, go ahead and change those again.
Go to x86_Microsoft-Windows-Shell-Setup__neutral and change the product key to your key from the Microsoft Volume License Portal. I’ve had problems with it showing up in the past. You just have to call Microsoft to get access if you already own VDA licenses.
Change the time zone to your prefered time zone. This computer is going to be in EST. Microsoft has a list of all time zones here: http://technet.microsoft.com/en-us/library/cc749073(v=ws.10).aspx
There are a couple of cool things to note. Notice that the machine name is set to %machinename%. This will allow us to name the computer from Windows Deployment Server.
Also, note that the CopyProfile is set to true. This is where the administrator profile gets copied to the default profile.

Now go to Microsoft-Windows-UnattendedJoinIdentification. Change the value for JoinDomain to your internal domain.
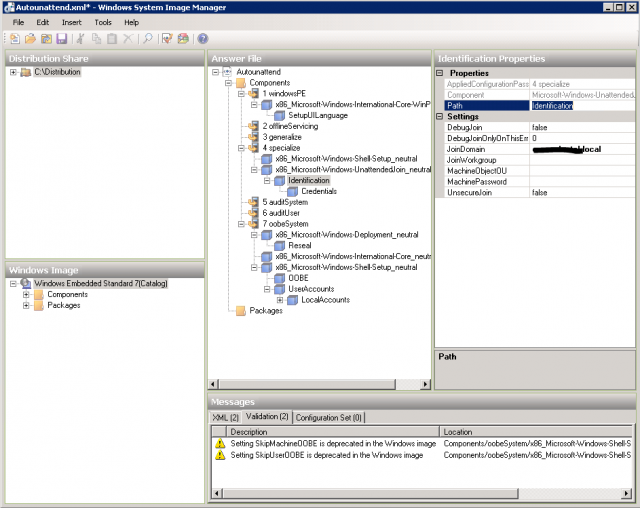
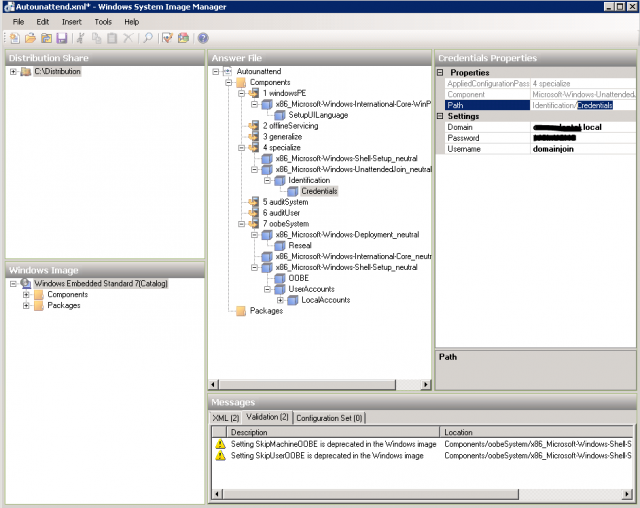
Navigate to Microsoft-Windows-UnattendedJoinIdentificationCredentials and put in any account that has access to join computers to the domain. Again, you can use the domain admin if you have no security concerns. I have an account specifically for domain joins.
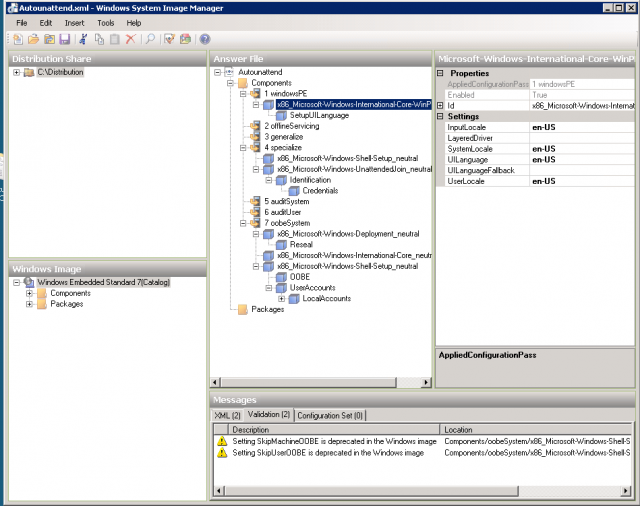
Go to x86_Microsoft-Windows-International-Core__neutral and change the location again if you are not in the US.
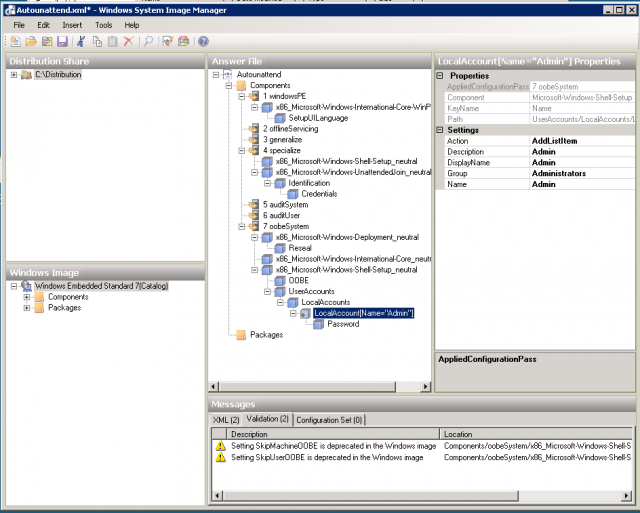
Now, we have to make the unattended file create a new user. If you don’t create a user, all kinds of stuff will break. So, make sure you create one. You can delete it later if you want. Make sure to adjust the name and password as you desire. I just called it admin and added it to the domain admin group. Also, go down to password and put in your desired password there.
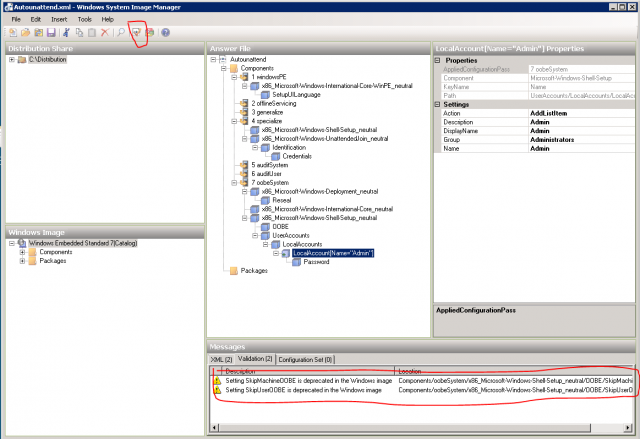
Validate this file and note that there are two warnings. These are okay. They’re nothing important, just a couple of changes in Thin PC vs. Windows 7.
Save this Autounattended file and copy it to: WDSserverREMINSTWdsClientUnattendAutoUnattend.xml
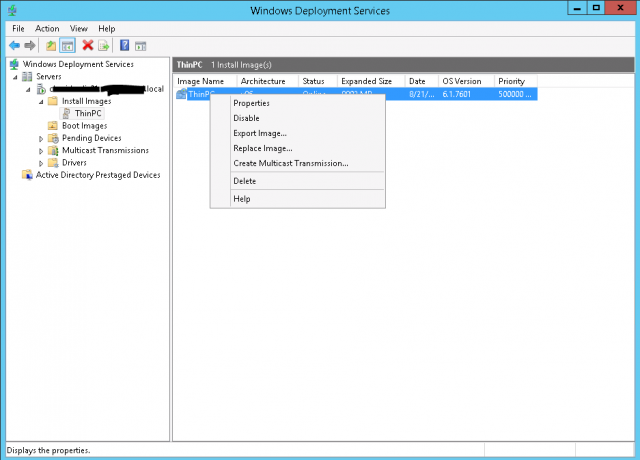
Now, open up up the WDS console and expand install images. Go all the way down to the image you created ealier. Right-click it and select Properties.
Click the box to allow the image to install in unattended mode.
Click Select File and pick the autounattend.xml file you just created.
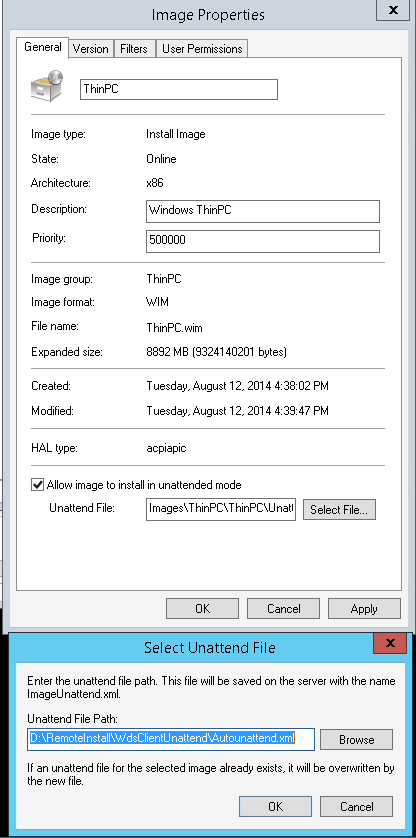
Click OK. This will set that install image to use that unattended XML file to automatically install windows. Here’s an important note: It caused me a lot of problems while testing everything out originally. When you select that file, it actually stores a copy somewhere on the WDS server. If you just make a change on the autounattend.xml file you need to come back in here and select that file again. Otherwise, it won’t actually make any change to your XML file.
4. Deploy the New Image
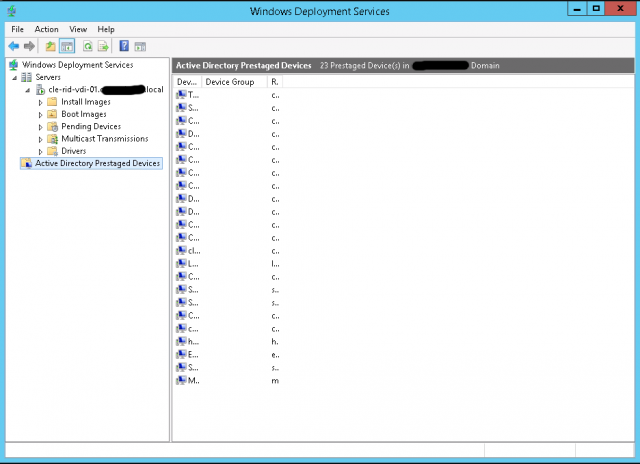
We have finally made it to the fun part. Go back into WDS and navigate to Active Directory Prestaged Devices.
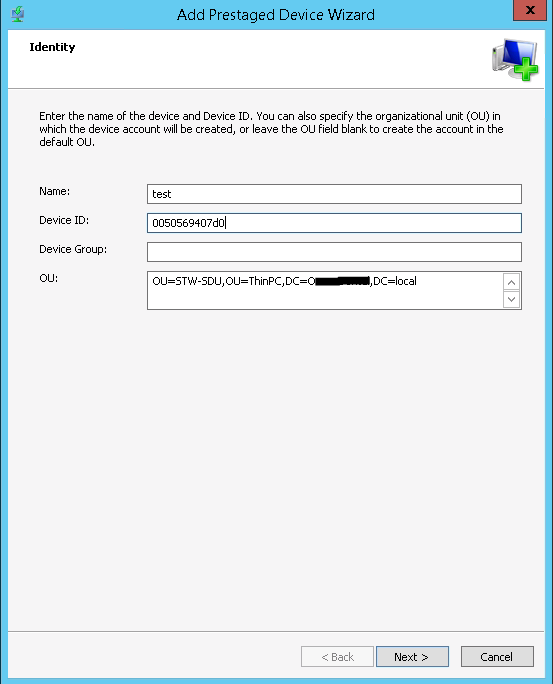
Right-click in the box and select Add Device. That brings up the Add Device Wizard. Put the name of your new computer in the Name box. It will actually name your computer that automatically.
Make the device ID the mac address of the computer. I’m going to test on a virtual machine. So, I just grabbed that mac address out of the VMware console. Leave Device Group empty. You can change the OU if you want it to automatically put that computer in a certain organizational unit. In my example, I am putting the computer in an OU called STW-SDU. That OU does need to be created prior to using this wizard.
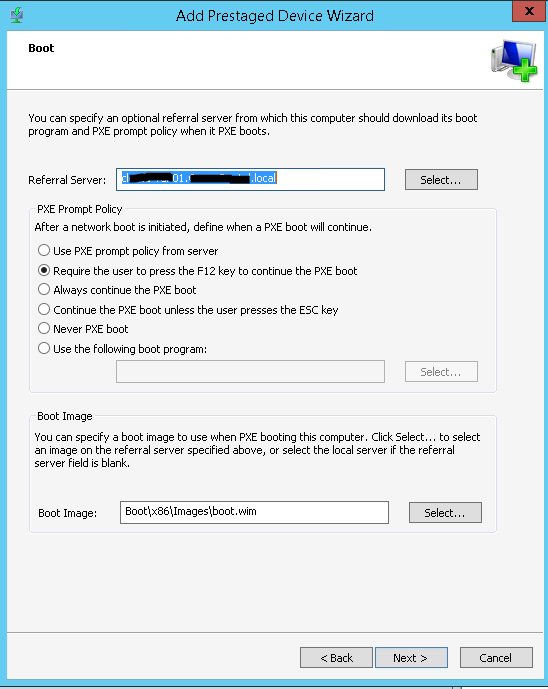
Click Next. Select your WDS server as the Referral Server. Select Require the user to press the F12 key to continue the PXE boot.
For Boot Image, make sure to select the regular boot image.
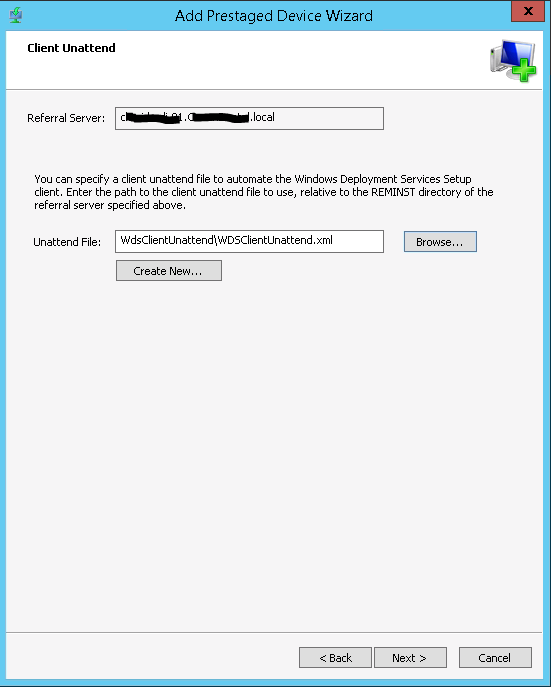
Click Next. For your Unattended file, select the WDSClientUnattended.xml file we created earlier.
Under User Settings click Configure User. Just pick an account with admin rights. Make sure to keep the box to have the computer join the domain check (unless you don’t want it to join the domain for some reason).
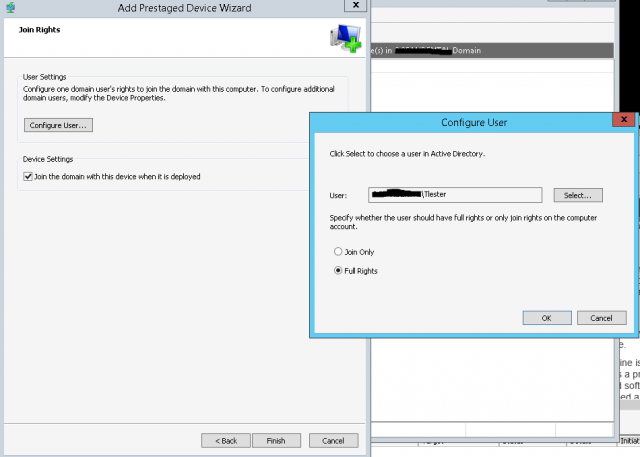
Click Finish.
5. Let’s Test a Deployment
I like to disable the capture image to make thing easier. Go to Boot Images. Right-click on your capture image and select Disable. This just makes it so that you don’t get prompted to capture an image when you boot to the WDS server.
Now wait for it to install. Hopefully, everything works.
The computer will reboot during the installation. Do not press F12 when it reboots automatically. That will cause it to start the installation again.
If you do have problems, the first thing to check is the unattended XML files. If it prompts you for anything, then there is probably something wrong with the settings of the unattended XML files. If you do make changes to those files, make sure to go back into WDS and remove the check marks for the current unattended XML files. Then, add the new ones back – even if they are the same name and the same location. Otherwise, it won’t implement any of your changes.
6. You’re Ready to Deploy
After that, you are ready to deploy to all the other computers. It was a long process to get setup and working, but now you get to reap the fruits of all your hard labor.