
Our client needed to provide external users (their customers) with access to their Tableau Server on Amazon Web Services (AWS). When it came time to discuss authentication, Active Directory (AD), while generally a good choice within an enterprise, was quickly ruled out.
They needed an identity/authentication provider that worked outside their network and provided a user-friendly password management experience (e.g. if a user entered an expired password, they didn’t just get a generic “username/password invalid” message). They also couldn’t use vanilla local authentication on the Tableau Server because they needed to enforce strong passwords with periodic expiration and wanted the option to easily add 2-Factor Authentication (2FA) later.
We helped the client choose OneLogin as an identity provider (IdP) and SAML service due to our past experience; but since this was my first time setting up an IdP, I ran into some newbie issues. I wrote this guide to spare you the distinct pleasure of experiencing them, as well.
This walkthrough utilized Tableau 9.3.0, but the majority of this tutorial applies back to 8.1 with the introduction of SAML support.
How It’s Done
- Install Tableau Server with local authentication selected.
- Obtain or generate an SSL key, and, if necessary, convert it into .crt and .key files.
- Create a folder called SAML in the directory you installed Tableau Server, for example: C:Program FilesTableauTableau Server
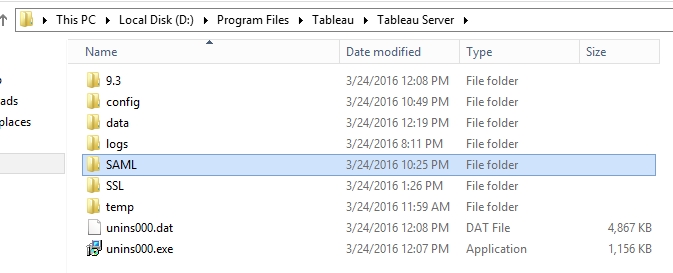
- Move your .crt and .key files into this SAML directory.
- Identify your Tableau Server URL (e.g. http://reports.myserver.com) and set up any domains, load balancers or proxies necessary. Make sure you can log in to your Tableau Server via this URL using a local username and password.
- Stop Tableau Server.
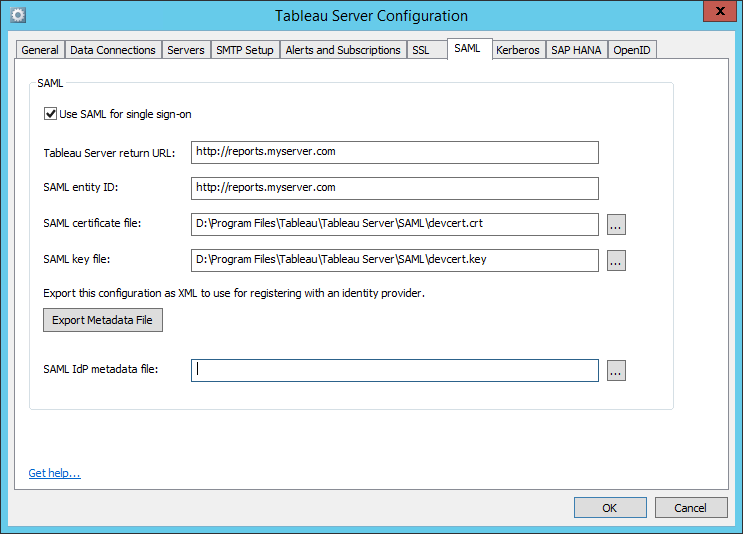
- Open up the Tableau Configuration utility (Start > All Programs > Tableau Server 9.3 > Configure Tableau Server), and go to the SAML tab. Enter your Tableau Server URL in the Tableau Server return URL and SAML entity ID boxes. Be sure to include http:// (or https:// if you’re using SSL) and remove any trailing backslashes.
- Enter the path or browse to the .crt and .key files you moved to your SAML directory in the respective SAML certificate file and SAML key file boxes.
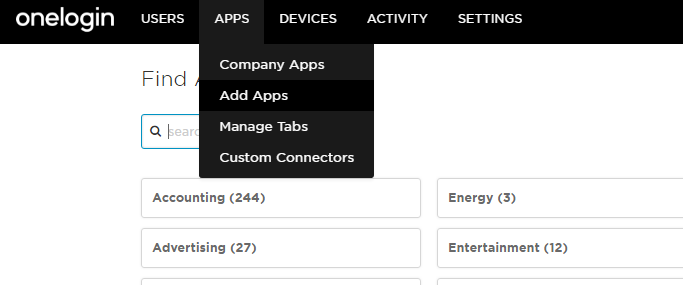
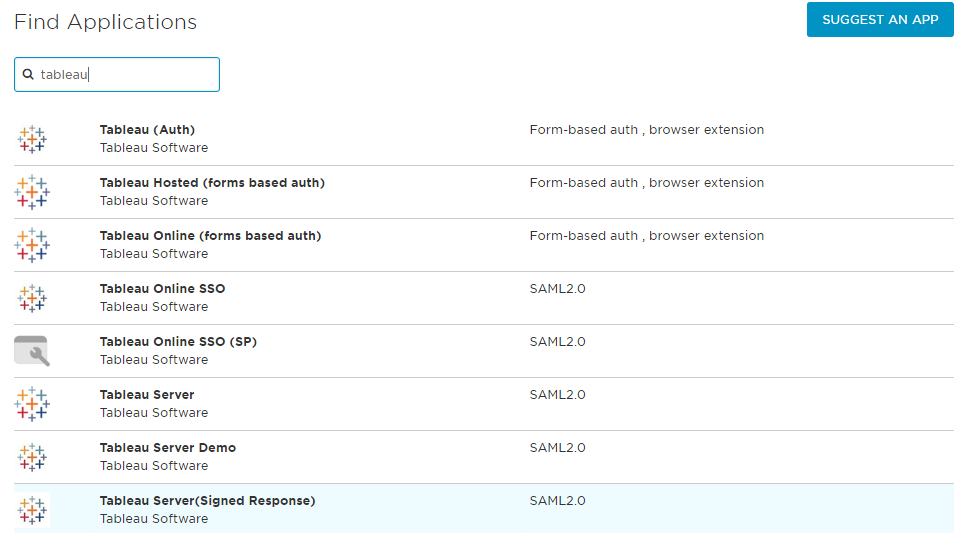
- Leave the configuration utility window up for now and head over to OneLogin. From the Admin area, go to Apps -> Add Apps and search for Tableau.
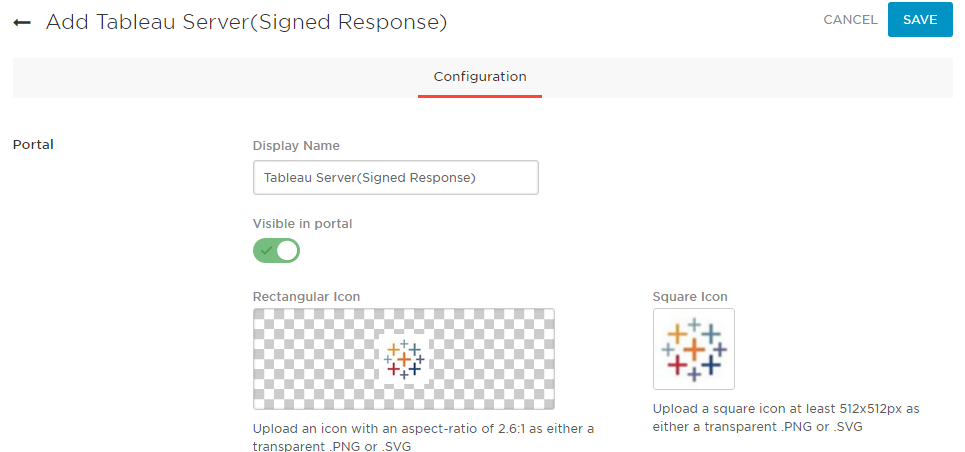
- Choose Tableau Server(Signed Response).
- Name it differently if you’d like, and click SAVE.
- Find and click on the newly created app under Apps -> Company Apps. On the Configuration tab, choose https if you’re using SSL on your Tableau Server, otherwise leave it at http. For Server Name, enter just the friendly URL of your Tableau Server, without http(s):// but make sure to include www. if applicable. In the SAML Audience box, enter the full URL from your SAML Entity ID box back on the Tableau Server configuration utility.

- On the Parameters tab, ensure credentials are Configured by admin. Disable the existing fields for Email and Username by setting their value to – No default –. Tableau requires that these come in as lower case, so we’ll need to add them separately.
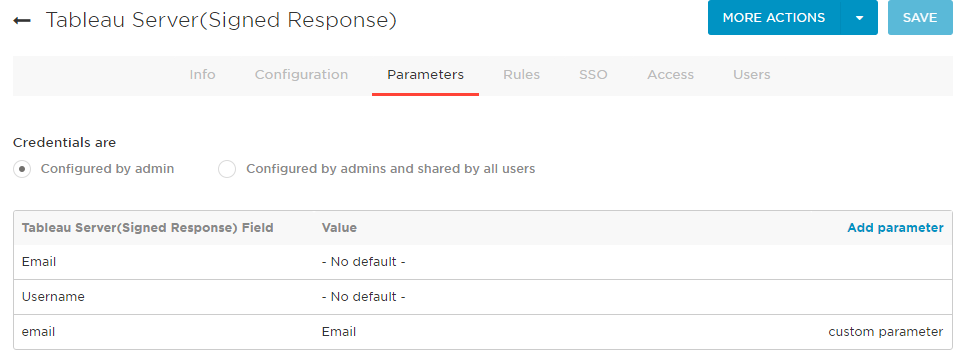
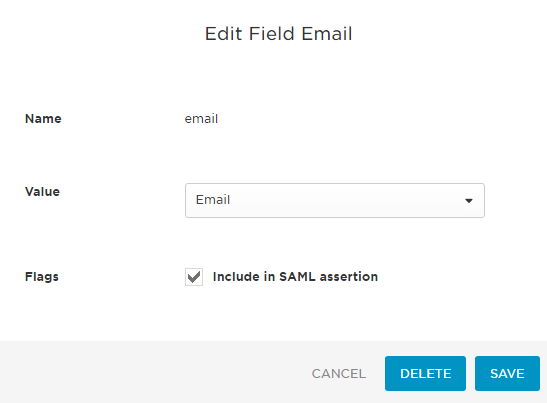
- Still on the Parameters tab, click Add Parameter and type in either email or username (the field you want to match in Tableau Server) and click SAVE. Then, click the newly added line for that field and choose the OneLogin field that should be passed through to Tableau Server. In my case, I used email and Email respectively. Make sure Include in SAML assertion is checked, and click SAVE. Again, the key is the lowercase e in email. First, I had to add the field for email and click SAVE. Then, I could edit it, choose the Email value from the list and hit SAVE again.
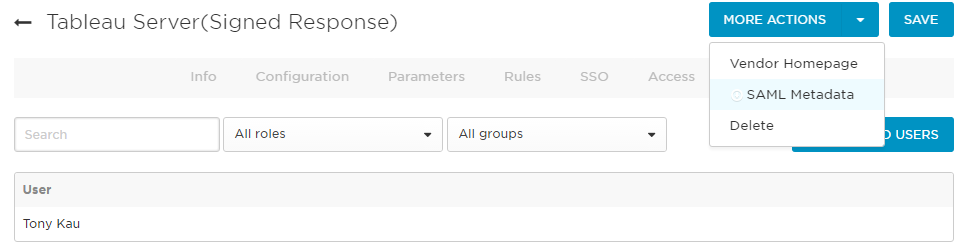
- Next, we want to export our configuration. Click SAVE for the App (to make sure settings are locked in), which will kick you out to the apps page. Click the app to go back in. On the More Actions drop-down, click SAML Metadata to download an XML file with the metadata we’ve just created in the App. It should now be in your default downloads folder.
- If you want to enable the LogOut function from Tableau Server, you’ll need to make a change to this XML file before providing it to your Tableau Server. Open it up in a text editor and look for the line near the end that says:
<SingleSignOnService Binding="urn:oasis:names:tc:SAML:2.0:bindings:HTTP-POST" Location="https://myoneloginaccount.onelogin.com/trust/saml2/http-post/sso/123456"/>
Duplicate this line directly below itself and make the following changes:
- Change SignOn to Logout
- Change the Location URL to the one found on your SSO tab in OneLogin, under SLO Endpoint
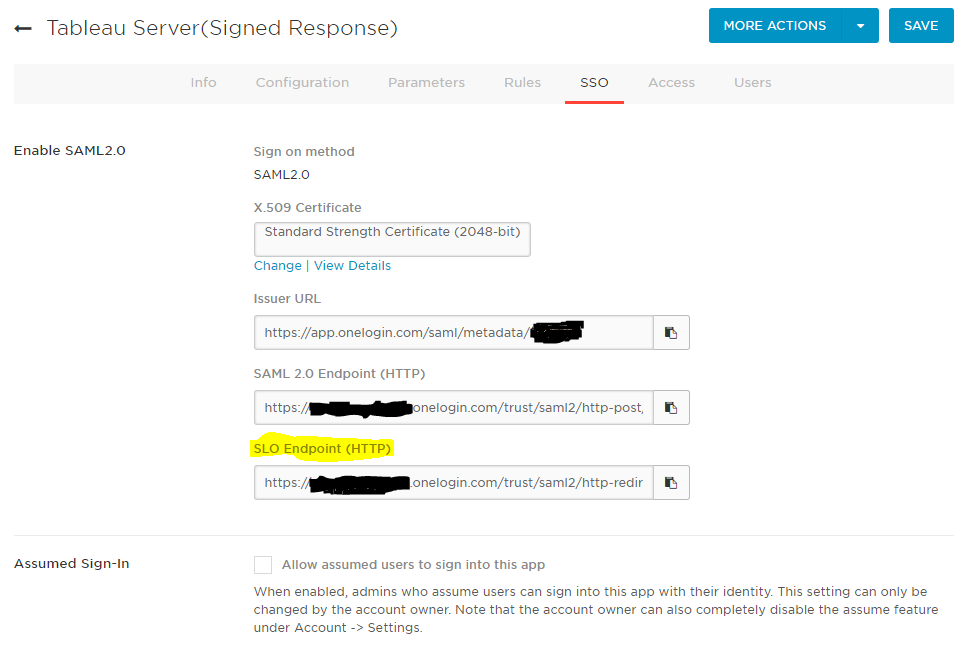
When you’re done, the line you added should look like this:
<SingleLogoutService Binding="urn:oasis:names:tc:SAML:2.0:bindings:HTTP-POST" Location="https:// myoneloginaccount.onelogin.com/trust/saml2/http-redirect/slo/123456"/>
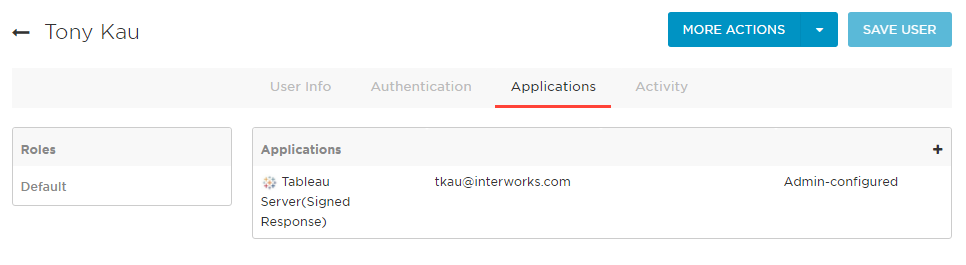
- Finally, we need to give our OneLogin users access to this app. If you haven’t added users already to OneLogin, this is a good time to do so. You’ll then need to give them access to the App by clicking Users -> All Users (or Groups if you’re managing with groups. Hint: Yes, you probably should be). Choose a user or group, and under the Applications tab, click the + button on the Applications box. Choose the new Tableau Server app you just created.
- Copy the XML file to your SAML folder on your Tableau Server (where you put the .crt and .key files earlier). Jump back into the Tableau Server Configuration utility and choose this file for the SAML IdP metadata file box.

- Click OK. You may be prompted to enter the password for the Tableau service account on the General tab if you haven’t already.
- Start Tableau Server, and log in using your SAML credentials! Your username will need to exist already on Tableau Server for a successful login.
Hopefully everything went smoothly. In case it didn’t (like my original installation), I wanted to give you some resources to get you up and running ASAP:
First, Tableau’s SAML troubleshooting page. Second, I’m here to tell you that logs are your friend.
The Tableau Server log directory is C:ProgramDataTableauTableau Serverdatatabsvclogs if you installed Tableau Server on drive C, or in with the Program Files if you installed in a different directory (for example: D:Program FilesTableauTableau Serverdatatabsvclogs). The most helpful for me was vizportalvizportal-#.log.
Errors You Might See in the Logs
Double https://
- Error message: catalina-exec-2 : ERROR org.opensaml.common.binding.decoding.BaseSAMLMessageDecoder – SAML message intended destination endpoint ‘https://https://reports.myserver.com/wg/saml/SSO/index.html’ did not match the recipient endpoint ‘http://reports.myserver.com/wg/saml/SSO/index.html’
- Cause: I started by using the Tableau Server app in OneLogin instead of Tableau Server(Signed Response), which was causing this error to be thrown in the logs:
- Fix: I switched to using the OneLogin app called Tableau Server(Signed Response), which required an Audience ID and never saw this error again.
Error validating SAML message
- Error message: catalina-exec-4 : INFO org.springframework.security.saml.log.SAMLDefaultLogger – AuthNResponse;FAILURE;127.0.0.1org.opensaml.common.SAMLException: Error validating SAML response catalina-exec-4 : ERROR com.tableausoftware.domain.user.saml.SAMLExtendedProcessingFilter – SAML Authentication Failed, please contact the administrator. org.springframework.security.authentication.AuthenticationServiceException: Error validating SAML message
- Cause: I had added /wg/saml/SSO/index.html to the end of the SAML entity ID string in the Tableau Server configuration, and I got this error.
- Fix: Removing /wg/saml/SSO/index.html from the end of the SAML entity ID string and instead using the server URL (http://reports.myserver.com) fixed this error.
No valid value for attribute
- Error message:catalina-exec-2 : ERROR com.tableausoftware.domain.user.saml.SAMLExtendedProcessingFilter – SAML Authentication Failed, please contact the administrator. org.springframework.security.authentication.AuthenticationServiceException: Incoming SAML message has no valid value for email attribute. Please verify ServiceProvider configuration in Identity Provider.
- Cause: Tableau is looking for certain CASE SENSITIVE attribute names in the SAML message it receives from OneLogin.
- Fix: The fix was to tell OneLogin to pass the values in the manner Tableau is expecting, e.g. username or email:

Other Considerations and Customizations
- In older versions of Tableau Server, up through 9.0.3, I believe, you are unable to use an email address and must use the username.
- If you have more than one node, copy the SAML folder with the certificates to all workers.
- Relevant tabadmin set commands:
tabadmin set wgserver.saml.idpattribute.username emailSpecifies the attribute used by the IdP for SAML authentication. The default isusername, but I usedemail.tabadmin set wgserver.authentication.restricted trueSet this to true to disable local password use (and by extension, tabcmd) for non-System Administrators. When set to true, all users must sign in via SAML. The default isfalsetabadmin set wgserver.saml.logout.enabled falseSetting to false removes the ability to logout within Tableau Server. The default istrue.tabadmin set wgserver.authentication.desktop_nosaml trueSet to true to disable SAML authentication for Tableau Desktop – users would need to log in to publish or connect to published content with Tableau Server credentials instead of SAML credentials. The default isfalse.tabadmin set wgserver.authentication.app_nosaml trueSet to true to disable SAML authentication for Tableau Mobile App – users would need to log in to view content with Tableau Server credentials instead of SAML credentials. The default isfalse
This post was inspired by a helpful answer by Pablo Caif in a community thread. A big shout out to Joe Everett for burning the midnight oil to work through these issues with me.