This is the third post in an ongoing series that compares new and improved features in Veeam 8 to those in Veeam 7. This article highlights the new Failover Plan feature. You can find all posts within this series on our Veeam 8 vs. Veeam 7 channel. To view a list of changes for Veeam 8, see this article. If you’re setting up Veeam 8 for the first time, you can check out this step-by-step install guide.
One of the newer features in Veeam 8 that will significantly simplify running DR tests and executing a real DR plan is the Failover Plan feature. This feature allows administrators to configure Pre-failover scripts, Post-failover scripts, order of booting the virtual machines and Boot Delays. This article displays the options for configuring a failover plan with one virtual machine and executing the job.
Veeam 8: Configuring a Failover Plan
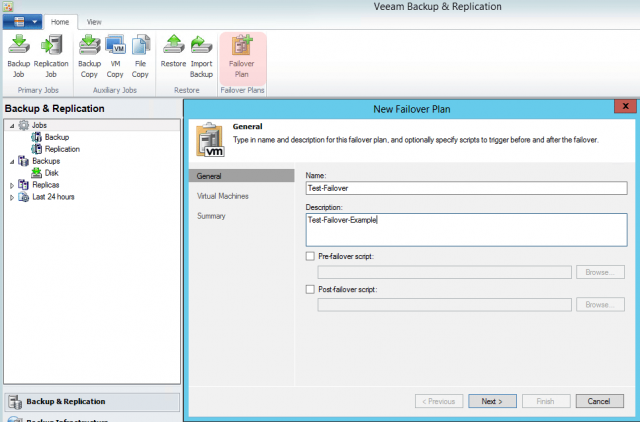
Similar to configuring a backup job, replication job, etc. to configure a new failover plan, there are handful of areas within the GUI to either create or add VM’s to the Failover Plan. For example purposes, a failover plan has been created by clicking the Failover Plan button on the top navigation menu that appears when first opening up Veeam Backup & Replication.
Once the New Failover Plan window has been opened, a custom name and description can be assigned for the plan. Since multiple failover plans can be created, this allows admins to create failover plans based on their needs such as:
- Groups of applications
- Department-specific VMs
- Priority of virtual machine
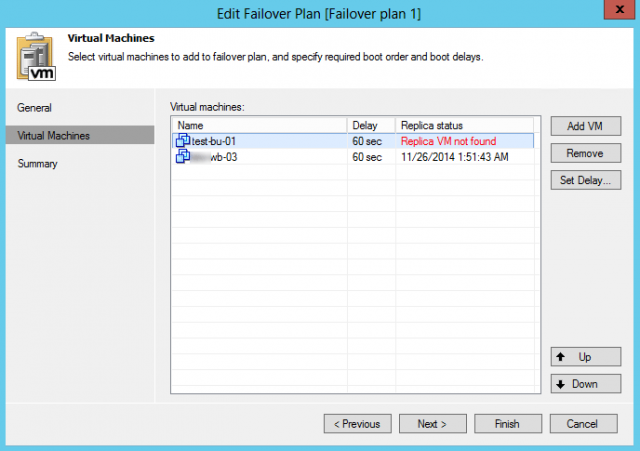
On the Virtual Machine window, admins will have the ability to select VM’s from the infrastructure or replica to allow admins the flexibility to structure their failover plan in a way that makes sense to them. If a virtual machine is selected from the Infrastructure tab, Veeam will attempt to find the associated replica. This is beneficial in that admins can select VM’s from an entire folder within VMware. Alternatively, the replica can be selected directly from the replica job.

In the screenshot below, I have shown an example of a machine that is currently not replicated by Veeam and one currently replicated by Veeam.
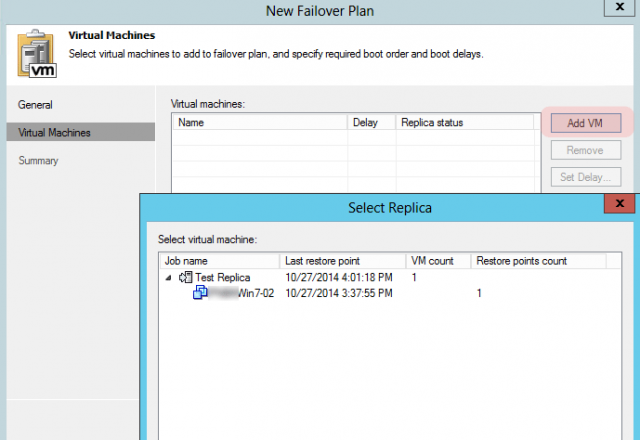
In the screenshot below, an example of selecting a VM from an existing replica has been shown.
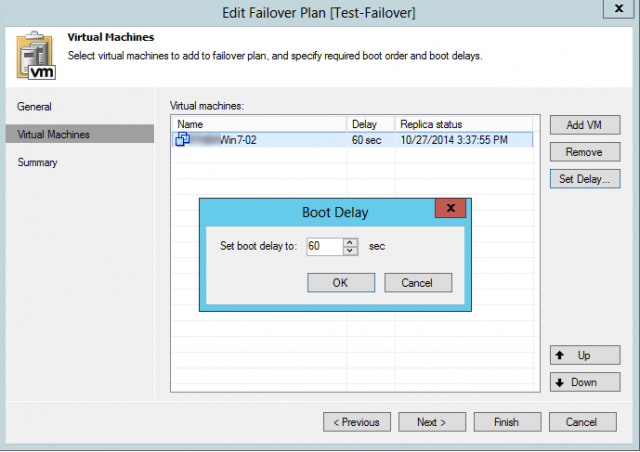
In my example, the Win7-02 VM is a standalone server and does not require any dependencies. However, if a dependency were to be required to a server like a database server, a delay time can be configured to allow the VM to fully boot up. By default, this is set to 60 seconds. However, it is important to have a thorough understanding of the applications in your environment before utilizing the defaults settings or creating a failover plan.
Once Finish or Next has been selected, a summary of the failover plan will be displayed.
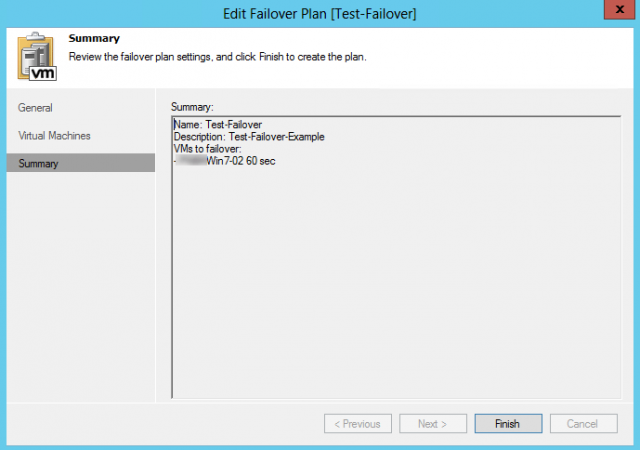
Veeam 8: Initializing a Failover Plan
Similar to other features, Veeam will keep the default menu clear of any items that are not currently being used. Once a failover plan has been created, a new option will appear in the Backup and Replication tab called Failover Plans. This area can be navigated similarly to other areas within Veeam.
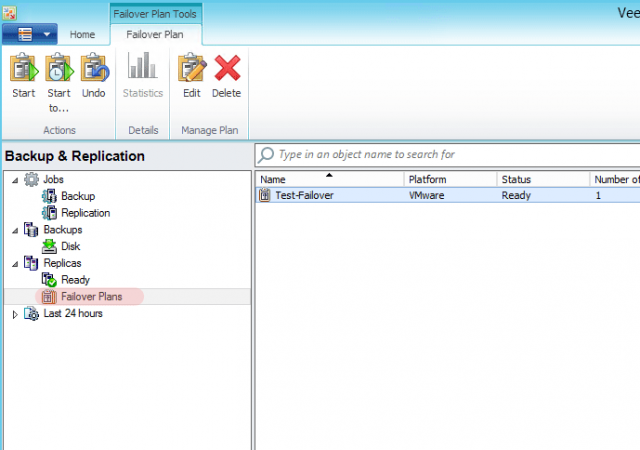
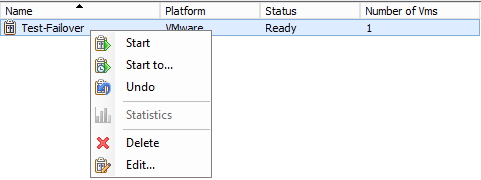
Before initializing a failover plan, it is important to note that virtual machines added to the failover plan will pull the settings preconfigured in the replica job, such as the separate virtual networks (enable network remapping) and different IP addressing scheme (enable re-IP). If your VM’s need to have special preparations to run the virtual machine, do not click START. Under Start to… admins have the ability to utilize a restore point if needed.
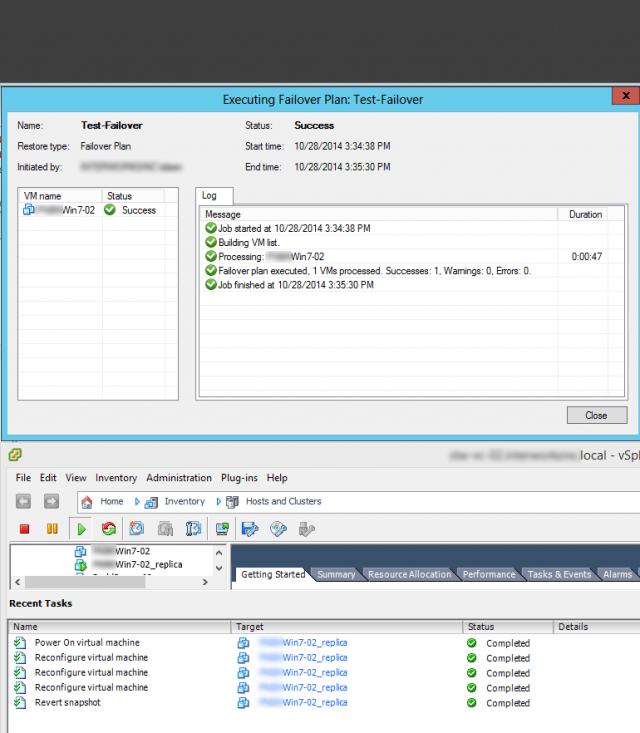
Once the failover plan has been initiated, the production VM will automatically be powered off and the replica VM will be powered on. In the example down below, Win7-02 was already powered off. So, this process was skipped in the VMware recent tasks.
Once the replica machine has fully powered on, Veeam will display new options under the newly created Active area. These options will be identical to using the Failover Now feature.
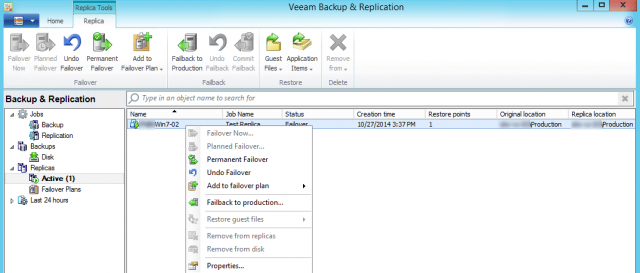
Once DR testing/DR Plan has been completed, a number of options will be available such as:
- Failback to Production
- Undo Failover
- Permanent Failover
These changes can be applied either to an entire Failover Plan or on an individual machine basis. For example, in the case of a DR test, if all changes being applied are no longer needed, the Undo Failover feature can be applied to an entire Failover Plan, which will quickly delete any DR Testing changes applied to the environment.
If changes to the replica VM need to be kept and applied to the production environment, the Failback to production… option should be used. This option is most applicable if the production VMs go down and VMs at DR need to be stood up for actual production use. Once this option has been selected, a wizard will pop up displaying which VM’s will need to be failed back to production.
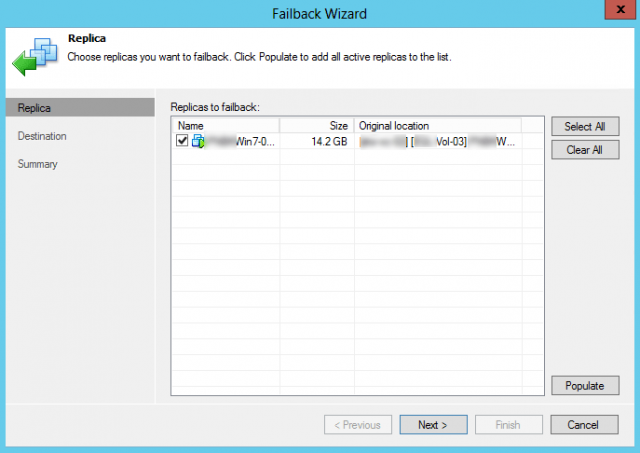
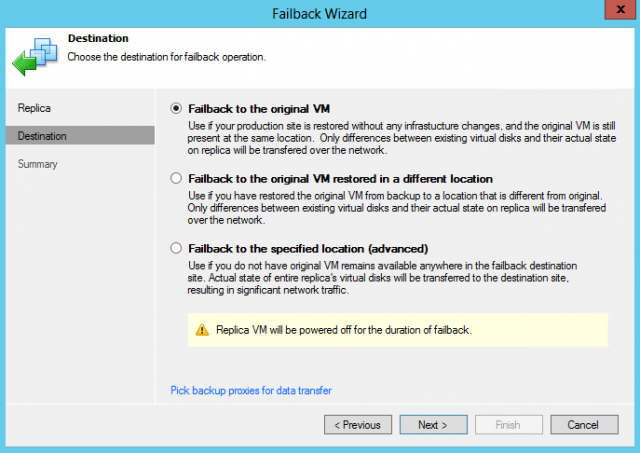
After the required all virtual machines have been checked, Veeam will allow one of the following options to be selected:
- Failback to the original VM (this will overwrite the original VM)
- Failback to original VM restored in a different location (this will assign a new VM-ID in VMware)
- Failback to specified location (advanced) (this option will be required if the original site has any associated data with the VM)
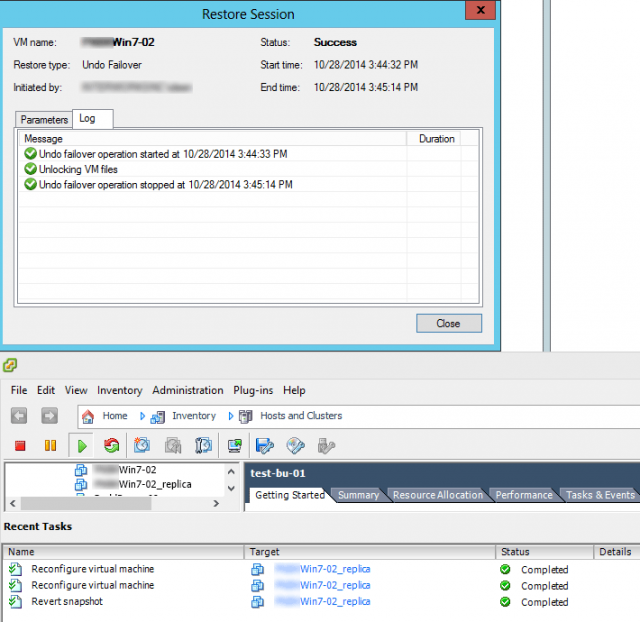
If a DR test is being executed and all changes can be disregarded, the Undo Failover feature is the most applicable option. Since the changes in my example can be disregarded, Yes was selected..

In the screenshot below, an example of Veeam has been shown when the Undo Failover option has been initialized. As expected, the DR VM was reverted to the latest “replica” snapshot and the machine was powered off.
To learn more about the Failover Plan feature in Veeam, visit http://helpcenter.veeam.com/backup/80/vsphere/failover.html or, alternatively, visit http://www.veeam.com.

