
In the last decade, there has been a profound change of expectations in the world of IT. Applications are expected to have no down time while at the same time having minimal to no loss of data.
Thanks to virtualization and discoveries in technology, it is now cost-effective for many organizations to have high redundancy with a handful of hypervisors and a storage area network (SAN). However, this does not protect on the application layer as the operating system may still go into an unrecoverable state.
For applications that cannot be clustered, an IT administrator’s next best option is to rely on a backup. In traditional backup model where tapes are utilized, it would take anywhere from a half-day to a full week, depending on the size of the data being recovered and the server. During this recovery process, the application remains in a down state and, in some cases, could cost organizations millions of dollars.
Veeam’s answer to this problem was both innovative and practical with their Instant Recovery feature within Veeam Backup and Replication. They asked the question: “Why not power on the machine directly from the backup and allow the data to be pushed back to the SAN while that machine is powered on directly from the backup?” This would allow recovery time objectives (RTO) to be reduced to as little as 15 minutes versus the traditional tape method.
This article is a walkthrough of the Veeam Instant Recovery process and shows the simplicity of the product.
Using Veeam Instant Recovery
Considerations Before Running a Recovery
Before utilizing Veeam Instant Recovery, it is important to weigh your options before deciding that you want to restore your server from a backup. For example, if your recovery point objective (RPO) is significantly older than your existing production machine, it may be more worthwhile to try to repair the OS or Application before running the Instant Recovery.
Additionally, in almost no scenario should you restore a domain controller back to an environment unless it is the last/only domain controller in the environment.
Running Veeam Instant Recovery
In the scenario below, an application update was scheduled during business hours. After the server was rebooted, Windows came up in an unrecoverable state even after attempting a Windows repair. A few options were available:
- Recover the Entire VM (including registration)
- Instant VM Recovery
- Failover to DR
In this case, since the virtual machine needed to be restored somewhat quickly, it was decided to run an Instant Recovery.
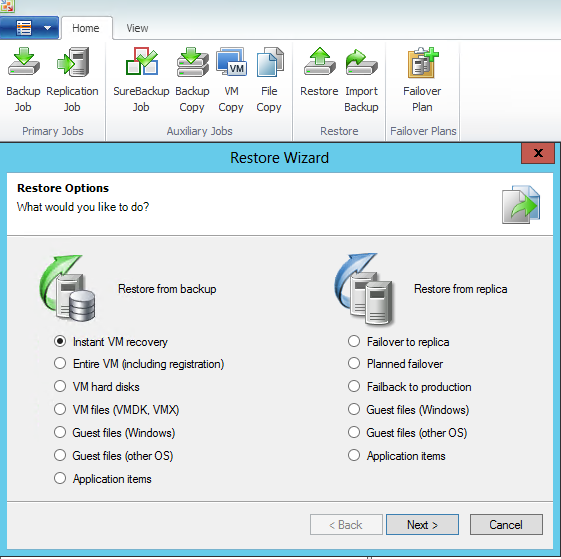
After starting the Instant Recovery process and selecting a suitable restore point, two options were available:
- Restore to the original location
- Restore to a new location or with different settings
Since I knew the existing virtual machine was a bad copy, the Restore to the original location was used. Had I wanted to restore a separate copy and keep the existing virtual machine active, I could have selected Restore to a new location, or with different settings. It is important to keep in mind that if this option is selected, a new virtual machine will be deployed in VMware with a new vm-id.

After selecting the Restore Mode, a suitable Restore Reason was entered. On the Ready to Apply page, you will have the option to Power on the VM automatically and Connect the VM to network.
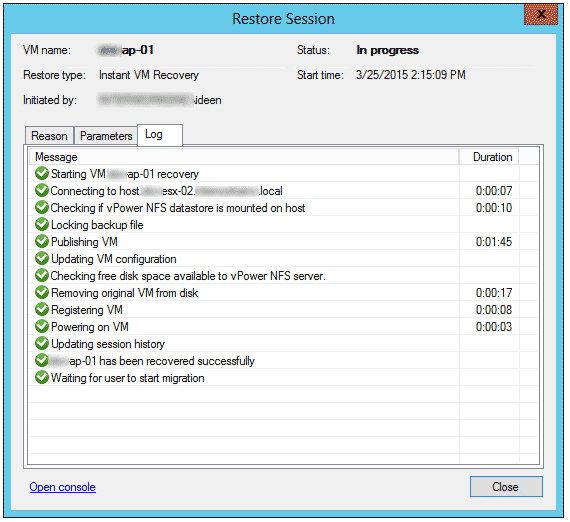
Once some other quick options are selected and Finish is selected, it’s time to sit back let the Instant Recovery to run.
As shown by the screenshot below, it took approximately three minutes to mount the virtual machine into VMware and power the machine on. In total, my recovery time objective for this machine ended up being less than 15 minutes.
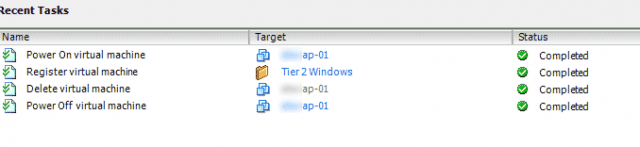
If Restore to the original location was selected and the virtual machine being recovered currently exists within VMware, you will need to allow Veeam to delete the original source machine (or manually do it yourself). Veeam will attempt power off the original machine and delete it before registering and powering on the replacement machine. Below is a screenshot of the tasks within VMware:
After verifying the machine had booted up properly, a confirmation was received that the virtual machine could be rehydrated back into the production environment. To do this, Migrate to production… was selected.
Note: While the virtual machine is running Instant Recovery mode, the Veeam backup file will be locked.

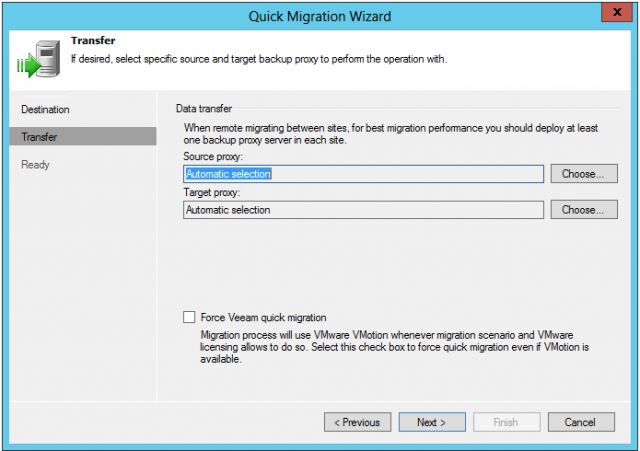
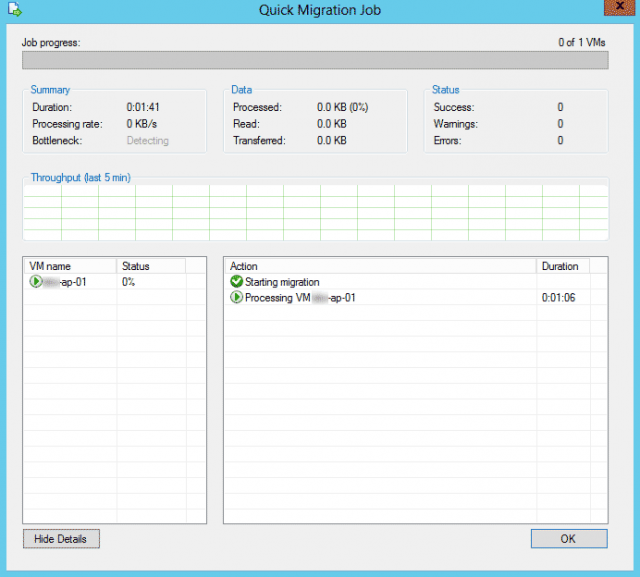
Once Migrate to production… is selected, Veeam admin will have the option to select a new cluster, resource pool, VM folder and datastore. On the next window, there will be an option to do a Force Veeam quick migration. This will “register the VM on the target host, restores the VM contents from the backup file located in the backup repository and synchronizes the VM restored from backup with the running VM.”
For more detail on Quick Migration, see the following article: http://helpcenter.veeam.com/backup/80/vsphere/quick_migration.html

On the next window, a source and proxy can manually selected. In most cases, Veeam will be smart enough to determine the best use proxy available in the environment.
Once all options have been selected, Veeam will allow one final review of the migration process:

Once the process has started, Veeam will show a status window of the restore rehydration / quick migration process. The time it takes for rehydration process to finalize will be dependent on the storage for the Veeam backup, network speeds and storage utilized within the hypervisor. In the example below, the virtual machine (60GB) took approximately 30 minutes to recover:
To find out more about Veeam, visit http://veeam.com/.