One of the nice features about ShoreTel is the ease of use of the ShoreTel Communicator. One feature that can be enabled is Call Fowarding. This feature can allow users to forward incoming calls directly to a phone number of their choosing such as Google Voice, a cell phone, or a home phone.
ShoreTel Communicator: Configuring Call Forwarding
If you are an end-user, note that your ShoreTel administrator must enable call forwarding in the configuration. If you are an administrator, instructions have been provided below in the ShoreTel Director: Enabling Call Forwarding at the bottom of this article.
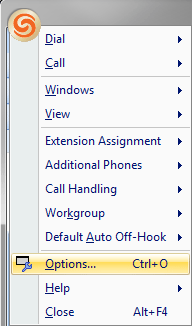
To enable Call Forwarding, click on the ShoreTel icon in the top left of your communicator.
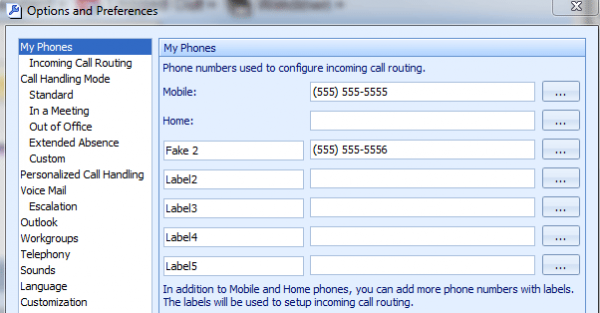
Under the My Phones tab, enter in your desired numbers. Up to 7 separate numbers can be added, 5 of those numbers allowing custom labels.
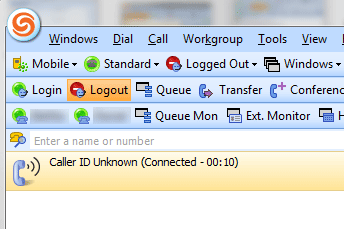
Once the numbers have been added, click OK. On the ShoreTel communicator screen, the desired External Assignment can be selected. In my example, both Mobile and Fake 2 are displayed.
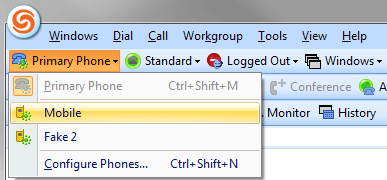
In my example, I have selected Mobile to be my primary phone.
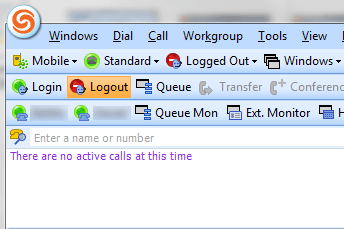
Once Mobile has been selected, any calls that are transferred to me or any calls that come in through my direct line will now forward to the Mobile phone.
If I wish to call someone within my organization or call someone using my organizations phone line, I can use the ShoreTel Communicator to call that person. The following will occur:
- ShoreTel will call the Mobile number first.
- If the Mobile number answers then ShoreTel will then attempt to call either the extension or outbound call.
Keep in mind that if you are using Extension Assignment, ShoreTel will use one of your available lines to call your cell phone, home phone, Google Voice, etc. If you are making a call to an outbound number (not an internal extension) such as (555)-555-5550, this will take up a second phone line to complete the circuit.
ShoreTel Director: Enabling Call Forwarding
If you are a ShoreTel administrator and would like to enable Call Forwarding, you can do so in Administration > Class of Service. Select the Telephone Feature that needs to be adjusted.

Once the Telephone Feature has been selected, scroll down and find Allow External Call Forwarding and Find Me Destinations. Check Allow External Assignment.

If this feature is enabled in your environment, make sure you have the call capacity to be able to handle the additional traffic. Keep in mind that you will take up 2 trunks, one for the inbound call and another for the outbound call to the externally assigned device.

