Tableau purchased Power Tools in 2019. Contact Us for more information.
As more and more companies expand across the oceans, it becomes more of a necessity to embrace other languages and expand the consumer base of your data visualizations. This walkthrough will create an easy way to take a single workbook that needs to be shared in different languages and publish new workbooks in each language to another location. You may have the new workbooks separated by projects, sites or even Tableau servers.
This particular example is a Tableau workbook using a data dictionary in flat files and swapping based on a parameter. In a database, you would probably handle this with a join condition instead, but the premise is the same. An alternative would be to create three unique data connections and then swap them out rather than use a parameter.
Using the Data Dictionary
Create a data dictionary table that includes a Language column with a reference to the different languages (can be 1, 2, 3 or English, French, Japanese):
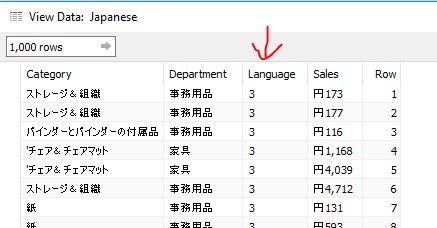
Image 1.1 – In this diagram, the number 3 represents Japanese, and there are numbers 1 for English and 2 for French as well. The Row will keep the same row number for each language, so the first Category in English is the same row number as the first Category in Japanese.
Create a Parameter
Create the Parameter in Tableau Desktop to swap between the language options 1, 2, 3 or English, French, Japanese:
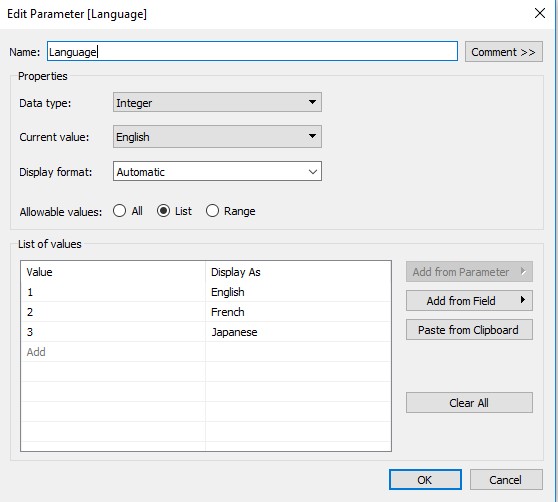
Image 2.1 – A parameter named Language is set with a list where Value 1=English, Value 2=French, and Value 3=Japanese.
Data Source Filter
Create a calculated field that filters the Language Dictionary based on the parameter chosen:
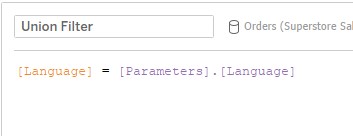
Image 3.1 – [Language] represents the Language column from Image 1.1, and it will equal the number that is chosen from the Language parameter. If the parameter is set to 1, then only the 1s are shown from the Language column.
Next, create a Data Source Filter utilizing the calculated field just created:
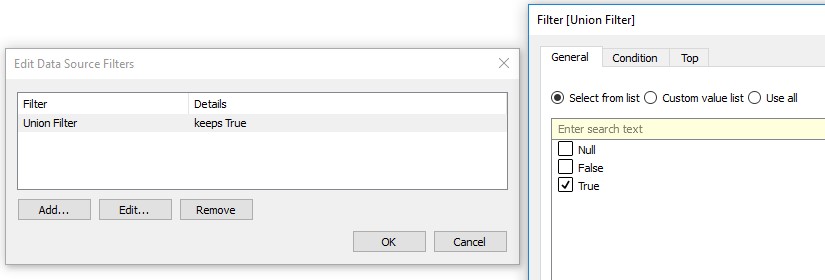
Image 3.2 – In this image, a data source filter is created and the calculated field Union Filter is used and set to True.
Publish to Tableau Server (Default Project or Template Project). This will be the workbook that should be updated and kept current, for this will be what the other workbooks are copied from.
Power Tools for Tableau Deployment
Use the Deployment arm of Power Tools for Tableau to create a Plan to publish the other workbooks based on the parameter being switched to 1, 2, 3 or English, French, Japanese:
Set up the Source and Destination servers:
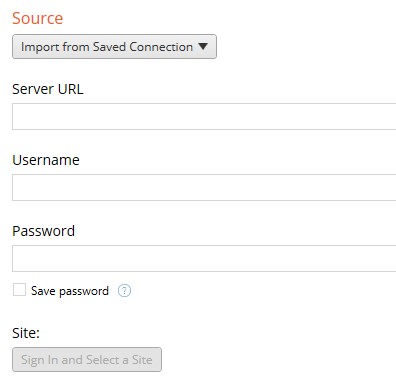
Image 4.2 – This will be where you choose the source location of the workbook that was created. Sign in to your Tableau Server using a site admin’s credentials and choose the site if necessary.
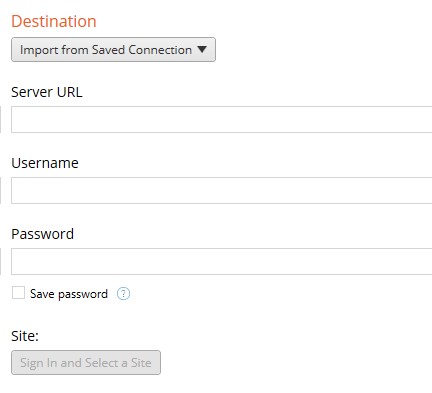
Image 4.3 – This will be where you choose the destination location of the new workbooks that will be created. It can be the same server and site as the source or a different server and site.
Under Source Projects, choose Specific Projects and select the project where your initial published workbook is located:
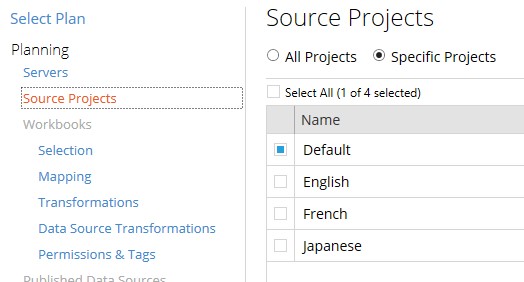
Image 4.4 – Once logged into the server, this shows projects to search from.
Under Workbook Selection, you can select Rule Based and select which project to look in. You can filter by tags or method of publication. Using tags to define what workbooks to use makes it easy to specify or change later:
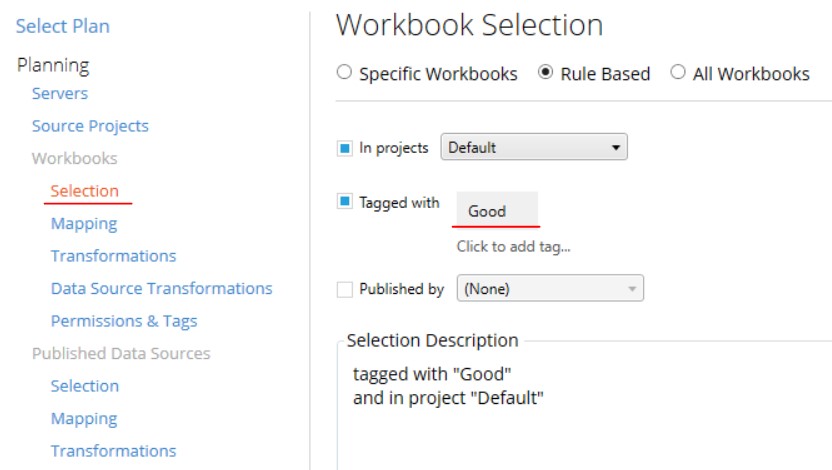
Image 4.5 – This image uses a tag of Good to choose which workbook to select from the Default project. On the workbook in Tableau Server, be sure to add the tag of Good so it will be selected.
Select Change Project from the Add Mapping drop-down menu:

In the Edit Mapping section, choose the Source Project from where the source workbook is located. Under Destination, click on the Project drop-down menu and choose Add New. Type in the name of the project that will be created when you create the new workbook in a certain language:
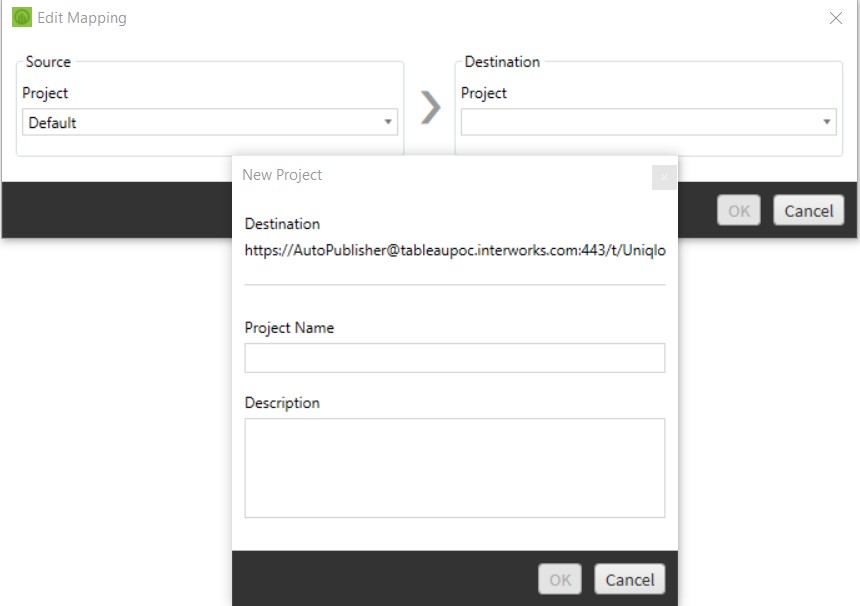
Image 4.7 – For example, if this is being set up for the English language version, you would type in ProjectName – English. When this plan is run, it will create a new project titled ProjectName – English, and the English version of the workbook will be saved inside.
Under the Add Transformation drop-down menu in the Workbook – Transformations section, select Set Parameter Value:

Select Apply to all workbooks in the Workbook Selection tab:
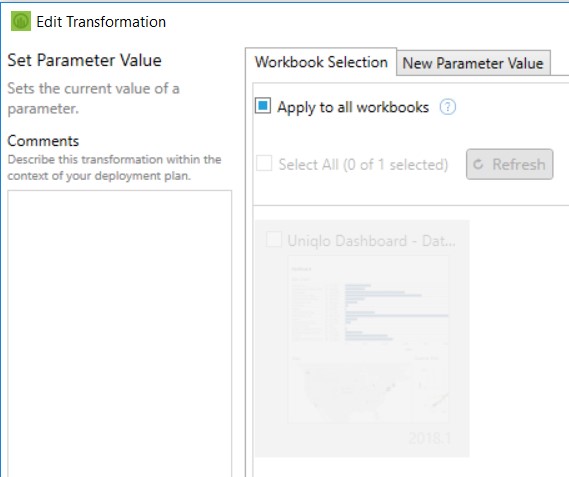
Image 4.9 – Here, you can select either all workbooks or certain ones. If you only have certain ones using the tag Good, you can just choose Apply to all workbooks.
Under the Parameter Value tab, type in the name of the parameter created earlier in Tableau Desktop. Choose the data type you are using, and enter the value that matches that of the parameter you want. I would add a comment to easily reference this parameter choice:
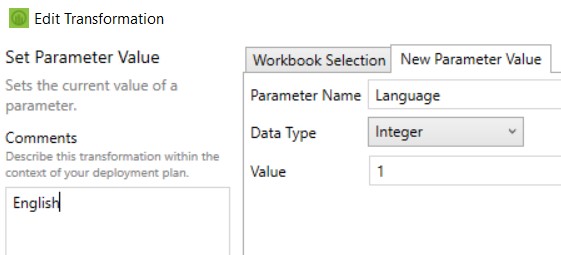
Image 4.10 – This image uses the parameter Language with a data type of Integer, and since the English language is wanted, a value of 1 is used.
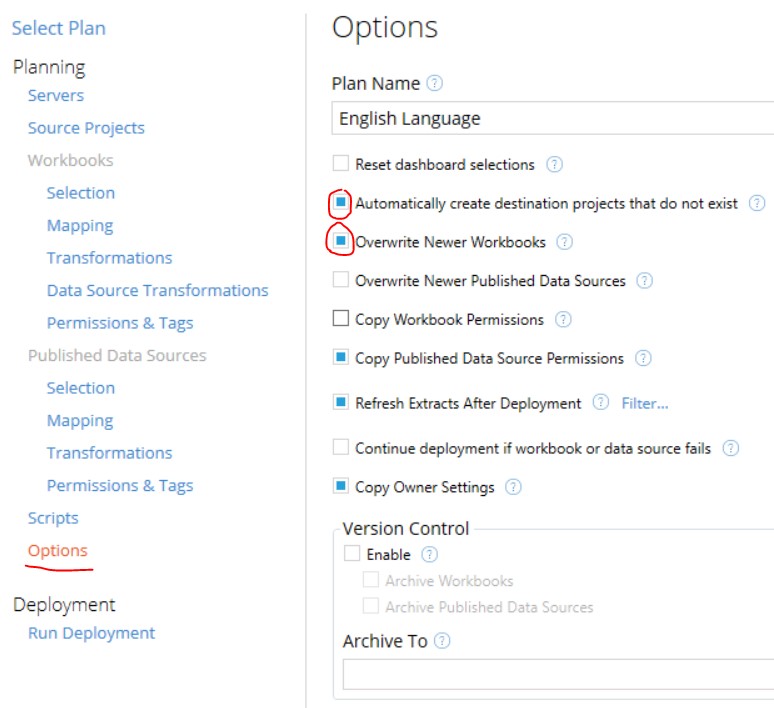
Skip down to Options and give the plan a name. Be sure to choose Automatically create destination projects that do not exist and Overwrite Newer Workbooks. Save the plan in the bottom-left corner, and create a new one for each value of your parameter:
PowerShell Automation
If you would like to automate the running of all of your plans at once, you can use a PowerShell script. You can find documentation on this here. You just need to know the path to the saved .edt files saved from Power Tools: Deployment and the path to the installation of Power Tools: Deployment so that the runner.exe application can run:


