
This blog post is Human-Centered Content: Written by humans for humans.
Why Bulk Insert Is Hard in Sigma
Sigma’s writeback is designed for row by row input. A user fills out a form, hits submit, one row gets written. That works well for simple data entry.
The problem comes when one user action needs to produce multiple output rows and you don’t know how many at build time. Sigma’s action sequence builder has no loop construct. Every row that gets written has to be explicitly configured at design time as its own action.
For a fixed row count that’s manageable. For a dynamic one, it breaks down fast.
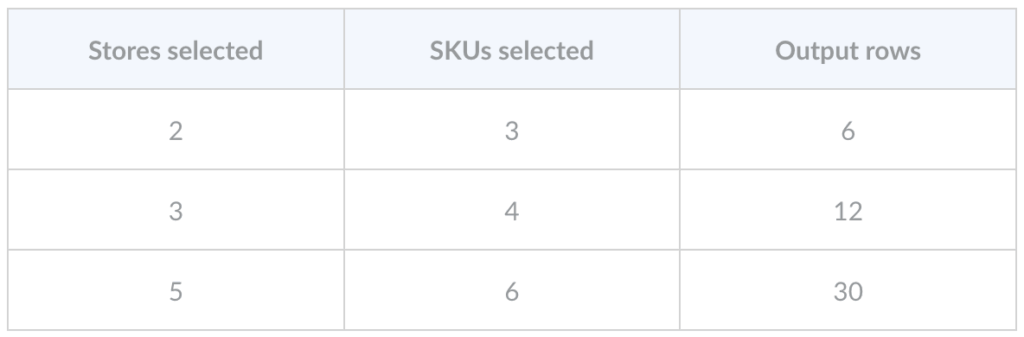
The specific scenario that surfaces this: A user selects stores and SKUs, and the app inserts one order line per combination. The output row count is determined at runtime, not build time:
Approach 1: Native Action Sequences
Sigma’s built-in Insert Row action is the lowest friction path. No infrastructure, no external dependencies. You configure it in the workbook UI and wire it to your controls.
For a dynamic cross join, you pre-build one Insert Row action per possible output row. Each action targets a specific position in the matrix
- Action 1 writes Store 1 × SKU 1.
- Action 2 writes Store 1 × SKU 2.
- And so on up to whatever maximum you decide to support.
Unused slots get conditional logic to skip them when the user’s actual selection is smaller than the maximum.
What it looks like in practice:
You need two controls: a Loop Number and a Max Rows. When the button is clicked, Loop Number is set to 1 and Max Rows is set to the count of records in the staging table using Max([staging_table/Row Num]) as the formula:
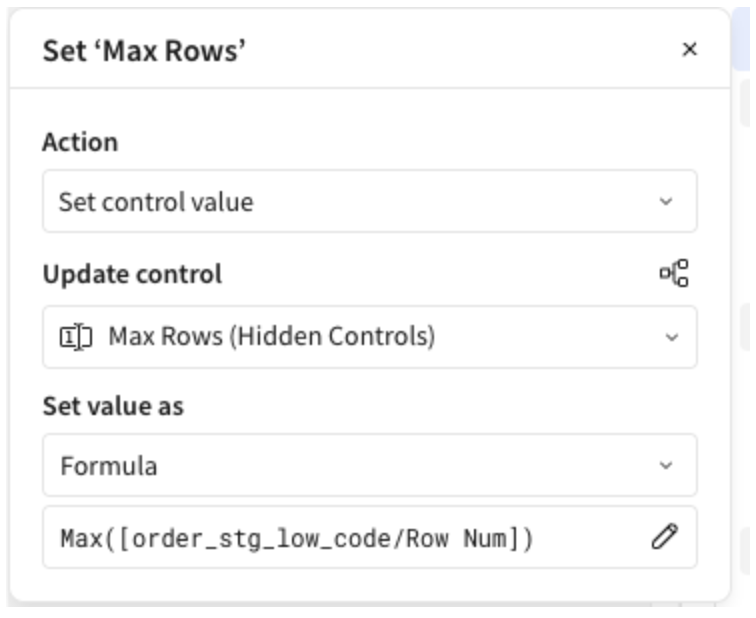
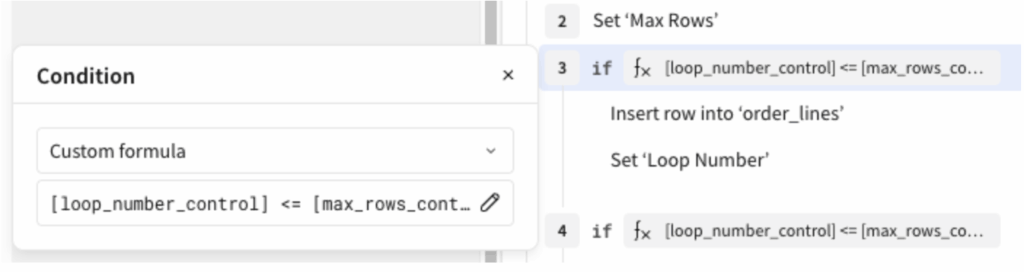
The condition on each block is a custom formula: [loop_number_control] <= [max_rows_control]
Here’s what the full action sequence looks like: Set Loop Number, Set Max Rows, then the conditional insert blocks repeating from there:
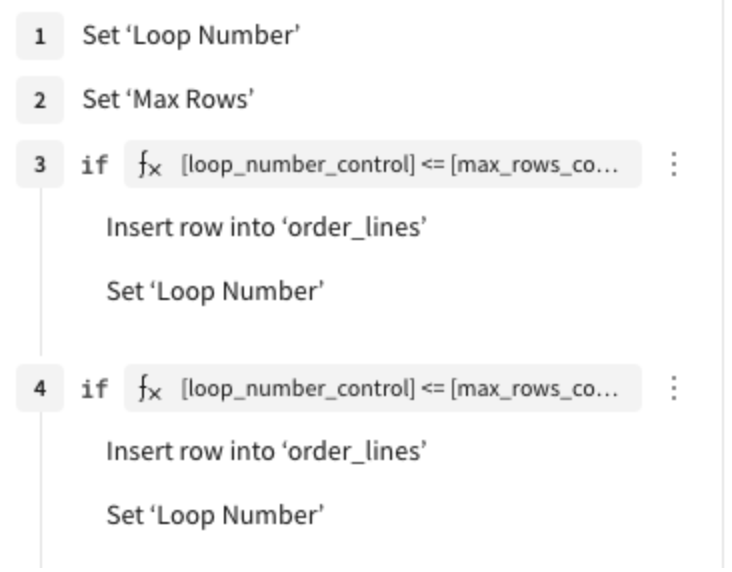
You build that pattern once, then copy and paste it for every row you want to support. Supporting up to 25 rows means 25 copies of that action block, each targeting a specific row position. The ceiling is whatever you paste up to at build time.
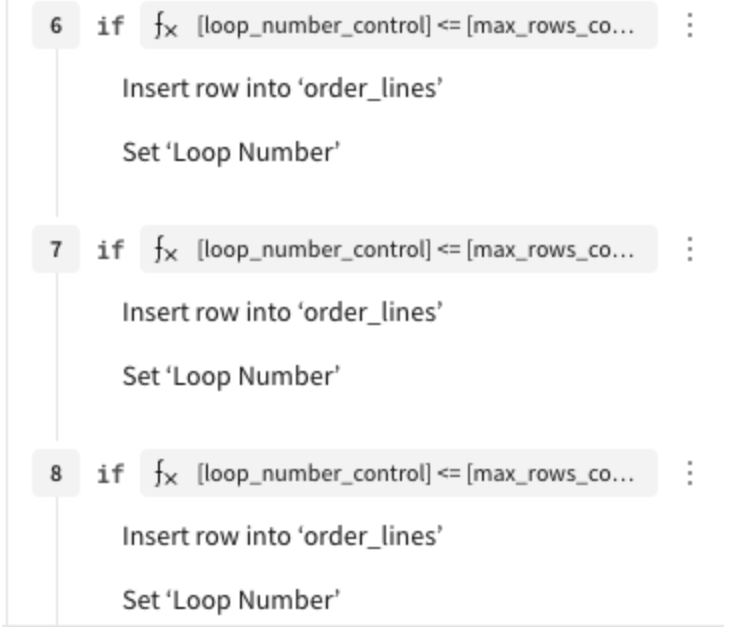
The fundamental problem is that it doesn’t follow DRY (Don’t Repeat Yourself). If you’re comfortable copy/pasting 25 action blocks and never touching them again, it works. But the moment logic needs to change, you’re making that same update in every single copy. That’s not a fun place to be in a production app.
Approach 2: Stored Procedure
Instead of building individual row operations in Sigma, you stage the raw inputs and call a stored procedure that handles the insert. The procedure reads the staged inputs, generates the full cross join and bulk inserts the complete result set in a single call. Any row count. No ceiling. One place to maintain the logic.
Calling the procedure from Sigma depends on your warehouse.
For most cloud data warehouses (Snowflake, BigQuery, Redshift), Sigma can call a stored procedure directly from a native action. Wire the button to a Call Stored Procedure action, pass your parameters, done.
For Databricks, there is no native Call Stored Procedure action in Sigma, yet. You need an additional layer: A Sigma API Action that hits the Databricks Statement Execution API, which then executes the CALL statement. More setup, but the same outcome.
What it looks like in practice (Databricks path):
- User fills in inputs, Sigma writes them to a staging table
- On submit, a Sigma API Action posts to the Databricks Statement Execution endpoint
- Databricks executes the stored procedure, which reads the staging table, runs the cross join logic and inserts the output rows
- Sigma reads the result table and displays the output
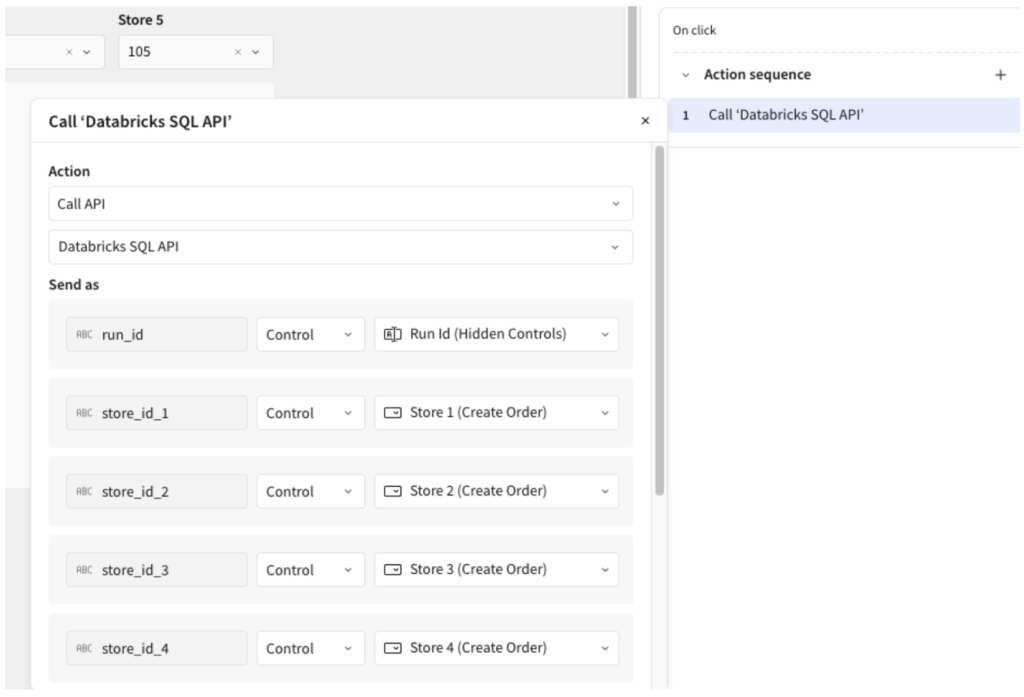
For Databricks, the API Action calls the Statement Execution API with a CALL statement:
{
  "statement": "CALL catalog.schema.procedure_name(:run_id, :store_id_1, :store_id_2, :store_id_3)",
  "warehouse_id": "your-warehouse-id",
  "catalog": "your-catalog",
  "schema": "your-schema",
  "wait_timeout": "30s",
  "parameters": [
    { "name": "run_id",     "value": {{run_id}}     },
    { "name": "store_id_1", "value": {{store_id_1}} },
    { "name": "store_id_2", "value": {{store_id_2}} },
    { "name": "store_id_3", "value": {{store_id_3}} }
  ]
}
In Sigma you simply call the API and pass the required parameters through:
Which One to Use
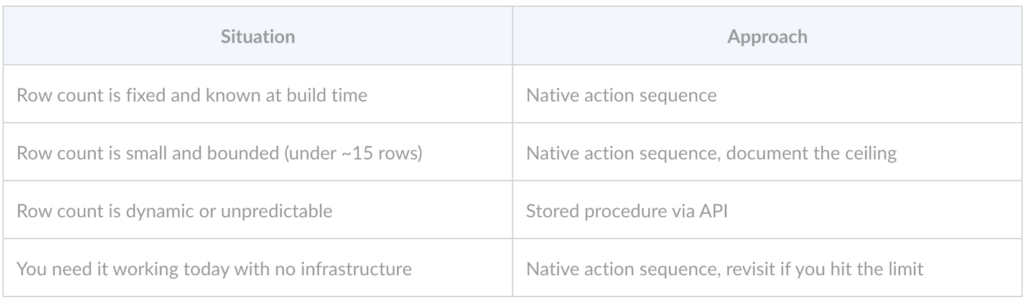
The stored procedure approach adds real setup overhead: an API connector configured in Sigma admin, a stored procedure in your warehouse, and grants for the service principal. If your row count is fixed or comfortably bounded, the native approach should be your first option.
The stored procedure earns its overhead when the row count can’t be predicted at build time. That’s the specific condition the native approach can’t handle reliably.