
Recently, Snowflake released external access integrations into general availability. This allows Snowflake admins to create secure tunnels for Snowflake to communicate with the outside world, and can therefore communicate with external APIs to complete all manner of tasks. For example, external access could be used for any of the following, among many others:
- Send alerts to Teams webhooks so that the alerts can be presented in a Teams channel.
- Send alerts to Slack webhooks so that the alerts can be presented in a Slack channel (this post).
- Communicate with a Matillion ETL API to trigger jobs.
- Communicate with the Matillion DPC API to trigger pipelines.
- Communicate with a Tableau Server/Cloud API to trigger datasource extract refreshes.
- Retrieve data from an API, for example the Snowflake Status API
- Communicate with any other external API for any other reason, the opportunities are limitless!
This specific article focuses on how to communicate with a Slack webhook to send alert messages to a Slack channel, however this series will include the other examples above as well. With each new article, the entry above will be converted to a link.
How To Enable a Webhook to a Channel in Slack
Before we configure the external access to allow Snowflake to communicate with a Slack webhook, we need to create the webhook itself. Note that this may require a Slack admin for authorisation.
To achieve this, we need to take the following steps:
- Create a new Slack API app for your workspace.
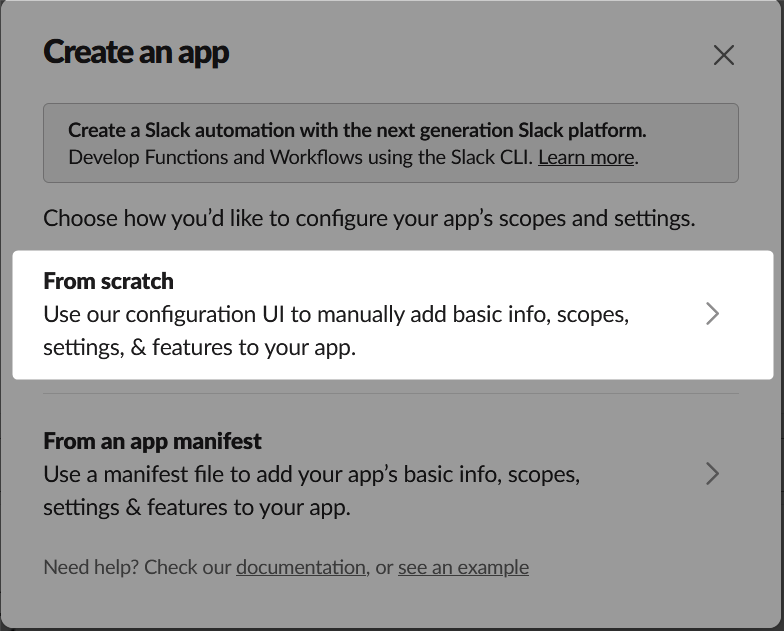
- Navigate to the Slack API Apps page and select “Create New App:”

- In the next menu, select “From scratch:”
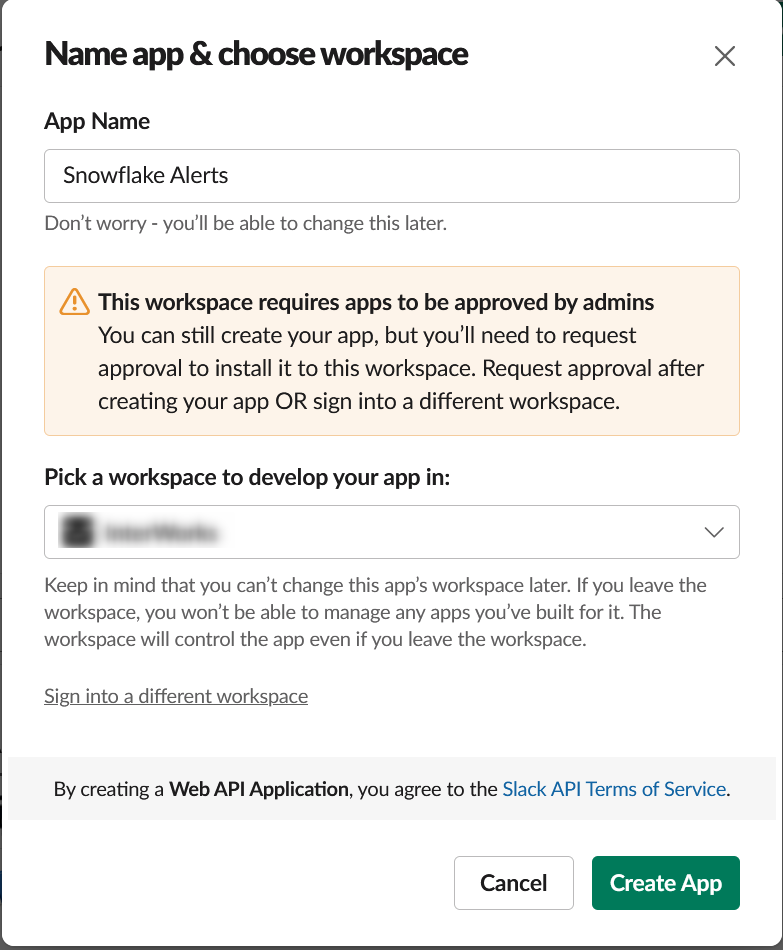
- Enter a name for the app and select the workspace in which it should be created. Then select “Create App.” In our example, the app is called “Snowflake Alerts:”
- Navigate to the Slack API Apps page and select “Create New App:”
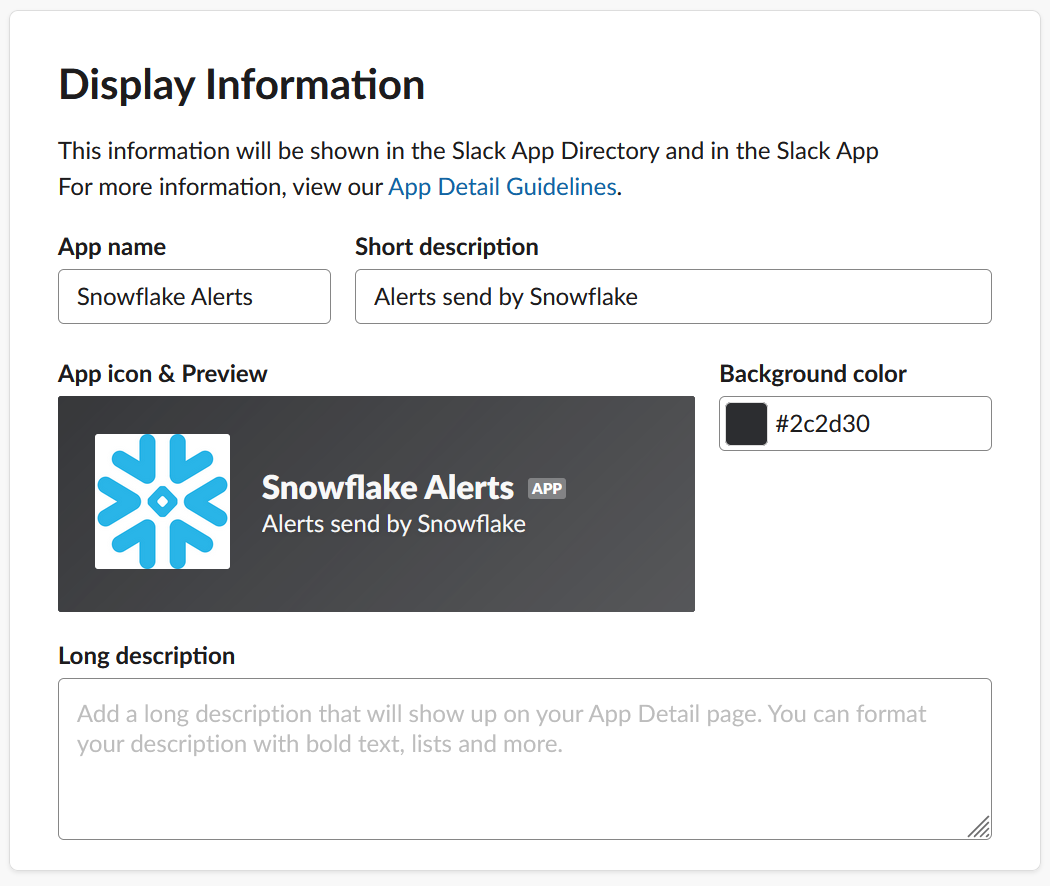
- Open the new app and configure the display information, including a short description and which icon the app use as a profile picture when posting messages in Slack:
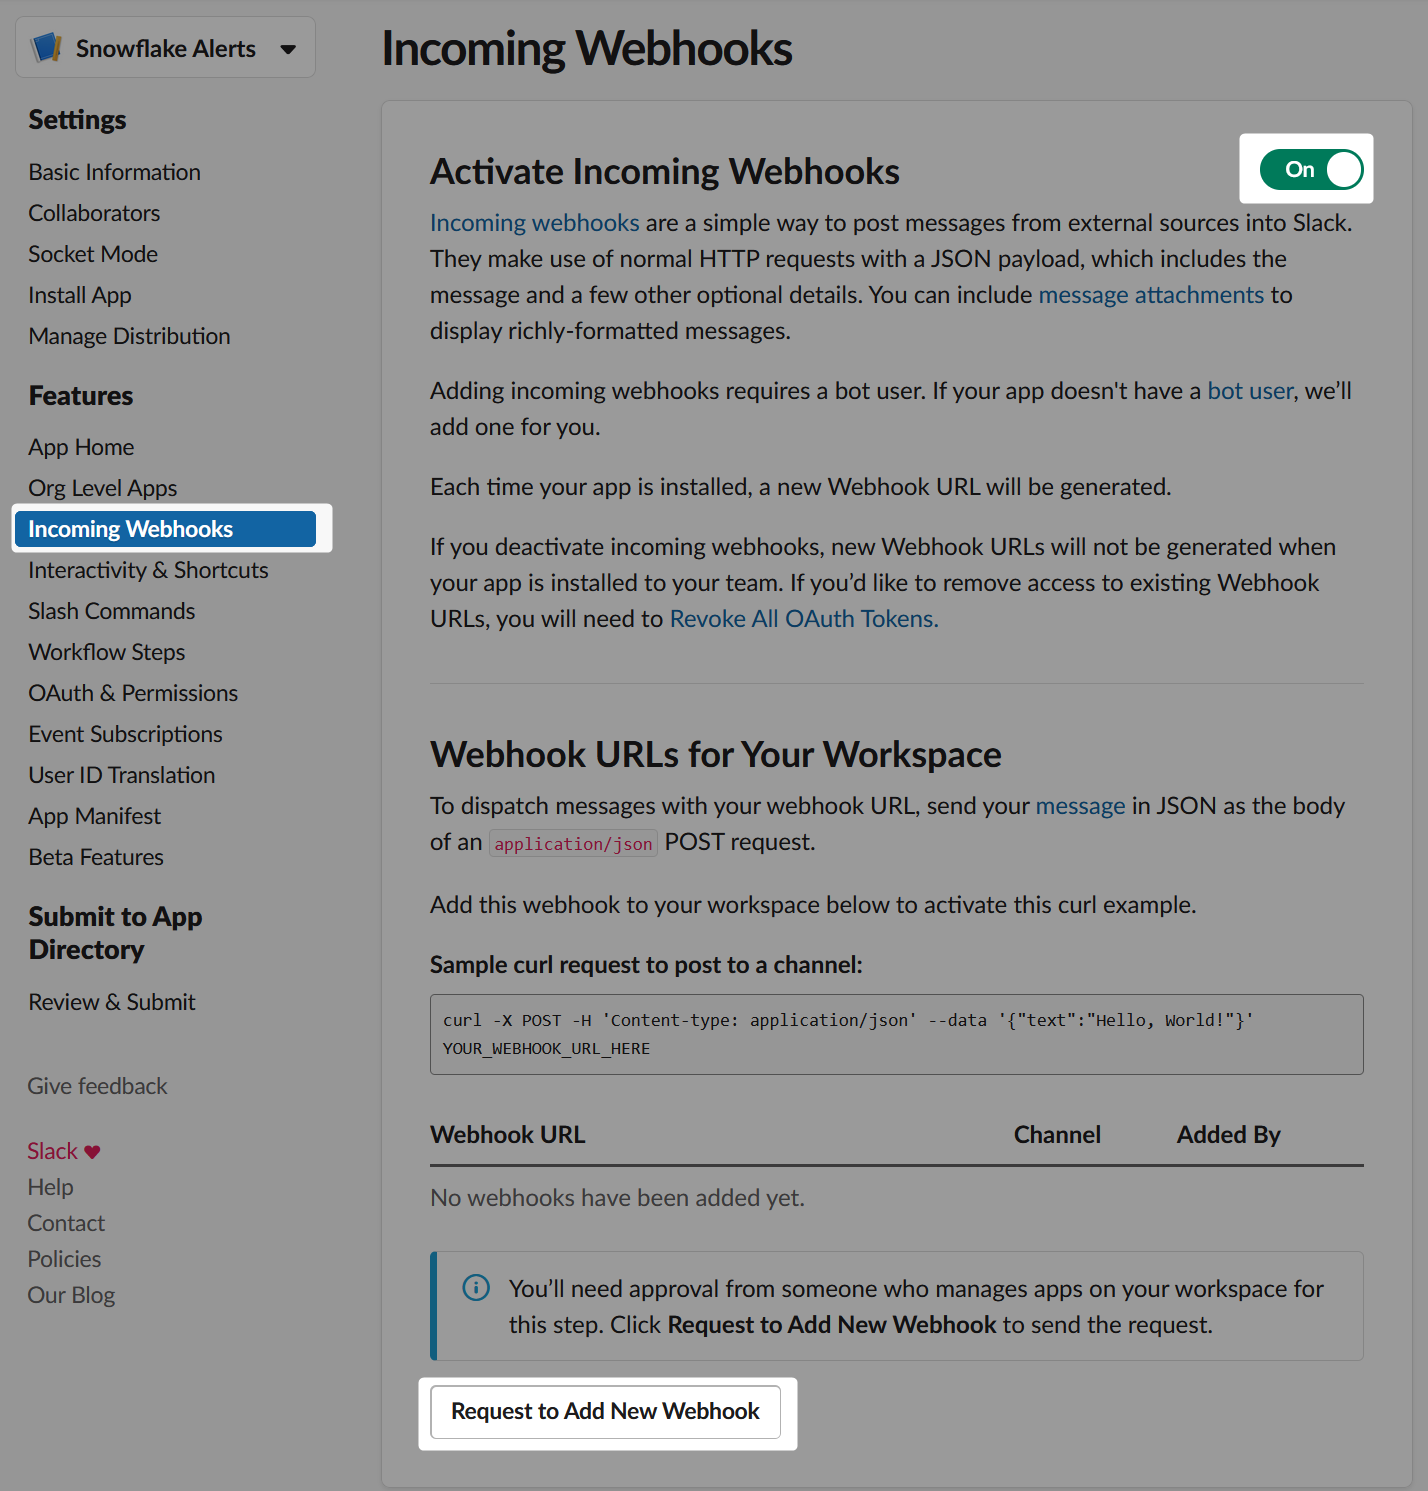
- Enable an incoming webhook for a channel
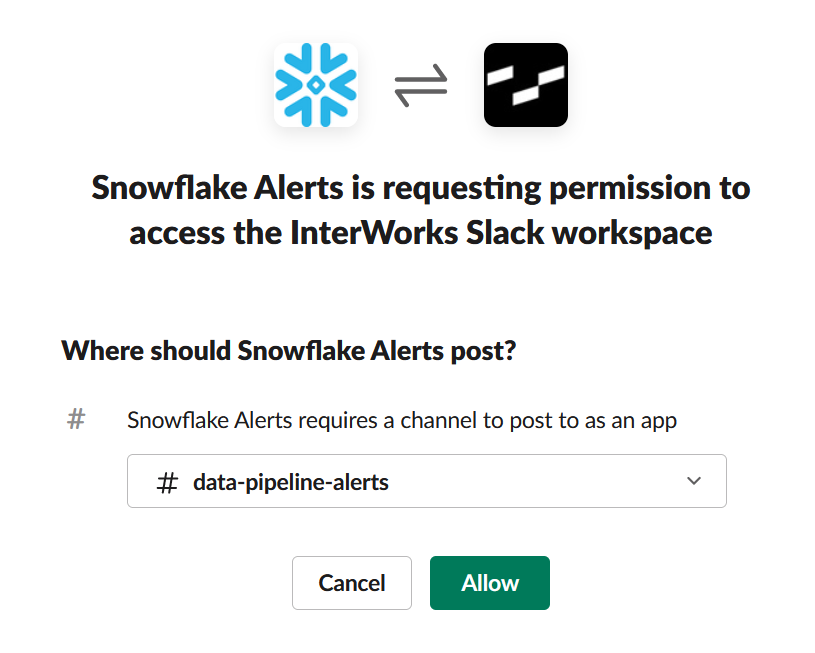
- In the “Incoming Webhooks” pane, select “Request to Add New Webhook:”
- Select the channel where the webhook should send messages to. In our example, the channel is called #data-pipeline-alerts:
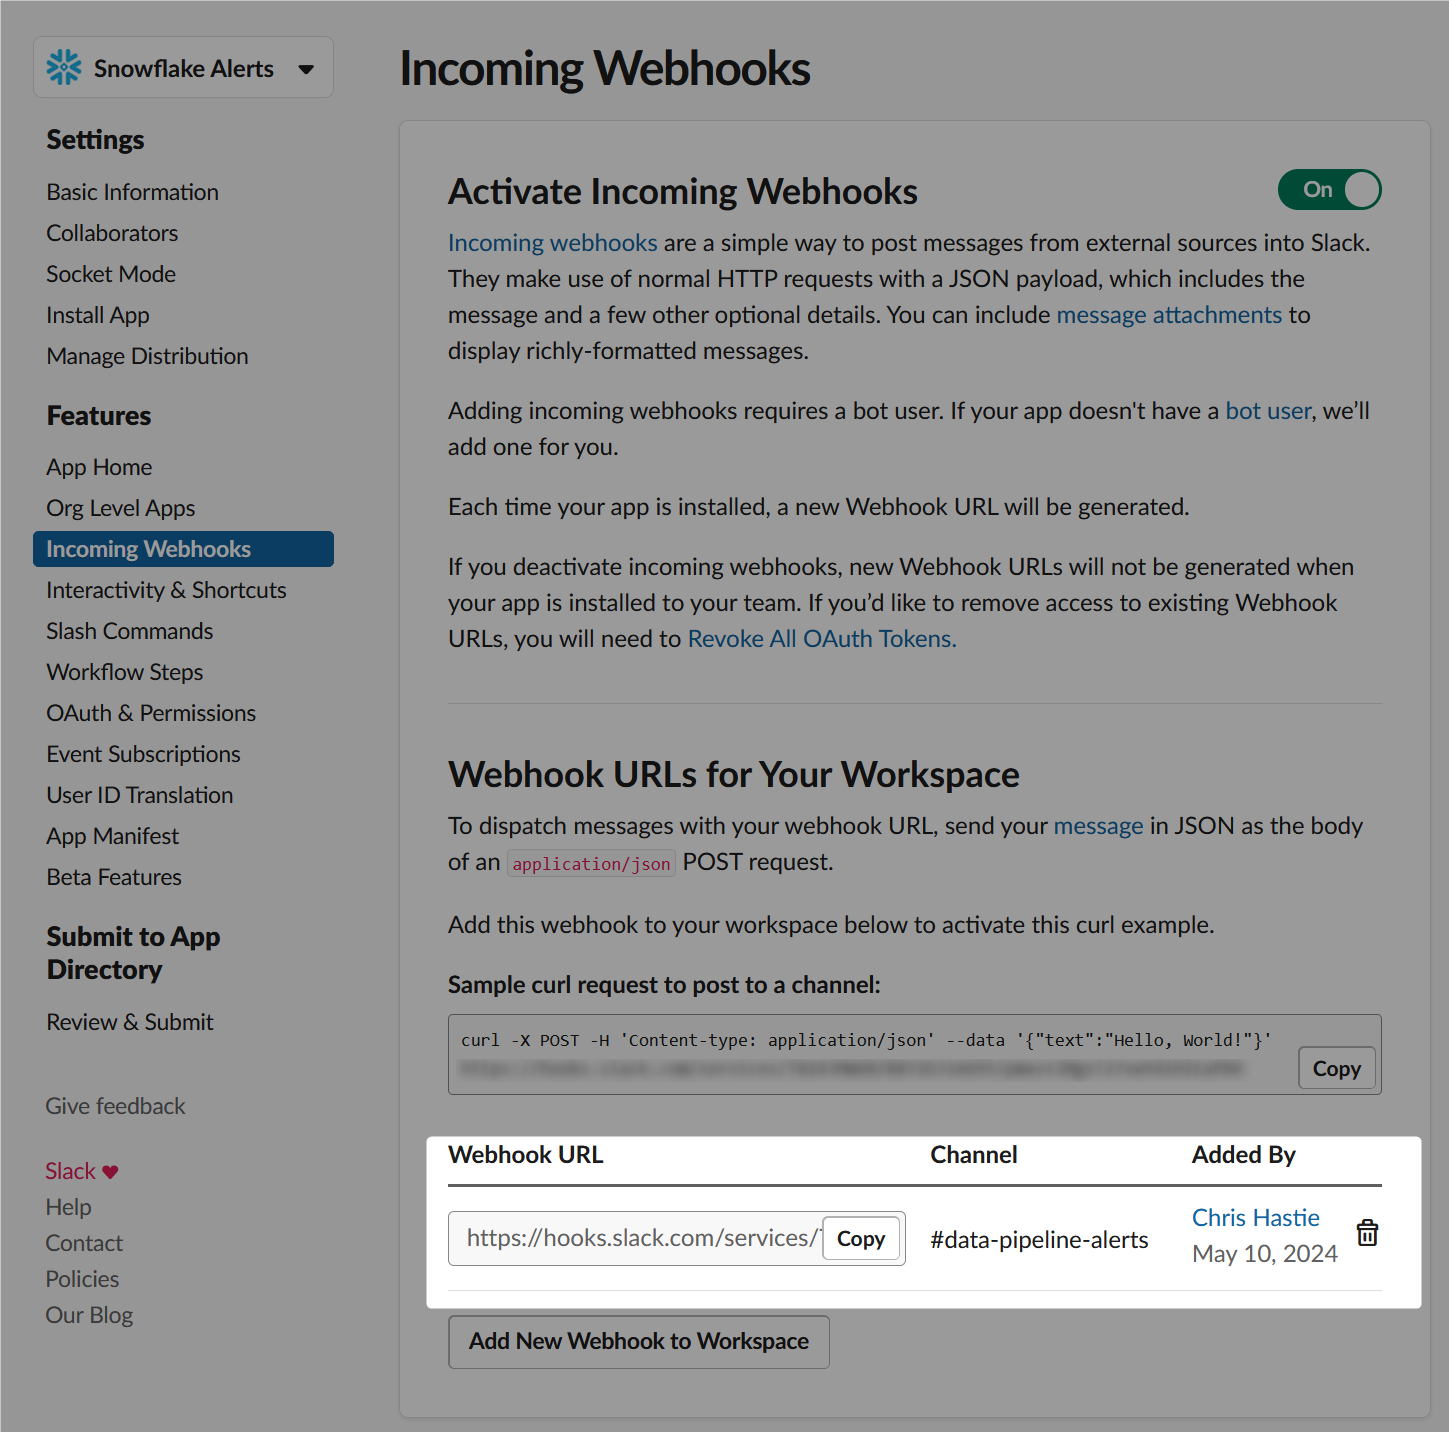
- Confirm that the new webhook has been created, then copy the webhook URL. This will take the following form, and comprises of the host for the Slack webhooks, identifiers for the workspace and channel, and some authentication materials:
https://hooks.slack.com/services/?????????/???????????/????????????????????????
- In the “Incoming Webhooks” pane, select “Request to Add New Webhook:”
How Does External Access in Snowflake Work?
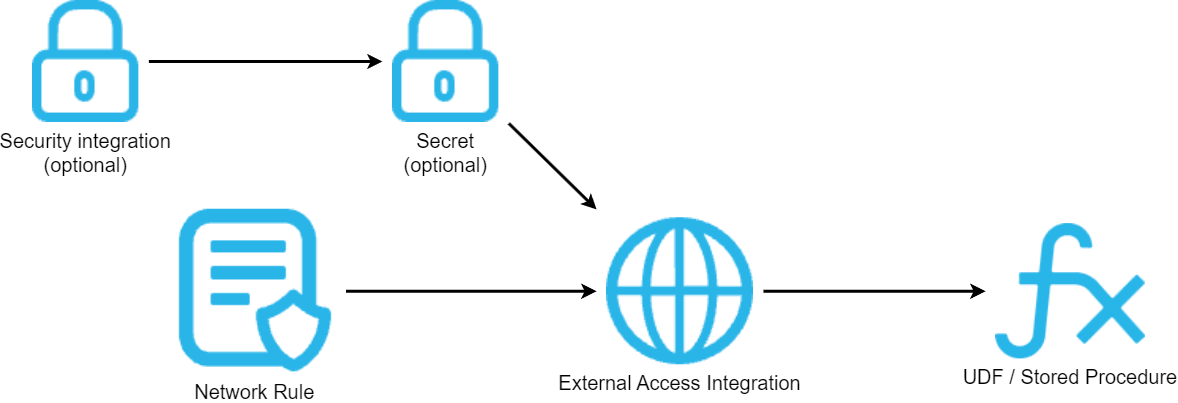
Before we dive into the specific example, let’s cover the architecture involved for external access in Snowflake. There are four main components:
- A network rule that controls where traffic is allowed to travel to
- An external access integration that allows Snowflake objects to leverage the network rule
- An optional security component to faciliate authentication. This usually leverages a Snowflake Secret object that can either securely store information such as a username and password, or make use of a related Security Integration object that facilitates OAuth authentication with an API endpoint
- A Snowflake object such as a stored procedure or a user defined function (UDF) that leverages the external access integration
This is demonstrated in the following diagram:
How to Configure an Outbound Network Rule
In short, network rules are database objects that store information on a type of network traffic for Snowflake. This traffic can be one of two categories:
- Ingress – Traffic from outside of Snowflake that is coming in to Snowflake
- Egress – Traffic that is leaving Snowflake and travelling outside
This article specifically focuses on the egress category, and how we can leverage this to enable Snowflake to communicate with endpoints outside of Snowflake’s network. Note that in Snowflake’s terminology, the category (ingress/egress) is referred to as the “mode,” and this terminology will be used for the rest of this article.
Example Network Rule for External Access
Here is a simple example for creating an outbound/egress network rule:
create network rule "MY_OUTBOUND_NETWORK_RULE"
  type = HOST_PORT -- Always use this value for external access integrations
  mode = EGRESS -- Always use this value for external access integrations
  value_list = ('?????') -- Populate with host(s) of the target endpoint(s), such as matillion.customer.com, host.online.tableau.com, customer.webhook.office.com, eu1.api.matillion.com, etc
  comment = 'Allows traffic to be sent to the host(s) in the value_list'
;
This template can be used to configure the network rule for any external access.
It is important to note that Snowflake stores network rules as database objects, meaning they sit inside schemas in databases. This is different to network policies, which are account-level objects. This is easy to get confused, which is why it has been mentioned here.
Specific Network Rule Example
The following network rule could be leveraged to enable outbound/egress traffic with set of Slack webhooks:
create network rule "EXTERNAL_ACCESS"."NETWORK_RULES"."EGRESS__SLACK_WEBHOOKS"
  type = HOST_PORT
  mode = EGRESS
  value_list = ('hooks.slack.com') -- All Slack webhooks have the same host
  comment = 'Allows traffic to be sent to webhooks in Slack'
;
How To Set up an External Access Integration
In short, external access integrations are account-level objects that act as the bridge between egress network rules and any other Snowflake objects (stored procedures/UDFs).
Here is a simple example for creating an external access integration that leverages an outbound/egress network rule:
create external access integration "MY_EXTERNAL_ACCESS_INTEGRATION"
  allowed_network_rules = ("MY_DATABASE"."MY_SCHEMA"."MY_OUTBOUND_NETWORK_RULE")
  enabled = FALSE
  comment = 'External access integration to support traffic sent to the <endpoint(s) enabled by the network rule(s)>'
;
Depending on your required target, you may have a need for additional security components to authenticate your requests with the destination. For example, the destination may expect authentication via a username/password combination that has been converted into a bearer token, or it may leverage OAuth and expect a combination of client ID and secret ID. Of course, these are just two examples and there are other possibilities for more complex use cases.
My personal recommendation is to create your external access integration before creating any additional security components, then apply them using alter commands.
In the case of Slack webhooks, no security components are required since the authentication is included as part of the webhook URL itself. It is therefore safe to create the integration and enable it in the same statement:
create external access integration "EAI__SLACK_WEBHOOKS"
  allowed_network_rules = ("EXTERNAL_ACCESS"."NETWORK_RULES"."EGRESS__SLACK_WEBHOOKS")
  enabled = TRUE
  comment = 'External access integration to support traffic sent to webhooks in Slack'
;
How To Send Snowflake Alerts to a Slack Channel
Now that we have discussed and configured the underlying architecture behind our process, we can move on to our true goal, which is to create a stored procedure in Snowflake that can automatically send alerts to a Slack channel.
Creating a Mapping Table for Slack Channels and Webhooks
Whilst this step is not necessary and you could develop the process without it, leveraging a mapping table can make the process much simpler. The idea here is to create a table that maps channel names to webhook URLs. That way, if you have multiple channels and webhooks that you might use for different scenarios, you can have a single stored procedure that leverages the target channel name as an input. The benefit of the mapping table specifically is that the stored procedure can then convert the channel name into a webhook URL, both avoiding the webhook URL being exposed to end users and making it easier for them to send messages to their desired channel.
Here is some example code for creating such a mapping table:
create or replace table "EXTERNAL_ACCESS"."MAPPING_TABLES"."API__SLACK__ENDPOINTS" (
    "NAME" string comment 'Name of the Slack channel, for reference'
  , "URL" string comment 'Endpoint for the webhook where messages should be delivered'
)
as
select *
from values
    ('data-pipeline-alerts', 'https://hooks.slack.com/services/?????????/???????????/????????????????????????')
;
Understanding Adaptive Cards
Slack webhooks (and the wider Slack API) use Block Kits as the main mechanism for sending messages. To make things easier, the stored procedure provided below already converts the inputs into a blocks array and sends it to the webhook.
If you wish to learn more about these and create your own input formats, take a look at the documentation, including the reference and the builder.
Creating a Stored Procedure To Send a Message to a Slack Channel
Finally, we come to the main meat of the article. First, I will provide the full code for the stored procedure. I will then explain some key areas.
This article does not explain Python stored procedures in general. If you wish to know more about these, the following article is recommended: A Definitive Guide to Python Stored Procedures in the Snowflake UI. This is part of our Snowflake with Python series.
The full procedure definition is as follows:
-- Create stored procedure
create or replace procedure "EXTERNAL_ACCESS"."PROCEDURES"."API__SLACK__SEND_MESSAGE"(
      PIPELINE varchar
    , DESCRIPTION varchar
    , ENVIRONMENT varchar default 'Snowflake - Main - Production'
    , ENDPOINT_NAME varchar default 'data-pipeline-alerts'
  )
  copy grants
  returns string
  language python
  runtime_version = 3.10
  handler = 'main'
  external_access_integrations = ("EAI__SLACK_WEBHOOKS")
  packages = ('snowflake-snowpark-python','requests')
as
$$

## Snowpark imports
from snowflake.snowpark import Session as snowparkSession
from snowflake.snowpark.functions import col, lit

## Other imports
import requests
import json

## Define main function
def main(
      snowpark_session: snowparkSession
    , pipeline: str
    , description: str
    , environment: str
    , endpoint_name: str
  ):

  ### Retrieve the endpoint url
  endpoint_url = retrieve_endpoint_url(
      snowpark_session = snowpark_session
    , endpoint_name = endpoint_name
  )

  if endpoint_url is None:
    return "Endpoint name not approved"

  ### Retrieve message body
  message_body = create_message_body(
      pipeline = pipeline
    , description = description
    , environment = environment
  )

  ### Send the message to the endpoint
  response_message = send_message_to_endpoint(
      message_body = message_body
    , endpoint_url = endpoint_url
  )

  return response_message


## Define function to retrieve the endpoint URL
## from the ENDPOINTS table
def retrieve_endpoint_url(
      snowpark_session: snowparkSession
    , endpoint_name: str
  ):

  ### Query the ENDPOINTS table, filtered by NAME
  sf_df_endpoint_url = snowpark_session.table('"EXTERNAL_ACCESS"."MAPPING_TABLES"."API__SLACK__ENDPOINTS"') \
    .filter(col('"NAME"') == lit(endpoint_name)) \
    .select(col('"URL"')) \
    .collect()

  ### If a value is found, return it.
  ### Otherwise, return None
  if sf_df_endpoint_url is not None \
    and len(sf_df_endpoint_url) > 0 \
      :
    endpoint_url = sf_df_endpoint_url[0]["URL"]
  else:
    endpoint_url = None

  return endpoint_url

## Define function to create the body
## for the message send to the endpoint
def create_message_body(
      pipeline: str
    , description: str
    , environment: str
  ):

  message_body = {
      "blocks": [
        {
          "type": "header",
          "text": {
            "type": "plain_text",
            "text": f"Alert - {environment}"
          }
        },
        {
          "type": "section",
          "text": {
            "type": "mrkdwn",
            "text": f"*{pipeline}*"
          }
        },
        {
          "type": "section",
          "text": {
            "type": "plain_text",
            "text": description
          }
        }
      ]
    }

  return message_body

## Define function to send the message to the endpoint
def send_message_to_endpoint(
      message_body: list
    , endpoint_url: str
  ):

  ### Populate headers for the API call
  headers = {
    "Content-Type": "application/json"
  }

  ### Execute API call
  response = requests.request("POST", endpoint_url, headers=headers, json=message_body)

  try:
    if response.status_code == 200 :
      return "Complete"
    else :
      return f"Incomplete. Response code: {str(response.status_code)}"
  except Exception as e:
    return f"Error encountered:\n\n{str(e)}"

$$
;

-- Test query
call "EXTERNAL_ACCESS"."PROCEDURES"."API__SLACK__SEND_MESSAGE"(
    PIPELINE => 'TEST PIPELINE'
  , DESCRIPTION => 'A test description'
)
;
The following lines are important here:
- Line 13 enables the stored procedure to leverage the external access integration that facilitates access to Slack webhooks.
- Lines 62-82 define a function that leverages Snowpark for Python to query the mapping table and retrieve the webhook URL, using the input endpoint name. This is leveraged on lines 36-39.
- Lines 86-118 define a function that leverages the inputs to create a message body as a blocks array. This is leveraged on lines 45-49.
- Lines 121-140 define a function that sends the message body to the webhook URL. This includes:
- Lines 127-129 determine the headers for the request, simply instructing the webhook to expect JSON in case it defaults to something else.
- Line 132 sends the POST request itself to the webhook URL.
- Lines 134-140 return the response from the request, with some minor error handling.
- Lines 146-149 can be used to test the process.
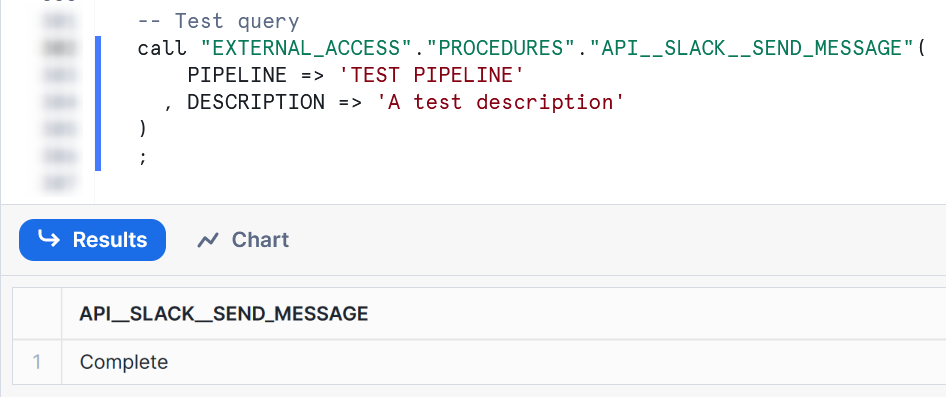
Testing the Stored Procedure
A successful test of the stored procedure should yield a simple “Complete” response, which has been configured within the stored procedure:
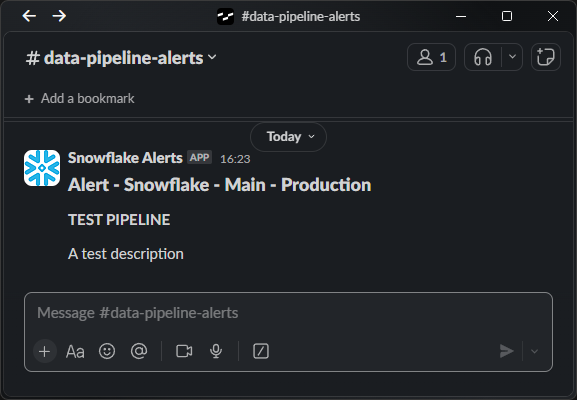
Once executed, you should see the message appear in your Slack channel:
Leveraging the Stored Procedure Inside a Snowflake Alert
The final step on our journey is to leverage this new stored procedure inside a Snowflake alert. Here is a simple template:
create or replace alert "MY_EXAMPLE_ALERT"
  warehouse = MY_WAREHOUSE
  schedule = 'USING CRON 0 * * * * UTC' -- Hourly
if (
  exists (
    select 1
    from "MY_SOURCE_TABLE"
    where <condition>
  )
)
then
  call "EXTERNAL_ACCESS"."PROCEDURES"."API__SLACK__SEND_MESSAGE"(
      PIPELINE => 'My Pipeline'
    , DESCRIPTION => '<condition description> has been encountered in MY_SOURCE_TABLE'
  )
;
You may want to take this further by creating another stored procedure in the middle. The alert can execute a wider stored procedure that performs multiple activities, one of which could be to call the stored procedure that sends a message to the Slack channel.
For full details on how alerts work, check out this article: Understanding Snowflake Alerts and Notifications
Wrap Up
Hopefully the information in this article provides you with all of the tools you need to establish your own connections that enable Snowflake to send alerts and other messages to Slack. This stored procedure can now be made available to other users using Snowflake’s Role-Based Access Control (RBAC) and could be useful in multiple scenarios, including:
- Sending alerts when dynamic table refreshes have failed.
- Sending alerts when tasks have failed.
- Sending alerts when other alerts have failed.
- Sending messages when specific pipelines are starting/finishing.
- Sending messages to confirm when bespoke activity has taken place.