
Ever tracked astronomical objects at a planetarium, watched real-time flights via Flightradar24 or followed your pizza delivery make its way to your door? Each of these experiences relies on the magic of streaming data, specifically benefiting from row-level data ingestion to minimize latency and maximize efficiency.
With Snowflake’s Snowpipe, you can make data quickly accessible by automatically ingesting files, a process that is much faster than manually running COPY INTO commands for batch-loading data. Yet, when even faster data updates are essential, Snowpipe Streaming API steps in. This API allows for the writing of individual rows, rather than files, directly to Snowflake tables. This results in faster data availability and lower associated costs, making it an ideal solution for real-time data streaming applications
In this article, we’re going to guide you through the process of streaming real-time location data of the International Space Station (ISS) into Snowflake using Snowflake Connector for Kafka with Snowpipe Streaming API. The guide includes four main steps:
- First, we’ll set up a Kafka server.
- Next, we’ll produce data by calling an API.
- Then, we’ll set up the Snowflake Kafka connector.
- Finally, we’ll establish the data stream between Kafka and Snowflake.
To round it up, we’ll conclude with a screen recording that showcases what such a real-time data stream might look like in a Streamlit application.
Step 1: Setting up a Kafka Server
Just like a radio station broadcasting different shows on different frequencies, Kafka manages different streams of data through topics. Producers send data into these topics and consumers tune in to receive it, allowing for real-time data processing. Unlike traditional radio, which is generally one-way, Kafka enables two-way communication, letting data be both sent and received for more complex operations.
Create an EC2 Instance
Kafka requires a virtual machine (VM) or server with at least 2GB of RAM to operate. You can use an AWS EC2 instance, a virtual machine from Azure or Google Cloud, or even your own local machine. For this example, we are using an EC2 instance equipped with 2GB of RAM and running Amazon Linux.
Install Kafka
After your EC2 instance is up and running, connect to it using SSH. Setting up SSH out of the box can be challenging. For guidance on Windows, please refer to:
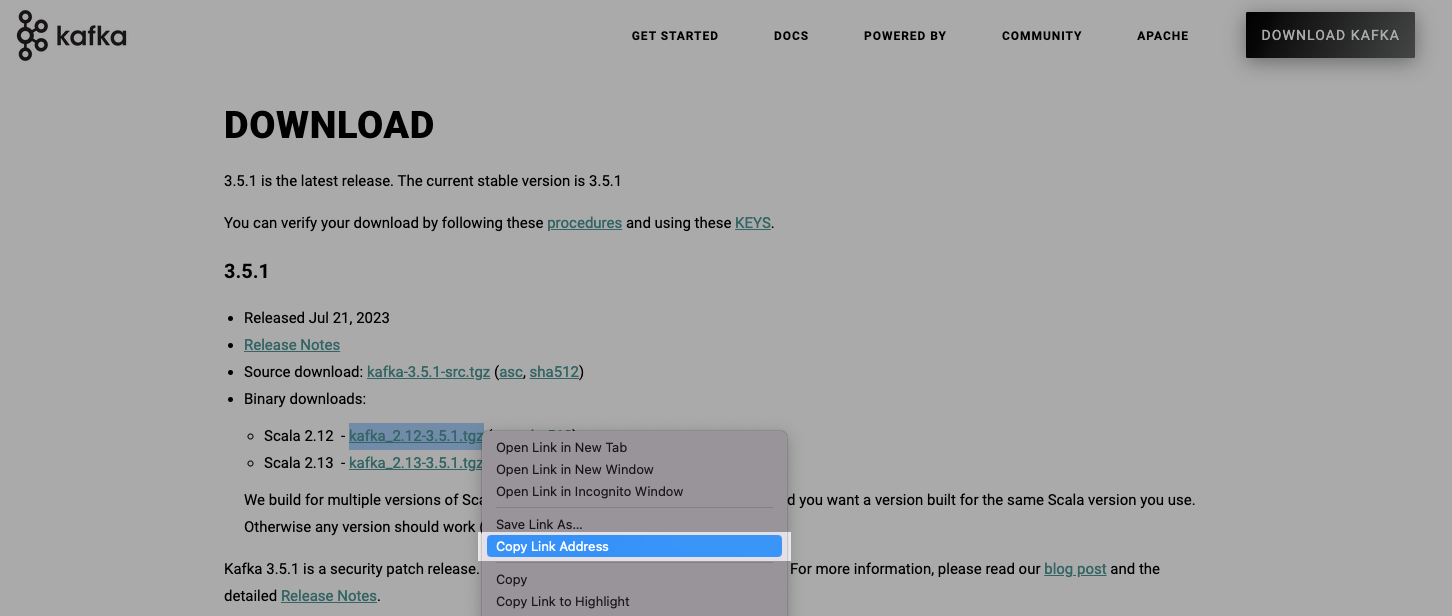
Next, you need to download Kafka. Make sure to download the binary version to avoid issues like: Classpath is empty. Please build the project first, e.g., by running 'gradlew jarAll'. First, visit the Apache Apache Kafka and locate the link for the latest version, as shown in the image. Then, use the wget command within your EC2 instance to download it. For example:
wget https://downloads.apache.org/kafka/3.5.1/kafka_2.12-3.5.1.tgz
After downloading, extract the file using the following command. Make sure to modify the file name if you are using a different Kafka version.
tar -xzf kafka_2.12-3.5.1.tgz
Initialize Zookeeper
If Kafka were a radio station broadcasting various channels (topics) of data, then Zookeeper would be the control tower coordinating all the transmissions. To start Zookeeper, navigate first to the directory where Kafka is installed and launch Zookeeper with the following command:
bin/zookeeper-server-start.sh config/zookeeper.properties
Start the Kafka Server
Open a new Command Line Interface (CLI) window, reconnect to your EC2 instance via SSH and switch to the Kafka directory. Start the Kafka server (aka broker) with the following command:
bin/kafka-server-start.sh config/server.properties
Create a Kafka Topic
To run Kafka, which operates on a Java platform, you’ll first need to ensure that Java is installed on your system. For instance, you can install Java 8 on Amazon Linux using the following command:
sudo dnf install java-1.8.0-amazon-corretto -y
To initialize a Kafka topic where data will be published, you’ll need to open another CLI window, reconnect to your EC2 instance via SSH, switch to the Kafka directory, and execute the following command:
bin/kafka-topics.sh --create --topic my_topic --bootstrap-server localhost:9092 --partitions 1 --replication-factor 1
--topic: Specifies the name of the topic.--bootstrap-server: Specifies the server for the initial connection to the Kafka cluster.9092: This is the default port for Kafka.--partitions: Specifies the number of partitions for the topic.--replication-factor: Sets the replication factor for the topic, which is useful for fault tolerance.
For detailed information on the flags and options for creating a topic, visit the Kafka’s Documentation.
Step 2: Data Ingestion into Kafka Topic
The Kafka console offers two key utilities for topic interactions:
kafka-console-producer.bat: Publishes data to Kafka topics.kafka-console-consumer.bat: Consumes data from Kafka topics.
However, for this project, we’re using a Python script for more customized data handling. The script utilizes the confluent_kafka library to send messages to Kafka topics. To fetch data, it employs the requests library to regularly call an API provided by Open Notify. This open-source project offers an easy-to-use API for accessing various NASA data related to space and spacecraft.
Save the provided script on your EC2 instance as my_topic_producer.py. In the context of our demo, the script will call the API every 6 seconds and Kafka will flush 10 rows to Snowflake.
from confluent_kafka import Producer
import requests
import time
import json

def delivery_callback(err, msg):
    """Callback to handle message delivery reports."""
    if err:
        print(f"Failed to deliver message: {err}")
    else:
        print(f"Message sent to topic {msg.topic()}")

kafka_config = {'bootstrap.servers': 'localhost:9092',}     # Kafka settings
producer = Producer(kafka_config)                           # Initialize Kafka producer
api_url = "http://api.open-notify.org/iss-now"              # ISS API URL

while True:
    response = requests.get(api_url)                        # Fetch ISS location data from API
    if response.status_code == 200:
        api_data = response.json()                          # Convert API response to JSON
        producer.produce('my_topic', value=json.dumps(api_data), callback=delivery_callback)  # Send data to Kafka topic
        producer.flush()                                    # Wait for message to be sent
    else:
        print(f"API call failed. Status code: {response.status_code}")
    time.sleep(6)                                           # Wait 6 seconds before the next API call
Step 3: Setting up the Snowflake Kafka Connector
Download the Snowflake Kafka Connector
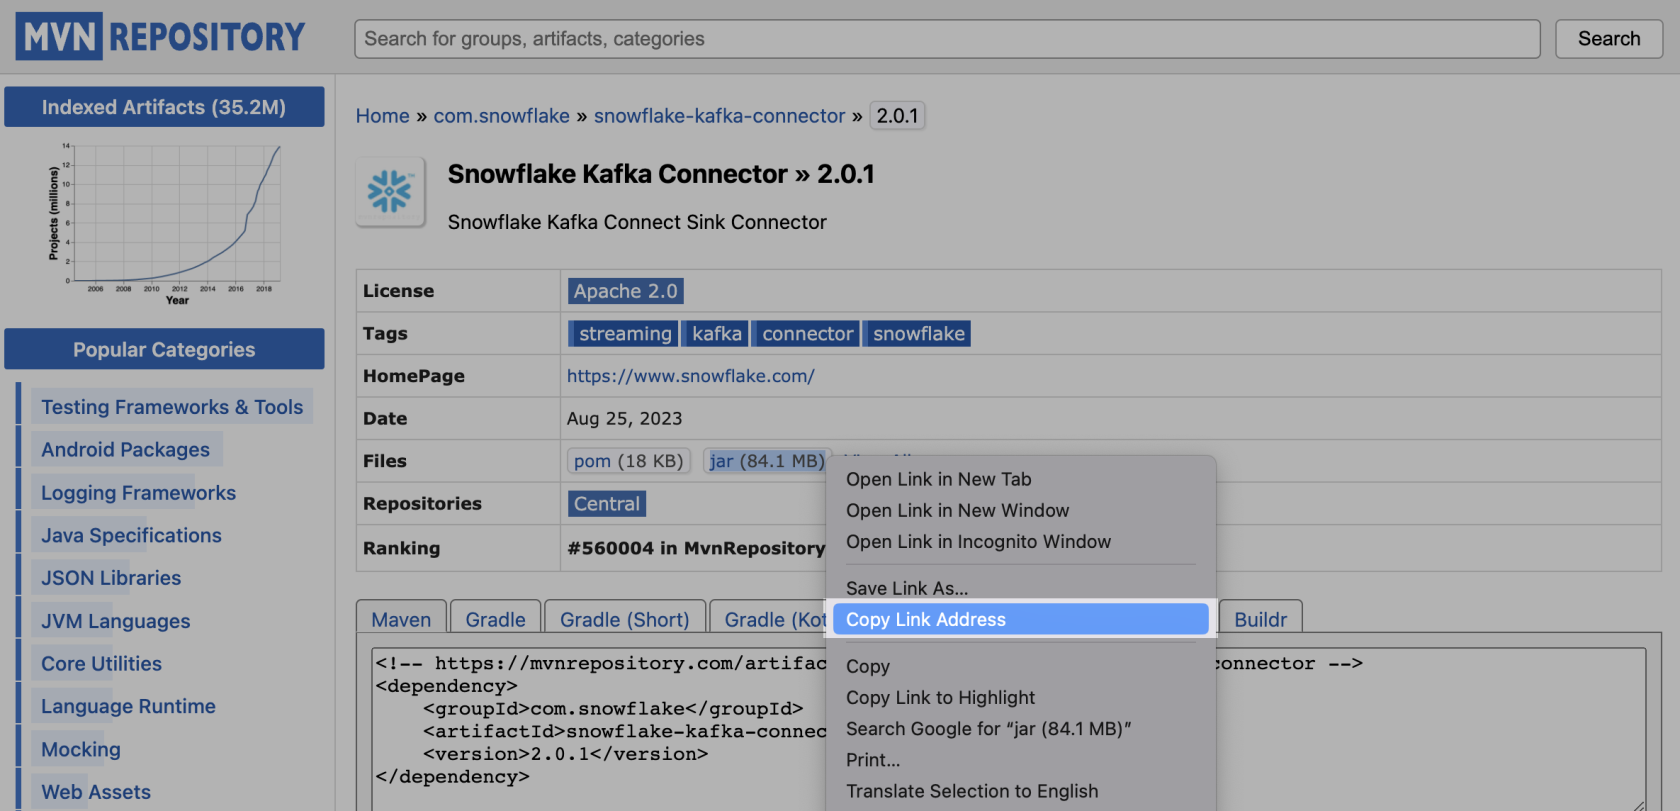
Then, switch to the command line interface connected to your EC2 instance. To download the connector, navigate to the libs directory inside your Kafka folder and use the following wget command:
wget https://repo1.maven.org/maven2/com/snowflake/snowflake-kafka-connector/2.0.1/snowflake-kafka-connector-2.0.1.jar
Create and Configure SF_connect.properties
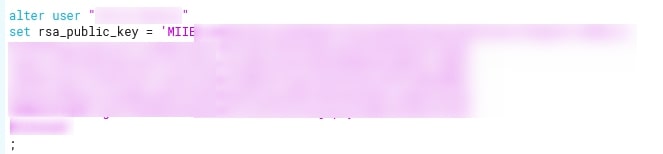
The connector needs to be configured by creating a file specifying details like Snowflake credentials, topic names, and table names. Secure this file properly as it contain sensitive information like a private key. The connector uses key pair authentication, requiring a minimum 2048-bit RSA key pair. Generate this using OpenSSL and assign the public key to the Snowflake user (as shown in the following screenshot). For more on key pair authentication, refer to our related article.
Follow these steps:
- Go to the
configdirectory within your Kafka folder. - Create a new file called
SF_connect.properties. - Open the file to enter the necessary settings. Enter the blurred details with your own information as shown in the following screenshot.
- Save the file.
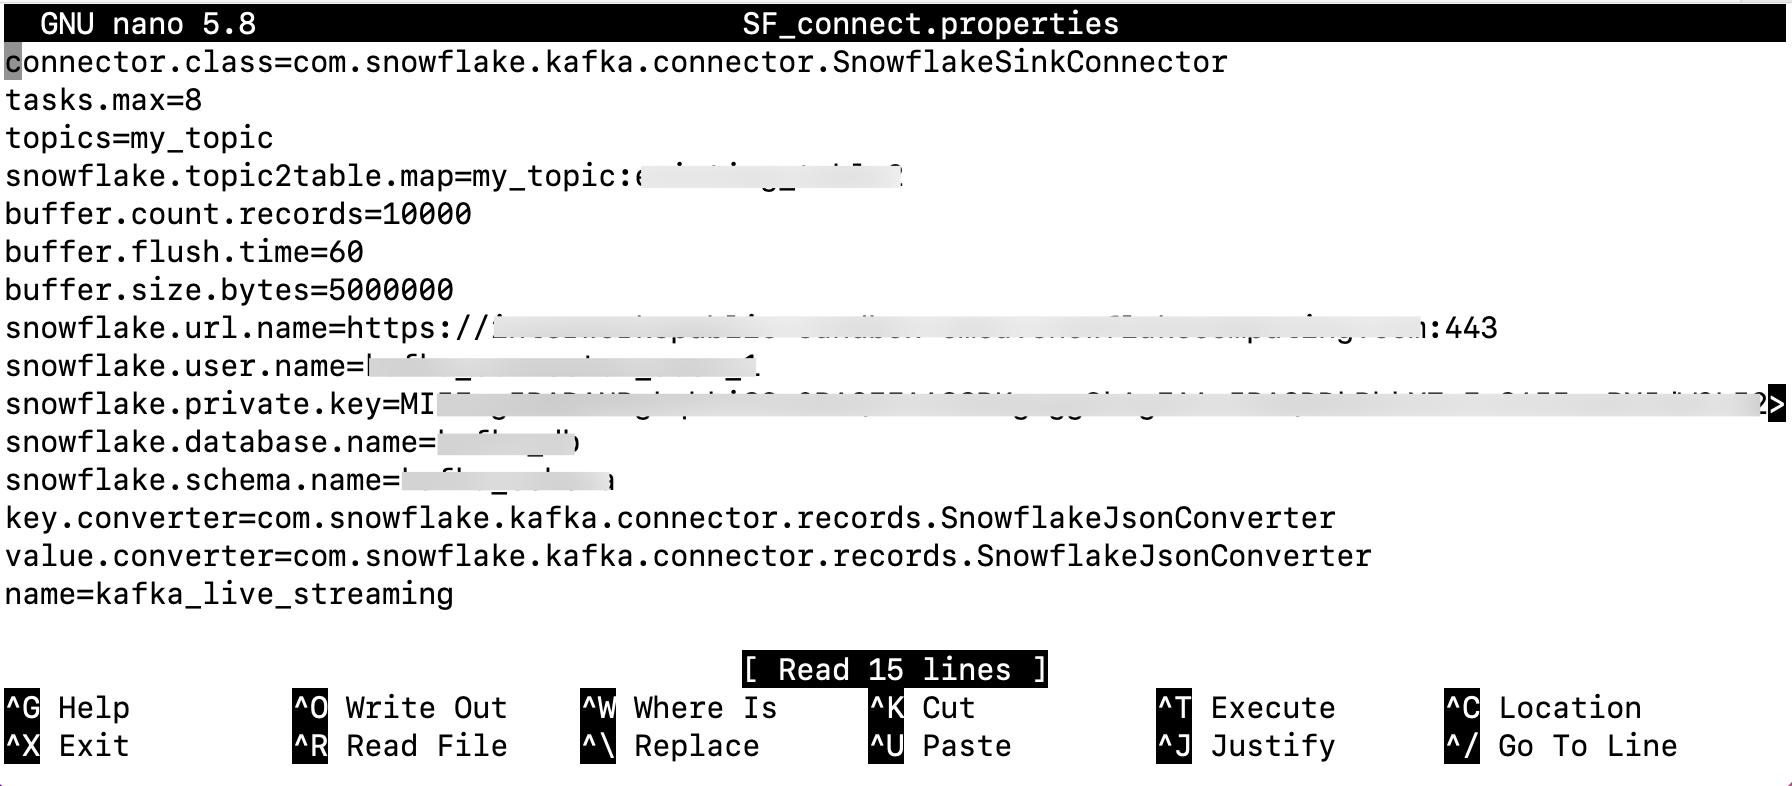
Notes:
- To create an encrypted private key in Snowflake, you can omit the
-nocryptflag while generating it. Afterwards, you’ll need to include thesnowflake.private key.passphraseconfiguration in yourSF_connect.propertiesfile. - Remove any delimiters from your private key.
- Ensure you’re using an account with sufficient permissions to access the database, schema and create tables.
- You don’t have to create a table or pipe manually; the connector takes care of it.
- The lowest setting for
buffer.flush.timeis 10 second, which is how long the connector waits before sending cached records to Snowflake.
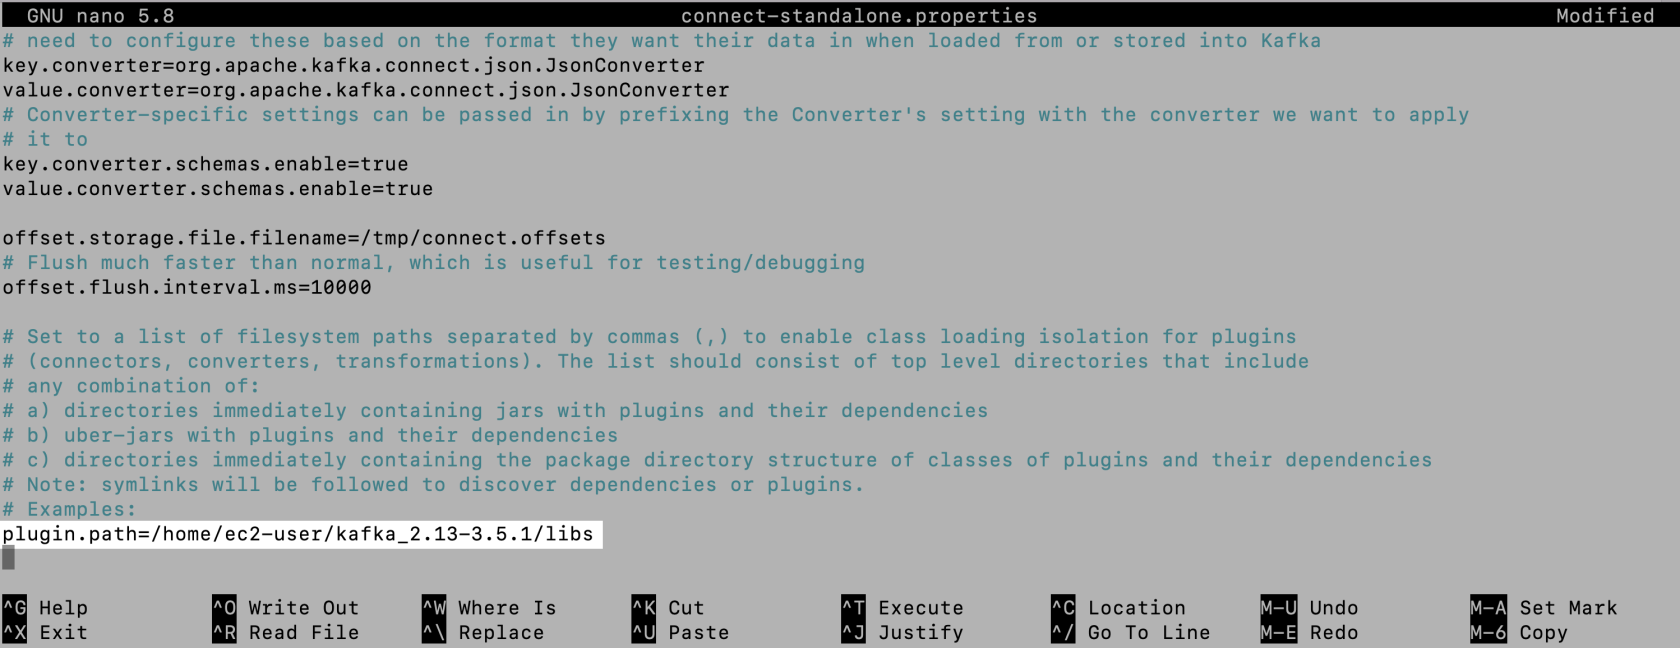
Update connect-standalone.properties
To ensure the correct function of the Snowflake connector and any other connector plugins, it’s essential to direct the Kafka Connect utility to the location where your connector plugins, including the Snowflake connector, are stored. Follow these steps within the config directory:
- Open the
connect-standalone.propertiesfile to edit. - Uncomment the
plugin.pathline. - Enter the path leading to the
libsfolder inside your Kafka directory. - Save the changes and close the file.
Refer to the following image to see an example of the plugin.path setting we’re using for this demonstration:
Step 4: Establishing the Data Stream
To set up the data stream between Kafka and Snowflake, run the following command:
bin/connect-standalone.sh ./config/connect-standalone.properties ./config/SF_connect.properties
When you run this command, it triggers the Kafka Snowflake Connector using the settings in your pre-configured properties files. The connector then auto-generates a table with two VARIANT columns, named RECORD_METADATA and RECORD_CONTENT. In the same automated fashion, it also establishes an internal stage and a pipe. All of these components work together to efficiently funnel data from the stage to the newly created table, either immediately if the topic contains data or upon the arrival of the first record.
All that’s left is to start generating data. Open a new command line window, navigate to the Python script created earlier and run it:
python3 my_topic_producer.py
Bonus
Once the connection between Snowflake and the Kafka server is successfully set up, you unlock countless of opportunities for business analytics, application integration and even machine learning. In our specific use case, we’ve employed a Streamlit app to display the International Space Station’s (ISS) location. A screen recording, accelerated to 20x speed, is provided below to give you a glimpse of the app’s functionality.
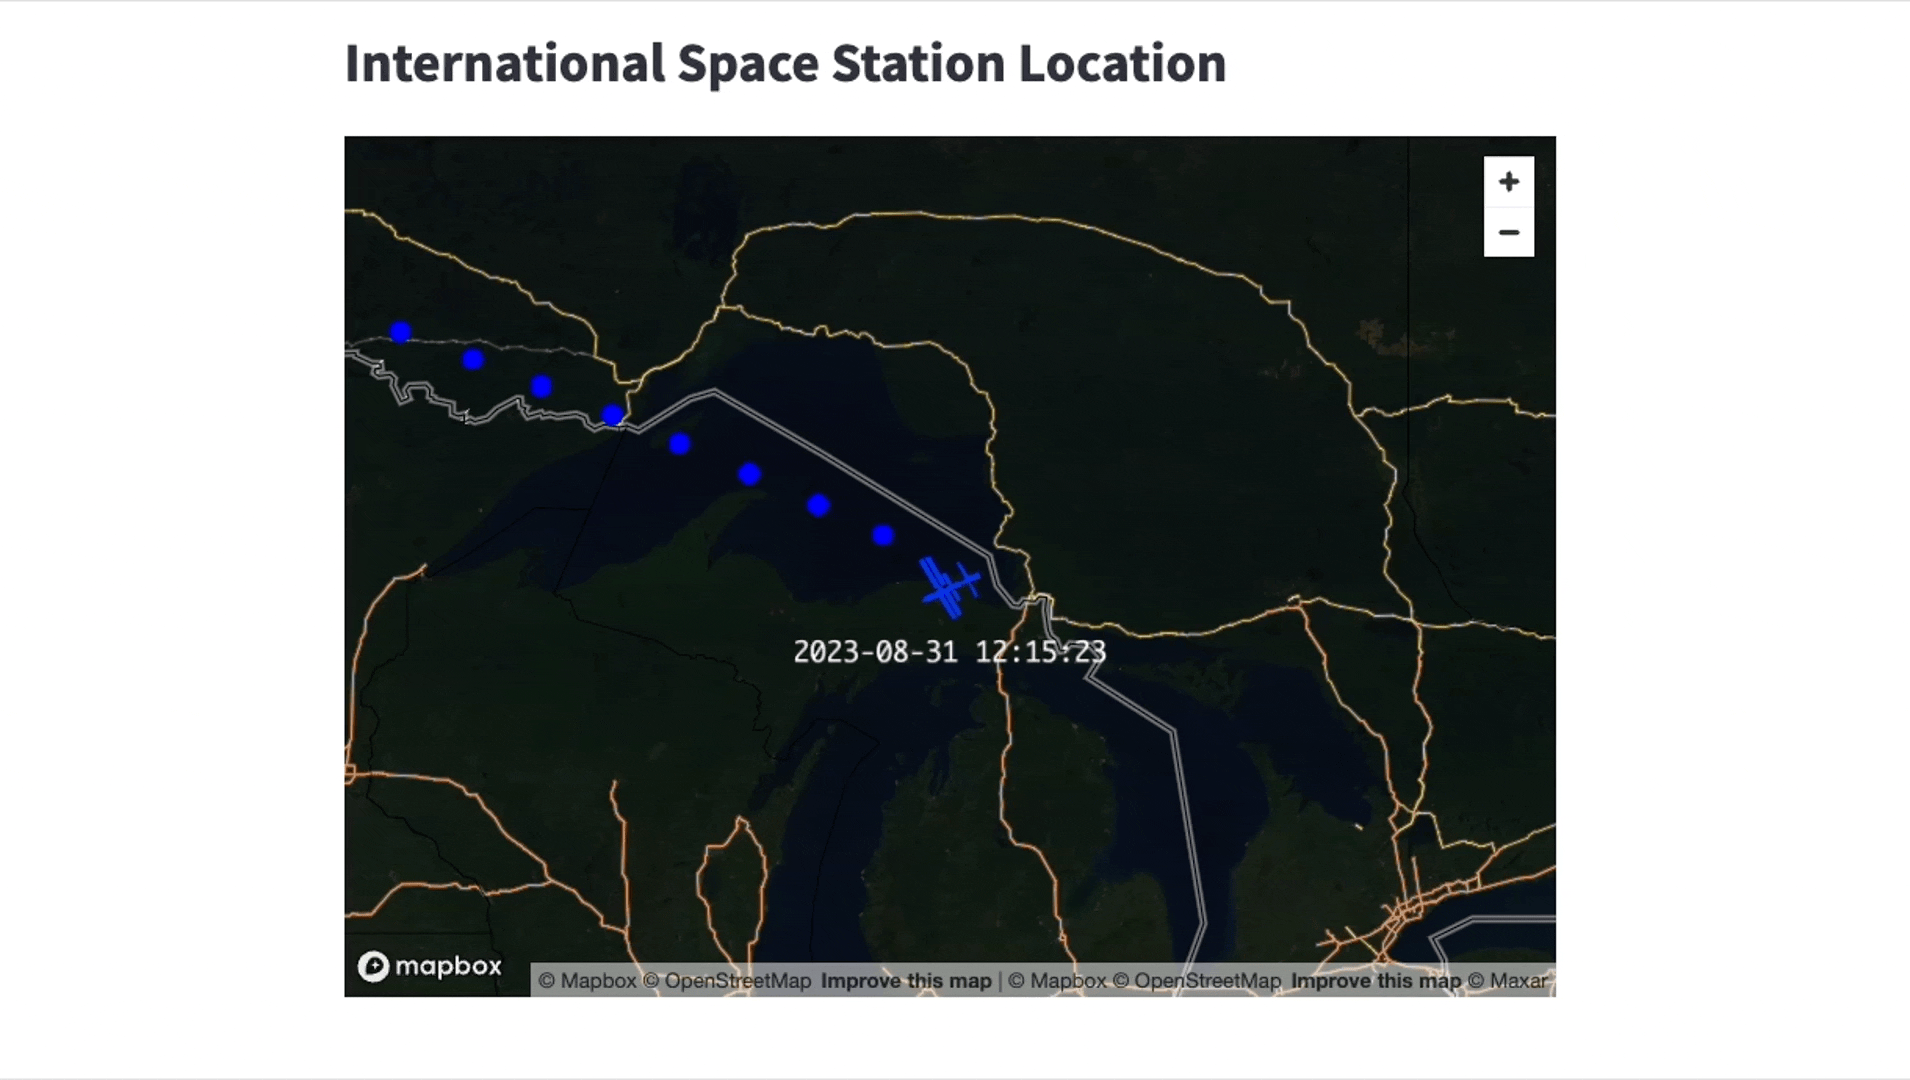
We’re running the Streamlit app locally, but keep in mind that Streamlit is also featured directly in Snowflake in public preview. Our app uses pydeck for advanced visualization capabilities and updates every minute.
Wrap Up
In this article, we’ve shown how to use Snowflake Connector for Kafka With Snowpipe Streaming. This is a quick and effective way to move rows of data from Apache Kafka right into Snowflake tables. With just a ten-second delay, it’s almost like getting the data in real-time, which is great for many different use-cases.
To bring the concept to life, we gave a real-world example by showing how to send location data from the International Space Station (ISS) into Snowflake. This shows you just one of the many ways you could use this feature for your own needs.
If you have any questions or want to know how to stream your own specific data, feel free to reach out. Let’s discuss how this can work for you.