
This series takes you through various features and capabilities of Snowflake to address a wide range of business requirements, use cases and scenarios.
Row-level security (RLS) is a data access control concept that pertains to dynamically restricting the rows of data that a certain user can access in a particular dataset. Over the course of my consulting career, I have encountered this business requirement on numerous occasions, such as the need to restrict personally identifiable information (PII) or the need to limit access to sensitive financial data. My hope in this hands-on tutorial is to walk you through a simple yet effective example on how you can implement row-level security within your Snowflake environment through the usage of data control tables.
Problem Statement
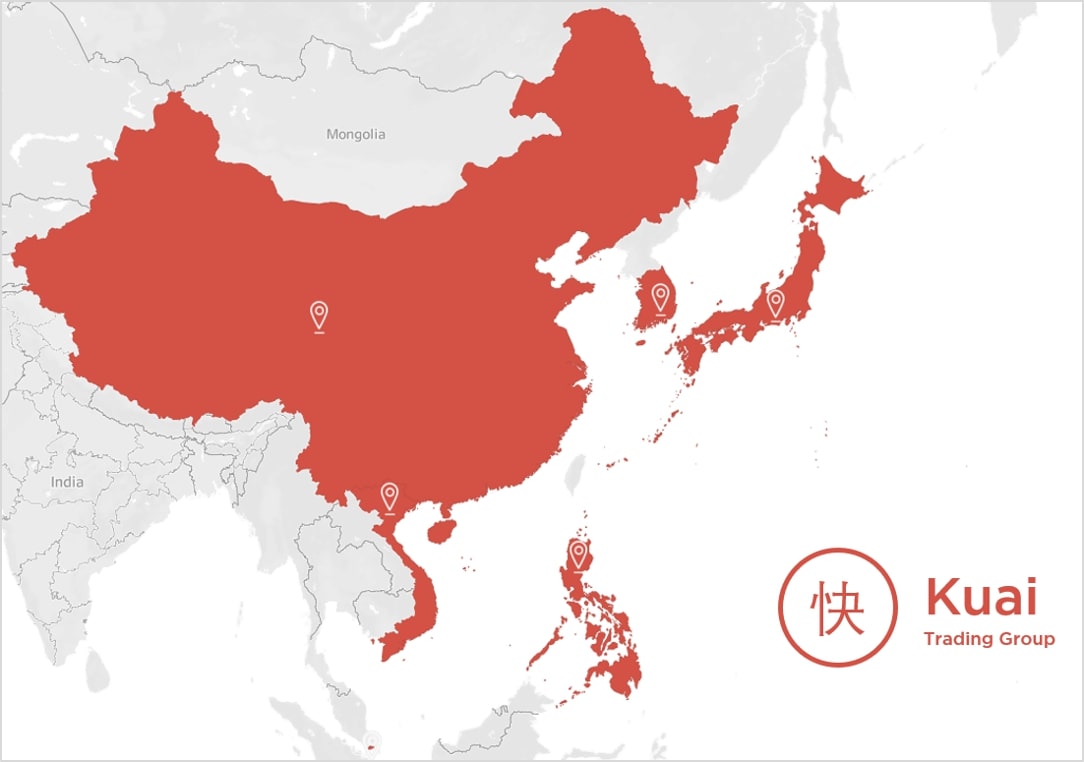
The example dataset in this tutorial features a fictional pan-Asian retailer named Kuai (快) Trading Group, a conglomerate operating a chain of grocery retail outlets in six countries, namely: Mainland China, South Korea, Japan, Vietnam, Singapore and the Philippines:
Below are the following business rules and conditions that summarize the organization’s row-level data security requirements:
- Country-level managers are only allowed to see sales data for their respective countries (e.g. the Singapore country manager is only allowed to see Singapore data)
- Sub-Region-level directors are only allowed to see sales data for countries that belong to their sub-region (e. the East Asia sub-region director is only allowed to see data from Mainland China, South Korea and Japan)
- The sales director of the APAC region has no data restrictions and can see data for Kuai Trading’s business operations in all six (6) countries
Overview of the Data Sources
Before we go through a step-by-step walkthrough on how to address these row-level security requirements in Snowflake, let’s do a quick overview of the dataset we will be working with. This post assumes that you are comfortable already with staging and loading data into Snowflake. If not, feel free to check out this primer on how to load data into Snowflake written by my colleague Chris Hastie.
The sample data files can be downloaded at the bottom of this post.
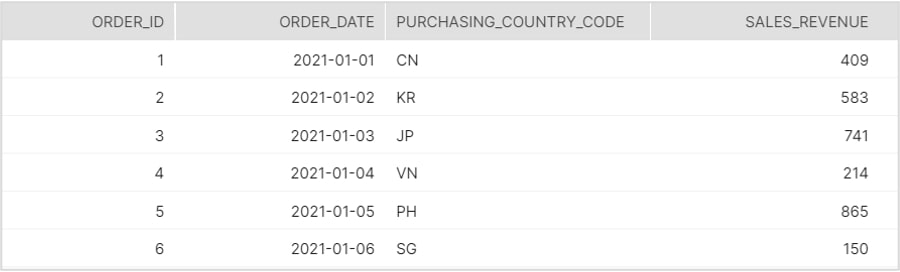
FACT_ORDERS Table
This is meant to represent a daily aggregation of sales data for all six countries where Kuai Trading operates.
DIM_GEO Table
A lookup table of geography-related dimensions.

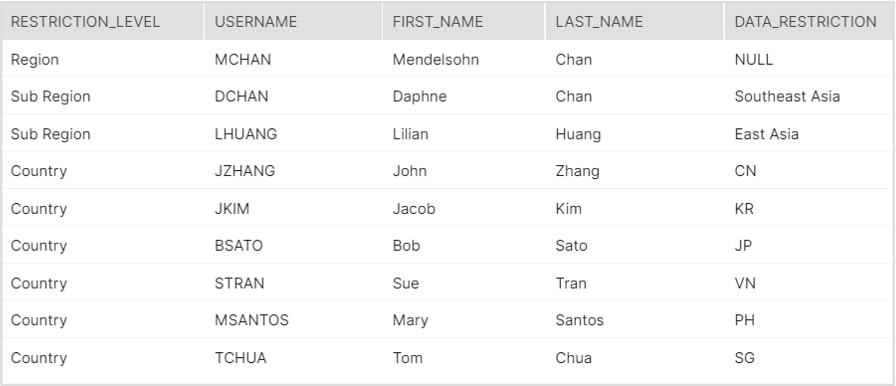
DATA_SECURITY_CONTROL Table
This is perhaps the “secret sauce” of today’s tutorial; it contains a list of all LDAP usernames in the organization with their corresponding clearance for data access.
Building the Secure View
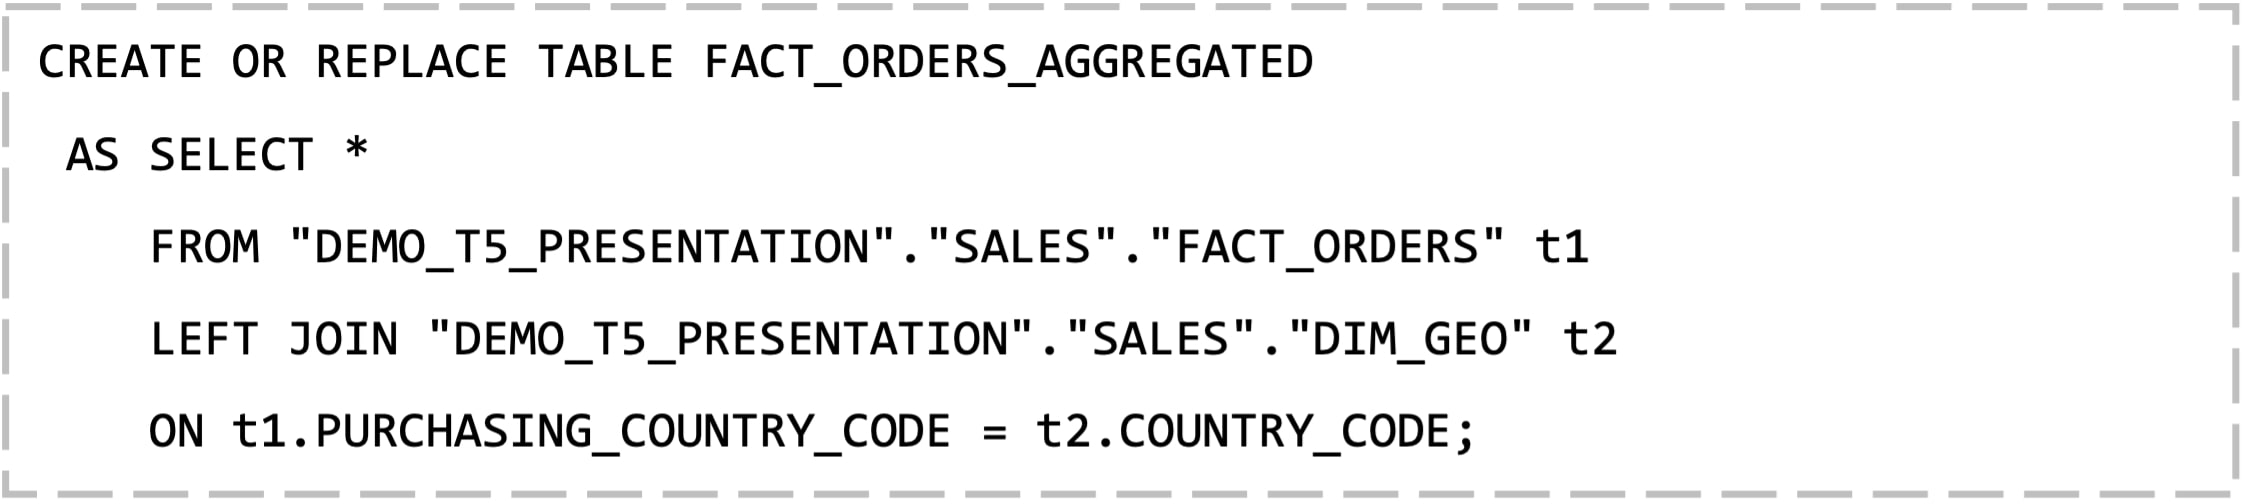
The end-goal of this walkthrough is to develop a final, semantic layer table from which end-users can derive business insights from using straight SQL, or by using a visual analytics tool like Tableau to connect to the underlying Snowflake source. But before that, let’s join our FACT and DIM tables together using a CTAS statement to create a master FACT_ORDERS_AGGREGATED table:
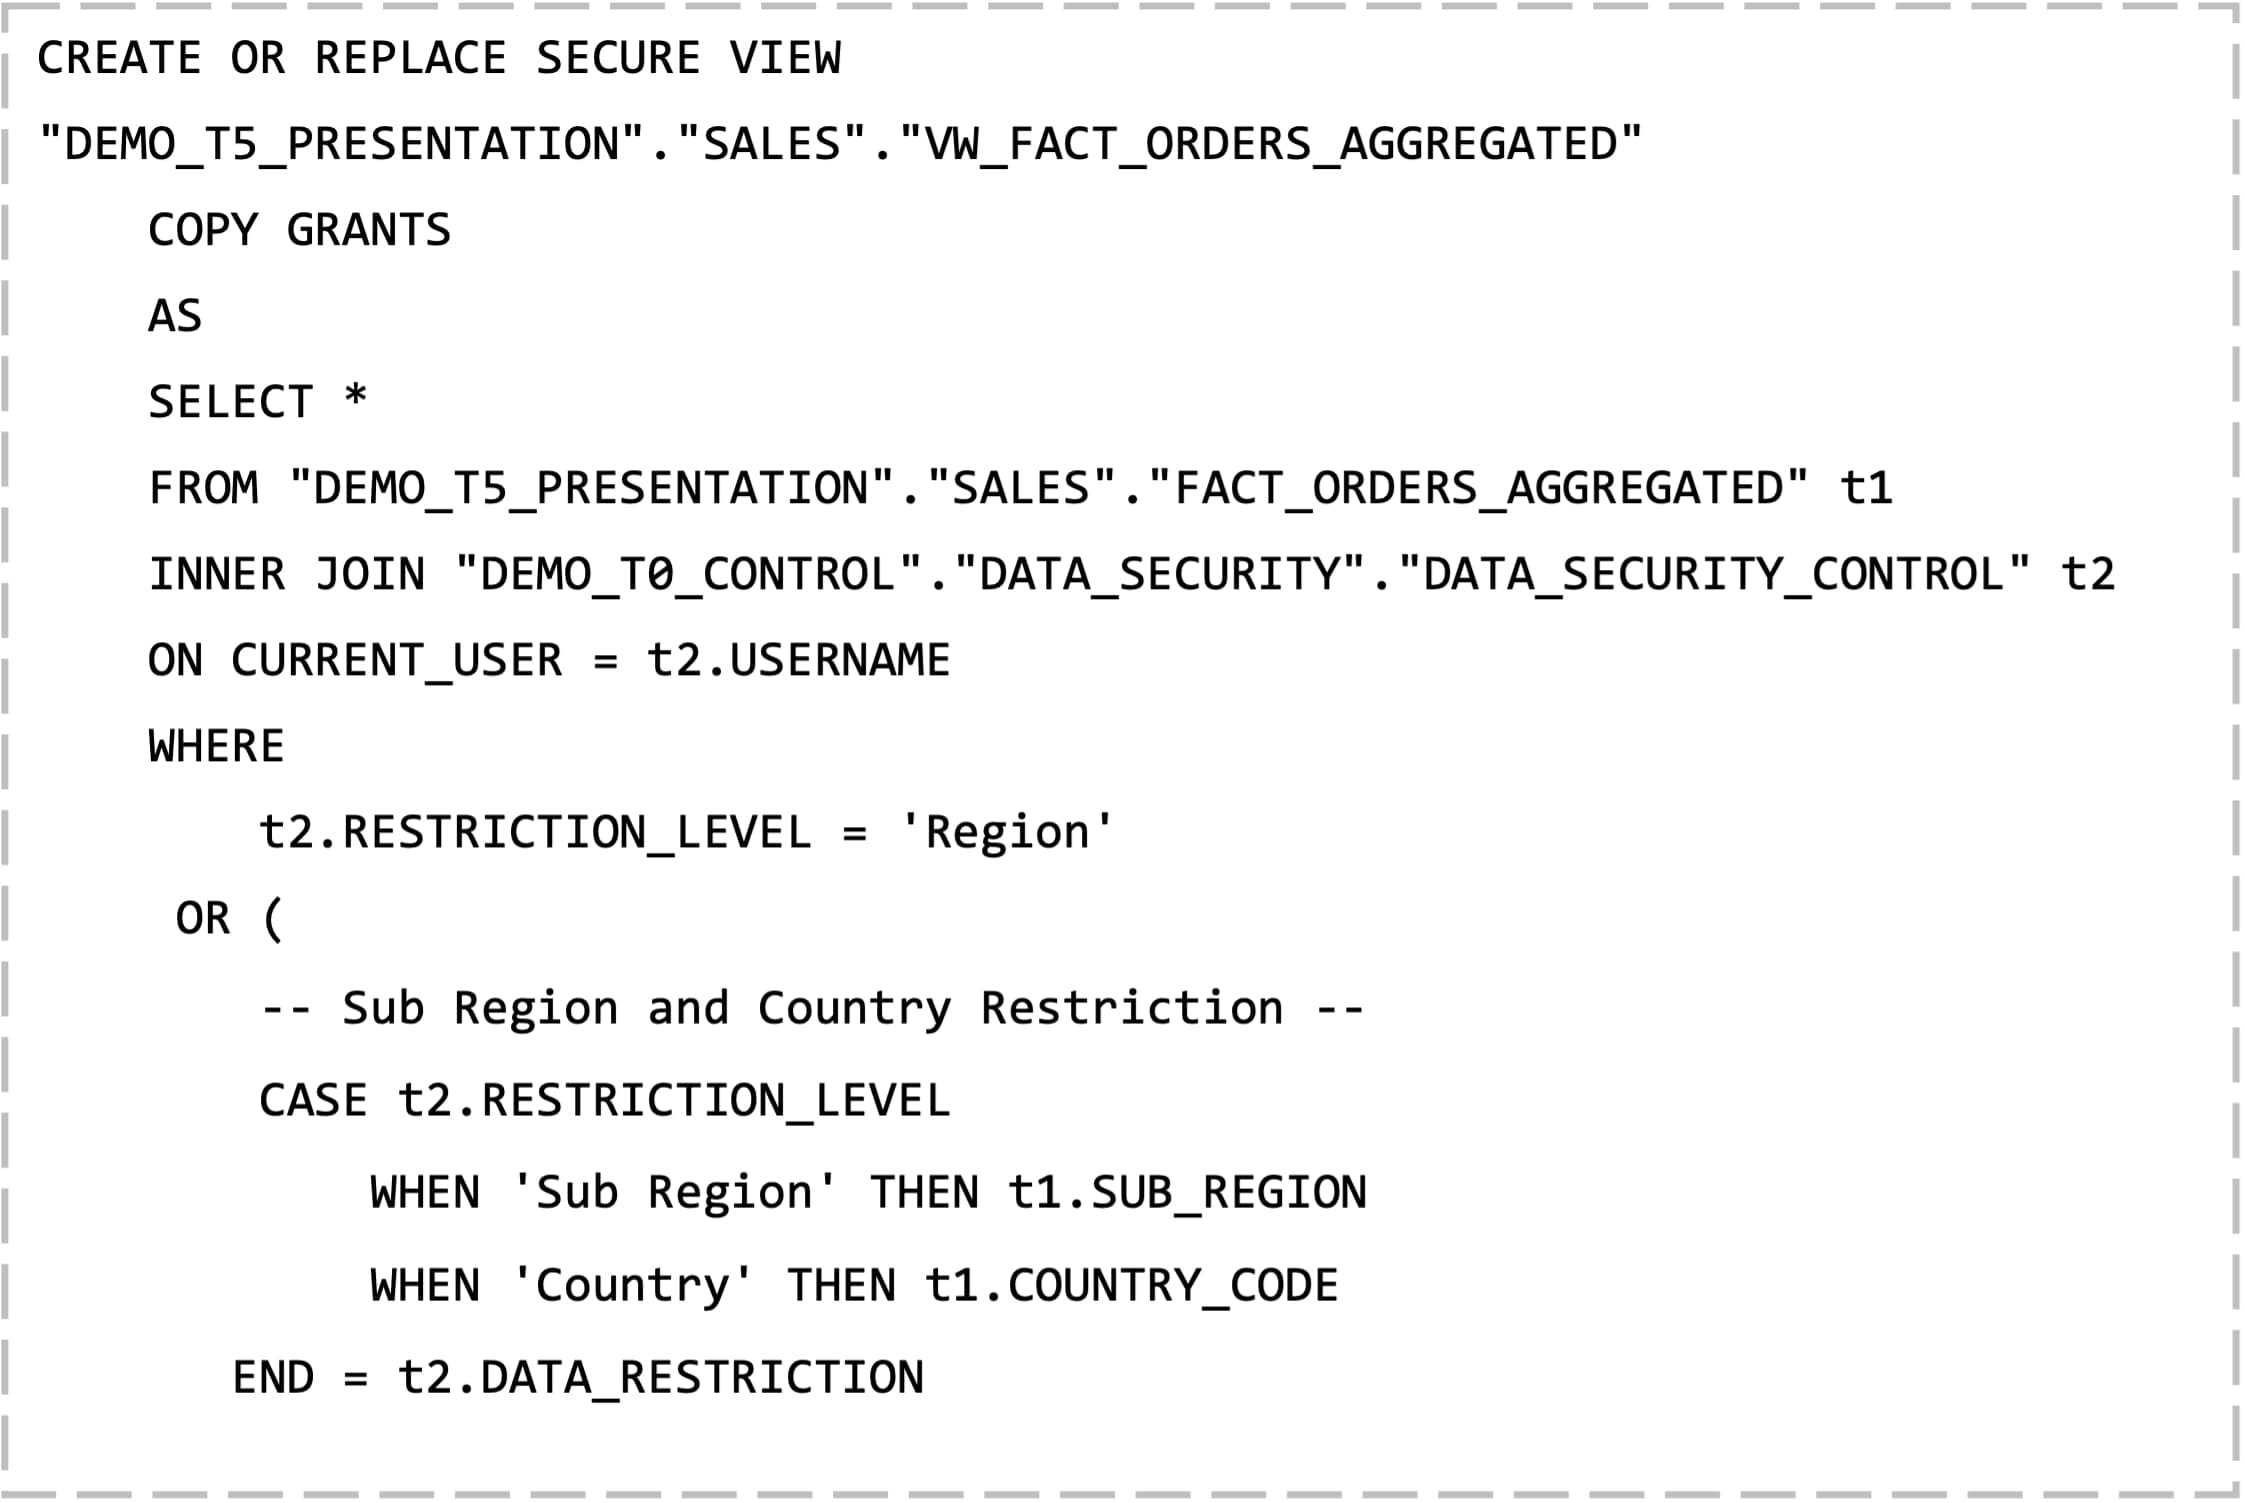
Finally, we come to the crux of the solution, which is to create a secure view that will serve as that final, semantic layer data source your end-users will connect to:
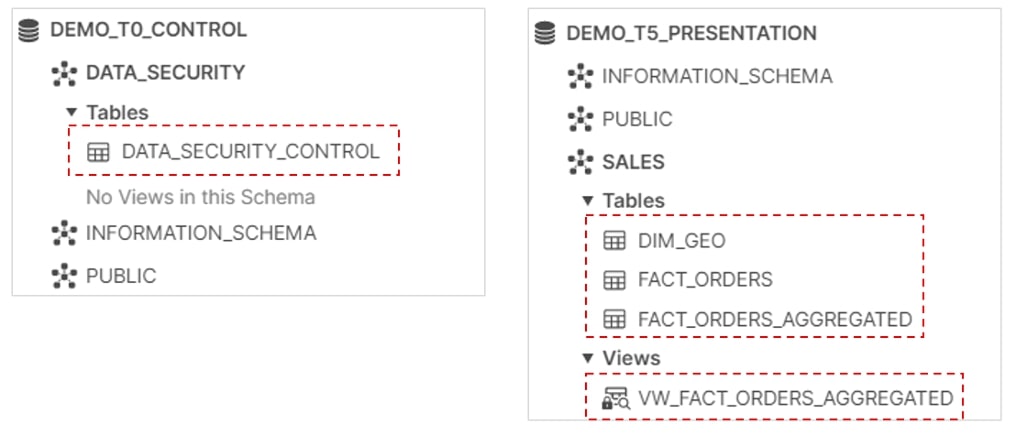
Now that the secure view has been built, let’s do a quick recap so far on the Snowflake database objects that comprise the overall solution:
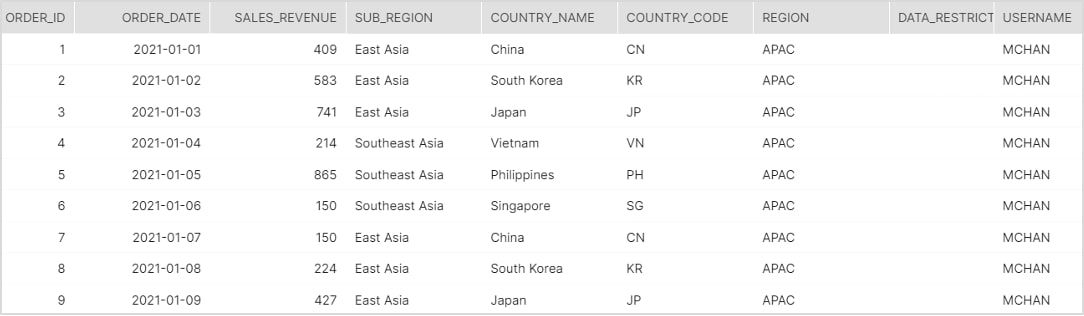
In addition, to prove that the row-level security logic works, the screenshots below aim to depict which rows of data various end-users have access to after they log into the Snowflake environment and start querying the dataset.
Stress Test #1
User: Mendelsohn Chan
Title: APAC Sales Director
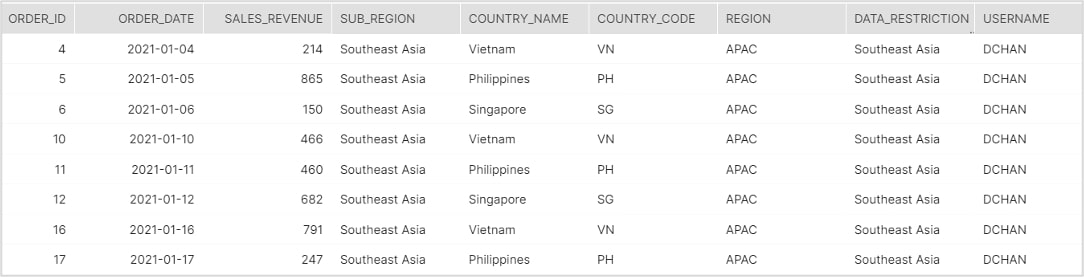
Stress Test #2
User: Daphne Chan
Title: Southeast Asia Sub-Region Lead
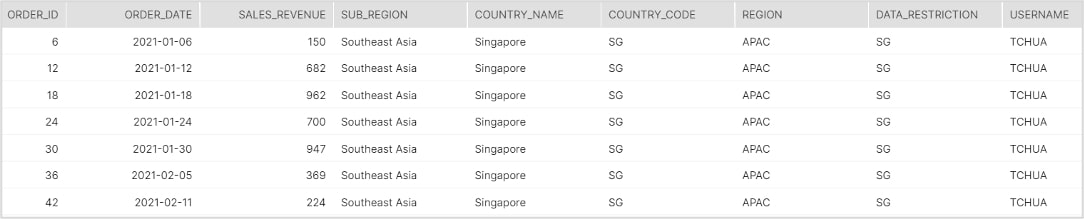
Stress Test #3
User: Tom Chua
Title: Singapore Country Manager
Important Considerations
Now that we’re assured the solution works, I will try to unpack the SQL code used to build the secure view.
- Using a SECURE VIEW: The purpose of using a secure view is to ensure that we conceal the view definition from unauthorized users. That way, no one can attempt to deconstruct and try to understand how the row-level security logic was applied. Moreover, users won’t be able to see the view definition as well using a GET_DDL or DESC command.
- The CURRENT_USER() function: The purpose of the CURRENT_USER() function is to dynamically return the name of the user currently logged into Snowflake. In my experience working with large, enterprise organizations, a common method of managing users in Snowflake is to leverage Federated Authentication and SSO, coupled with Azure SCIM Integration. By using this approach, the CURRENT_USER function returns a username string that essentially just pulls from your Azure Active Directory as that centralized source. It is also worth mentioning that the [USERNAME] field in our DATA_SECURITY_CONTROL table is also derived from the usernames stored in Azure AD, thereby allowing us to join our data security table to our main sales data source. This is perhaps the most important facet of our row-level security solution.
Solution Summary
As a recap, we just discussed a practical use case on to how to implement row-level security in Snowflake through the help of data security tables and secure views. As a final note, I will say that row-level security encompasses a wide variety of different use cases and situations; hence, there are a myriad of other approaches out there you can also explore. The dataset and solution featured in this tutorial, albeit simple, cover the most common row-level security requirement I’ve seen in the real world – to restrict data access based on a hierarchical condition. Other instances where this solution can be applied include the following scenarios:
- Call center agents granted access only to their own call data, with team leads and supervisors being able to view subordinate data that fall under their direct reporting line
- HR employees with various levels of access based on their title or role (e.g. HR Coordinators, HR Generalists and HR Business Partners)
I hope you found this hands-on tutorial interesting and useful. Please feel free to message me if you have any questions, and stay on the lookout for more Hands-On Snowflake blog posts in the future!