
Recently, I needed to add a text box with an embedded URL to a client’s dashboard that read “Click to See Report.” The client, who still uses Tableau Desktop 10.5, wanted users to access an external report related to the dashboard content. However, there was a thin black border wrapped around the text when I would hover and click on it. It made the user interaction feel messy. Luckily, after some troubleshooting, I figured out how to “remove” the border that appears around the text field when hovering over said field.
Making the Border Invisible
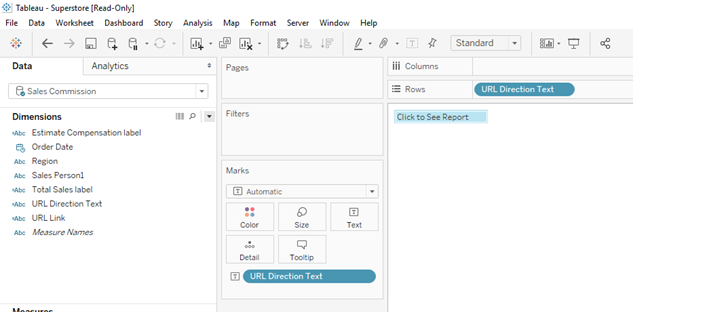
To start, I added my Text field to the Rows shelf and then dragged a copy of the same field to the Text icon on the Marks card. Next, I removed some of the default formatting around the text by doing the following:
- I right-clicked on the text field that I added to the Rows shelf and unchecked Show Header.
- At the top of the workbook, I navigated to Format > Borders, and in the Format pane on the left side of the workbook, I selected Row Divider > Pane > None.
If I hover back over the text, I see the dreaded border:
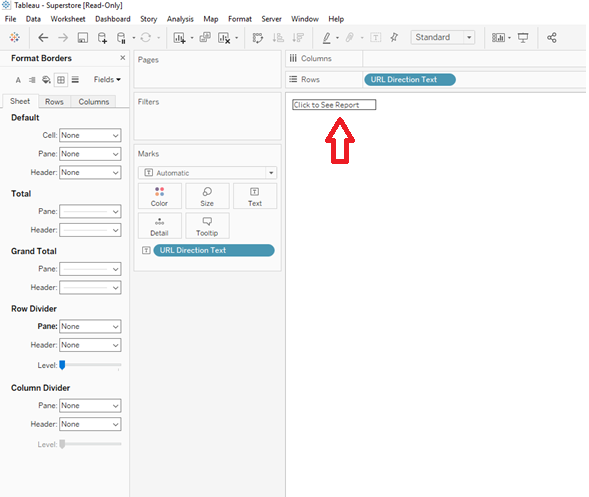
I simply want users to hover on the text and click through to an external link without seeing this. I’d also want this to disappear if a user were simply hovering over text with Tooltip. So, I return to my formatting menu:
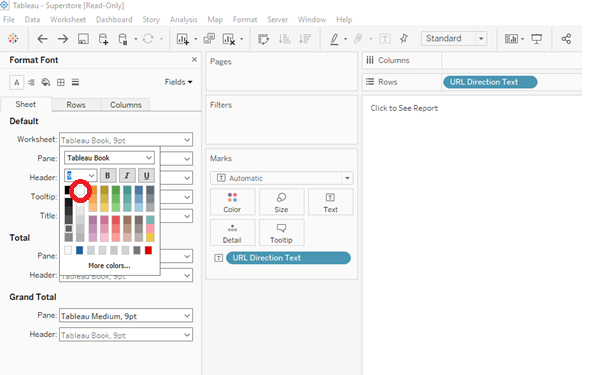
- At the top of my workbook, I navigate to Format > Font.
- In the Format pane on the left side of the workbook, I make sure I am on the tab labeled Default, under Worksheet, and change the font color to white. This is the key step that makes the border “disappear.” Note that if your background is not white, you’ll want to make sure the color you choose here matches your worksheet’s background color:
Making the Text Visible
Despite the magic of step 2 above, you’ll need to make one more adjustment so that your text is visible again. There are two ways to do this:
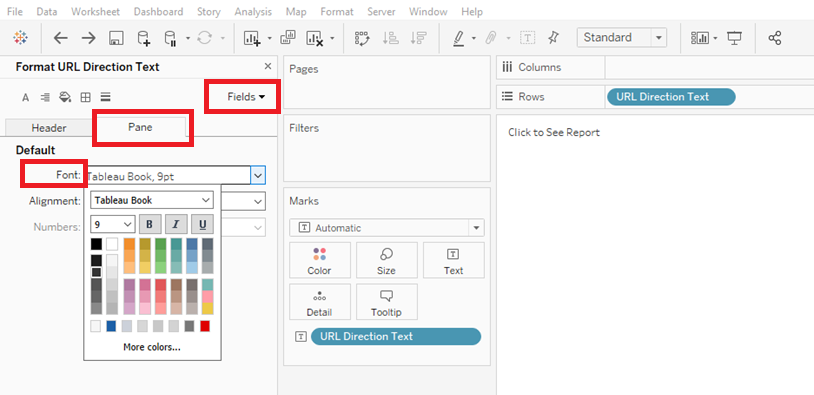
Option 1: In the Format pane, go to the Fields drop-down in the upper-right corner, and select your text field. In the Format pane, select the Pane tab and under Default > Font, choose your required font size, style and color. Now, no borders are visible when you hover over the text:
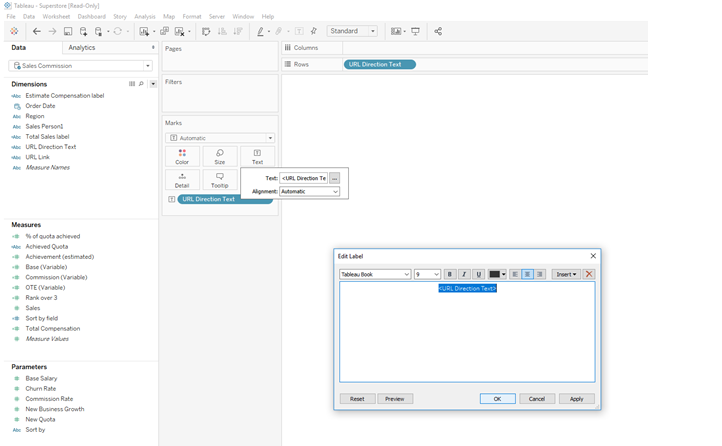
Option 2: Navigate to the Marks card, and click on the Text icon. Click on the gray ellipsis icon ( … ), and in the Edit Label box that pops up, highlight your field name and choose your font size, style and color. Click OK and return to your sheet. Again, no borders are visible when you hover over the text:
Note that while there does appear to be a faint white border around the Click to See Report text, after you go through the process of placing the sheet on a dashboard, adding a URL action, setting the action to run on Select and publishing to Tableau Server, the white border will not be visible, as the action will occur very quickly.