Please note that Portals for Tableau are now officially known as Curator by InterWorks. You can learn more at the official Curator website.
Here’s a not-so-secret secret fact about the portal that might blow your mind: it’s a webpage! Well, what does that even mean? It means that what you see is driven by a combination of HTML, CSS and JS. Still lost? Don’t worry; it’s our job to worry about how all that works. The big thing I’m trying to point out is that there are heaps of tools out there that give you some “embed code,” and each page on the portal can hold that code. Fortunately, you don’t have to be a world-class web developer to make this happen because we made it easy for you! Let’s dive in.
Embedding a Video in a Webpage
Let’s do a quick one to get our feet wet. Go to your favorite YouTube video (mine is our 2018 company summit recap because I’m doing a headstand in the thumbnail), and click the SHARE button below the video:

Then choose the Embed option:
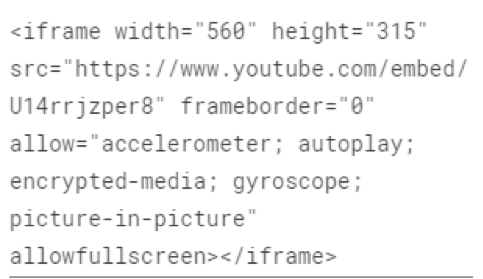
Copy the embed text that shows up:
Then, we’ll pop over to the portal and create a new page by going to Content > Pages and clicking the New Page button:

Give the page a title and then scroll to the bottom where we add content. Click the ADD NEW ITEM box, select Unrestricted HTML as the Content Type, and drop in that code from YouTube:
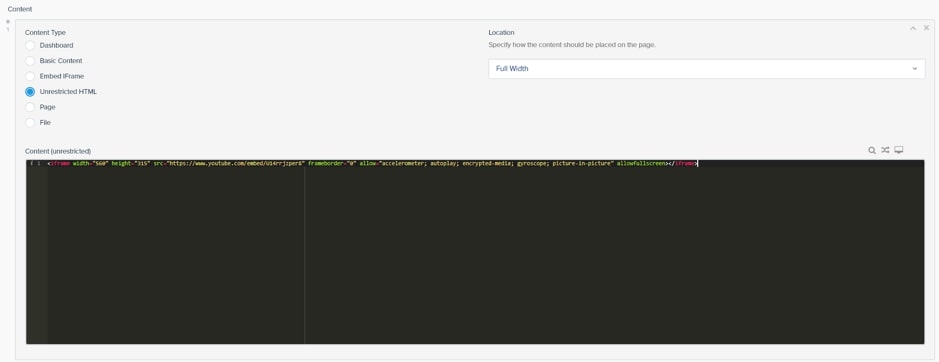
Go ahead and hit Create (or Save if it already exists) and view the page on the frontend:

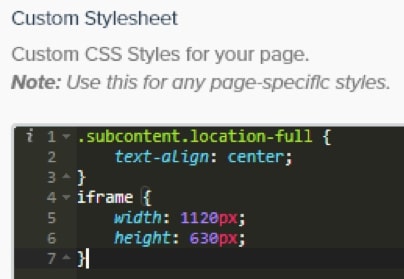
I added this styling to center the video and make it a bit larger:
And boom! All done!
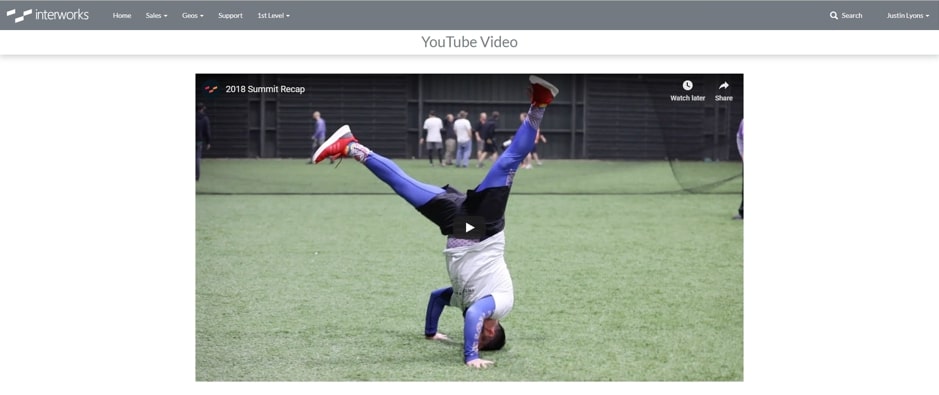
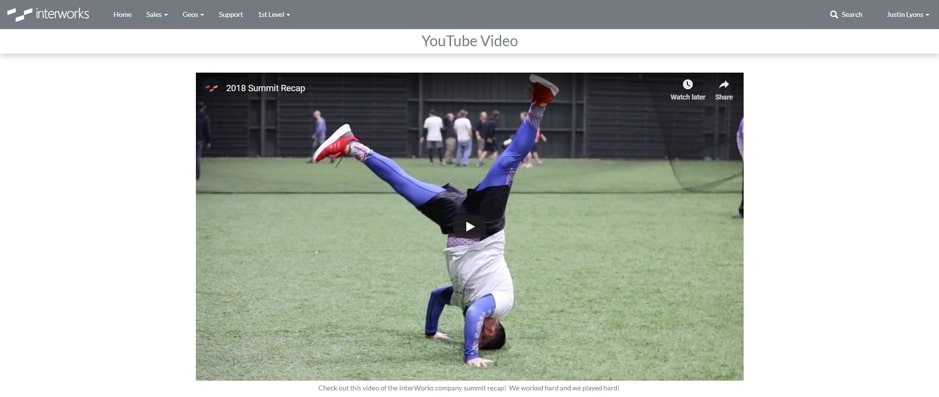
You can also add more content below the embedded video by clicking the ADD NEW ITEM box, choosing Basic Content (or whatever Content Type you’d like to add) and typing some text:

And now the text is added below the video. So easy!
This next example will show how to add Facebook’s commenting plugin. This tool allows users to comment on the portal using their Facebook account.
Quick note: If your content has tight security requirements, this isn’t the best plugin to use but would be great for exposure if you have public-facing content.
Although this one has a bit more user interactivity, it’s just as simple to add to the portal. First, navigate to the Facebook Comments Plugin page and fill the URL to comment on field with the portal page this will be implemented on. You can go through the same page creation flow in the portal of hitting the blue New Page button, give the page a title and hit Create. You can then grab the link that’s generated and use it on the Facebook Plugin Code Generator:
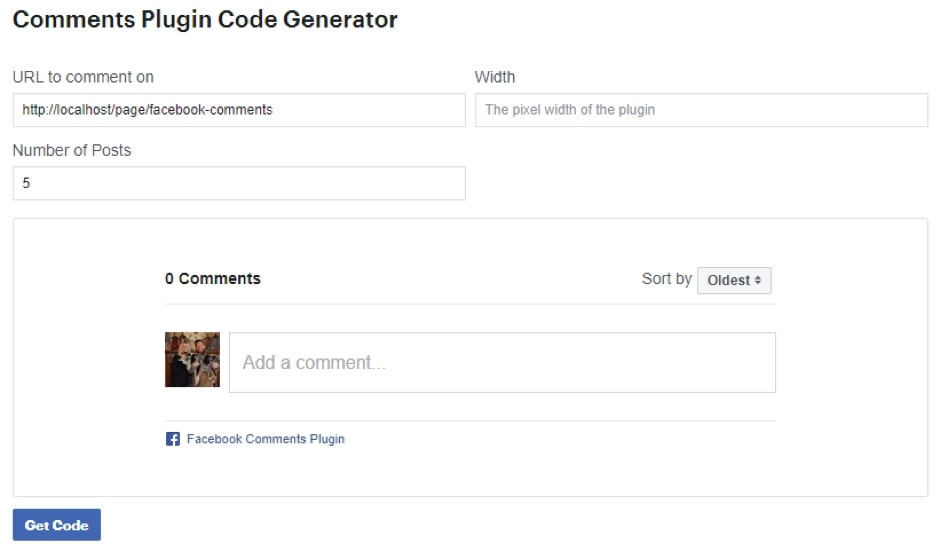
Next, hit the blue Get Code button just below the preview. A box will pop up that has two boxes of code. The first includes the Facebook JavaScript SDK that’s necessary for all their embedded offerings, and the second is the code that brings in the comments box. If you want to use Facebook plugins on more than one page, you can add the SDK code to the Settings > Portal Settings > Styles tab > Head Insert to implement it globally. In this case, I’m going to only include it on the single page, so I’ll put the SDK code and the comments code in the same spot on my page.
Adding the Comment Plugin Below the Dashboard
I want to add this comment plugin below a dashboard, so on my new page, I’ll first add a dashboard using the Dashboard Content Type:

Click the ADD NEW ITEM box, and add some Unrestricted HTML with the Facebook code:

Hit Create (or Save if your page already exists), and check out the results on the frontend:
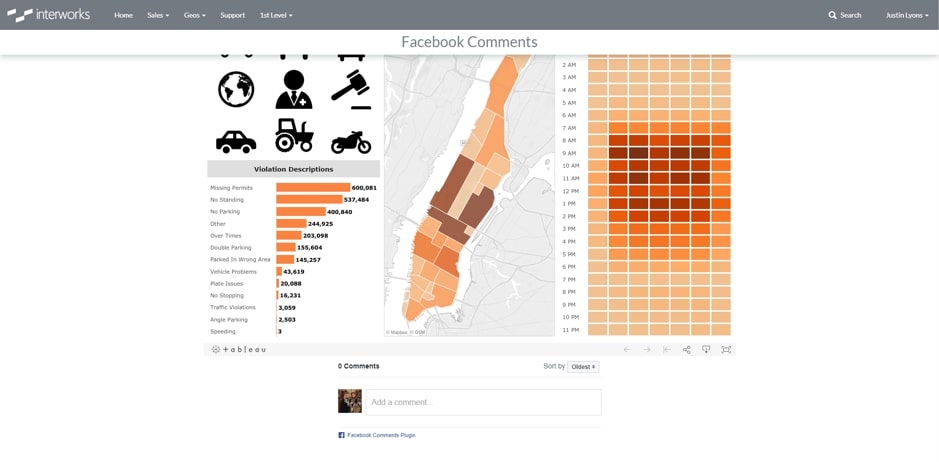
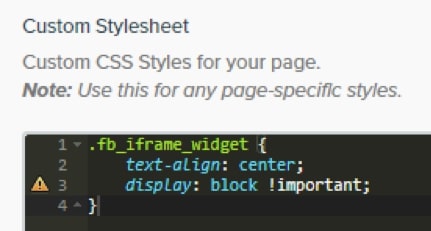
Note: I added this code to the page’s Custom Stylesheet to center the comment box:
There are loads of tools that have the embed code output to embed them in webpages, and now you know how to add those tools to the portal. If you have any questions about configuring your portal to use a tool or maybe getting a portal for your business, feel free to reach out. We’d be happy to help!

