Setting Up a Personal dbt Instance
Over the past few weeks, I have been diving into dbt in my free time to learn more about the tool as well as about data preparation before it normally reaches my hands in Tableau. If you’re unfamiliar with dbt, check out this introduction from our very own Paul Vincent. In the beginning, I created a trial account with both Snowflake as well as dbt Cloud to dive right in. In order to explore some administrative aspects of dbt, as well as to experience building a full environment from the ground up, I wound up creating my own instance locally on my laptop as well. I want to share how I went about this and encourage anybody who is interested to give it a try, as this is an easy (and free) way to learn.
Considering that dbt offers free trials, it might be a bit confusing as to why you might want to do this. There are a couple of reasons:
- Dbt has two versions, being dbt Core and dbt Cloud. Their free trials are done entirely through dbt Cloud alongside a cloud data warehouse of your choosing. However, given that dbt is open-source, there are ways to use it outside of their cloud environment, and setting up a personal environment is one of the best ways to explore this. While dbt Core and Cloud are based on the same product, there are a few quality-of-life improvements that dbt Cloud offers that are not immediately available in dbt Core.
Dbt Cloud:
 Dbt Core in VSCode:
- While the free trial of dbt Cloud does not have a time limit, my accompanying trial of Snowflake did. With the methods I describe below, you are free to explore for all the time you need.
Create Your Data Source
First, you will need an underlying data source that dbt can use. Fortunately, dbt is not restricted to cloud data warehouses and can connect to many different local data sources, including PostgreSQL, MySQL and SQLite.
Note: There are some differences in dbt depending on the underlying data source. Whichever one you use, I highly suggest reading the documentation to learn about these differences.
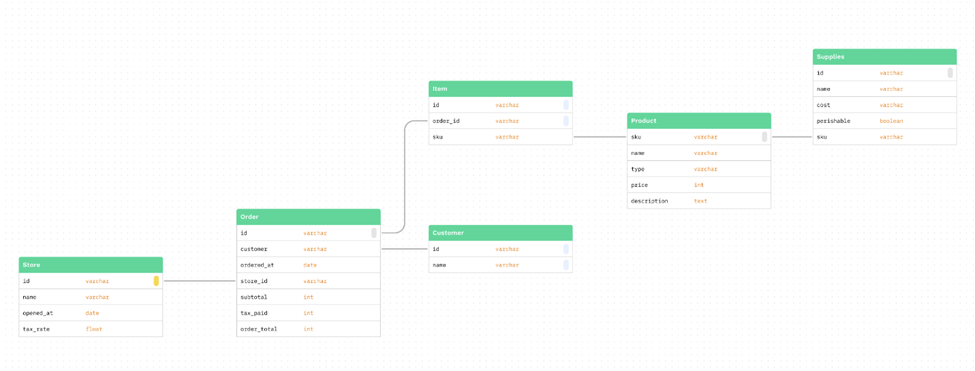
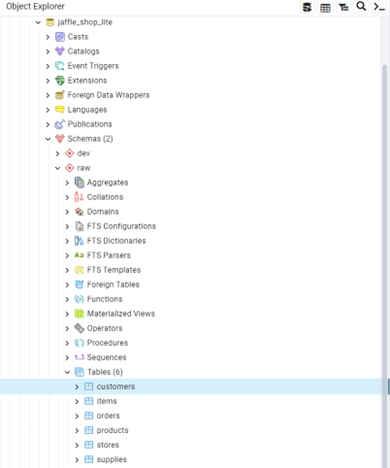
For this tutorial, I chose PostgreSQL, as it is the one I am most familiar with. After downloading it and running the installer, a server was created locally on my machine, and I created a superuser to essentially act as the DBA. Feel free to test dbt along with various permission settings within Postgres. After installing and configuring Postgres, you will need six pre-existing tables to hold your raw data, recreating this schema (note: the actual data will be generated in a later step):
Set Up an IDE
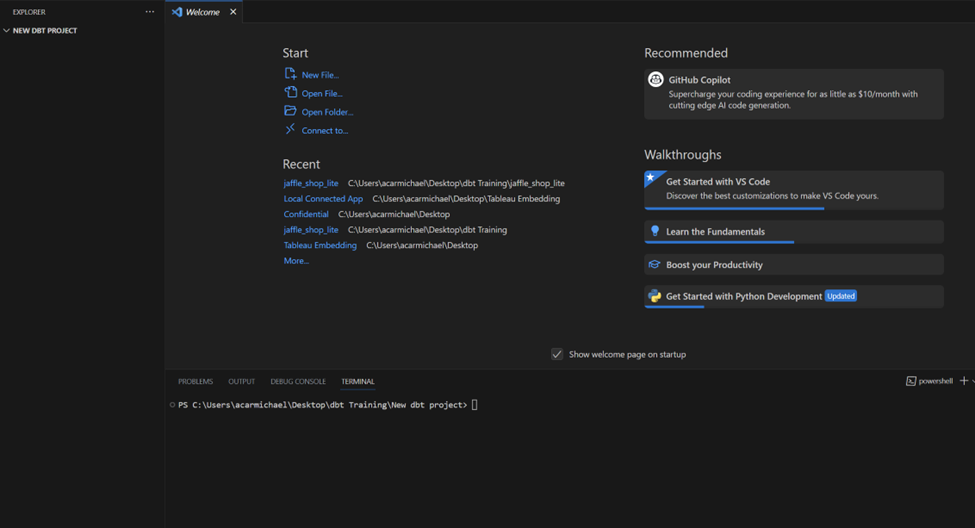
Next, you will need an IDE of your choice to write the SQL that powers dbt. I personally use VSCode, as it has some extensions that can greatly improve quality-of-life while writing SQL. These extensions include vscode-dbt, dbt Power User and Better Jinja. However, you may use a different IDE as well.
Additionally, you will need Python. At the time of writing this blog, dbt supports Python 3.7-3.10. After installing python, it is recommended to have a dedicated environment specifically for dbt, which can be accomplished by using something like venv. After activating your virtual environment, you can begin installing dbt.
Note: The specific package you install will depend on your underlying database. In my instance, I installed dbt-postgres via pip install dbt-postgres.
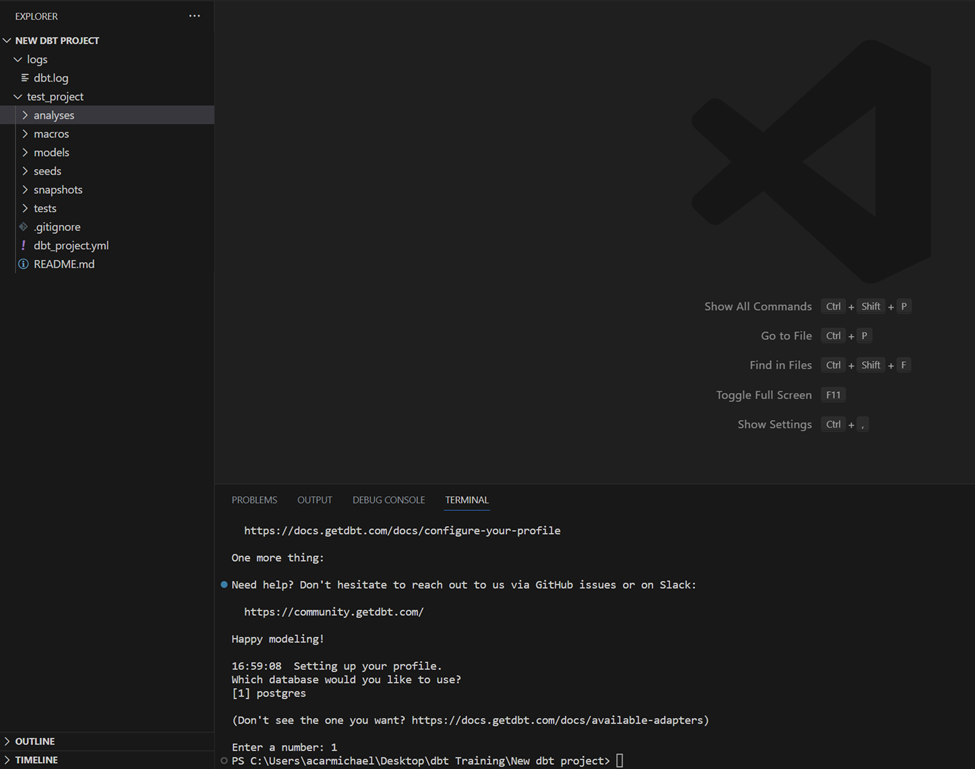
At this point, I recommend creating a dedicated directory anywhere on your machine that will hold your project. Within this directory, you can simply run dbt init and dbt will automatically generate the necessary file structure within this directory, where you can store your models and yml files. Note: installing dbt via pip will allow dbt commands to be used anywhere on your machine, i.e. you no longer need to be in your dedicated python environment when using dbt.
As an example, I’ve created a brand new directory that contains nothing. After opening it in vscode and running dbt init in the terminal, it is now populated with the necessary folders for a dbt project named “test_project.” You will also have the option to set the type of database that you will be using, which will be important in a later step.
Before:
After:
Generate the Data
We’re almost ready! However, what good are data-related tools without data? Fortunately, dbt has created a utility called jafgen that can automatically generate CSV files based around their classic Jaffle Shop example used in many other dbt training materials. Running these two commands will install jafgen in your environment and create three years’ worth of example data:
pip install jafgen
jafgen --years 3
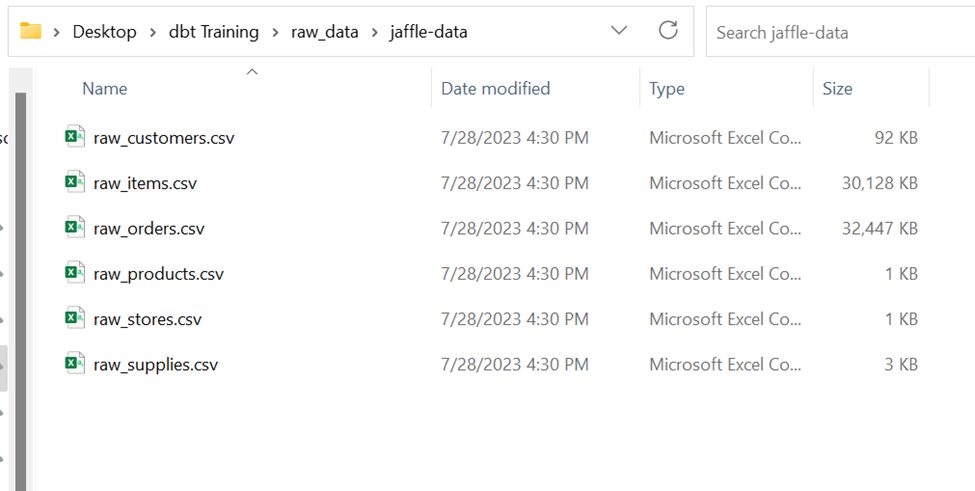
These CSVs can be loaded into the tables you created earlier via either the data import tool within the pgAdmin application (installed alongside postgres server earlier) or via any other method you would like to use.
Connect dbt to Your Data Source
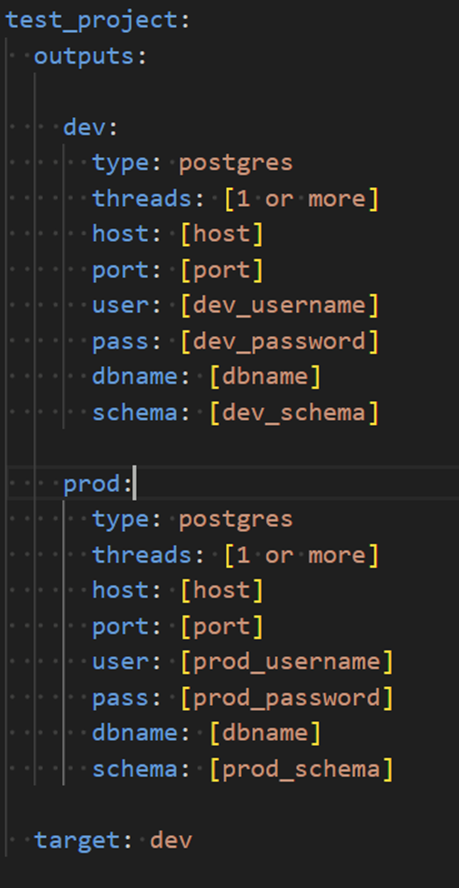
Lastly, before we can test that everything is working, we need to tell dbt how to connect to our data. When we initialized our project via dbt init earlier and chose the underlying data source, that created an important file called profiles.yml. By default, this is located in the \.dbt folder of your home directory (for example: C:\Users\acarmichael\.dbt). This file is where you can define DEV and PROD environments as well as connection details and credentials for your database. You can find the details on profiles.yml here. After configuring your connection profile, you can edit your dbt_project.yml to use that profile.
Newly created profile:
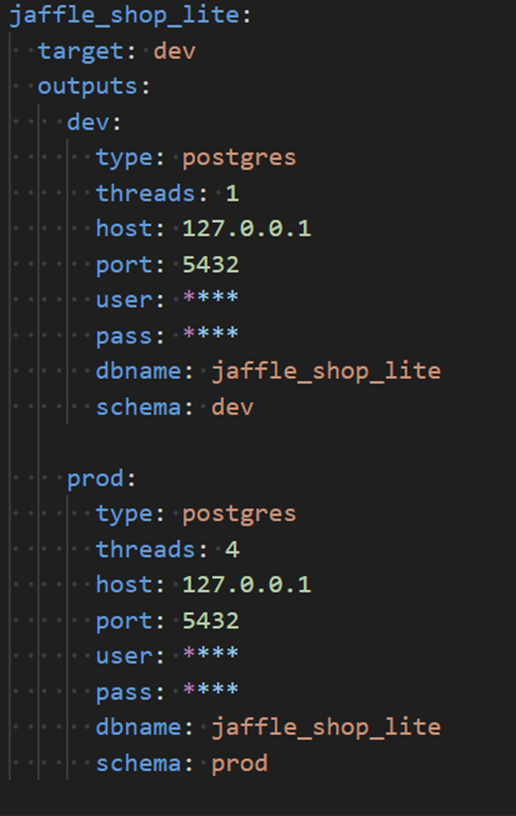
Example profile, filled out (use your own username/password):
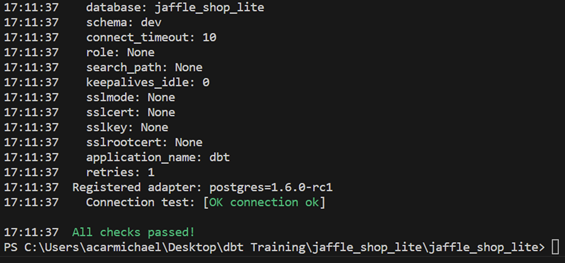
Finally, the time has come. You can start by testing to make sure dbt can connect to your data properly by using dbt debug. If all checks pass, then you may start developing your DAG and exploring to your heart’s content. If the output looks similar to this, then you’re good to go.