
Are you not yet confident enough to announce that you are a data scientist because you haven’t programmed a model yourself with a neural network? Neural networks (NN) are an advanced technology in data science, widely applied in the field of computer vision. The perceived complexity could scare some people away from trying it. Kaggle, a machine learning community, challenges beginners with Digit Recognizer, which aims to recognize handwritten digits. Dataiku makes it possible for beginners to implement NN with low (or no) coding. This article will guide you through to get your first NN model.
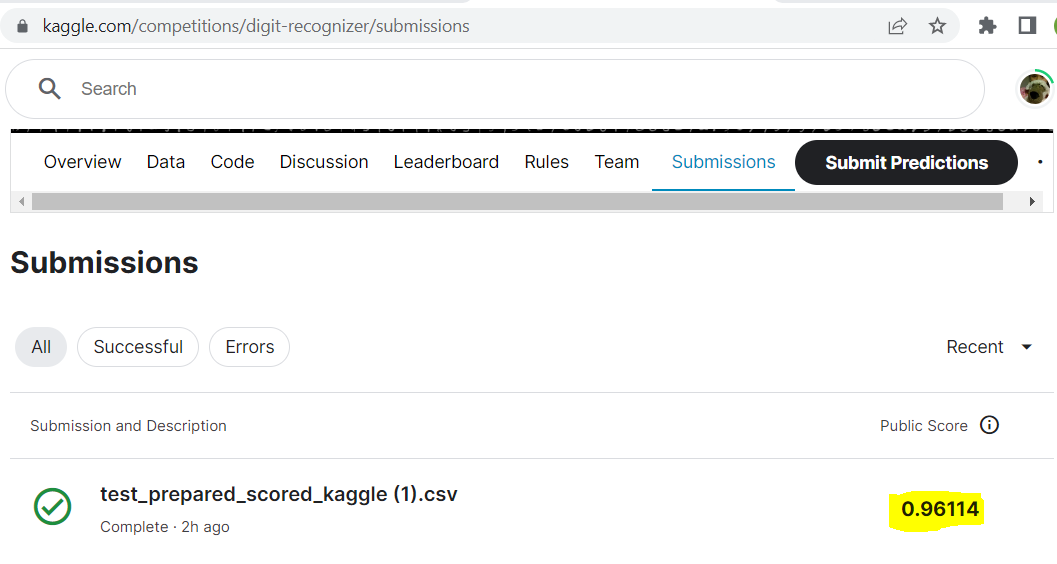
Above: An accuracy score of 96%
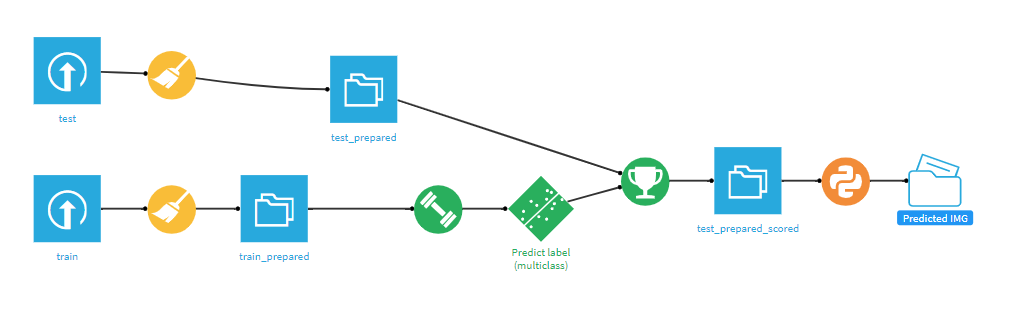
Above: The final flow

Above: Recognizing the image
Setting Up Your Neural Network
Here’s the step by step. We also included .gif’s with each bullet point to guide you through each step as an additional resource:
- Get input datasets for your project
Below: This step in .gif format
- Set up a code environment for your project (don’t worry, we are not going to code much) in Dataiku. Both Python and R can be applied in one project. In our case, Python Keras library is used to build our NN.
- If you do not have Python installed on your machine, install Python (version >= 3.6, <=3.9) and make sure Python is in your system variable path
- Dataiku → Administrator → Code Envs → NEW PYTHON ENV
- Choose your installed version of Python and give it a name, click CREATE
- Click Packages to install, add following library names to install list and click update:
pillow
matplotlib
keras
jinja2
h5py
statsmodels
flask
scikit-learn==1.0
tensorflow
- Set up code envs for your project to use the newly created code env.
- Prepare train dataset (Same pre-processing on test dataset)
- Open train dataset by double-clicking it in the flow view (A quick keyboard shortcut: press G+F keys or hit on top bar ) and observe it: it has 784 pixel + 1 label columns. Pixel values are between 0 and 255 meaning grey degree. Each row is one image of dimension 28×28 and labels represent digit (0 ~ 9). In order to map input row with recognizing result, we will create a ‘Row_ID’ column by generating row index.
- Back to flow (G+F) and single-click on train dataset to add a prepare recipe from action panel on the right side, leave default name on output set and store into filesystem_managed (or any place you want to store into), hit ‘CREATE’
- Now in Prepare recipe click and search for ‘Python function’. Leave mode as ‘cell: xxx…’, Set output column ‘Row_ID’ then click “edit PYTHON CODE SOURCE CODE”, replace scripts with following code, save and run.
count = 0
def process(row):
global count
count = count + 1
    return count

- Model training: ‘train_prepared’ has now 1 label + 1 Row_ID + 784 pixel = 786 columns. For human eyes, the 28×28 matrix of grey degree pixels are the keys (or features) to recognize which digit it represents. Therefore, we set 784 columns as features, label column as target, Row_ID just for identification, not as input.
- Click on ‘train_prepared’ on flow and select Lab on action panel on the right-hand side. Choose ‘Deep learning prediction’
- Choose ‘label’ as the target variable and ‘Deep learning’, leave default naming, then click CREATE. You will see NN scripts are ready without manually coding
- Now we are in model design. The label values are 10 digits between 0 and 9, therefore this is a multi-class classification problem. Therefore, we set prediction type to be multiclass classification in Target tab and let Dataiku re-detect settings if it asks.
- Now set up input features, go to features by clicking on ‘Feature Handling’ on the left, input all and reject Row_ID (label as target automatically excluded by Dataiku).
Please note: Dataiku will automatically reject features having same values, e.g. pixels on corners strokes will never reach. Nevertheless, we keep all 28×28 pixels as input.
- Double-check runtime environment is using the one we set up, hit save & train
- Take a coffee break. Model will be ready in some hours depending on your computer performance.
- After coffee break, model is done but you can’t find it in flow. It is hidden in the lab. If you click on “train_prepared” on the flow and go to lab, it is below visual analysis options. Let’s expose it into flow
- Click on it and go to models, check its accuracy: 96% , not bad! deploy it!
- Press G+F to go back to flow. The green diamond is your NN-model!GIF.
Congrats! You have proven yourself to be a data scientist with an NN-model! Be proud of yourself!
- Now you can use that model to predict the test dataset (Assuming you did same pre-processing on the test dataset and have it ready, too.)
- Click on the green diamond model and choose ‘Score’ on action panel
- Set input dataset ‘test_prepared’, output ‘test_prepared_scored’, store into ‘filesystem_managed’, click ‘CREATE RECIPE’ & ‘RUN’
You want to check result with your own eyes? We can export images to a folder to visually
check whether the predictions are performing well. Here is our favorite part of python coding
- Now we convert pixels from dataset rows back to .png with recognized label on their filenames, so that we can visually check them.
- G+F back to flow, click on ‘test_prepared_scored’ and select Python code recipe
- Set output to be a new folder named ‘Predicted IMG’ and hit ‘CREATE RECIPE’
- Paste following scripts under the code generated by Dataiku (Warning: Don’t delete this code!) and run it!
- First block: importing libraries
- 2nd block: debugging on Jupyter Notebook to view images if you’d like to code and check
- 3rd block: converting first 100 rows into 100 28×28 png images and store them to the ‘Predicted IMG‘ folder with predictions in filenames.
Following box in code block
# -------------------------------------------------------------------------------- NOTEBOOK-CELL: CODE

import io

from PIL import Image

import matplotlib.pyplot as plt

# -------------------------------------------------------------------------------- NOTEBOOK-CELL: CODE

#Debugging snippets, show each image in notebook

row= 100

img1= test_prepared_scored_df.iloc[row][0:784].to_numpy().reshape((28, 28))

plt.imshow(img1, cmap="gray")

plt.show()

print ('Prediction: ' + str(int(test_prepared_scored_df.iloc[row][795])))

# -------------------------------------------------------------------------------- NOTEBOOK-CELL: CODE

# Convert first 100 rows to .png image and save them to folder with name “Row_ID_[Row_ID]_prediction_[prediction].png“

for row_num, row in test_prepared_scored_df.head(100).iterrows():

    img1= row[0:784].to_numpy().reshape((28, 28))

    im = Image.fromarray(img1)

    im = im.convert("L")

    buf = io.BytesIO()

    im.save(buf, format='PNG')

    byte_im = buf.getvalue()

    filename = 'Row_ID_' + str(row_num) + '_pridiction_' + str(int(row[795])) + '.png'

    with Predicted_IMG.get_writer(filename) as w:

        w.write(byte_im)
Well DONE! Check the images and their predictions in ‘Predicted IMG’ folder.
Test dataset has 28 thousand images, to check it visually one by one could be exhausting. Let Kaggle evaluate our model quality.
- Prepare the scored test dataset to meet Kaggle’s submission format and export the result as csv and upload it to Kaggle for evaluation! Wow, without really coding an NN we achieve 96% accuracy
Now you want to let the model predict your own handwritten digit. And curious how to deploy it into production? Stay tuned, next blog will follow soon.
P.S. – If you are new to Dataiku, you can start a 14-day free trial here.