
Ever wondered how to create a circle object on a two-dimensional plane in Snowflake? Among others, here are a few reasons that you may wish to do this:
- Depicting socially distanced locations on a floorplan
- Displaying the range or “trade area” from a delivery depot
- Identifying when several locations are all within a particular distance of a central hub
- Displaying the impact radius of disaster events
- Identifying the extent and nature of overlapping customer bases between nearby branches
- Identifying areas not covered by the operational range of any transmission towers
It’s possible you may just want to create a circle object for the fun of it. Whatever your reason, you’ve come to the right place. This post will cover the technical approach for how to generate a circle object on a two-dimensional plane in Snowflake.
If you wish to map your circles onto a geospatial surface such as the surface of Earth, the formula becomes more complex. We must then consider the curvature of the sphere whilst calculating the points on our circle and can expect some odd-looking oval-shaped results when viewing our circles on a Mercator projection, which is how we typically view the world on a map. This will be tackled in a later blog post.
This post will be followed up by another one that will give an example of this approach being used for a real scenario, which would be to identify the best location for a central hub that must be within a certain distance of various different resource deposits.
The Mathematics Behind the Code
Our approach will rely heavily on the mathematics behind identifying the coordinates of a point on a circle. If you don’t care much about the mathematics and just want the SQL code for a circle, feel free to scroll past this section. Otherwise, let’s get started!
Simple Example
Consider a circle. For our simple example, the center of the circle has coordinates (0, 0) and the circle has radius 1. The radius is the distance between the center of the circle and the boundary.
Simple Example: Coordinates of a Single Point
We can easily figure out four coordinates on our circle, and I have displayed these on the following image. These four coordinates are simple as we travel by the length of the radius from the center in either a direct vertical or direct horizontal direction until we reach the edge of our circle:

But how do we calculate the coordinates for any other point on our circle? This is where we start using some relatively simple geometry. First, we pick a reference point on the circle where we already know the coordinate, just to make our life a bit easier. I have chosen the point (1, 0), but we could have chosen any of our four known points. From here, we can take any point (x, y) in our circle and consider the angle between that point and our chosen starting point, designating that angle as θ:
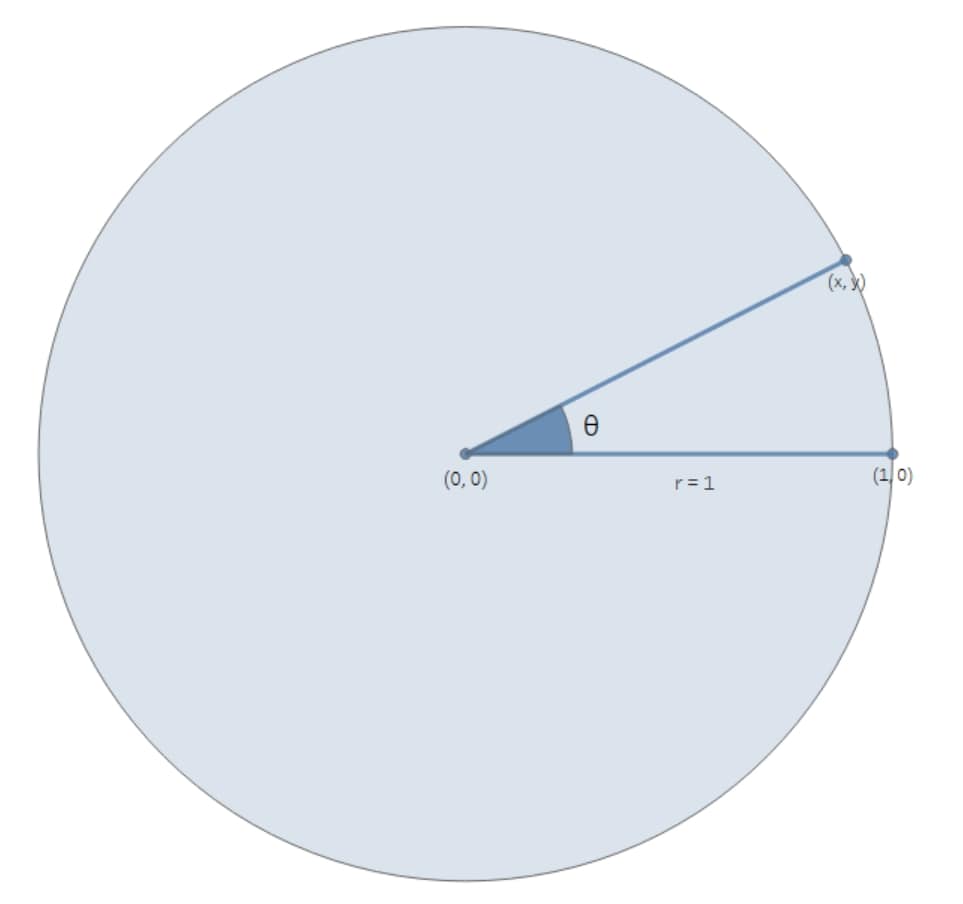
There are plenty of explanations available on how we calculate these coordinates, but I am going to take the simple shortcut and just provide it. I’m not looking to start a full mathematical proof of how trigonometric functions like cos and sin work! So, assuming our angle θ is in radians, our calculation for x and y is actually very simple in this example:
x = cos(θ)
y = sin(θ)
If our angle was in degrees instead, we could simply convert it to radians by multiplying by π / 180. If we had chosen another point on our circle as the starting point instead of (1, 0), these formulae would slightly change.
So far, we have established that we can find coordinates (x, y) for any point on a circle provided that the center is (0, 0), the radius is 1, and we know the angle θ in radians. Those coordinates are (cos(θ), sin(θ)).
Simple Example: Drawing the Circle
The trick to drawing a circle is not to draw a perfect circle, but instead to draw a straight-edged polygon with enough edges that it looks like a circle. In the image below, we observe this effect by increasing the number of points in our polygon until it suitably approximates a circle.

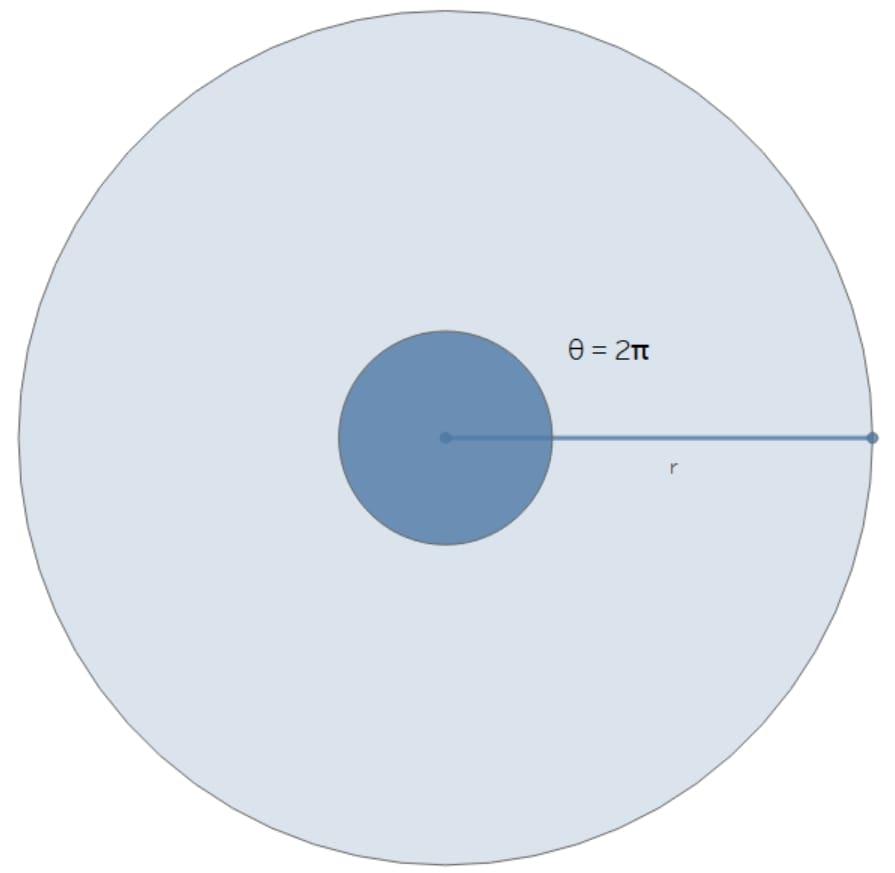
So all we need to do is decide on a number of points for our circle and determine the angle θ for each point. The full rotation around a circle is 2π radians (demonstrated in the image below), so we can determine the angle by simply dividing the full 2π amongst our points:
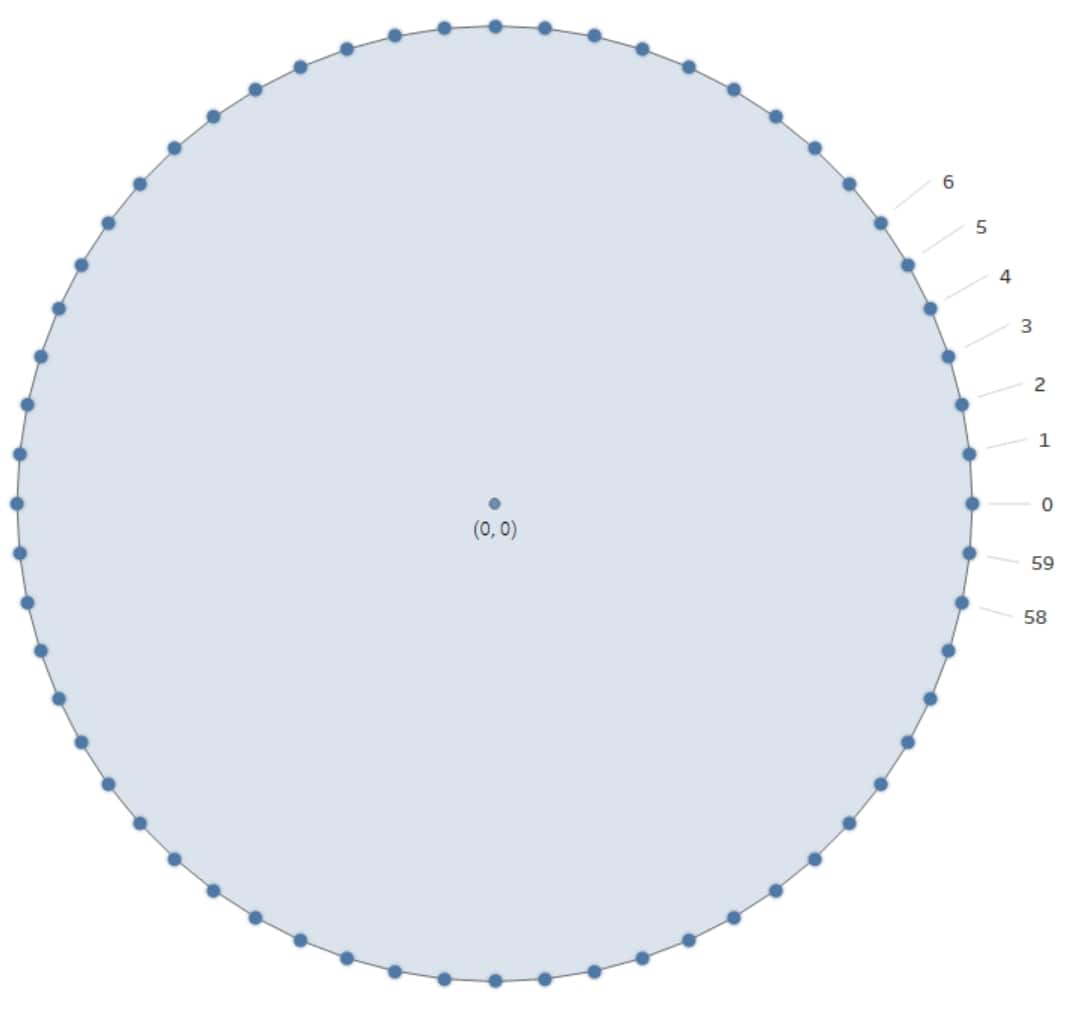
Let’s say that we want to use 60 points for our circle, though we could probably use a far lower number. We label these points from zero (0) to 59 around our circle. Below, we demonstrate a few of these numbered points:
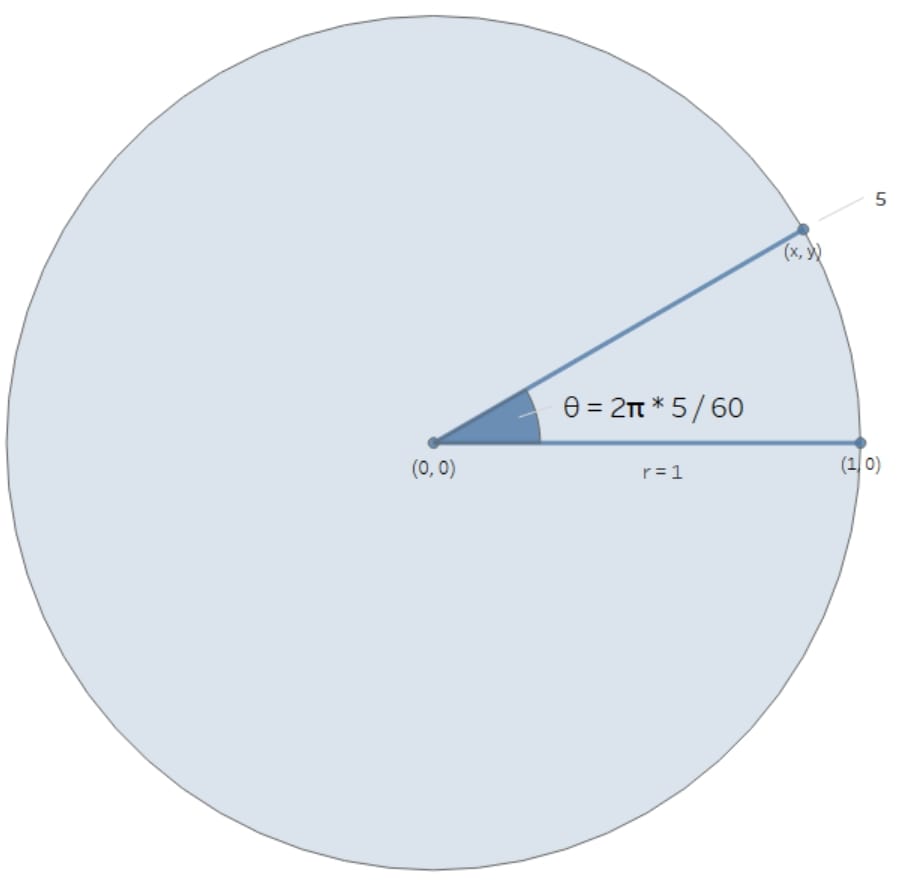
So, to determine the angle θ for any of our points, we simply multiply 2π by the point ID divided by the total number of points. For example, when we have 60 points in our circle and want the angle for the point with ID 5, we have the following calculation for the angle:
θ = 2π * 5 / 60
We now have all of the tools we need to generate the coordinates for a set of points around the boundary of a circle and can thus create the circle by connecting these points.
Quick General Formula for Coordinates for a Single Point
If our circle does not have the center (0, 0) and the radius is not 1, this calculation is more complicated. Let’s now consider a circle with center (a, b) and radius r, with θ as the angle between the horizontal plane and our desired point (x, y). This is demonstrated in the image below:
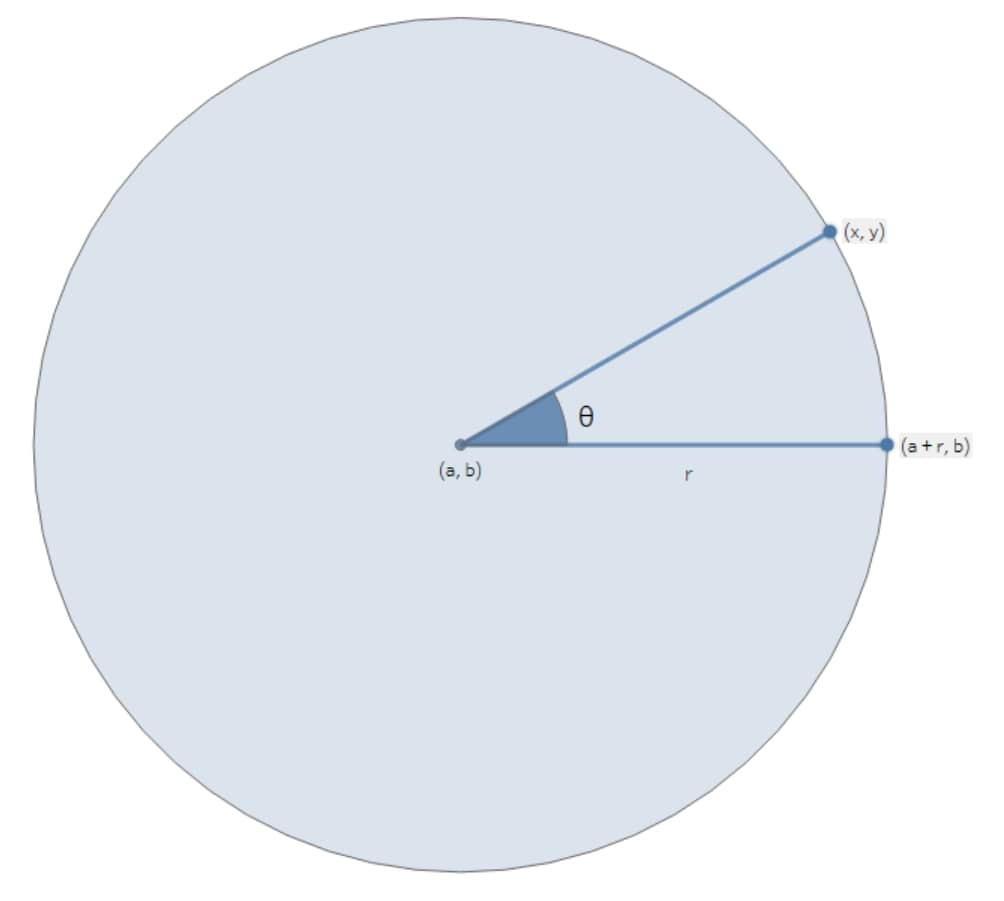
The mathematics to derive these formulae is more complicated than I wish to go into here, so in the interest of brevity, I will simply provide the formulae. Proofs to achieve these formulae are available online:
x = a + r*cos(θ)
y = b + r*sin(θ)
These formulae for coordinates (x, y) can be used for any circle, regardless of the center or the radius.
Creating Circle Objects in Snowflake
Well, that was a lot of mathematics to run through considering this is meant to be a Snowflake blog! So let’s put this all together in some SQL in a way we can use.
How Snowflake Understands Spatial Data
Snowflake’s understanding of spatial data is based on geographical longitude and latitude instead of a standard two-dimensional coordinate system. This is to support geospatial mapping and has many advantages, including being able to directly map spatial objects against the Earth in software such as Tableau. However, there are three issues with this approach when we consider drawing our circles:
If you are curious how to handle these issues to plot in a full geospatial environment, look out for my later blog post. For this flat, two-dimensional approach, we will avoid these challenges using the approach below.
How We Avoid the Challenges of How Snowflake Understands Spatial Data
These challenges above are rather complex. They can be solved with the right methodology, however the steps required are far more complex and are not necessary if we only wish to represent our circles on a flat two-dimensional plane. Snowflake will still consider our circles using the GEOGRAPHY data type in a spherical world, but we can mitigate the issue with a simplistic solution.
The solution is to make our coordinates small enough that the curvature of the Earth is not an issue.
The simplest solution here is to drastically reduce the scale of our work to fit within the standard confines of latitude and longitude spanning an area of minimal curvature, centered at (0, 0). We achieve this by dividing all of our coordinates and distances by a rescaling multiple that will reduce our canvas and avoid the antimeridian. Snowflake will still consider our x and y coordinates to be longitude and latitude, but if our values are almost 0 then the issue disappears.
For example, if we consider the distance between London and New York, we naturally have to consider the curvature of the Earth. The distance is far too great to ignore this curvature. But what about the distance across my living room? My living room is a few metres long. In the grand scheme of the Earth, a few metres on the surface are about as flat as you can get. We can safely ignore the curvature as the distance is so small.
Let’s look at a different example from a more technical perspective. Consider we have the coordinates (25, 40) on a two-dimensional grid, and we wish to draw a circle of radius 5. In terms of longitude and latitude, the distance “5” is massive, crossing five degrees of longitude at the furthest distance. It is impossible in this instance to be accurate using a two-dimensional approach. However, we can shrink the problem to a much more reasonable scale. Instead, let’s look at the coordinates (0.00025, 0.00040) and draw a circle of radius 0.0005. We can safely ignore the curvature of the Earth now as we are only looking at a distance of 0.0005 degrees of longitude at the furthest distance. At such a small scale, we have effectively created a flat two-dimensional canvas for ourselves.
Fortunately, when rendering our circles on a display software, we can simply zoom in a sufficient amount for our canvas to appear nice and large for our work.
Your choice of rescaling multiple may vary depending on the scale of your coordinates. Personally, I think a strong choice is to rescale by the distance Snowflake perceives between (0, 0) and (0, 1) in longitude and latitude. This is approximately 111195.101177484 and is calculated in Snowflake with the following function:
ST_DISTANCE(ST_MAKEPOINT(0,0), ST_MAKEPOINT(0,1)) as rescaling_multiple
Generate a Circle Object for a Two-Dimensional Plane in Snowflake
The full SQL code to generate a circle object in Snowflake can be found here in the InterWorks public GitHub. This code includes comments that walk through the logic in order to supplement the logic addressed in this blog.
The key points of the SQL code are:
- Create a table with the different longitude and latitude locations of each data point.
- Use a table generator to create a simple table of row IDs.
- Generate a new table that leverages the generated row IDs to determine the coordinates of various points around our circles. This is where all the mathematics above comes into play!
- Use ST_COLLECT to group the points for each circle together.
- Finally, convert the collected points into polygons.
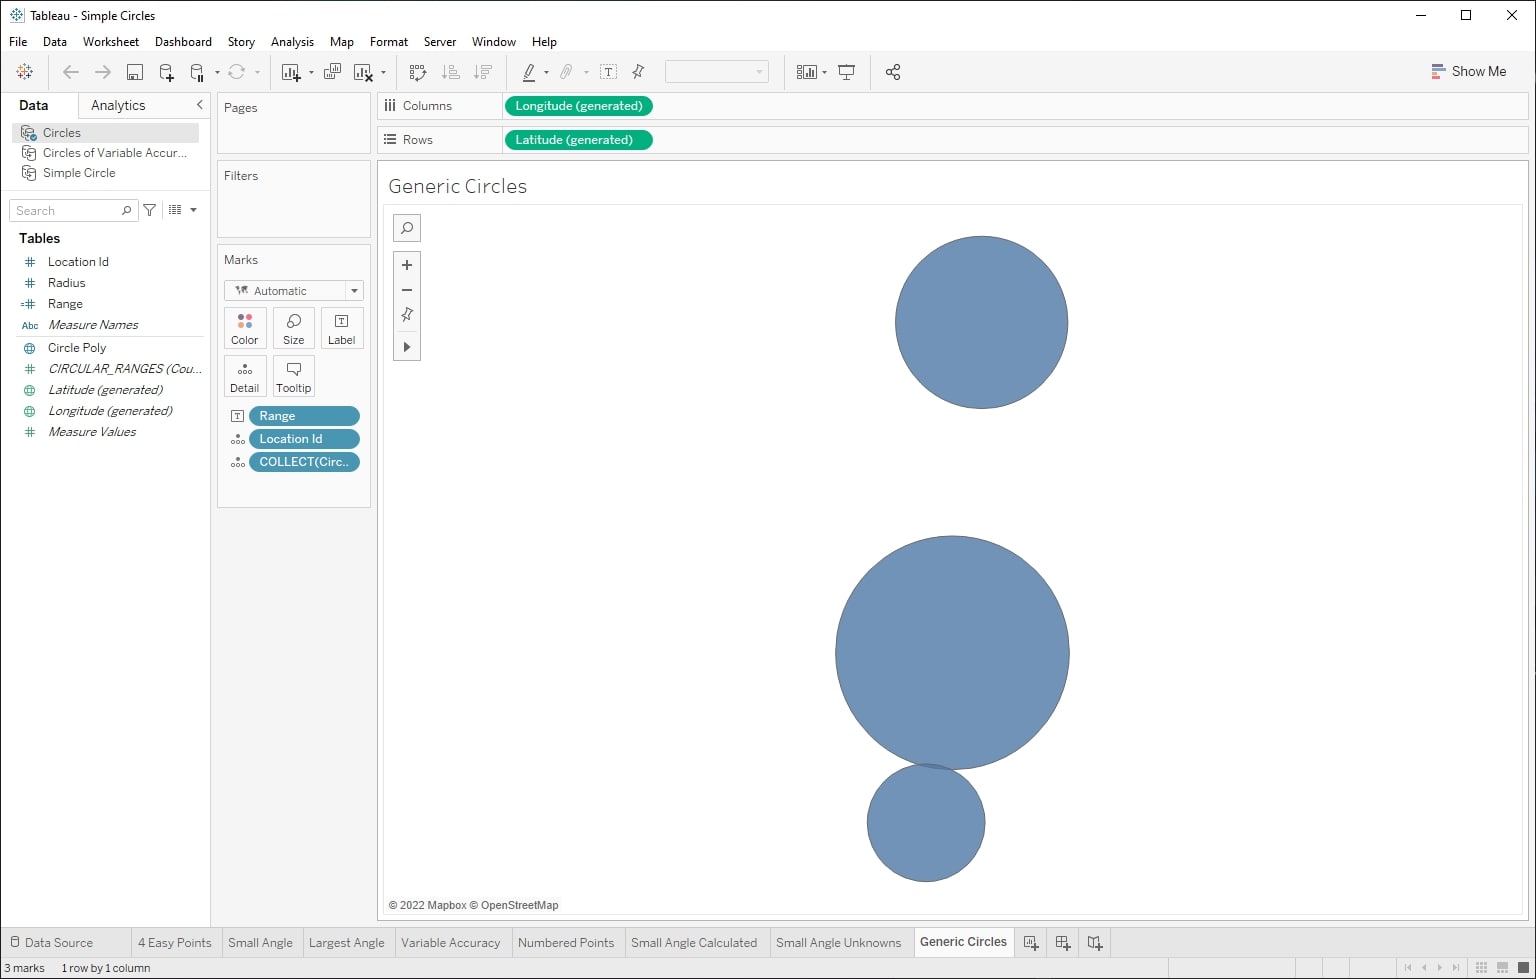
These circle objects are complete objects and can be queried in the later versions of Tableau:
Future Posts
As mentioned above, I will address the following in future posts:
- An example use case for circles in a two-dimensional plane
- Creating geospatial circle objects in Snowflake
- An example use case for geospatial circle objects in Snowflake
I hope you have enjoyed this blog post and have a reason to leverage it in your own environment. Let me know what use cases you come up with!