
This post does not cover all of the functionality of Git as there is far too much content to cover. You can find a far more comprehensive overview of all of the functionality by directly reviewing the Git documentation. The objective of this post is to introduce Git in a simpler way by explaining several core components and how they fit together.
What Is Git?
In their own words, Git is a free and open source distributed version control system. To expand on this, Git is a tool that can be used to allow multiple developers to work on the same set of files in various ways and combine their progress. Git will track changes to each file on a line-by-line basis, which allows developers to work on the same file simultaneously and address any conflicts when they choose to commit their work to the central repository.
Developers can leverage Git either through a command line interface (CLI) or through various tools that provide Git integration, such as Matillion or Visual Studio Code. This post does not directly address either the CLI or the graphical approach but instead aims to explain what the various objects/actions are.
For more detail, we’ll explain what the following objects/actions are and how they fit into the bigger picture:
- Git Repositories
- local repository
- init (aka initialise)
- remote repository
- clone
- Basic Local Development
- change
- staged change
- commit
- More Advanced Functionality
- checkout
- branch
- merge
- conflict
- Interacting with Remotes
- fetch
- push
- pull
Git Repositories
Local Repository
A local repository is a set of files on your local machine that has been initialised as a Git repository. At minimum, this will be a directory on your local machine that contains a .git subdirectory. This is often referred to as a “local repo”.
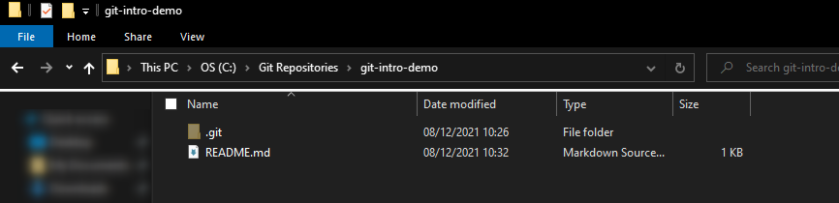
Often a Git repository will also include a README.md file, which provides an overview of its contents. Here is an example of a new local repository that only contains the .git subdirectory and a basic README.md file:
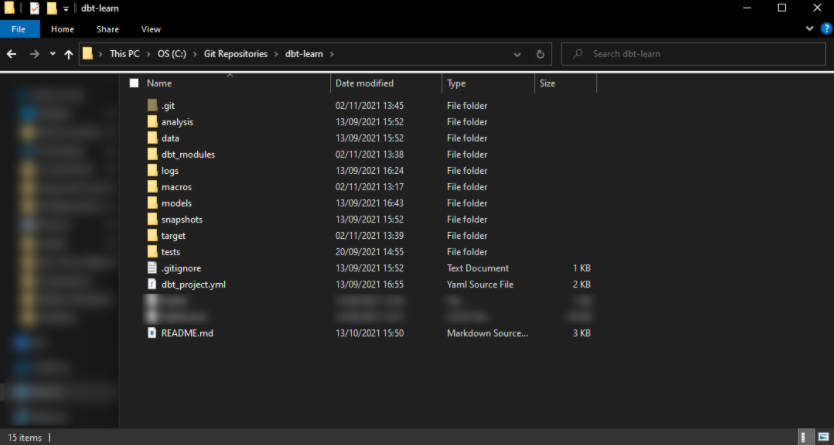
In contrast, here is an example of a local repository that contains a larger number of files and is being used for an actual project. This specific example is of a dbt project, though this is not relevant for this post:
Git Init (a.k.a. Initialise)
The git init command is used to create a local git repository. By executing this command in the command line interface (CLI), or by selecting Init or Initialise in a graphical tool that facilitates Git integration, you can convert an existing local directory into a local Git repository. More directly, the git init command generates the .git subdirectory within your given directory. Here is an example of this command being executed in PowerShell:

Remote Repository
A remote repository is a Git repository that is stored on some kind of Git hosting platform, such as GitHub, GitLab or Azure DevOps. Often, hosting Git repositories is part of the functionality of a Git hosting platform.
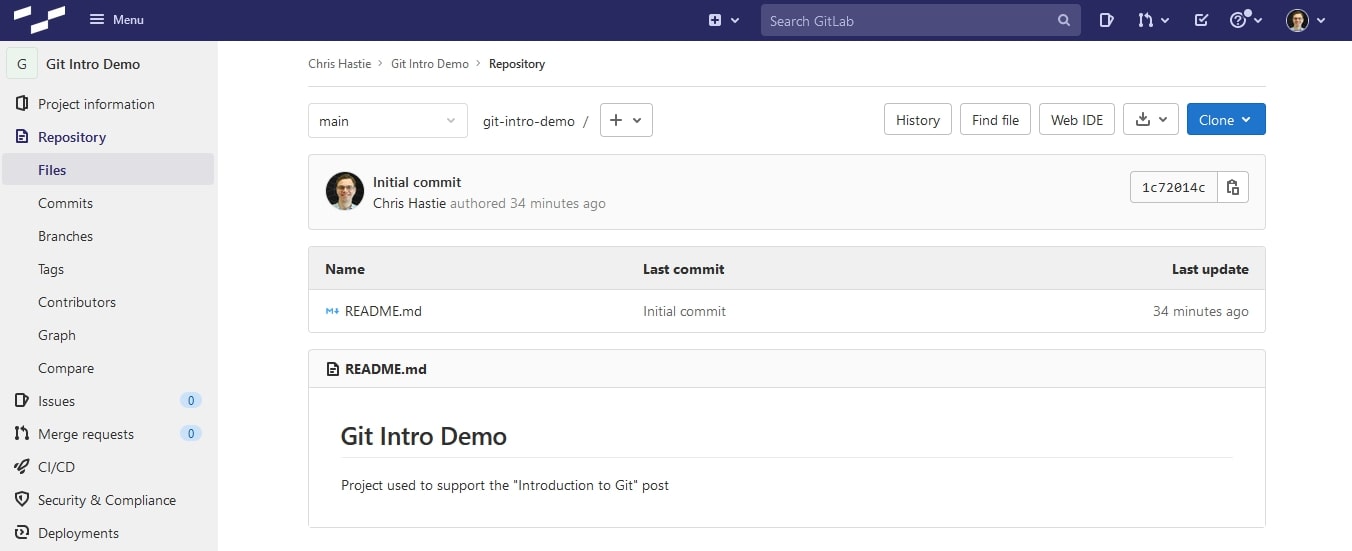
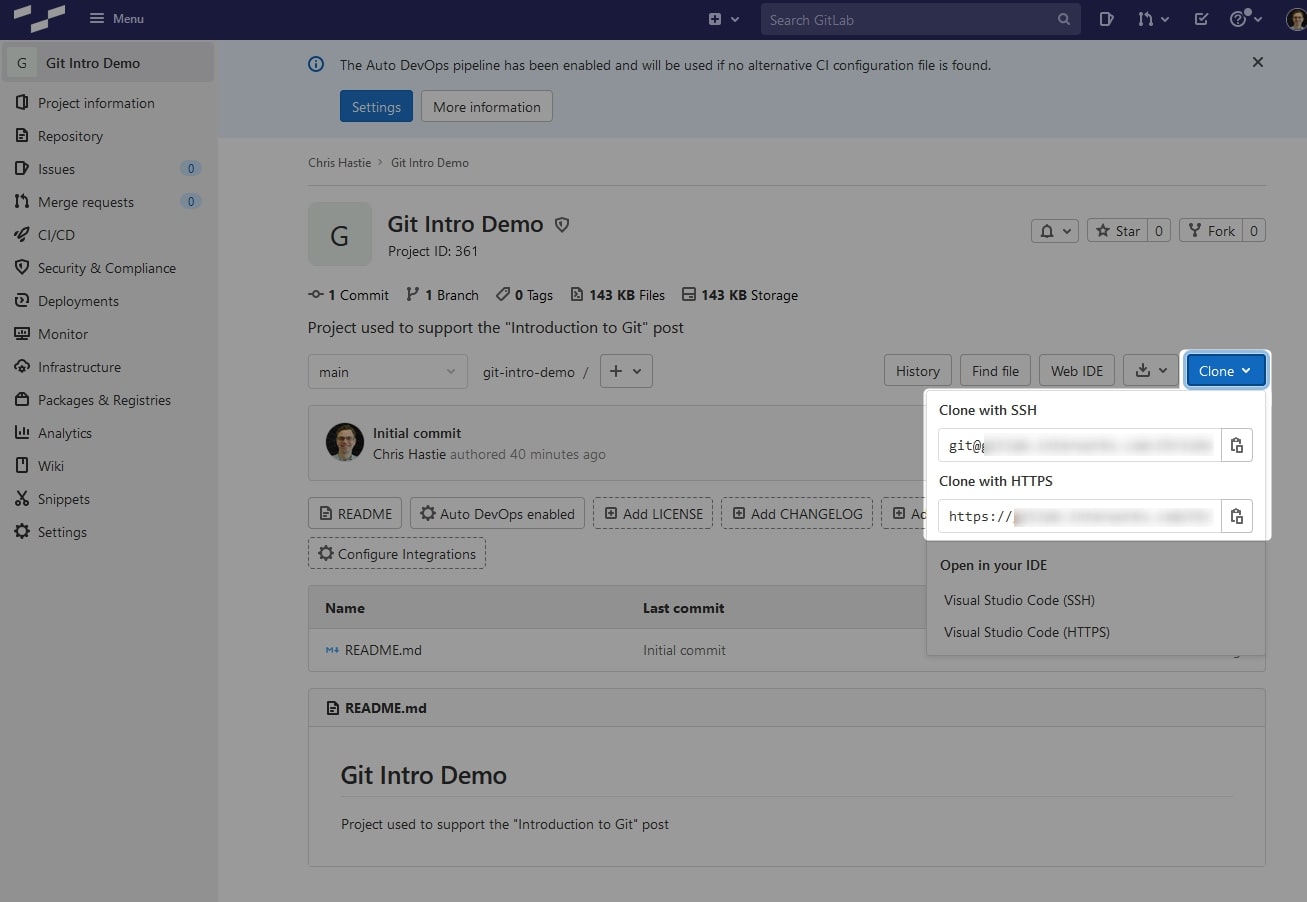
Here is the same example of the newly created repository that only contains a README.md file, this time as it appears as a remote repository in GitLab. As you can see, the contents of the README.md file is displayed as the README.md file provides an overview of the contents of the repository:
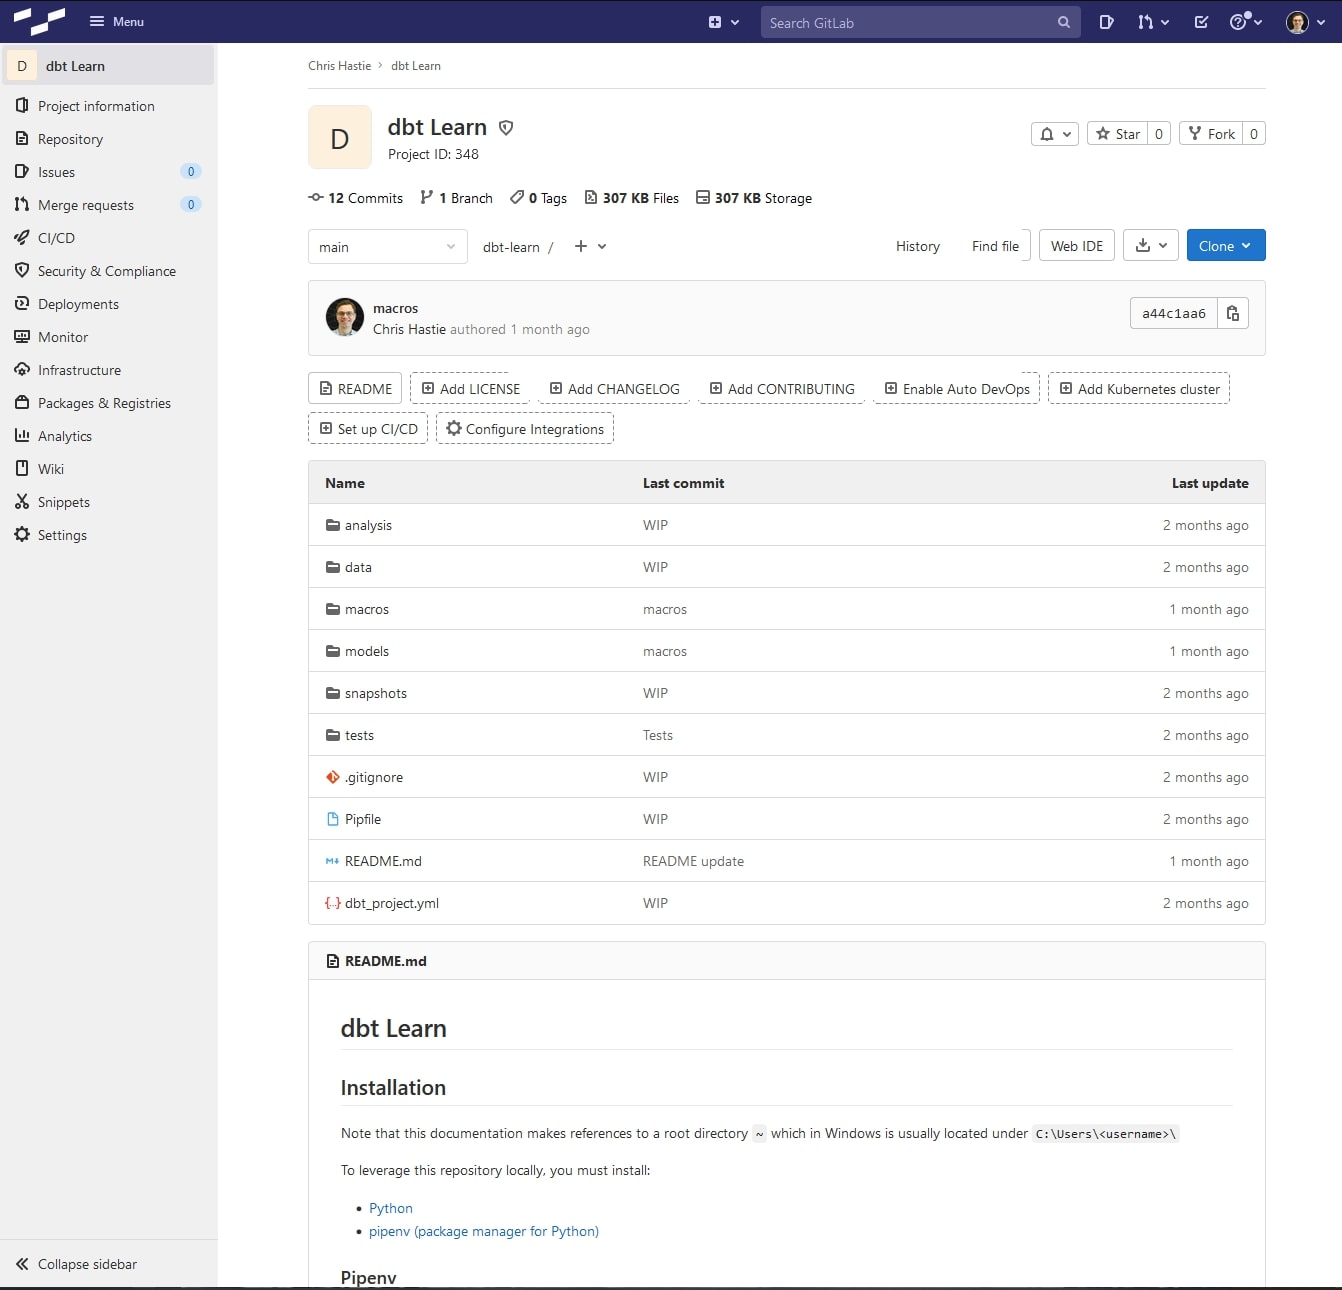
In contrast, here is the same example of a repository containing a larger number of files and used for an actual project, this time as it appears as a remote repository in GitLab:
Clone
To clone a repository is to create a duplicate on your local machine. The most common occurrence of cloning would be to download a remote repository, which creates a local repository on your machine. It is important to note that when a local repository is created by cloning a remote repository, the .git subdirectory in the local repository will already contain all the information required to connect back the remote origin. This means the local repository is already configured, so we can upload our changes when desired and download the latest version of the repository when desired.
To clone a remote repository, first identify that repository’s SSH or HTTPS URL, which is often found in the upper-right corner of your remote repository:
You can then use the git clone <URL> command to clone the remote repository to your local environment, as in the following example with PowerShell. Depending on your configuration, you may be prompted for credentials. This post does not cover this; however, I have another post that covers how to set up SSH-Agent in Windows for passwordless Git authentication.

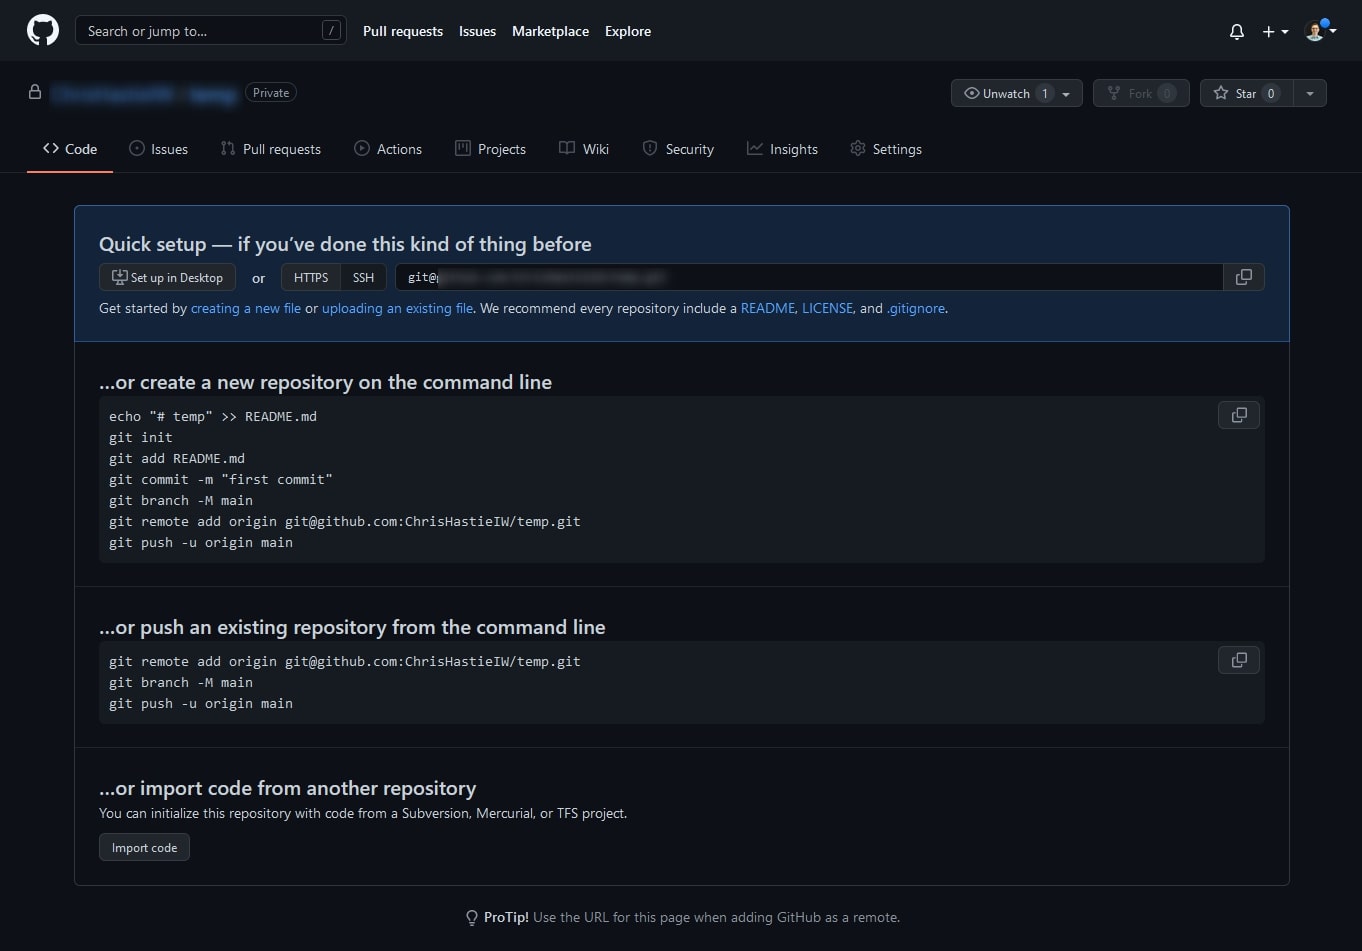
If a local directory is created using git init instead of by cloning a remote repository, you can use the git remote command to add a remote directory to the configuration of your local directory. For example, if we create an empty remote repository in GitHub, we are shown this code that includes steps to create/push an existing local repository to this new remote repository. We discuss git push further down in this post:
Basic Local Development
Change
Any time a file in a local repository is modified, those changes are tracked by Git on a line-by-line basis. For example, let’s say we have a README.md file with the following content:
# Git Intro Demo

Project used to support the "Introduction to Git" post
We then decide to update the file with several new lines, resulting in the following:
# Git Intro Demo

A new line that I have added for this demo

Project used to support the "Introduction to Git" post

Another new line that I have added for this demo
If we view this change visually using Visual Studio Code or a similar tool, we can see how Git has tracked these specific changes. As we can see, Git has identified the additional lines added:

We could instead decide to update the file a bit further by modifying existing lines, such as the following:
# Git Intro Demo

Project used for demonstrations that support the "Introduction to Git" post
We now see that Git is also able to track changes inside a specific line, highlighting how the word to was updated to become for demonstrations that. In reality, Git treats this as the entire line being deleted and replaced with a new one; however, our display is capable of identifying and highlighting the specific parts of the line:

Not all Git clients will behave this way, though. For example, GitLab will simply display this change as the deletion and addition of a line, instead of an edit:

Finally, we could go as far as deleting the line entirely and writing something new, such as the following:
# Git Intro Demo

A new line entirely

Another new line

Something more
In this case, we see that Git has identified the deletion of a line and the addition of several others:

Git is capable of tracking any number and combination of lines being deleted, modified or added within a file. This is known as tracking the changes within the file. Creating, renaming or deleting a file is tracked similarly.
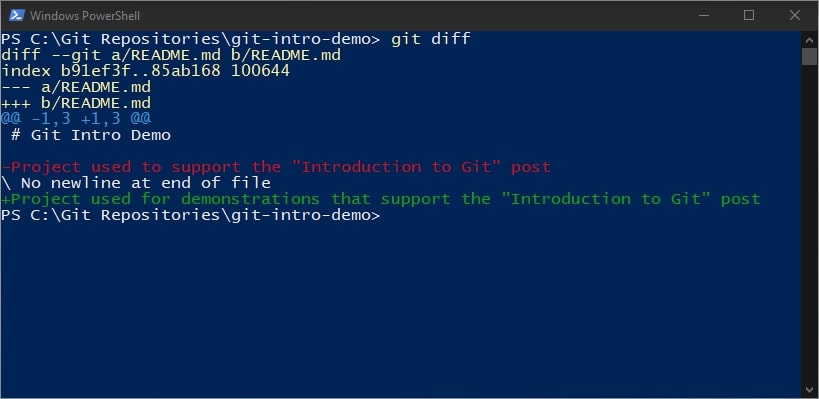
If we were not using a graphical interface and instead wanted to use the command line, the git diff command can be used to view similar information. Here is an example using PowerShell:
Staged Change
Once we are happy with the changes that have been made to files in our repository, we can look to save these changes. Saving a change requires the combination of staging it then committing it.
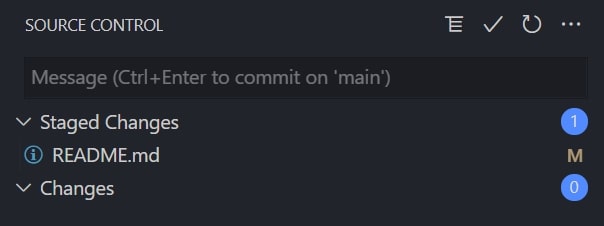
To stage a change is to add it to a list of changes that are ready to be committed. In graphical interfaces, this is often achieved with a simple plus icon or a checkbox list. Here is an example from Visual Studio Code:
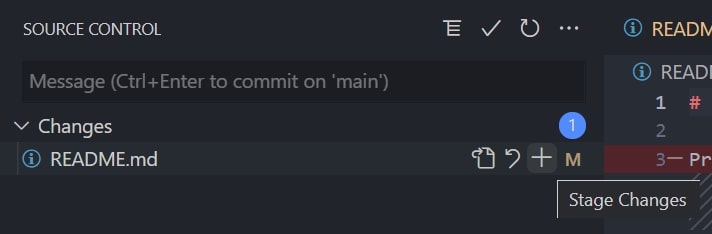
The changed file will then appear under Staged Changes:
To achieve a similar result in the command line interface, you can use the git add <filepath> command. You can stage all files using git add .
Commit
A commit is a version-controlled instance of your files. Another way to think of it is a snapshot of your files from a specific point in time.
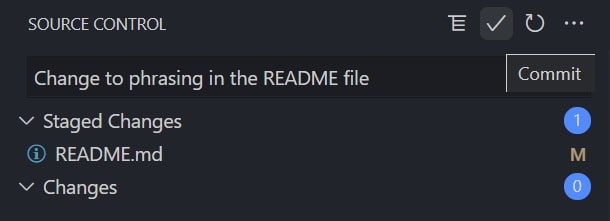
Once your changes are staged, they are ready to be committed. It is common to make changes to various files over the course of a development, staging each when ready and then committing them all in one go. When reviewing the history of our repository, we can then review the status of the files at any given commit. When committing changes to a repository, it is best practice to include a brief yet useful message to describe what changes are included in the commit. For our example, we add the comment Change to phrasing in the README file.
In graphical interfaces such as Visual Studio Code, there is usually a text box in which we can add our comment and a tick icon to execute the commit itself:
In the command line interface, we instead use the git commit -m “Comment here” command. Here is an example using PowerShell:

Once changes are committed, Git will consider these changes as recorded and no longer treat them as changes. Instead, these changes are now simply a part of the most recent version of the file and are thus part of the current “unchanged” state.
If you are making a series of commits over time, you can picture them along a timeline such as in the following image. The initial state of the repository when it was first initialised is known as the original commit:

More Advanced Functionality
Checkout
We previously discussed how each commit acts as a snapshot of your files from a specific point in time. If you want to, you can use the git checkout command to update all of the files in your local directory to match a specific commit. Another way of thinking about this is that you are restoring your local directory to match the specific point in time that has been captured in the given commit.
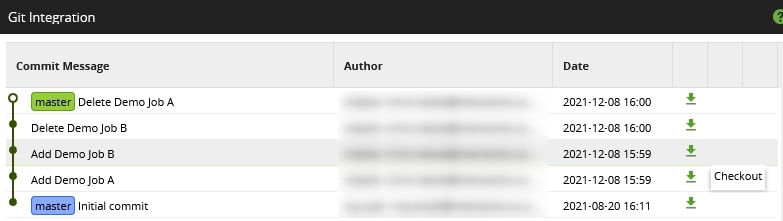
For example, here is a screenshot of the Git Integration screen from within Matillion that lists all of the commits in our repository. On the right, you can see download icons that allow us to check out a given commit. By selecting this option, we would update the files in our local repository to match this specific snapshot of time in the chosen commit:
Checking out a historic commit is an effective way to revert your local files to an earlier state. There are several reasons to do this, including:
- Reverting recent changes
- Viewing historic content of files
- Retrieving a file that was deleted through later commits
- Creating a new branch (described below) from an earlier point in time
Branch
Branches are where Git starts to get more interesting, in my opinion. Currently, we have discussed creating a repository and committing changes to it. But what if we want to have multiple versions of our files for different purposes? Maybe we have a production area and a testing area, or something more complex. For this, we can leverage branches.
At any point in time, we can split off a new branch from our current commit. Here is a diagram representing several branches that are used to facilitate a development lifecycle. The main branch represents the production environment. This is supported by a testing environment that aligns with the test branch. We then have several release branches where active development occurs:
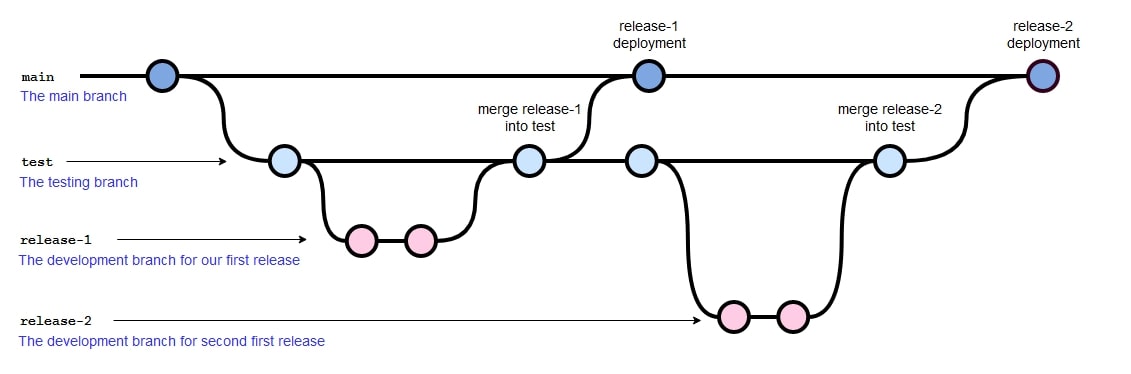
At any time, it is possible to check out a commit from another branch and thus jump between branches if required—for example, if developing content in different areas that each has its own development branch:
![]()
Merge
The diagram above shows several occasions where two branches meet. This is called a merge. A merge is used to apply commits from one branch to another branch, so another way to think of a merge could be as a deployment of code changes from one branch to another.
For example, we can see from the diagram that release-1 merges with test, and release-1 seems to disappear. In this scenario, developers have been working on release-1 and have deployed it to test, thus applying any committed changes they made to any files in the release-1 branch to the matching files in the test branch.
For another example, we can see several occasions where the test branch merges with the main branch. In these situations, committed changes to files in the test branch are applied to the matching files in the main branch.
This methodology allows developers to build/modify functionality in their code in a standalone development environment before deploying it directly to their testing environment and eventually to their production environment. Since we can merge branches when needed, we don’t need to manually keep track of everything that has been committed during development, and thus do not need to remember every change or recreate every commit in order to redeploy it to testing, production or any other environment.
Conflict
Since we have the capability to merge two branches and these two branches may both be active, it could be possible that each branch contains committed changes to the same file, or even to the same line of a file. Consider the scenario in the following diagram,where we can see two different branches modifying the same file in conflicting ways:
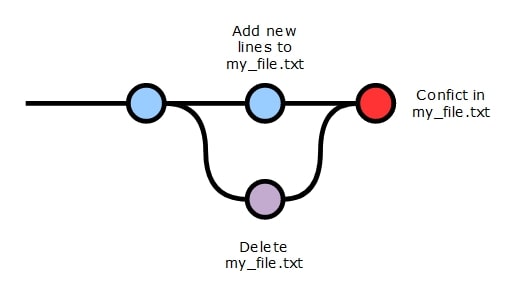
When we attempt to merge these two branches, we face a conflict. We cannot add lines to my_file.txt at the same time as deleting it. This does not make sense, as both commits cannot be applied simultaneously. When this occurs in Git, we are offered a choice on which version of the file to keep in the newly merged branch. In Git terminology, by choosing which commits we wish to keep, we are “resolving” the conflict.
It is worth noting that changing the same file in multiple branches will not always cause a conflict because Git tracks changes to files vs. tracking the exact file contents. It is possible that the sets of changes in the two branches don’t clash with one another. For example, one branch may contain modifications to the first row of a file whilst the other branch may contain modifications to the tenth row of a file. These changes do not contradict each other from Git’s perspective and are unlikely to result in a conflict.
Interacting with Remotes
Fetch
When developers are working with files in a local repository, it is important to be able to update those local files with any new commits that exist in the remote repository. Retrieving these updates is achieved using a combination of a git fetch and a git pull.
The purpose of a fetch is to retrieve the collection of changes that have been committed to the remote repository. Files in the local repository itself are not modified, though executing a fetch will allow the user to determine whether their local files are outdated and understand whether a pull may be necessary.
Pull
The purpose of a pull is to retrieve the collection of changes that have been committed to the remote repository and integrate those changes with the files in the local repository. This goes beyond simply fetching the information and actually applies the changes to local files, thus bringing the files in the local repository up-to-date with the equivalent files in the remote repository.
It is possible that a pull could trigger a conflict if a file in the remote repository has been modified in a way that conflicts with a local change to the same file. If this occurs, Git will request guidance from the user on which version of the file to keep, similar to when a conflict arises in a merge.
Push
The purpose of a push is to upload committed changes from the local repository into the remote repository. Another way to think about this is as a deployment of local changes to the remote repository.
The standard practice is to always perform a fetch before performing a push, often with the fetch resulting in a requirement to pull before pushing. This ensures that conflicts are resolved locally before pushing to the remote.
Credit
The Git flow diagrams in this post were made using this gist as a starting point.
I hope you found this post to be a useful introduction to Git and its basic functionality. Git is a powerful tool for any team of developers, and I would recommend giving it a try if you are developing your own code-based products or flows.