This week I had the pleasure of speaking in Boston at EACUBO with a friend and business associate, Ted Curran (Executive Director of Finance at Carnegie Mellon University). EACUBO aims to promote high-quality, professional development opportunities to higher education officers. This, year Ted and I had the opportunity to share how data analytics helped transformed decision making at CMU. The conference was great, and I had a wonderful time discussing data analysis with all those who attended.
One attendee had a specific question surrounding Tableau: what options are available for enforcing row level security? This isn’t an uncommon question. As of Tableau 7, most users had one of two options:
- Implement security tables in the data layer. In the workbook, leverage Tableau’s User Functions to determine who is logged in at any time and pass that user to the underlying connection.
- Use Tableau’s Create User Filter option to assign permissions manually for any dimension in the workbook.
Option 1 is complex, but can be very powerful. This is especially true when your number of users reaches the hundreds and thousands. Its implementation is out of the scope of this post, but we can help guide you in that process if you feel this is the direction your organization needs to go. Option 2, on the other hand, is very simple and straightforward to implement which you’ll see below. Its biggest limitation is the fact that your permissions are set for the workbook, but not the data source to which you’re connected.
Let’s assume your organization has one primary data source (can be a live database connection or an extract) that is shared among a set of workbooks through Tableau’s Data Server. Each workbook provides a different view of your data, but all are accessed by the same group of users and should be secured in the same manner. It would be nice if you could simply apply the user filter to the single data source and have the permissions be inherited among all the workbooks which utilize it. In Tableau 7, this is not possible. All user filters are set on the workbook itself. If you wish to implement a change in your security framework, it will require an update to each and every workbook where you’ve used it. In Tableau 8, the good folks at Tableau have ensured that will no longer be necessary.
Creating a User Filter
I’ll be using Tableau’s Superstore data set to demonstrate the process of creating a user filter. Let’s assume we have a simple visualization showing sales across the country, and we’d like to secure it by region. When a manager logs in to Tableau Server in order to access the view, he or she should only see the regions he or she has assigned permissions to see.
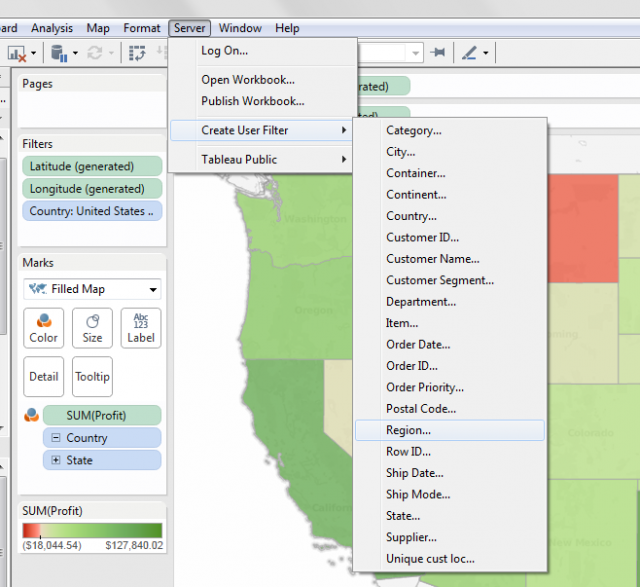
Get started by navigating to the Server -> Create User Filter menu and select the dimension you’d like to secure. In our case, it will be the region dimension. If you’d like to secure more than one dimension, you’ll simply repeat this step for all other dimensions you wish to secure. You’ll be asked to log into Tableau Server, and if you have implemented sites, select the site which you’ll be publishing to.
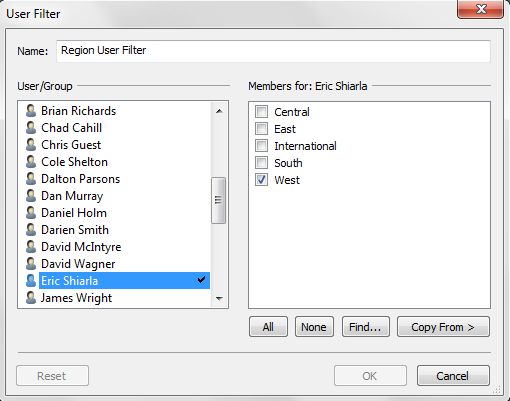
Next, you’ll come to the User Filter dialogue box. From here, you can select the user or groups you wish to secure on the left and select the members of the dimension that user or group should have access to on the right. You can set permissions for multiple users or groups from within this dialogue box and when saved each will be captured. I’m based in Los Angeles so I’ll set the permissions for myself as West only.
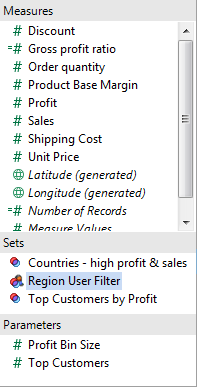
Click OK when you’re ready to save. You’ll notice that Tableau creates a new set for the user filter you just created.
If you apply this set to the filter card all the permissions you’ve set will be enforced. In my case, I’ve declared my user can only see the West region. As soon as I apply the set to the filter card my map filters to West region. If you’d like to test the user filter on other users Tableau offers the ability to impersonate another user using the Filter as User menu located in the bottom right of the workbook (see below).
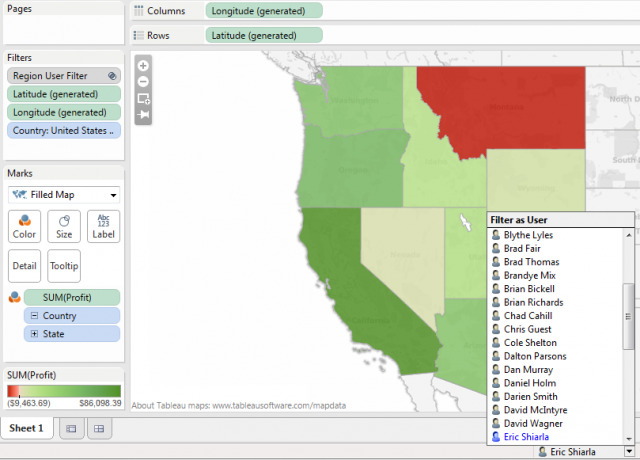
If you’re working in Tableau 7, this is the point where you’d publish your workbook and repeat the same steps above for every additional workbook you wish to secure. In Tableau 8, we can take this one step further.
Edit Data Source Filters
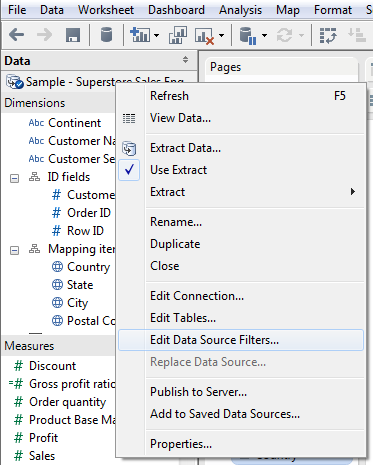
One of the lesser known additions in Tableau 8 is the ability to add filters directly to a data source rather than applying filters to specific sheets within the workbook. Simply right click on any data source in the data window (or access the data source from the Data menu) and you’ll find the option to Edit Data Source Filters … right below the Edit Tables option.
You’ll next come to a dialogue box which allows you to add as many filters to the data source as you’d like, including the Region User Filter set which we just created.
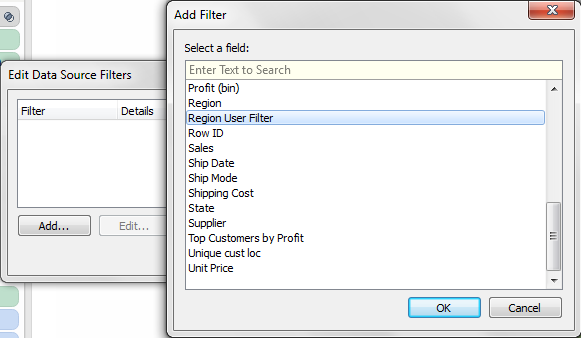
Once you’ve added the filter, you’re ready to publish it to server for workbooks to centrally access. If you’re unfamiliar with this process, Tableau has some good documentation found in their online help. Once your data source is published, any workbook accessing the data source by connecting to Tableau Server will automatically inherit all the row level permissions you’ve set in the user filter – including desktop authors as well. If a region manager has Tableau Desktop and wishes to create a workbook of his own he can use the data source you’ve published to server and will only have read access to the data he has assigned permissions for. He won’t be able to impersonate other users through the Filter as User menu since the user filter was applied to the data source and he’s not the data source author (you were).
That’s it for now. If you’d like to know more about implementing row level security or have any questions in regards to any of the steps above feel free to leave a comment and we’ll get you headed in the right direction.

