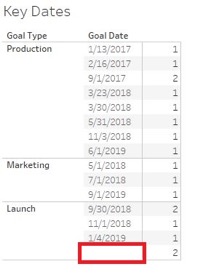
Recently, dashboards I’ve made for a client feature several dates in grid-like views. Sometimes, the date values are null, and while these null values are expected, the client prefers to see blanks in lieu of “Null” on their visualizations. After some troubleshooting, I figured out a quick trick with data type settings to make this happen.
In the example below, I am looking at a summary grid of how many key Production, Marketing and Launch dates I have for a company’s products. I don’t have Launch dates yet for a couple of records in my data, so I see Null instead of an actual date:
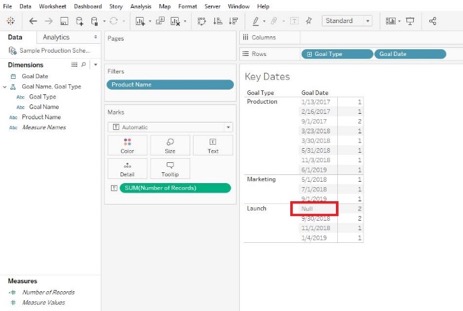
To clean this up and change Null to a blank, follow the steps below.
Note: This trick will not work with published data sources. Additionally, it may not work with certain live connections (e.g. Excel). In those cases, an extract is recommended.
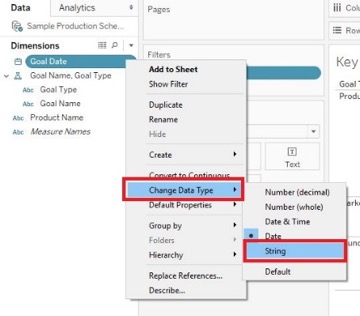
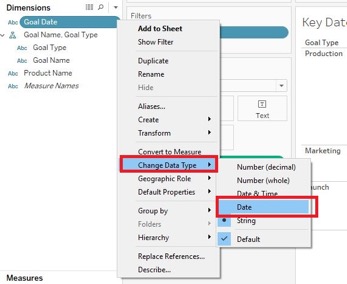
First, navigate to the data pane on the left side of the workbook, right-click on the date field (Goal Date), scroll down to Change Data Type and select String:
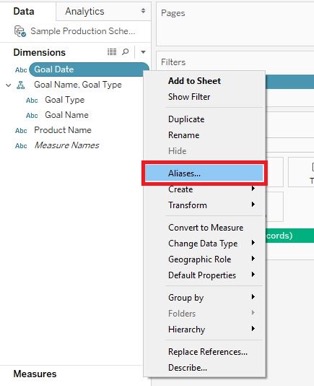
Return to the data pane, right-click on the date field again, scroll down and select Aliases. Once you select Aliases, the Edit Aliases dialog box will appear:
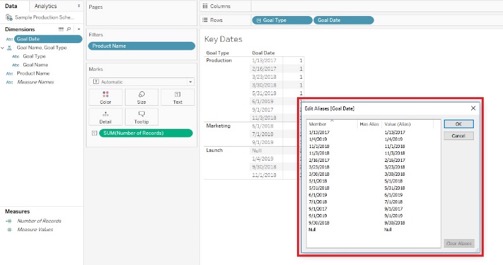
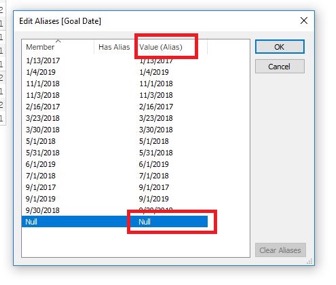
In the Edit Aliases dialog box, scroll down to the Null value, double-click Null in the Value (Alias) column.
Note: Aliases can be created for members of discrete dimensions only. They cannot be created for continuous dimensions, which include continuous dates, or measures.
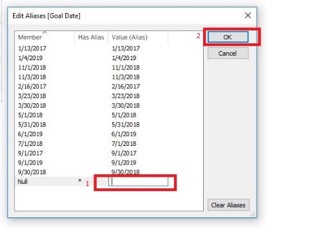
Delete the Null text, press the spacebar once and click OK:
Return to the data pane on the left side of the workbook, right-click on the date field (Goal Date), scroll down to Change Data Type and select Date:
Voila! The desired blank value remains:
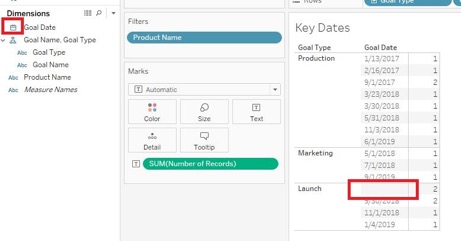
For a little best practice bonus, sort your date values so the blanks are at the bottom. Generally, I like to set up a default sort for the date field. As a result, I only need to set up the sort adjustment once, rather than every time I drag my date field into a new worksheet:
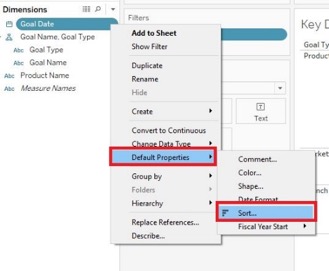
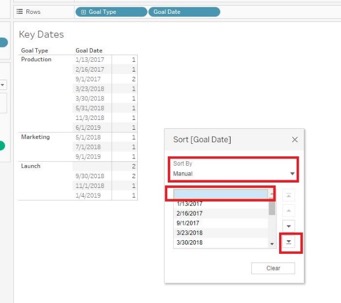
Return to the data pane, right-click on the date field again, scroll down and select Default Properties > Sort. Once you select Sort, the Sort dialog box will appear. Select Sort by > Manual, select the blank value, and click on the down arrow icon with a line underneath it. This will move the blank value to the bottom of your date sort:
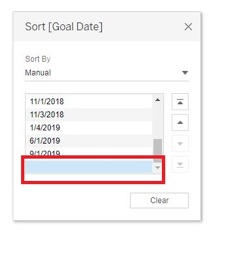
To see the new sort in place, click X on the Sort dialog box:
