
I was recently lucky enough to present at the Berkeley Tableau User Group about how to create a viz that will keep people coming back. I’ll be writing more about this in a later post, but one of the steps I talked about was making your viz special.
Seasoned Tableau pros have seen dozens of dashboards that use the default color scheme, formatting and fonts, so anything you can do to help your viz stand out by making it seem new and unique will be sure to increase traffic to your viz. One easy way to do this is by using custom maps. While there is certainly nothing wrong with using the default map included with Tableau, opening yourself up to the nearly endless possibilities available to you through OpenStreetMaps can do wonders for your dashboard. The best part about this is that it’s very quick and easy to do, as I’ll explain below.
Our starting point is going to be a knowledge base article from Tableau’s website. For anyone that wants to learn more about how to bring in maps that require the use of an API key or how to fine tune their new mapsources, this is a great resource.
Create a New Mapsource
The first step towards creating your new mapsource is to copy the following text into your favorite text editor (i.e. notepad, Sublime text or my personal choice of Notepad ++):
<?xml version="1.0" encoding="utf-8"?>
<mapsource inline="<boolean>" version="8.1">
<connection class="OpenStreetMap" port="80" server="<server-url>" url-format="<url-format>" />
<layers>
<layer display-name='Base' name='base' show-ui='false' type='features' request-string='/' />
</layers>
</mapsource>
Change the Boolean
I know this looks intimidating and like we’re going to have to do some scary coding, but I promise we’re just going to be copying and pasting. No coding necessary! There’s only three things for us to change. The first of which is . From the Tableau website: Replace the with either a true or false value.
Here are some explanations:
- A true value allows Tableau Desktop to save the configuration specified in the TMS file with the workbook. Use this value if your workbook is being published to Tableau Online or Tableau Public.
- A false value requires Tableau Desktop or Tableau Server to have access to the TMS file saved in the Mapsources folder to display the maps from your map server.
Unless you have a compelling reason to do otherwise, I would recommend changing this to true. It saves a lot of hassle when you’re publishing this out to either your internal Tableau Server environment or Tableau Public.
Change the Map URL
The last two things that we’re going to change have to do with the map URL. Again, from Tableau:
: (Required) Replace with the URL of your map server.
: (Optional) Replace with additional URL fragments that your map server requires. This might include the following tags:
- {Z}: The {Z} tag indicates the zoom level. A zoom level of 0 displays the entire world in one map tile. The TMS will fetch map tiles up to level 16.
- {X} and {Y}: The {X} and {Y} tags indicate the map tile coordinates.
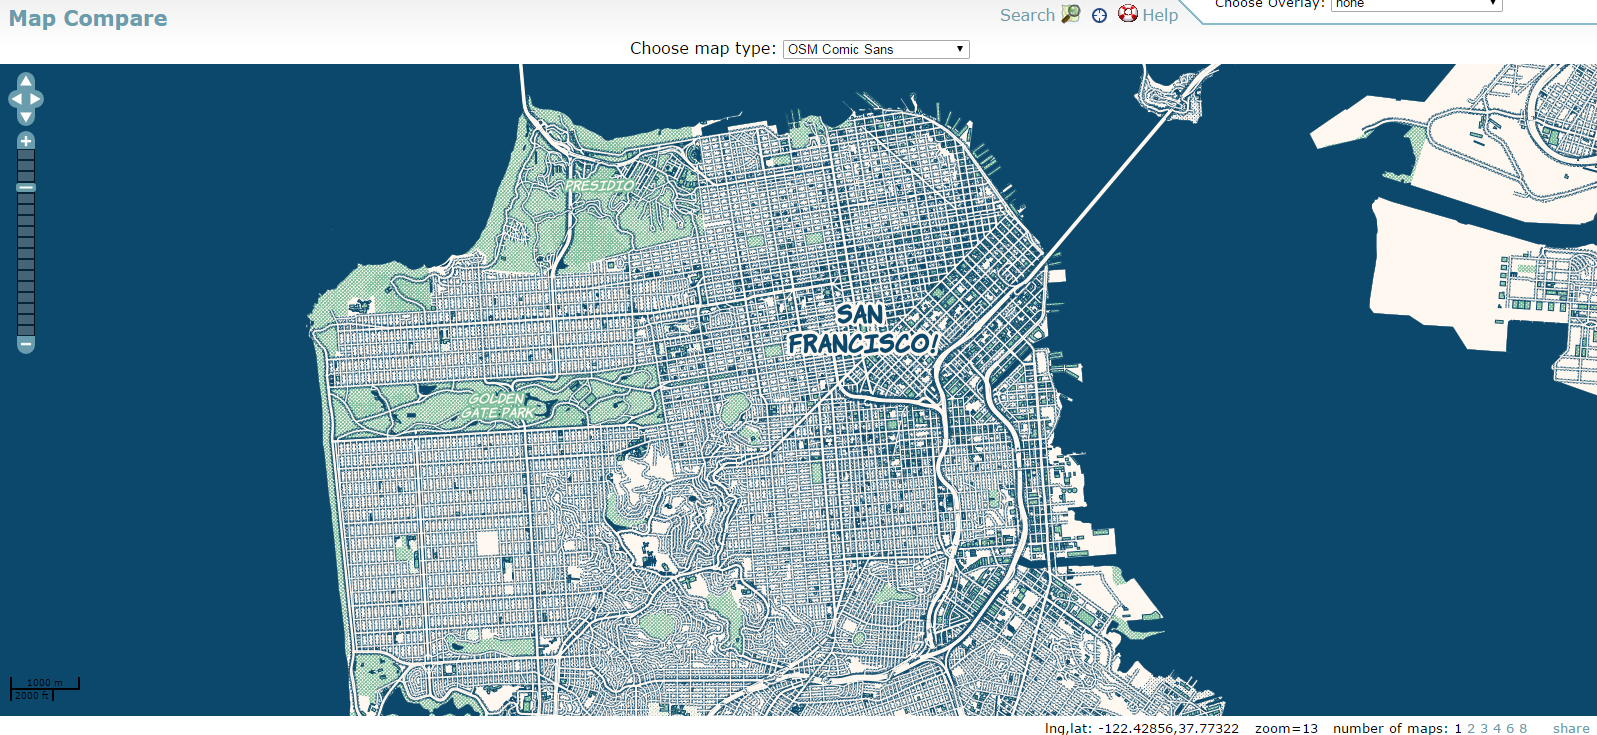
This sounds complicated! How do we figure out the URL of a map we find online? With OpenStreetMaps, it’s actually quite simple. First, open up Chrome and find an OpenStreetMap you’d like to use. You can find many OpenStreetMap options on http://mc.bbbike.org/, a great map comparison site, including the OSM Comic Sans that we’ll use here.
Once you’ve found a map you like, right-click somewhere in the map and select Inspect Element. Something like this should pop up for you:
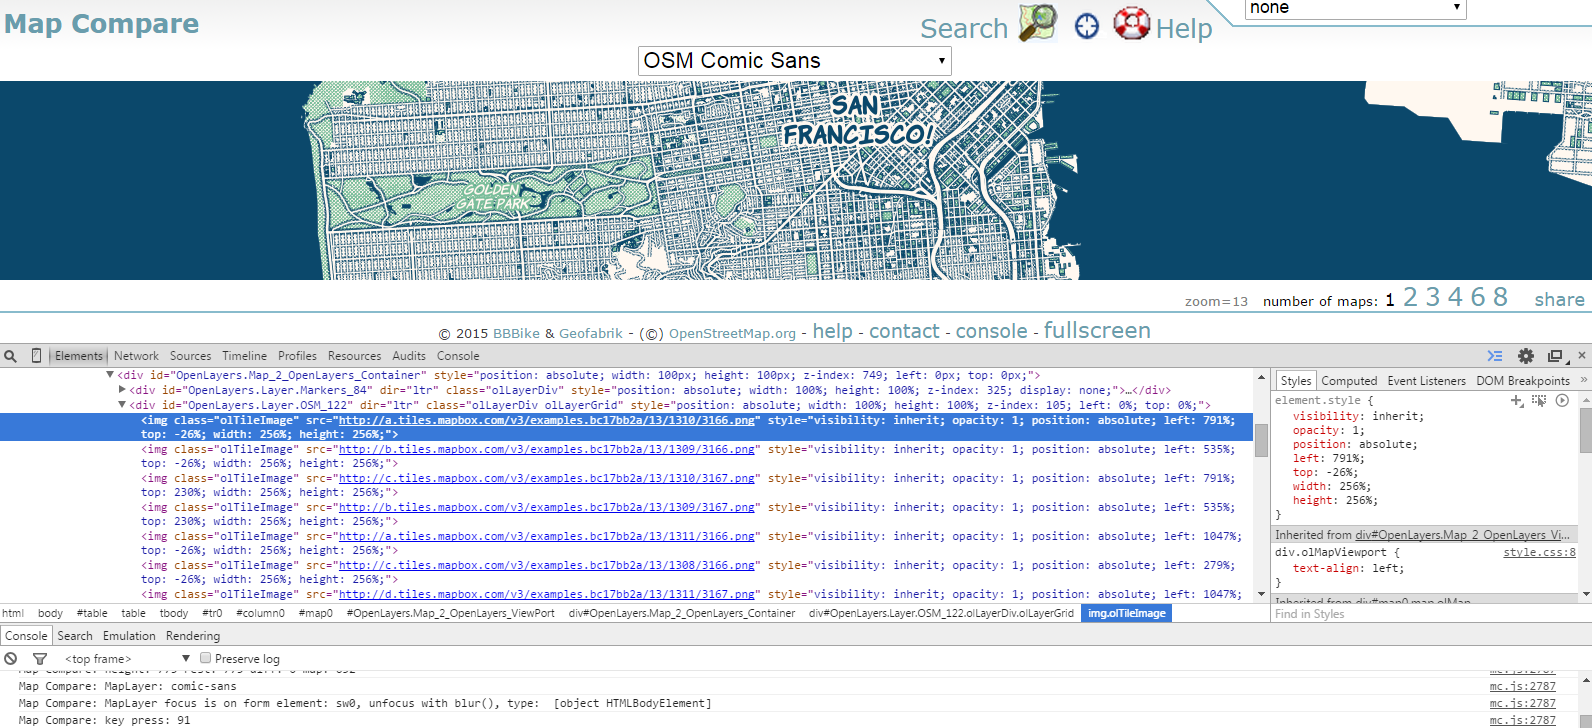
There’s a whole lot of mess here, but all we’re looking for is the src= portion that gives us the Server URL and URL Format. The Server URL is everything up through the .com, and the URL Format incorporates everything after the dot .com. You can double-click on the hyperlink to highlight it, then copy it and paste it into the text editor, putting something like http://a.tiles.mapbox.com in for our Server URL and something like /v3/examples.bc17bb2a/13/1310/3166.png into our URL Format.
Change the Numbers
The last part of text editing we have to do involves changing those three numbers at the end of our format to the {Z},{X}, and {Y} that they represent, so your Server Format should eventually look like /v3/examples.bc17bb2a/{Z}/{X}/{Y}.png
Now we’re done with our text editing! The file as a whole should look like this:
<?xml version="1.0" encoding="utf-8"?>
<mapsource inline="true" version="8.1">
<connection class="OpenStreetMap" port="80" server="http://a.tiles.mapbox.com" url-format="/v3/examples.bc17bb2a/{Z}/{X}/{Y}.png" />
<layers>
<layer display-name='Base' name='base' show-ui='false' type='features' request-string='/' />
</layers>
</mapsource>
Save and You’re Done!
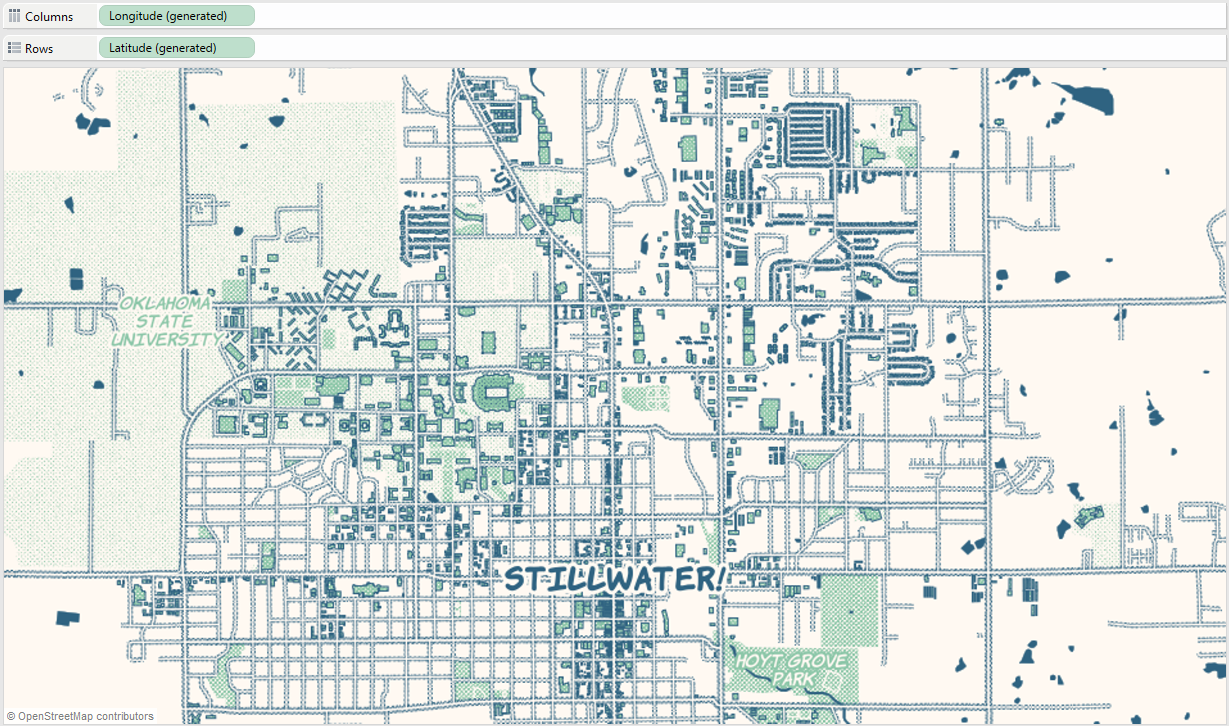
We’re going to save this file to in our My Tableau Repository/Mapsources folder. On a PC, this is typically under My Documents. The name you save it as will be the name that populates in Tableau, so choose wisely. Be sure to save it as a .tms file, not .txt. (If you do save it as a .txt, you can always change the extension later). The next time you open up Tableau, this map will be available to you by clicking Maps from the top, hovering over Background Maps and selecting your new map. We did it! It even makes Stillwater look cool!
I hope this helps to make your dashboards more unique and makes your vizzes stand out from the crowd.