Please note that Portals for Tableau are now officially known as Curator by InterWorks. You can learn more at the official Curator website.
You’ve got a Portal for Tableau. You’ve got Dataiku. You’ve also got an ingenious idea to use some of the data science from your awesome new Dataiku project on your portal’s frontend. For instance, you want to provide an interactive form to predict the weather at a user’s location, or maybe something actually useful like which traits your future baby with a specific celebrity will have.
You think to yourself that Dataiku provides a REST API, so this should be doable. You realize for security reasons that you’ll need the backend of the portal to do the heavy lifting of connecting to Dataiku’s API instead of pure AJAX. However, this means you need to write a fairly complex script using the portal’s integration feature to act as that middleman between the frontend and Dataiku. You’ve mastered frontend development, but writing a Python script to interact with an API is daunting.
This isn’t just true with Dataiku. You can replace it with any number of other systems that provide a REST API. Building out scripts to act as middlemen is still just as daunting.
Portals for Tableau Make It Easier
Portals for Tableau now provides API relay functionality to make this process easier. You’ll still need someone with frontend development chops to communicate with the API relay and process the results, but having the portal make calls to your desired API is much simpler.
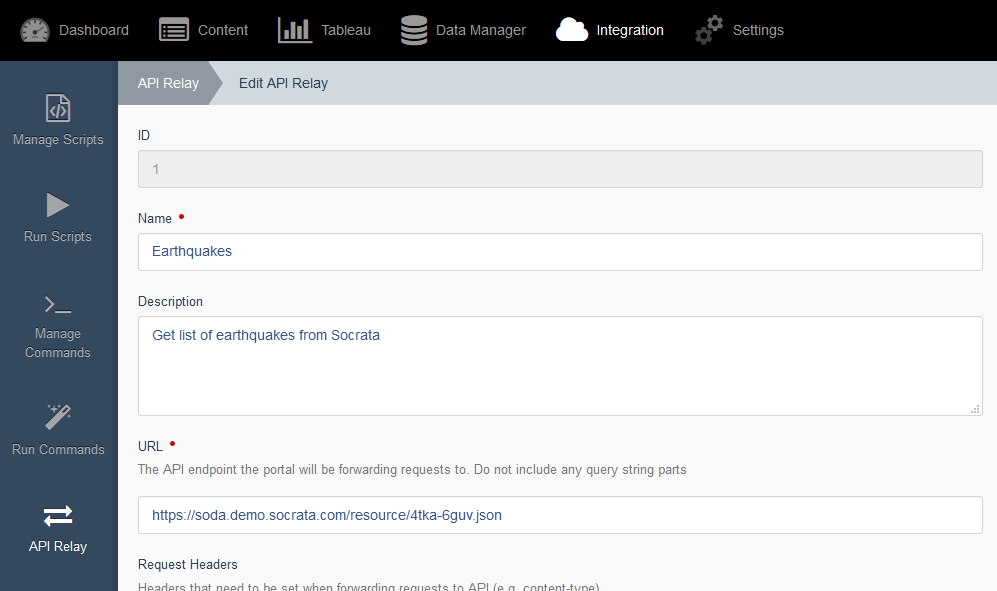
To add a new relay, log in to your portal’s backend, navigate to Integration > API Relay, and click the New API Relay button.
From there, you’ll enter a name and description for the relay. Next, you’ll specify the target API’s URL.

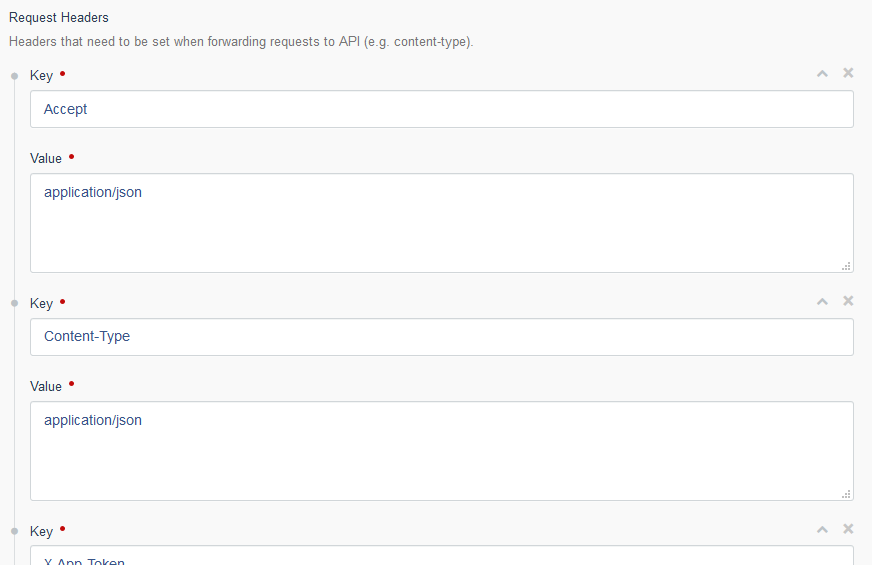
If the target API requires any request headers, you can specify those in the Request Headers sections by specifying each header as a key/value pair.

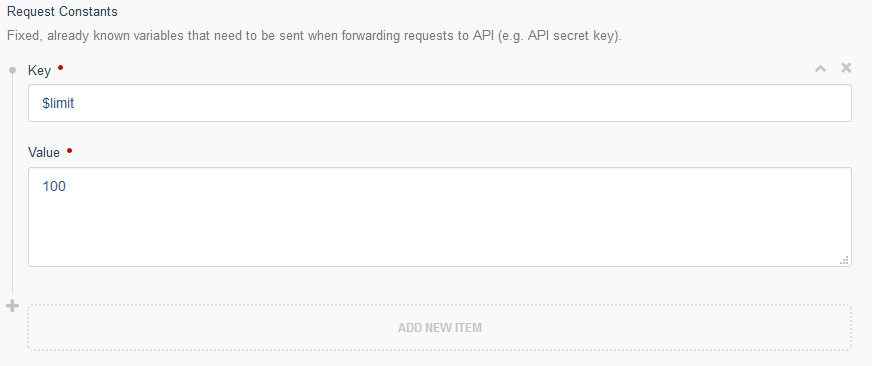
If the target API requires any request variables that are fixed, already known and/or need to remain a secret (such as keys, token, etc.), then those need to be specified in the Request Constants section. Each variable will be added as a key/value pair.

If the target API has any other request variables, those need to be specified in the Request Variables section. You’ll only need to set the request variable’s name, since you’ll pass the value in at the time you use the relay. Additionally, you can specify whether each variable is required or optional.

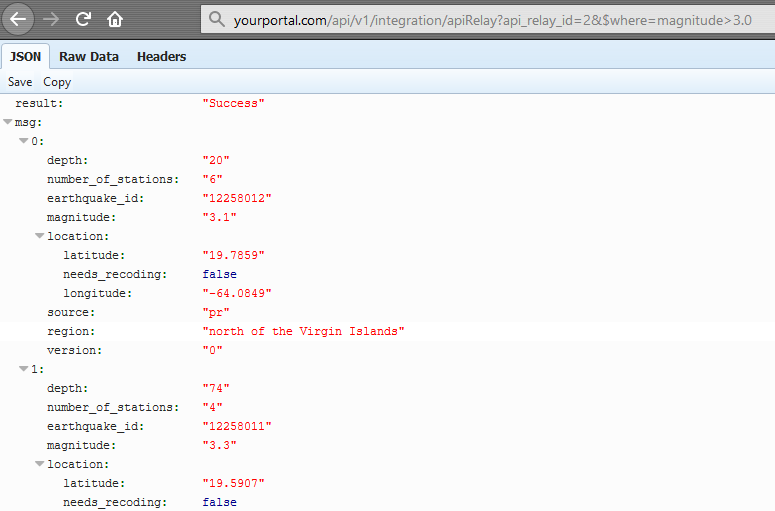
Once you create the API relay record, you’ll see an example link you can hit from your frontend code, which will execute the relay.

Here’s an example of the response you’ll get when using the API relay:


