
This blog post is Human-Centered Content: Written by humans for humans.
Why This Is Important
As my friend Josias likes to say: “Sigma has given us the keys to the castle.” When I heard you could integrate Python notebooks directly into Sigma, I knew I had to give it a try. The customizability that comes with Python coding put directly into the hands of data‑app developers is a powerful and exciting prospect indeed — especially when used in tandem with Sigma’s other amazing features. As a data‑science guy, my head is swimming with the possibilities: Forecasting, churn predictions, complex logical determinations and more.
Okay, so this is exciting, but how do we get started?
The Setup
There are two sides of the equation we need to set up to make this work. The Sigma Administration side and the Snowflake side. Keep in mind that to complete the setup tasks you will need admin permission in Sigma, and a level of permission in your snowflake instance which allows you to create stored procedures. If you have a different data warehouse provider these steps will vary. These steps are no longer strictly necessary to run Python code in Sigma, but they are still recommended if you want full control over packages and execution.
Let’s start with the data warehouse.
Snowflake
If you look at the Sigma documentation there is a lot of helpful information, but the most important step is to create the Python stored procedure. Here is the necessary code:
CREATE OR REPLACE PROCEDURE RUN_PYTHON_CODE(
    "PY_CODE" VARCHAR(16777216),
    "ARGS" VARCHAR(16777216) DEFAULT '{}'
)
RETURNS OBJECT
LANGUAGE PYTHON
RUNTIME_VERSION = '3.11' -- You can change this with your preferred version
PACKAGES = (
    'agate',
    'arrow',
    'dill',
    'fiona',
    'modin',
    'matplotlib',
    'nltk',
    'requests',
    'scipy',
    'scrapy',
    'snowflake-ml-python',
    'scikit-learn',
    'spacy',
    'sympy',
    'textblob',
    'tabulate',
    'urllib3',
    'pygments',
    'snowflake-snowpark-python'
) -- feel free to edit these packages as you see fit
HANDLER = 'run'
EXTERNAL_ACCESS_INTEGRATIONS = (py_script_access_integration)
EXECUTE AS CALLER
AS $$
import json
import textwrap

VERSION = "1.0"

def run(session, PY_CODE, ARGS):
    # Wrap the input script to evaluate it as Python code
    wrapped_script = f'''
import contextlib
import io
import traceback
from pygments import formatters, highlight, lexers

stdout_buf = io.StringIO()
with contextlib.redirect_stdout(stdout_buf):
    try:
        exec(code)
        __stdout = stdout_buf.getvalue()
    except Exception as e:
        tb_text = "".join(traceback.format_exc())
        lexer = lexers.get_lexer_by_name("pytb", stripall=True)
        formatter = formatters.get_formatter_by_name("terminal256")
        tb_colored = highlight(tb_text, lexer, formatter)
        __executionError = {{'summary': str(e), 'cause': tb_colored}}
'''

    # Define a namespace for script execution
    json_args = json.loads(ARGS)
    namespace = {'session': session, 'code': PY_CODE, 'args': json_args}

    # Execute the wrapped script
    exec(wrapped_script, namespace)

    # Retrieve and return the result
    result = {'version': VERSION}
    if '__stdout' in namespace: result['stdout'] = namespace['__stdout']
    if '__executionError' in namespace: result['executionError'] = namespace['__executionError']
    return result
$$;
Run this in the Sigma Writeback schema you plan to use with Python. Make sure to leave the code as is! With two exceptions:
- You can alter the packages section to add or subtract libraries you want available in your Python workbook.
- If you are not planning to use any APIs you can set EXTERNAL_ACCESS_INTEGRATIONS = ()
You will also want to grant permission to use the stored procedure to the Snowflake role associated with the User for your Python enabled connection:
GRANT USAGE ON PROCEDURE RUN_PYTHON_CODE(VARCHAR, VARCHAR) TO ROLE <role>;
GRANT USAGE ON FUTURE PROCEDURES IN DATABASE <write-back-database> TO ROLE <role>;
GRANT USAGE ON FUTURE PROCEDURES IN SCHEMA <write-back-database>.<write-back-schema> TO ROLE
I recommend this approach if you want to get up and running as soon as possible. If you are planning to use APIs or other external integrations, you will need to define those in a network rule and subsequently an external access integration. You will likely need higher levels of permission in Snowflake to be able to do this. You can find more information about that process here.
Now all you need from Snowflake is your user information. This is the information ties to the Snowflake user that ‘logs in’ on behalf of Sigma, likely you or whoever created the user should have this information. Assuming you are using a key pair authentication you will also need a fingerprint based on the RSA key associated with the user. If you have the proper permission, you should be able to find this by running this code in Snowflake:
DESCRIBE USER <user>;
Now with our stored procedure created in the Sigma writeback schema, and authentication information in hand, we are ready to begin creating the python enabled connection in Sigma.
Sigma
On the Sigma side things are relatively straightforward. No more code until we are coding in Python!
I recommend making a new connection dedicated to Python first as best practice, then once you know everything is working properly you can go back and enable an existing connection if you would like to:
- Head to the administration view in Sigma:
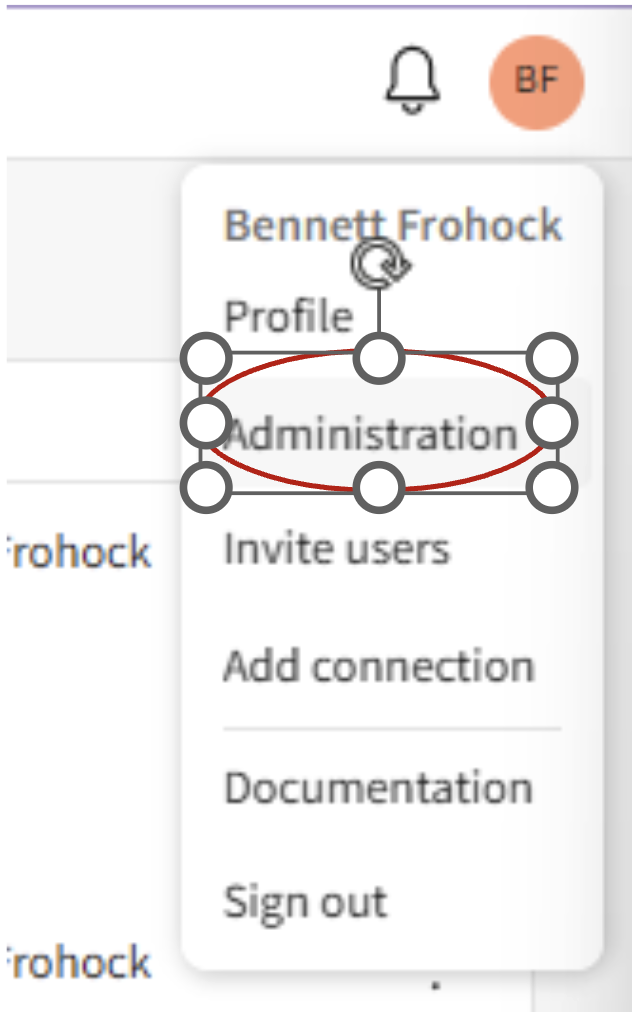
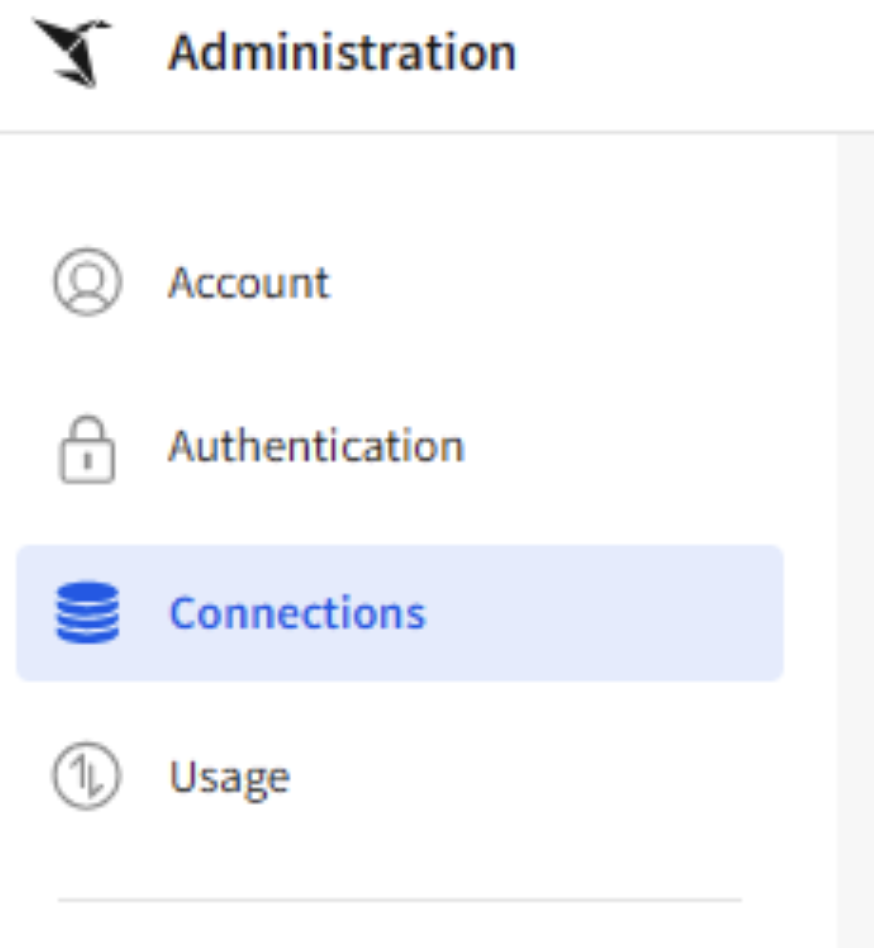
- Navigate to the Connections UI:
- Click the “Create Connection” button in the top right of the screen, or click on the connection you wish to alter.
- Input all the necessary information to create the connection. Check out Sigma’s documentation for more information.
- Make sure “User” is set to the one you got the authentication information for (including SHA fingerprint).
- Fill out all authentication information.
- Make sure the Write access is set up in the same database and schema where you created the “RUN_PYTHON_CODE” stored procedure.
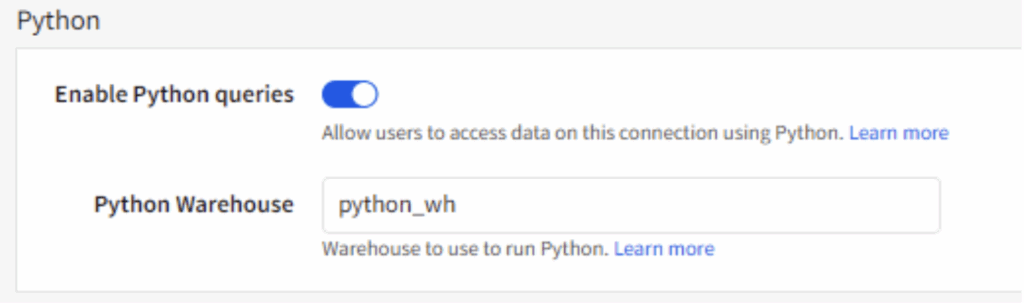
- Turn on “Enable Python Queries” and enter a valid warehouse name in the “Python Warehouse” section:
- Click create or save if you are editing an existing connection in the top right.
If everything is correct you should now be able to use Python notebooks with the connection.
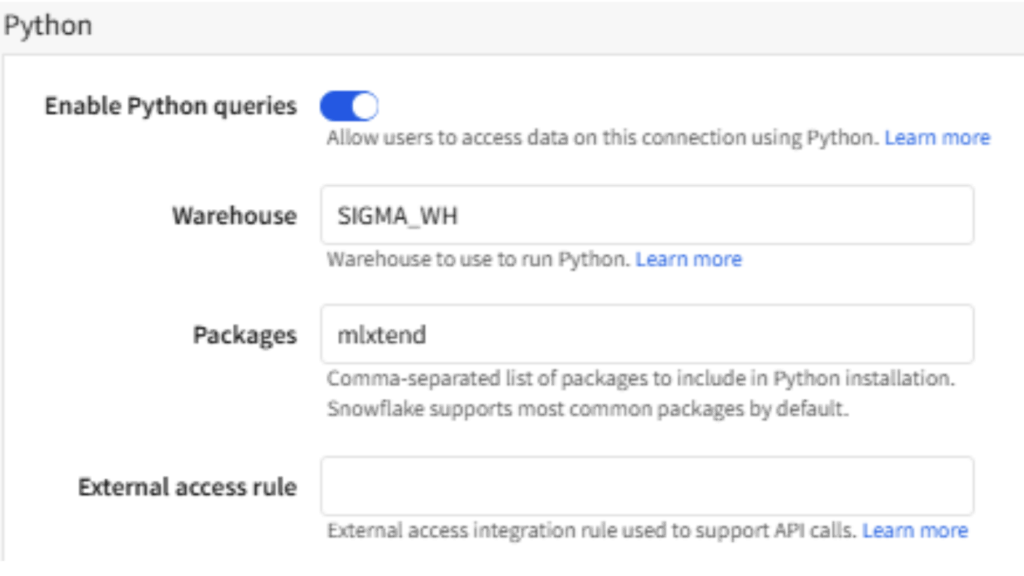
You can now manage packages and your external access rule from the UI in the connection in Sigma:
Using Notebooks in Your Workbook
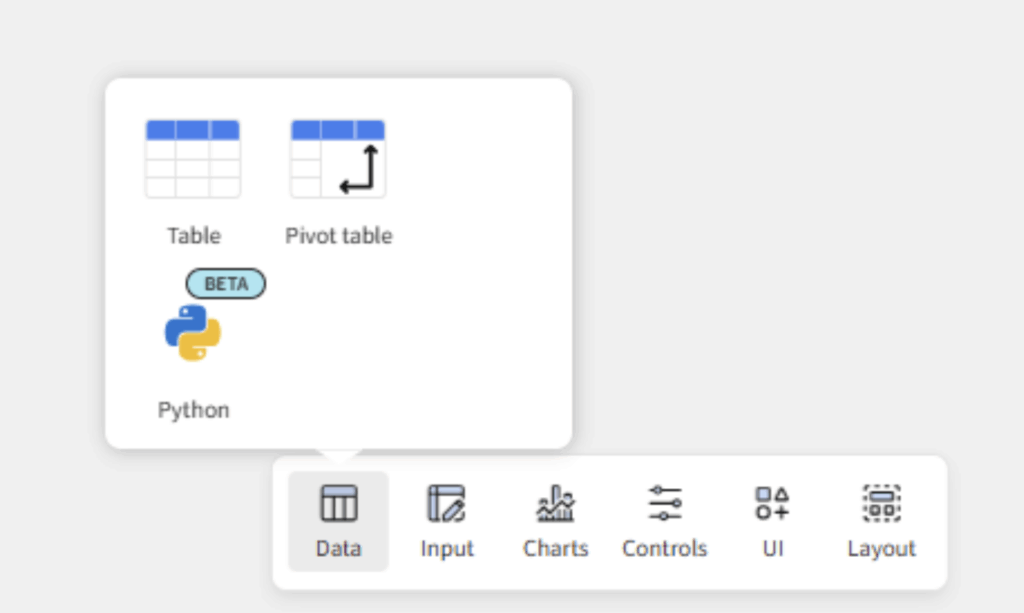
We are almost there! Open up a workbook (or create a new one) with a data source connected to your Python-enabled connection. You’ll find Python among the Data elements.
Drag a python element onto the grid and you are good to go! However, there are a few more things you should know.
1. Python elements can only interact with elements which are connected to a Python enabled connection.
2. Elements are read as snowflake Snowpark DataFrames, so you will likely want to cover them to pandas before performing your analysis:
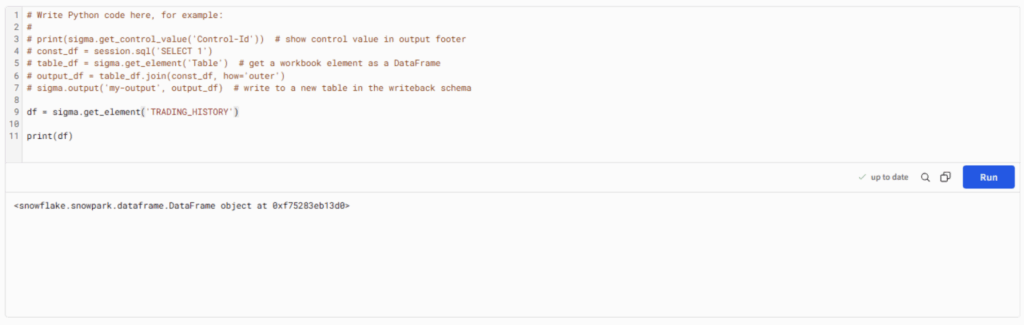
3. I usually use the following few lines to quickly convert to pandas:
df = sigma.get_element('Cards Drawn Child')
df = df.to_pandas(block=False)
df = df.result()
4. Controls with multiple values are read as lists.
5. There are three built in Sigma functions:
- sigma.get_element(‘element_name’)
- sigma.get_control_value(‘control-id’)
- sigma.output(‘output-name’, output)The first two are straightforward. They pull information from the Sigma workbook into the python environment. However, sigma.output() warrants some explanation.
Once you use the sigma.output() function, an output node will appear at the bottom of the Python element in the workbook. You can click on the dropdown of this node and create a child element based on the Python element:
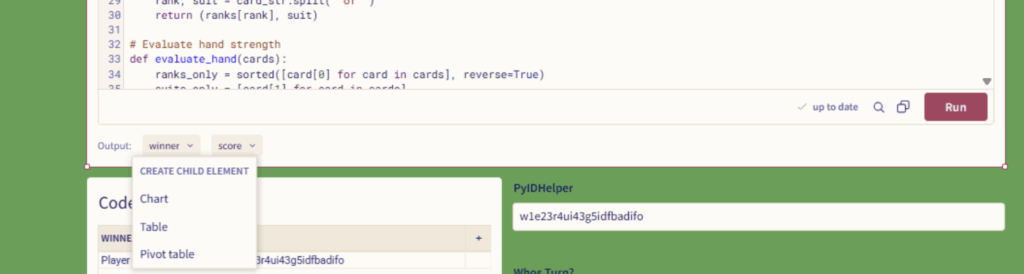
Usually, I prefer to make Tables first and go from there, but you can also make charts and pivot tables directly from the output.
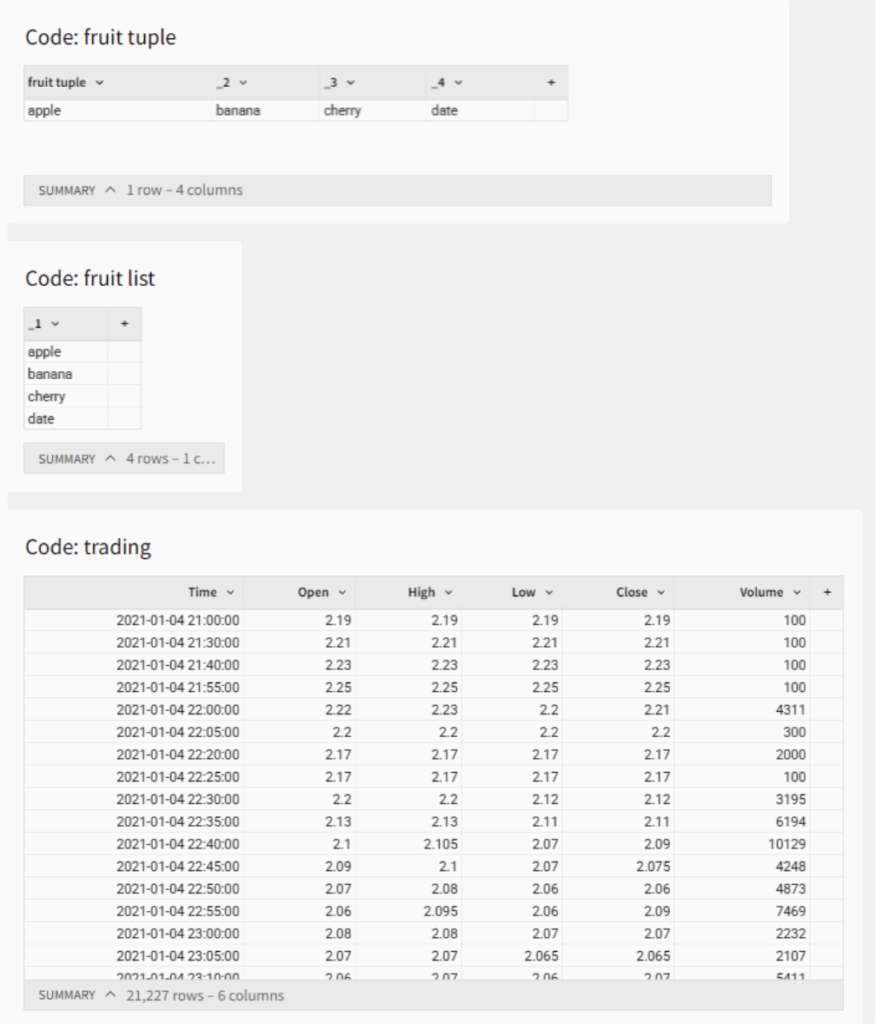
6. DataFrames output in a tabular format. Lists create columns and tuples create rows as may be expected:
7. You can output both Snowpark DataFrames and pandas DataFrames.
8. If you add columns to the output statement after creating a child element you will need to create a new child element to capture them.
The Possibilities!
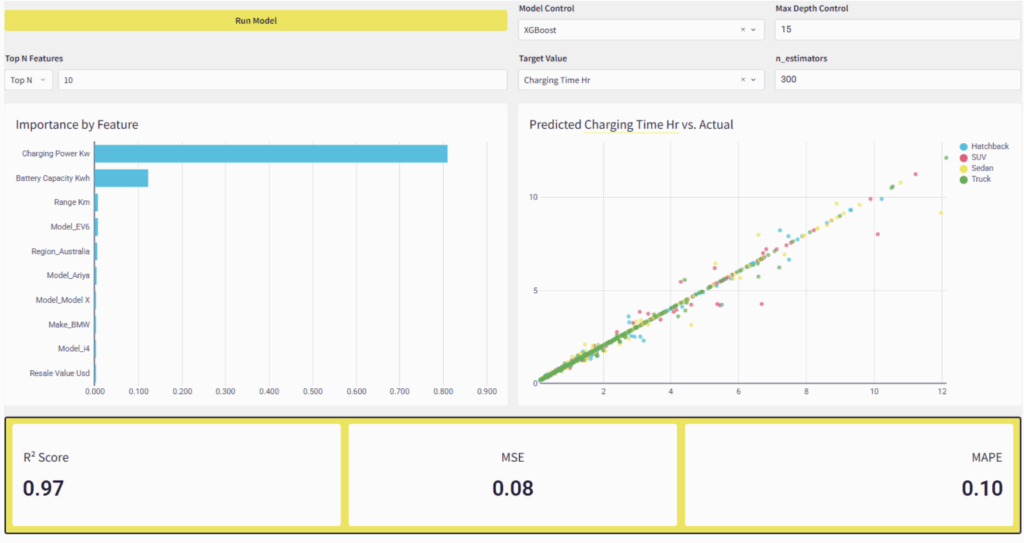
Now that we have Python notebooks integrated into our Sigma workbooks the possibilities seem endless. The first thing I did was to write a script to automatically determine the winner in a poker simulator. Then I slapped together a dynamic Gradient Boosting Model interface where you can choose a model, a target variable and hyperparameters and get ML results right within the Data App! Talk about self-service analytics!
We can also use APIs to call LLMs directly or gather data, and so much more.
I have also been experimenting with using Python to help bin geographic data Which can be handy as Sigma can only display 50,000 data points at once:

We can integrate live ML and NLP results with Sigma’s AI tools to create instant model interpretations for stakeholders. The possibilities are almost overwhelming!
Do you have any rad ideas for how to use Python to make Sigma that more powerful? Let us know!