Interactive dashboards are where Tableau really comes into its own. As a Creator, you can build something that lets your users explore and answer questions you didn’t even think to design for. But while we know that interactive dashboards are valuable, many users will find themselves using only a tiny fraction of the options available to them.
In this jam-packed webinar, we show you how to leverage a broad range of interactive options to take a sales dashboard from just okay to great:
The end result is something users can utilize to dive deep into the data and find just the thing they’re after.
This blog will guide you through some of the highlights of our webinar. To get the full list of tips and tricks, check out the recording below. You can also download the final workbook to unpick any of the solutions. Happy building!
Before we get stuck in, a brief orientation. We’ll spend a lot of time making dashboard actions. To make these, head to a dashboard, select Dashboard, and Add action. In that menu, you’ll find a bunch of options for things you can create:
The Basics
The first items for us to cover are global filters, quick filters and parameters.
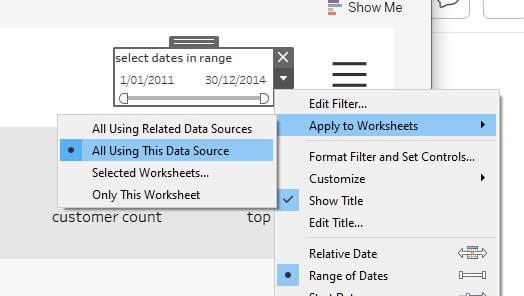
Global filters are when we bring in something like this, which lets us filter the whole dashboard based on settings our user chooses. The trick here is that the filter will, by default, only affect the sheet it came in with – in this case, the map. To make it apply to the whole dashboard, we need to ensure we’ve got it set to apply to all worksheets (or whatever subset we want):
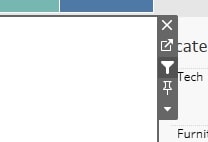
Quick filters let us select a mark on a view (like a bar on a bar chart) and filter the dashboard. To toggle these on, click on a view and press the funnel icon:
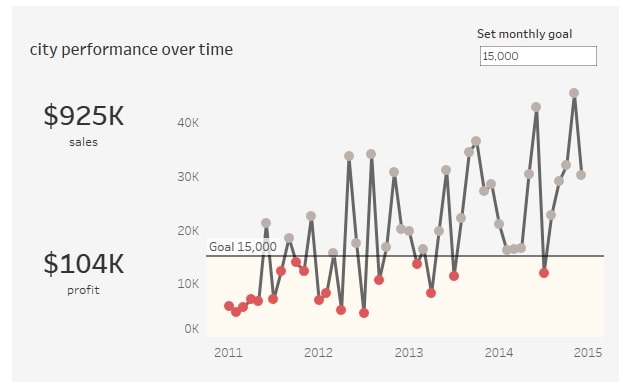
Parameters are variables that can replace set items in a calculation, filter or reference line. That sounds fancy, but you can think of them as similar to a filter: choose what thing you’re after and show that in some way. The benefit of parameters is that you can reference them in things like calculations, which makes them super flexible. Here, we’ve used them to set a monthly sales goal; periods above the goal are grey and below it are red. The user can vary the sales goal as needed and see the impact on attainment:
Dashboard Actions
All right, we’ve conquered the basics. Where to from here?
We’ll start by customizing filter actions. While we typically use filters to show a subset of our data (e.g. filter to a specific state and default to all data), they can actually work in a range of ways. I‘ll make a few amendments here, but the main one is to create a ‘pop–up view’ with individual city sale amounts. This is one of the most common filter amendments I make in dashboards. For example, it lets you have a crosstab or more detailed bar chart show up on demand, but otherwise not appear on your dashboard at all. To do this, we create a new filter action set to exclude values when nothing is selected:
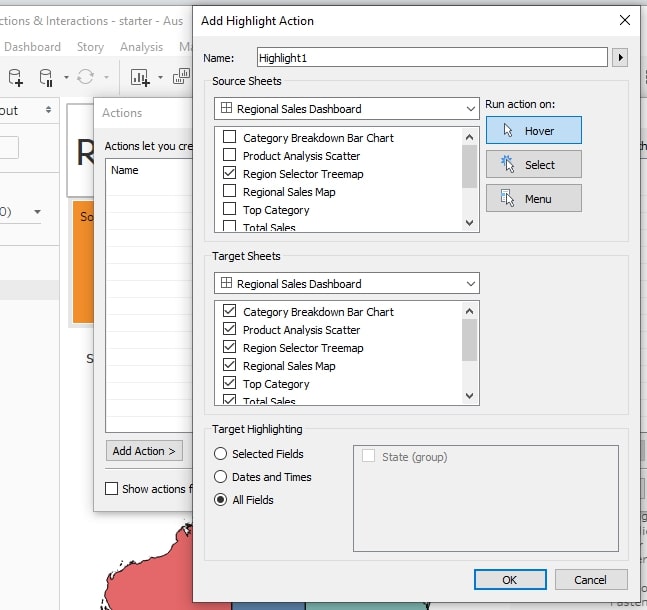
Our next step is highlight actions. These let me show a user the contribution of something, while keeping the broader context, e.g. how much of our bookcases’ sales is attributable to New South Wales? To do this, head to Dashboard > Actions, and this time, create a Highlight Action. Set the highlight to work on Hover on the treemap. Now, when I hover over my treemap, the contribution is highlighted; when I click, the dashboard is filtered. Huzzah!
Onto sets. Similar to our desire re: highlights, I want to show the contribution of individual products, or groups of products, to total sales in that category. How do I do this without filtering and losing the broader context? The trick here is a set. This lets me show a subset in context. Effectively, when I select a group of products, I’m adding them to a set, and that set is what is highlighted in my view. To do this:
- Head to our scatterplot sheet, and make a set for products, with anything in it (the inclusion is a placeholder, so just select anything).
- Go to the bar chart (or whatever you want the set to be highlighted on), and throw the set on Colour (you’ll see different colours for in and out).
- Head to your dashboard, and make an action so that selecting products changes what’s in the set. Tada!
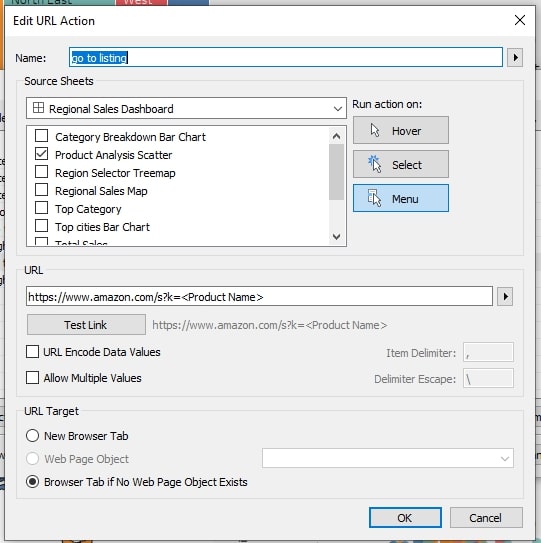
Simple URL actions. We’ve got some products on which we’re losing money. We want to let our user click on those products and see the listing on Amazon (or more reasonably, our company site, but let’s use Amazon for now). To do this, we’ll create another action – this time a URL action:
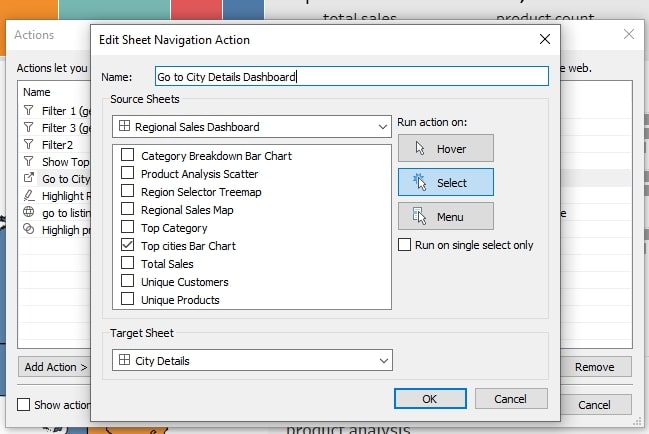
Navigation actions let us use things like clicks to move to other areas. Here, we’re going to use them to move between our main dashboard (for Australia–wide sales) and our cities breakdown (which lets us drill down on a city). The functionality we’re chasing is for a user to select a city and then be sent to the cities dashboard. To do this, we can use a Sheet Navigation Action:
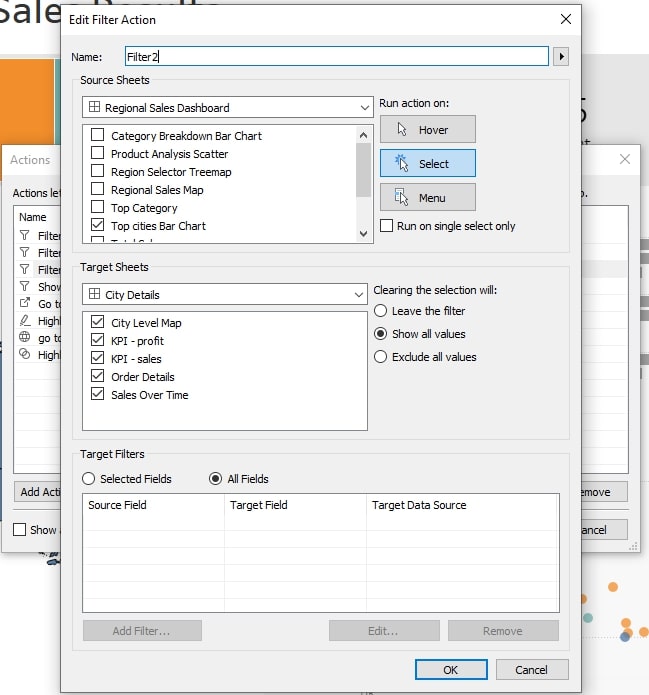
Tip: Add a filter action, too, so your city selection is passed to the second dashboard:
All right, now that we find ourselves on the city details dashboard, our user wants to swap between sales and profit measures. How do we do this? We’ve got a parameter built in, but they want a more intuitive user experience. Specifically, they’ve asked that when someone clicks on the sales or profit KPIs, the line chart updates. Can we do this? Absolutely! Welcome parameter actions. There are a few tricks to these:
- We need a parameter (here, we’ve got one that can swap between sales and profit; sales set as integer 1 and profit as integer 2).
- Now, we need a way for our KPIs to send directions 1 and 2 to our parameter to make it update.
- Open each sheet in turn, double–click on the Marks card, and add 1 to the sales KPI and 2 to the profit KPI.
- Create two parameter dashboard actions that change the parameter when those tiles are clicked.
Leveling up Our Tableau Dashboards
We’re into the home stretch and onto our last few tweaks!
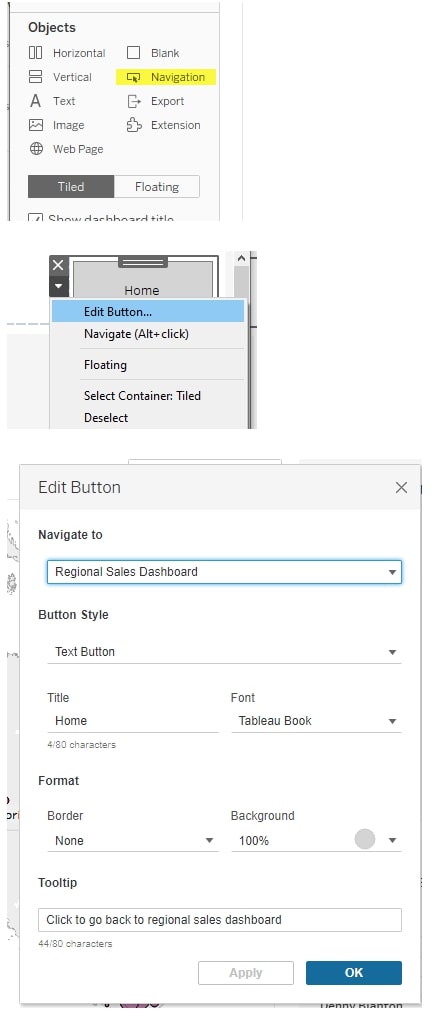
First, let’s make a button to move back from our city dashboard to home. Note that once this is published in Server or Online, this is in addition to a normal navigation approach, so you can skip this if that navigation is more natural to your users.
Drag a navigation item onto your dashboard. Then right–click it, and edit the button. Set it to go back to the main dashboard when clicked:
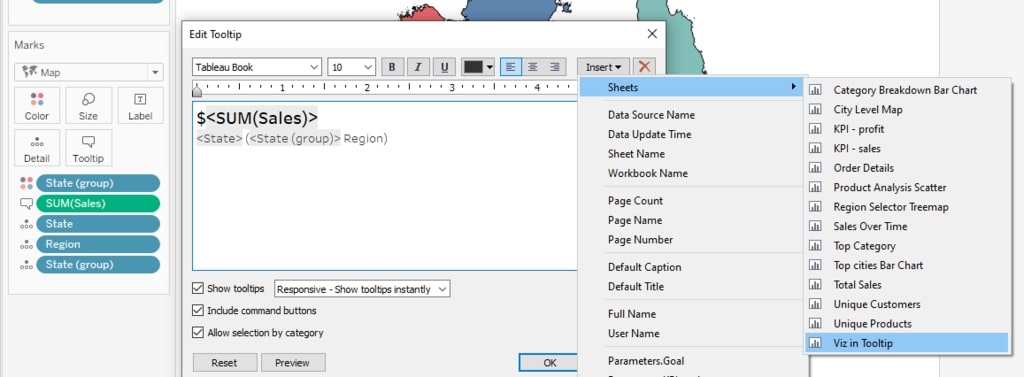
Now, let’s add a viz in tooltip for our map. This lets our user hover over an area on our map and see the sales trend for that state:
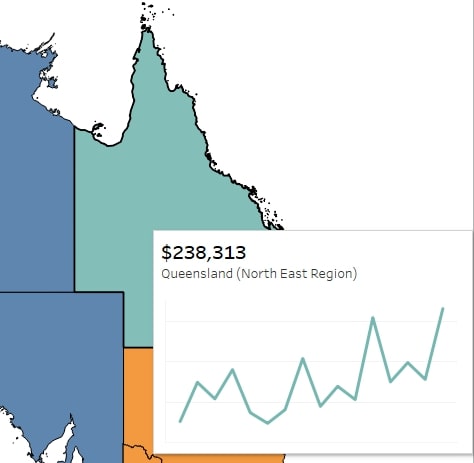
To do this, head to the map sheet, open tooltips, and add a sheet to the tooltip (here, it’s creatively called Viz in Tooltip):
Last but not least, show/hide containers. I have a ton of things on my dashboard now and a lot of interactivity. I should tell my users how to interact with all of these elements. I could do this by adding subtitles everywhere, but that’s a lot of subtitles. How can I show my users how to drive my dashboard without taking up too much real estate with this explanation? Enter show-hide containers. There are a few steps to these:
- Add a floating container to your dashboard, ensuring it takes up the whole dashboard.
- Add a show/hide button to the container, and place that show/hide button somewhere handy.
- Place an image inside the show/hide container that contains your instructions.
This instructional image was made in PowerPoint. You can use a lot of tools, but the trick is to take an image of your final dashboard, annotate it in some way, then save the annotations as an image to insert over your dashboard. To make directions ‘pop’, I’ve added a grey box with partial transparency and then overlaid my instructions in white boxes. This has the effect of greying out the bits that don’t include instructions.
That’s it! We’ve built our dashboard out from basic to hero, adding a tonne of interactivity and still retaining clear, simple directions available on demand. Check out the webinar recording below for the region desired, and play with the attached solution workbook for more. Happy Tableau-ing!
Webinar Replay – US
Webinar Replay – APAC
Webinar Replay – EMEA